Monthly Archives: May 2009

Week #3 Last Night I Dreamed of Some Bagels

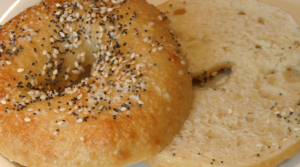
Bagel sliced openIn 1986 there was a popular Madonna song called “La Isla Bonita”.  I loved to turn the volume way up on my car radio when it came on and sing along at the top of my lungs.  The first line went, “Last night I dreamed of some bagels…”    It was only several years later that someone heard me singing along and corrected me.  The real lyrics are, “Last night I dreamed of San Pedro…”  Funnily enough it never seemed odd to me that Madonna was singing about bagels. Which brings me to this week’s challenge – bagels!  Click here to listen to the song and tell me what you hear!07 La Isla Bonita (Be patient – it takes a minute to load)

I have to admit I was very excited for this one.  At last, something I had a frame of reference for.  The breads in the first two challenges, Anadama and Christopsomos, I had never eaten before.  But bagels I know.  I grew up in Toronto.  In my opinion the ultimate bagels in Toronto come from Bagel World.  Their twister bagel is unbelievable.  It has a hard crust on the outside with a chewy, dense but moist interior.  I haven’t quite figured out how they twist the dough but this could be my next baking project. 

My joy in eating a Bagel World twister was only slightly dampened several years ago when I learned that one twister bagel is the equivalent of 12 points at Weight Watchers.  For those not in the know, that is about 60% of your daily recommended calories!  But trust me, it is worth every calorie.

The bagel recipe from the Bread Baker’s Apprentice comes very close to  Bagel World’s regular bagel (not their twister).  I was blown away with the taste and texture of the bagels I made.  They were pretty incredible.  I took 12 of them out of the oven at 5:30 last night and by 7:30 there were only two left.  My family devoured them.  It takes two days to make these bagels but trust me, you will not regret a minute of the time you spent making them.  They are that fantastic.  The recipe can be found in Peter Reinhart’s wonderful book, “The Bread Baker’s Apprentice”

The process begins with making a sponge.  This is a mixture of high gluten flour, instant yeast and water.  A little primer on flour here:  All wheat flour contains gluten.  Gluten is the protein found in flour.  The higher the level of gluten, the tougher or more elastic the dough will be.  At the bottom of the scale there is Cake and Pastry Flour with a protein content of 9%.  This is good for tender baked goods like sponge cakes and pie dough.  Next is All-purpose Flour with a protein content of 11%.  Most cakes and cookies use this flour.  Next is Bread Flour with a 12 % protein content.  Finally there is high gluten flour, with a protein content of 14%.  This is what you want for bagels to make them chewy. 

I could not find any high gluten flour here in Ottawa so I ordered some from King Arthur Flour.  This is a great on-line source for bread bakers.  They are located in Vermont.  If anyone out there knows where I can get high gluten flour in Canada, let me know.  It could save me a bit of money in exchange rate, shipping and taxes.

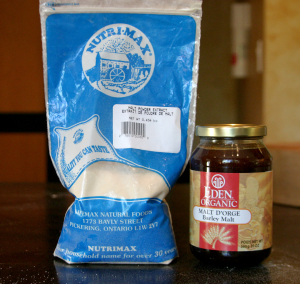
Malt options

Malt powder all over my floor


The sponge sits on the counter for 2 hours.  Then more flour, yeast, salt and malt are added.  It is the malt that gives the bagels their “bagel shop ” flavour.  Malt comes in two forms,  a powder and a syrup.  I bought both.


Of course when I got home I thought, “I’ll never use all this up.  Why did I get both?”  But, lucky for me, when I opened the powder, I accidentally spilled about half the bag on the floor.  So no worries about using it all up!


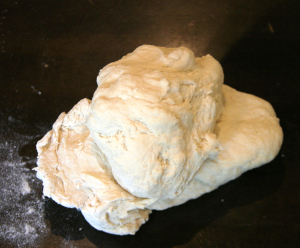
The book warns you that this is a stiff dough.  I tried mixing in my Kitchen Aid, but within about 2 minutes the bowl started popping off  and the machine rattled horrible.  Okay then, time for hand kneading. Before kneading the dough is a shaggy ball. 

Dough ready for hand kneading

Peter says it will take about 10 minutes of hand kneading to get the dough to an internal temperature of 77 degrees F.  It took me about  about 15 minutes and it’s a great workout!  After kneading, the dough is smooth and satiny.   
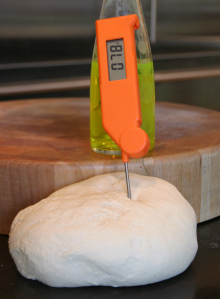
After 12 minutes of hand kneading

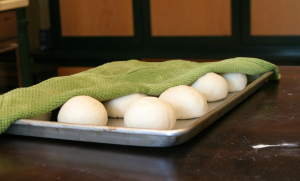
Now the fun part, forming the bagels.  The dough is divided into 12 equal pieces.  Use a scale!  Each piece is rounded into a smooth ball and then they are covered and rest for 20 minutes.
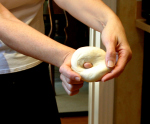
Bagels after being rolled into balls

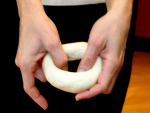
Poking thumb throughStretching dough into bagel shapeThen you poke your thumb through the ball to make a hole and gently stretch , using your thumb inside the hole to form a bagel, about 2-3 inches in diameter.  The bagels are then allowed to rest for 20 minutes and then you do the float test.


 Put one bagel in cool water and if it floats, the bagels are ready for the next step.  Mine floated after about 10 minutes.  It was exciting.  I felt like I’d passed the swimming test at summer camp again!   
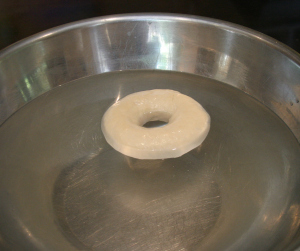
 

They float!Then the bagels take a nice long cool nap in the fridge overnight or up to 2 days.  It is this extended period of cold fermentation that makes an exceptional bagel.  The flavours are given a chance to develop.  I left mine in the fridge for about 30 hours.  Next it’s time to boil the bagels in a water bath before baking.  Some baking soda is added to the boiling water to coat the bagels and make them shinier and more golden when they are baked.  They spend about 1 minute in the boiling water, then they are flipped and go for another minute.
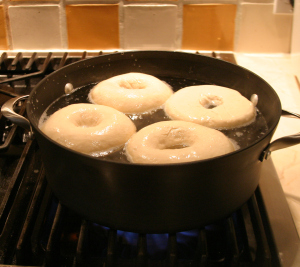
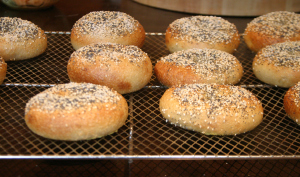
Boiling Bagels Next the bagels are topped.  I used poppy seeds sesame seeds and fleur de sel.  Into a hot oven and 10-12 minutes later, you have bagels.


Bagels out of the oven

We patiently waited 30 minutes and then devoured them.

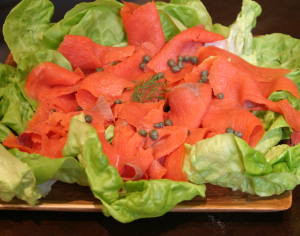
smoked salmon and capers


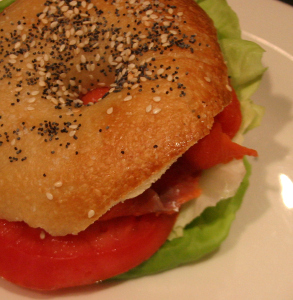
Smoked salmon cream cheese tomato and lettuce on bagel

Week#2: Artos, My Greek Jewish Bread

May 21, 2009

 It’s Week #2 in the Bread Bakers Apprentice Challenge.  This week’s bread  is Artos, the Greek Celebration Bread.  I was curious to learn a little more about this bread and so I did some research.  Artos is Greek for leavened bread but in Modern Greek, it has come to mean the bread used in church.  On Easter Sunday the priest blesses the bread and sprinkles it with holy water.  It is placed on a table where it sits for a week.  This week is known as Bright Week, often referred to as Easter Week.   Finally 6 days later, on Bright Saturday, the bread is blessed again and only then is the Artos broken and distributed among the whole congregation for eating.

If you were in my house the day I baked my Artos, there is no way you would have been able to wait a week to eat that bread.  The smell is intoxicating.


PR's octopusPeter Reinhart offers three variations on the Artos bread.  The master formula is an enriched bread with spices (cinnamon, nutmeg, allspice and cloves), eggs, honey and olive oil which can be made as is.  He suggests you shape this one in a boule (French for ball). That seemed too plain for me.  The second is Christopsomos (click here to listen to my Greek friend Peter pronounce this bread’s name authentically!) and includes the addition of dried fruit and nuts.  Christopsomos is also boule shaped but it gets the addition of a cross on top, which to me looked a little like an octopus and kind of creeped me out.   The third is Lambropsomo, a braided version which, in addition to the dried fruits and nuts, includes three hard boiled eggs, dyed red. I could only imagine my children’s horror at slicing into the bread and finding red eggs.

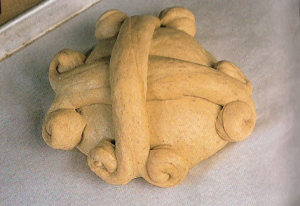
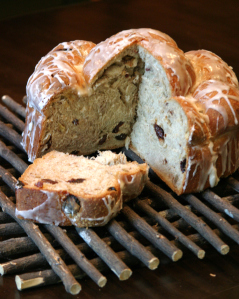
I decided on the second variation, Christopsomos.  I could not bring myself to make the little octopus on top, so I formed my bread with the same method I use at Rosh Hashanah (Jewish New Year) when I make a round challah.  You can see the method and results in the pictures below.  The recipe suggests glazing the bread with a water, sugar and honey mixture but I thought that would be way too sticky.  I made a cinnamon bun type of glaze instead.  It looked like a giant cinnamon bun but had a totally different flavour.

The bread begins with making a “pre-ferment”, which is basically a mixture of flour, water and yeast.  The purpose of a pre-ferment is to improve the flavour and structure of the dough.  It is basically a starter.  I chose to make a “poolish” starter which needs to sit on the counter for 3-4 hours until it comes alive and is all bubbly.  Then it can be used right away or refrigerated for up to 4 days.  I made mine, let is sit on the counter for 4 hours, put it in the basement fridge and promptly forgot all about it until 4 days later when I went down to the basement fridge to get some milk and saw that thing growing.  I realized I had better get my Artos in gear!

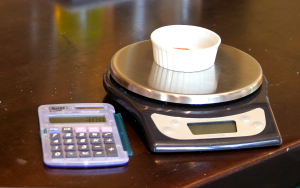
One of my only complaints about the book is that he uses all imperial measurements instead of metric .  It is especially difficult when he asks you to weigh out .o55 ounces of yeast.  Most scales will weigh in quarter or half increments but this is even less than that.  Most scales allow you to switch to grams, so  here is a tip for those who are not educated in the ways of metric.  Multiply the ounce number by 28.  In this example it would be .055 ounces x 28, which equals 1.5 grams.  A calculator comes in handy with your scale!  I just bought a new Salter scale and I love it.

scale and calculator

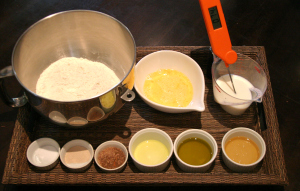
Here is my mise en place all ready to go.  I guess I learned something in Culinary school after all.

My mise en place

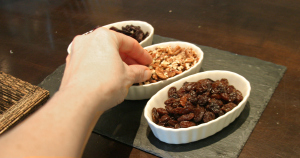
I decided to use raisins, toasted pecans and dried sour cherries.  They looked so good, my daughter got into them before I got them into the dough.

Helping herself to a snack

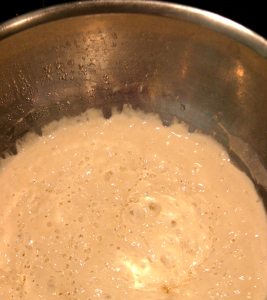
   Oops, just realized that I forgot to take the Poolish (starter) out of the fridge an hour before making the dough.

Poolish agter 3 days in fridge.

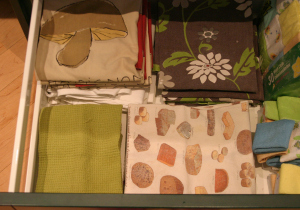
 Have to wait an hour before making dough so I decided to kill the time by cleaning out my kitchen drawers.  Long overdue.  It’s amazing the junk that collects.

My tidy dishtowel drawer

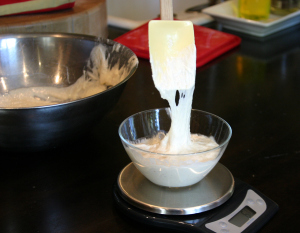
 Finally time to add the poolish.   It’s very sticky.

Poolish is sticky

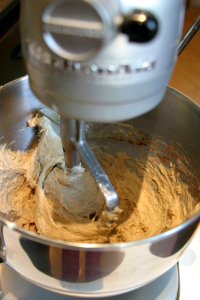
I mixed the dough in the kitchenaid on # 2 speed for about 6 minutes.

Mixing dough

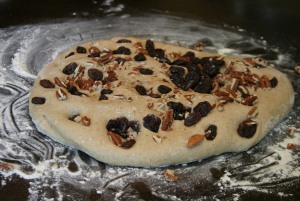
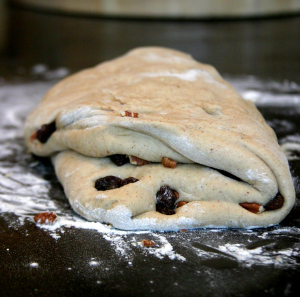
Mixing in add insThen I decided to hand knead in the fruit and nut ingredients. Here is my method which works really well for getting an even distribution of ingredients.   Gently flatten dough out and add about 1/3 of the ingredients, and press them into the dough.

Mixing in add ins 2 Fold the dough over, covering your additions and add another third of the ingredients on top.  Press them in, fold again and repeat with last amount of fruit and nuts.  Then give the whole thing a minute of kneading, before setting aside to ferment.

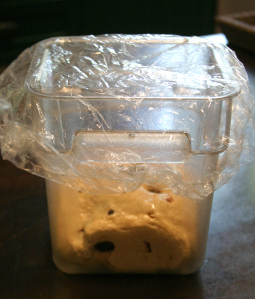
Dough goes into a  greased container for the ferment (first rise).  Thanks to  a tip from fellow BBA Challenger, Paul, I now use disposable shower caps to cover the dough instead of plastic wrap.  I can wash and reuse them many times.

 Dough set to ferment (with shower cap)

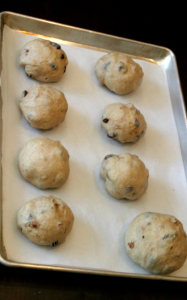
The dough doubled in about 90 minutes.  I gently punched down, weighed the dough and divided it into 9 equal pieces.  I formed 7 smaller boules and combined the last 2 pieces to form one medium sized boule, for a total of 8 boules.

7 little boules plus 1 medium boule

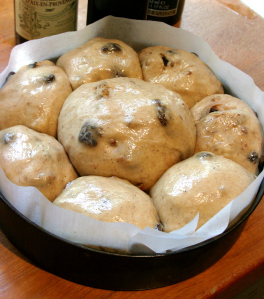
  I lined the bottom and sides of a 9 inch cake pan with parchment and arranged the 7 smaller boules around the edge and the larger one in the center.  Another 90 minutes for proofing and this baby was ready for the oven.

ready for baking

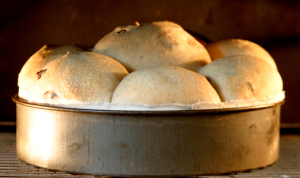
After 20 minutes I couldn’t resist a peek.  Great oven spring

Great oven rise

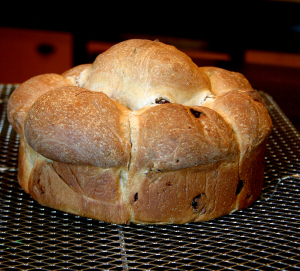
Bread just out of the oven.

Just out of oven


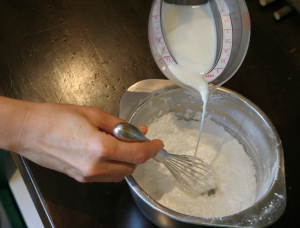
Mixing up glaze

I decided to mix up a glaze:

2 cups icing sugar

1/4 cup warm milk

1/2 teaspoon vanilla extract

1/2 teaspoon lemon huice

pinch of salt

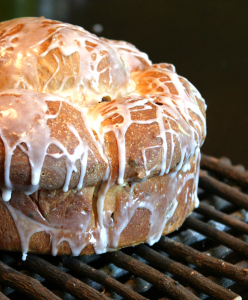
Poured glaze all over bread.

Finished bread 1

Let cool and sliced into it.  The verdict:  my daughter loved it, my son hated it and my husband and I would have liked it better without the cloves and allspice.

Sliced into

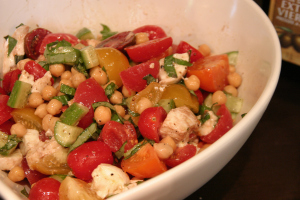
For dinner that night we had a tomato, chick pea, buffalo mozzarella, cucumber, and basil salad with olive oil and balsamic vinegar.  I usually add olive bread croutons to this but not tonight.  We’ve eaten enough bread for one day.

For dinner that night -Panzella salad without the panzella

Next week:  Bagels!

Thanks for visiting my site.  I’d love to hear from you.

Week #1: “Mom, why is there white powder all over your camera?” (Or, How I lost my blogger virginity.)

BBA Book

May 19, 2009

Several weeks ago, I accidentally stumbled across a wonderful food blog called Pinch My Salt , by Nicole Hamaker.  Nicole was about to embark on an exciting journey, baking her way through Peter Reinhart’s book, “The Bread Baker’s Apprentice”, one recipe at a time.  She was looking for company.  I have to admit, I’m not really a goal oriented person, but I felt compelled to join up.  I was # 109.  Now we are 200 strong baking our way from “Anadama Bread” all the way through to “Whole Wheat Bread”.  Yes we are going alphabetically.  We’ll tackle one bread a week and communicate through e-mail, blogging,  Twitter, a Facebook group, Flickr and  a Google group


Two weeks ago, I didn’t’ even know what blogging or Twitter was, and now I have set up my own food blog and joined Twitter. I still have not yet figured out how to actually Twitter (or is it Tweet?), and I am now very nervous as I already have 9 followers and have not led them anywhere yet.  When I told my 3 teenage children (19, 17 and 16) what I was doing, they mocked me and told me I really need to get a life.  I told them, if they continue to mock me, no bread for them.  They quickly stopped.  So if you’re interested in my journey, join me each week as I chronicle my bread baking adventure.  By the way, if you haven’t figured it out yet, the white powder on my camera was flour.  Food blogging is messy.

Bread Baker’s Apprentice Challenge # 1 Anadama Bread

The first bread I made originated in New England. There’s an old legend that tells of how the bread got it’s name.  A Massachusetts man was left by his wife.  Not only did she leave him, but she also took all their belongings and left him with only a pot of cornmeal mush and some molasses.  The husband  was so mad he mixed the  mush and molasses together with some yeast and flour and muttered, “Anna, damn’ er!”   Highly unlikely.  If I did that, my husband would call for take-out, but it makes a good story.  Making this bread is not that complicated but it does take 2 days.  Day 1 begins with mixing cornmeal and water together in a bowl and leaving it overnight on the counter to soak. I managed that without too much drama but there was quite a discussion on our Google site about what kind of cornmeal to use -coarse, medium or fine grain. I used coarse.  On to day 2.

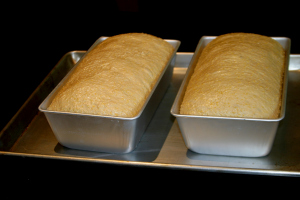
 The recipe calls for molasses which I find kind of cloying.  So I made an executive decision to substitute honey for some of the molasses. Instructions are given for kneading by hand or in a stand mixer.  I love my Kitchen Aid so I kneaded by machine.  It was a beautiful elastic dough.  I let it rise in a big bowl for an hour, then formed my loaves and let it rise a second time in the pan.  Here are the loaves ready to go into the oven.

Breads ready to go into the oven

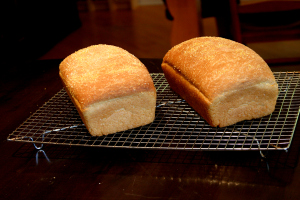
After 40 minutes my bread was done.  I love this book because the instructions are so detailed.  Most bread recipes tell you to bake until the bread is golden brown and makes a hollow sound when thumped on the bottom.  I have never understood what I am supposed to be hearing.  What exactly does hollow bread sound like?  Peter Reinhart tells us to bake it until an instant read thermometer, inserted into the center of the bread, registers 185 to 190 degrees F .  Mine registered 189.  Here is is right out of the oven.  For some reason, the bread on the left had a bit of a valley down the middle, while the one on the right rose perfectly.

Breads just out of the oven

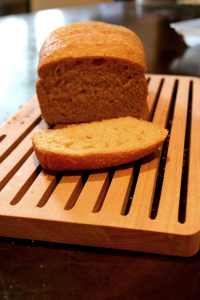
Now the hard part.  Waiting one hour before slicing into the loaves.  It was worth the wait.   It’s a soft bread but a bit crunchy because of the cornmeal.  For dinner that night I fed my family bread and butter.  No complaints.  We all liked it even better toasted the next day for breakfast, with salted butter and American Spoon sour cherry preserves.  Here is the bread sliced before the hordes got home and attacked it.

Bread sliced

Stay tuned for my next post, “Artos”, a Greek celebration bread.  Feel free to leave a comment in the space below.  I’d love to hear from you.