This post is wrong, so wrong, for many reasons. I apologize. In the first place, hot on the heels of 8 days of cookies, I should be coming to you with healthy and good for you recipes like cauliflower salad, in order to attone for the gluttony that preceeded. In the second place, this is not berry season, for goodness sake. The berries in the supermarket now are pale and insipid and have had to travel many miles to get to me. I am certainly creating a huge carbon footprint with this one, and for that, I apologize again.
However, in my defense, I had to make this cake or there would be hurt feelings in my house. This is the cake my first born requests every year for his birthday. It’s his favourite cake and it’s not his fault he was born in December. Blame the mother. (we get blamed for everything else!!) This year he is turning 21. A very big birthday which deserves a very special cake. And this cake, while perhaps off-season now, is nothing short of spectacular.
I found this recipe many years ago in Chatelaine magazine. I make it twice a year now, once in September, for my husband’s birthday and once in December for my son. Some traditions you just don’t mess with.
This is a simple cake to make, essentially you make 4 giant shortbread cookies and then layer them with whipped cream and berries. Start with creaming the butter and sugar, add the egg yolks, then add cake and pastry flour and ground almonds.
The dough gets chilled for about 30 minutes, then divided into 4 and pressed into large discs. The wonderful thing about this cake is that the layers can be pressed into shape by with your fingers and palms, just using a rolling pin at the end to smooth out the round. Here is a video showing how to form the layers.
While the layers are baking, get the berries ready. I found golden raspberries, red raspberries and strawberries in the supermarket that day. Feel free to use whatever is in season, or looks good. This is awesome with little wild blueberries in August.
While cake layers are cooling, whip the cream. The original recipe called for adding a few tablespoons of icing sugar to the cream but I prefer the cream unsweetened. You get enough sweetness from the cake layers and berries.
After slicing strawberries, assemble the cake. To keep things tidy, cut 4 layers of waxed paper and lay around the edges of the cake plate. Put a blob of whipped cream in the center to hold the cake in place so it does not slide across the plate when carrying it into the dining room (not that this ever happened to me!). Spread 1/4 of the cream on the first layer. I made an orderly boarder of strawberries and then dumped more berries, haphazardly in the middle. Continue with 2 more layers and then finish the top layer, taking care to place the berries in a decorative fashion.
The cake should be made several hours in advance. Leave it in the fridge for the layers to soften a bit, so cutting it will be easier. It is not the prettiest cake when sliced, but it is the most delicious.
On the eighth day of holiday baking, my true love threatened to leave me if I didn’t stop tempting him with cookies everyday. Good thing my baking was all done. Now for the fun part, packaging and labelling. I am always on the lookout for interesting containers to pack up the treats in. I found these containers at IKEA in June. I got a lot of strange looks as I wheeled my cart to the checkout, overflowing with 40 sets of these cookie tins. Several people wanted to know what I was going to do with them. When I told them I was using them for holiday gifts, to be filled with home-made cookies, I was besieged with “Friend” requests.
I like to package each type of cookie in a separate bag and label them so people know what they are eating. I use clear heavy-duty flat bottom candy bags. They are quite durable and the cookies look tidy packaged in them. The cookies can also be frozen in these bags for a few weeks and they do a good job keeping them fresh until you are ready to give them away. I invested in a professional bag sealer a few years ago. I used to tie each bag with ribbon but that took too much time. I figure the bag sealer has paid for itself already in the money I am saving on ribbon. Plus, it looks so professional. And, when the bags are tied with ribbon, it’s way too easy to break into a bag and sneak a cookie or two.
I make my own labels with a program called Print Shop. I have been using it for years and it is very easy to use and quite versatile. This year I decided to do square labels. Onlinelabels.com has a huge selection of all sorts of shapes. My daughter had the brilliant idea of photographing the cookies for the label. I decided to shoot them on a wooden tray I painted with chalkboard paint several years ago. I arranged the cookies on the tray and then wrote the name in chalk. I was not thrilled with how it looked. I decided to import the photo into my Print Shop program and add text. I found the perfect font called “Chalk Dust.” I have a bit of an obsession with fonts.
Here are the rest of the labels for this year.
Ribbons and boxes all ready to go.
Bottom box held white chocolate macadamia, caramel corn and peanut butter bark. Middle box held lemon coconut, chocolate peppermint and toblerone. And the gingerbread snowflakes fit snugly into the top box.
On the seventh day of holiday baking , my true love brought to me: a heating pad and thermometer. No, I’m not sick with fever and chills. Those are just some essential tools to temper chocolate. The recipe for these cookies comes from the December 2008 issue of Martha Stewart Living. I dreamed about these cookies for over a year, not quite trusting myself to make them without having a clear plan of where to deliver them. I finally made them for my holiday gifts last December and they were so amazing, I had to bake them again this year.
I have adapted this recipe somewhat. Martha asks you to roll the chocolate dough, chill it, cut out circles, with a 2 inch cookie cutter, chill the cut-out cookies and then bake them. I simplified things by rolling the dough into a cylinder, freezing it and then slicing and baking. Faster and easier. Although Martha does not suggest tempering the chocolate before dipping, I highly recommend it. It gives the chocolate a beautiful shiny coat and the white chocolate will not melt in your hand when you eat them. I am warning you, it is a time consuming and highly exacting process, but I think it’s worth it. Should you decide to forgo the tempering, they will still taste just as delicious but the appearance will not be as spectacular.
Begin with creaming the butter and sugar. Sift the dry ingredients. Usually when a recipe calls for sifting, I just ignore those instructions, but when cocoa powder is involved, it’s a good idea as it always has lumps. Divide dough into two, roll it into a cylinder, wrap in waxed paper, and freeze. Then slice and bake. The bottom of each slice becomes a bit flat when you slice them. You can reshape them quickly back into a perfect circle with your fingers if you want, and then you will have perfectly round cookies.
After the cookies have cooled, get ready to temper the white chocolate. DO NOT USE CHOCOLATE CHIPS FOR DIPPING! I can not emphasize this enough. Chocolate chips are made with certain stabilizers in them to help them hold their shape and not melt completely. That is not what you want here. Also, do not buy the pure white stuff at the bulk food store that is labelled white chocolate. It is not real white chocolate, but rather a coating compound. It will melt beautiufully, but it will taste like crap. Real white chocolate is ivory coloured. Buy good quality white chocolate. I like Callebaut or Lindt.
Many chocolate companies are now manufacturing their chocolate in the form of “Callets“. While they may look like chocolate chips, they are not. It is the same as buying a block or bar of good chocolate but saving yourself the time and mess of chopping. A great source for them is www.qzina.com. For tempering, it is also a good idea to have some solid blocks or bars of chocolate as well. Those work well to help cool down the chopcolate in the second step of tempering. A good quality instant read thermometer is helpful for this project. I have the Thermapen and I love it and use it for everything. It was recommended by Alton Brown and Cook’s Illustrated. Can’t get a better recomendation than those two! I also just heard about a chocolate thermometer , which looks really cool. haven’t bought it yet, but I am tempted.
Step 1: Melt white chocolate over a double boiler of simmering water, to 115º F.
Step 2: Remove from heat and add a block of white chocolate. Stir to cool chocolate down to 81º (for white and milk chocolate) (86° F for dark chocolate). This will take about 10-15 minutes. Be patient. Remove block of unmelted chocolate. This unmelted piece can be wrapped up and reused another time once it has cooled.
Step 3: Then briefly place bowl back over the double boiler for just 10-15 seconds, until it warms up to 86º F (for milk and white chocolate) (89° F for dark chocolate). Congratulations! You have tempered your chocolate. Now transfer tempered chocolate to a smaller bowl and place on a foil covered heating pad, set on low.
A fork is the best tool for dipping the cookies into the chocolate. I was given a fancy set of chocolate dipping tools many years ago and they are fun to use, but a regular fork will suffice. I saw a less extensive set of these tools on amazon, so if you plan to do a lot of chocolate work, they are a worthwhile investment.
Dip cookies in melted chocolate, and sprinkle with crushed peppermint candies. After you crush the peppermint candies (the Cuisinart does a great job of this), put them through a sieve. This will separate the finer dust from the crumbs. It’s nice to sprinkle some of the cookies with the dust and others with the coarser crumbs. Chill and eat!
On the sixth day of holiday baking, my true love brought to me a microplaner to zest lemons. These lemon coconut cookies may look Plain Jane, but once you bite into one you will realize they are anything but. They have a complex depth of flavour. So tender, they just melt in your mouth. Betcha can’t eat just one!
This recipe comes from the May 1993 issue of Gourmet magazine. Gosh every time I even have to type that name I feel bitter. I am still mourning the loss of that wonderful publication. I have moved from denial to anger on the grief hierarchy, so I guess that’s progress but I am still a long way off from acceptance. I am still hoping for a rebirth!
I have adapted the recipe slightly. The original called for sifting icing sugar on the finished cookies but I found that really took away from the delicate flavour of the lemon and coconut. The recipe also calls for lemon zest and lemon extract. I am not a lemon extract fan. It’s scent reminds me of Lemon Pledge. However, I have tried it with and without, and in this cookie it adds a zing of flavour that is not overpowering.
It’s a simple slice and bake cookie dough, which I love when I am really strapped for time (like Day 6 of my baking adventure). They keep well in the freezer for several weeks.
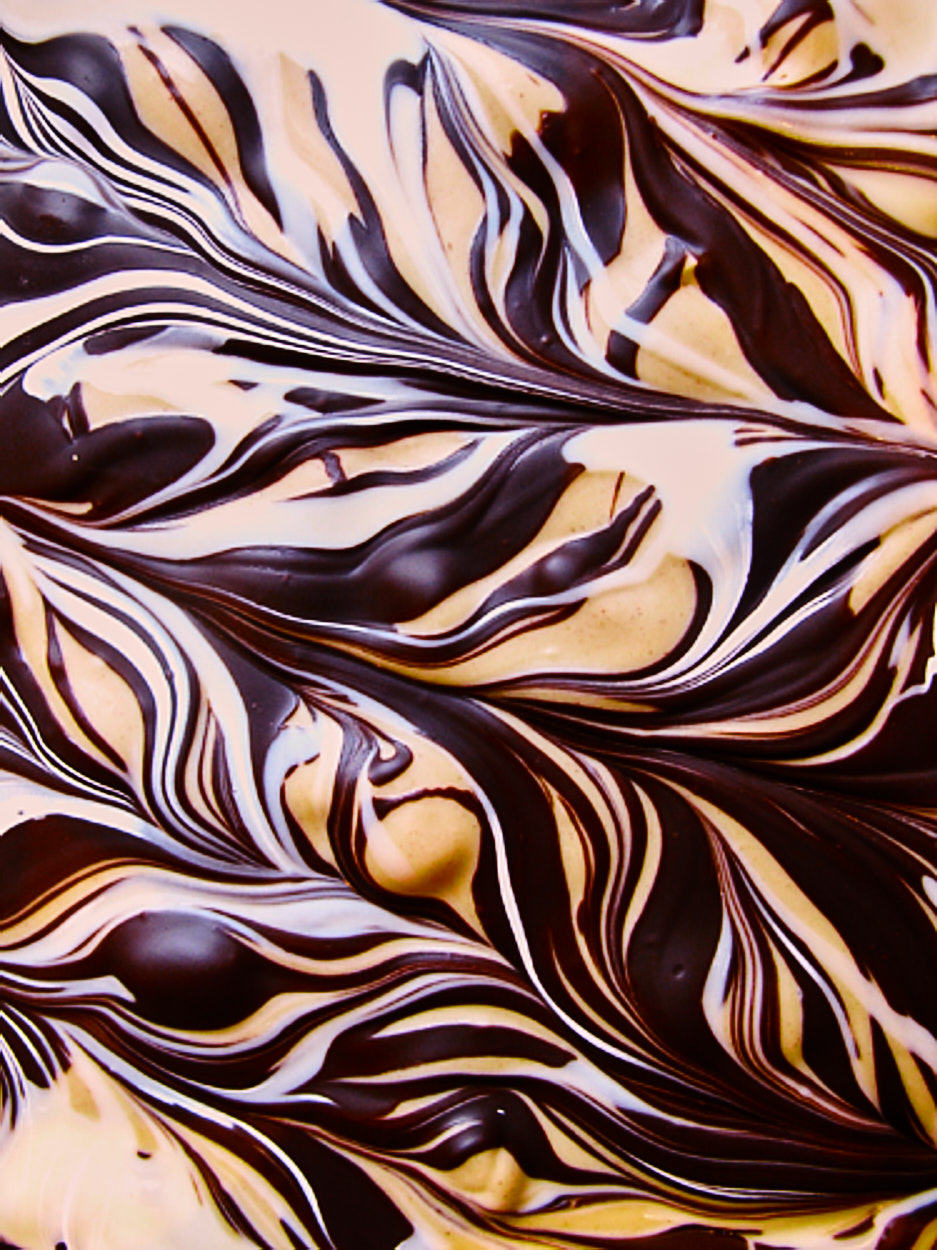
There’s something irresistible about the contrast in this Double Chocolate Peanut Butter Bark: the creaminess of white chocolate and peanut butter, the crunch of salted peanuts, and the crisp snap of dark chocolate. Sweet, salty, smooth, and crunchy — it’s a little symphony of textures in every bite.
But the real magic, for me, happens before the bark even sets. I’ve never been much of an illustrator, so baking became my creative outlet, and this recipe is where that artistic side comes alive. Pulling a knife through layers of melted chocolate to create a marbled swirl feels almost meditative. Even after more than 150 batches over 18 years, it still makes me smile.
Watch it come together:
Keys to Success in making Double Chocolate Peanut Butter Bark
Use good-quality chocolate: This is one of those recipes where the chocolate really matters. Avoid chocolate chips — they’re formulated to hold their shape in the oven, which means they contain very little cocoa butter. Because of that, chocolate chips don’t melt smoothly, can turn grainy, and often set with a dull finish. For the best results, use couverture-style chocolate. My favourites are Valrhona and Callebaut (I buy mine from the Vanilla Food Company). For the white chocolate, I love Valrhona White Feves or Callebaut White Callets, and for dark chocolate, Valrhona Manjari 64% is my go-to.
Use the right peanut butter: Melt the white chocolate and peanut butter together in a heatproof bowl set over a pot of gently simmering water. And please — don’t use natural or health-food store peanut butter here. You want the classic, creamy, emulsified kind (Kraft or Skippy are perfect) so the mixture stays smooth and stable when it cools. Once melted and silky, stir in salted roasted peanuts for crunch.
Line your pan well: Line a jelly roll pan with both foil and parchment. The foil adds structure, and the parchment prevents sticking. Together, they make cleanup almost effortless.
Cut the bark cleanly: After the bark has chilled and set, let it sit at room temperature for a few minutes before cutting. Score it gently with a paring knife into roughly 3-inch squares, then use a large, sharp serrated knife to cut through. A brief rest at room temp keeps the bark from shattering and gives you beautifully clean edges.
Double Chocolate Peanut Butter Bark
A creamy, crunchy, sweet-salty bark made with white chocolate, peanut butter, roasted peanuts, and swirled dark chocolate. Beautifully marbled and perfect for gifting.
382gramssmooth or chunky peanut butter,Kraft or Skippy, do not use natural
142gramsroasted, salted peanuts,coarsely chopped
Chocolate Swirl
340gramsbittersweet or semi-sweet chocolate,coarsely chopped
113gramswhite chocolate, coarsely chopped
Instructions
Prepare the pan: Line a 13×18-inch jelly roll pan with foil. Place a sheet of parchment paper on top of the foil.(Using both makes removing and cutting the bark much easier.)
Make the peanut butter layer: Melt the 680 g white chocolate and peanut butter together in a large heatproof bowl set over a saucepan of gently simmering water.Stir occasionally until smooth.Stir in the chopped peanuts.
Melt the chocolates for swirling: In a separate medium heatproof bowl, melt the bittersweet chocolate over a pot of simmering water, stirring occasionally.In a small bowl, melt the remaining 113 g white chocolate over simmering water.(Alternatively, you can melt either chocolate in the microwave at 50% power in 1-minute increments, stirring between each.)
Assemble and marble bark: Remove all bowls from the saucepans.Pour the peanut butter mixture into the prepared pan and spread it evenly to the edges.Transfer the melted bittersweet chocolate to a disposable piping bag. Pipe lines or zigzags of dark chocolate across the peanut butter layer.Repeat with the 113 g melted white chocolate, piping lines in between the dark chocolate.Using the tip of a small sharp knife or tip of a wooden skewer, drag through the piped chocolate to create a marbled swirl pattern.Chill the bark until completely firm, at least 2 hours or overnight.
Score and cut the bark: Let the chilled bark sit at room temperature for 10 minutes.Using the tip of a paring knife, gently score the surface into 18 squares (3 rows by 6).Cut along the scored lines with a large sharp serrated knife.(Letting it warm slightly prevents the bark from shattering and produces cleaner edges.)
Storing: Store in an airtight container in the fridge.Keeps for up to 1 month.
Notes
For best results, use real white chocolate, not compound coating. Real white chocolate is naturally ivory, not pure white.
For the dark chocolate, use a good-quality brand such as Valrhona, Lindt, or Callebaut.
Do not use chocolate chips. They contain stabilizers and very little cocoa butter, which prevents smooth melting.
This bark may be simple, but it delivers every kind of satisfaction: the artistic joy of making those swirls, the sweet-salty flavour combination, and the crunchy-creamy texture that keeps you coming back for “just one more piece.” It’s the kind of holiday treat you’ll make once and immediately add to your yearly lineup — whether for gifting, snacking, or simply admiring how gorgeous it looks. If you try it, let me know… and if you really want to impress someone, slip a few pieces into a cookie box. They’ll think you spent all day.
On the fourth day of my holiday baking adventure, I present to you, Gingerbread Snowflake Cookies.
Just as in nature, where no two snowflakes are identical, here, no two gingerbread snowflakes are alike. And that, I think, is the beauty of them! Although I love gingerbread, I seem to associate it with mostly with winter, although this summer, I did bake some to sandwich dulce de leche ice cream. That was an unbeatable combination.
Baking these cookies makes me very happy and makes my house smell unbelievable. Should you have any lingering odours in the kitchen (from frying or otherwise), bake these and those nasty smells will disappear. There are tons of gingerbread recipes out there, but the best one I have tried comes from Cook’s Illustrated. I follow their recipe exactly, with the exception of ground cloves. I leave that out. I find the flavour too overpowering. I also cut back slightly on the ground ginger and ground cinnamon.
It was from Cook’s Illustrated that I learned a clever method for rolling out the dough. Most recipes recommend chilling the dough before rolling it out. That is very difficult to do. Cook’s says to roll the dough out , between 2 sheets of parchment paper, while it is still soft. Then freeze it in the parchment, for about 30 minutes. Then cut out the snowflakes while the dough is very cold. A simple but brilliant idea.
I have 2 snowflake cookie cutters. The first is a beautiful large copper one made by Old RiverRoad. I found it on Amazon. the second is a medium-sized aluminum one I found in my local housewares store. Another fantastic source for cookie cutters is www.coppergifts.com. They also have photos of several decorating ideas for every cookie cutter they sell. It is a fantastic resource!
For those of you familiar with baseball parlance, I had to bring in a “Designated Hitter” to pipe the icing on the snowflakes. Last year I developed carpal tunnel syndrome from piping over 160 cookies in one day. I wasn’t taking any chances this year. Sarah, my old babysitter (and now friend) volunteered to come and pipe. I think you’ll agree she did a masterful job.
Filling the piping bag is easy if you put it into an empty pitcher, and fold the top edge over so it doesn’t slide down. I used disposable piping bags and a small plain piping tip.
I really like the look of white icing and clear coarse decorating sugar, but feel free to experiment with different colours. Spoon on the sugar when the icing is still wet. Be heavy-handed, you can shake the excess off. Line cookie sheet with parchment, so you can easily dump leftover sugar into sugar container to reuse.
Who wouldn’t love to receive this perfect mouthful of winter?
It seems like only yesterday I was going on about how wonderful it is when a product delivers as promised. Oh wait, it was yesterday. Yes people, my wonderful new beater blade has bit the dust. Serves me right for bragging about it. On the 10th batch of the Toblerone shortbread I was making, the spout of the bowl I was using to pour the chopped Toblerone into the mixer, accidentally hit the top of the spinning blade and it cracked my wonder blade into several pieces. All my fault!! I should have been more careful pouring. So I had to bake today using my old beater blade and it took way longer than usual because I had to keep stopping the machine to scrape down the sides. But not to fear, Golda’s Kitchen offers next day delivery so I’ll be back in business again tomorrow.
I got the recipe for these cookies many years ago when I worked at the now defunct David Wood Food Shop, in Toronto. I was pregnant when I worked there and the pastry chef took pity on me and fed me as many as I could eat. (Which was a considerable amount). Just knowing these cookies were in the shop made me practically skip to work everyday. I went through terrible withdrawal when I left to have my baby.
This is an odd recipe as you cream together the butter and brown sugar, but the white sugar gets sifted in with the flour as part of the dry ingredients. I never really understood why that is and what difference it makes. But that’s how they made them at David Wood and who am I to mess with perfection?
The recipe instructs you to quarter the macadamia nuts. Please go ahead and do that if you are that type of person and have the patience. Truthfully, I just add them whole. I find that the beater blade breaks them up somewhat and it all works out fine. I like to use salted macadamia nuts. (I know, what a shock!)
The edges get a little bit crunchy and the center is wonderfully chewy. Macadamia nuts and white chocolate have such a natural affinity for each other. The little hint of salt from the rich nuts balances the creamy sweetness of the white chocolate.
On Day two of my holiday baking adventure, I made Toblerone Shortbread. I got the idea for these cookies from pastry chef Anna Olson. She was preparing them on Cityline TV. She made a basic shortbread and topped each one with a chunk of Toblerone. I decided to kick it up a notch and mix chunks of Toblerone right into the dough. Toblerone, for those of you who don’t know, is a triangular-shaped milk chocolate bar filled with honey and almond nougat. I sometimes play games with myself and bake things I don’t really love, so I won’t eat too much of them. I thought I was safe here. I don’t really like honey and nougat, and lately my tastes have shifted to dark chocolate.
I bought 8 jumbo (400 gram size) bars and proceeded to chop them up. As I was chopping I took a small taste to see what we were dealing with here. It had been a long time since I hed tried a Toblerone bar. I let the chocolate melt in my mouth and then chewed the crunchy almond nougat. Oh #&@!& !!!! I do like Toblerone! Good thing I bought extra.
The recipe begins with creaming room temperature unsalted butter and icing sugar together. Can I just take a moment here to tell you again how much I love my new beater blade! Nothing makes me happier than when a product delivers as promised. Every time I use this blade I wonder what took them so long to come up with this idea. The beater blade is shaped like the regular paddle blade but it has little windshield wipers on the edges of the blade that scrape down the sides of the bowl for you. Mixing the dough is so much faster because you don’t have to stop the machine and scrape down the sides with a spatula.
I am all about saving time. I have always thought it would be brilliant to be able to get a pedicure and have your teeth cleaned at the same time. The hygenist could work up top in your mouth, and the esthetician could work down at your feet. They wouldn’t get in each others way and it would be such a time saver. I suggested it to my dentist and he looked at me like I was crazy. If there are any dentists out there, I really think this would be a great way to increase your revenue.
Chop up the Toblerone bars. Cream icing sugar and room temperature butter together. Add sifted dry ingredients. Add Toblerone .
I use an ice cream scoop to form the cookies. That way, they are all the same size and they bake evenly.
It is not necessary to chill this dough before scooping and baking. It is necessary to keep your mouth shut while scooping. This dough is amazing raw.
Last Monday I finally treated myself to a cortisone shot in my elbow. You may be thinking, “What kind of treat is that?” Well here is the sad story of my baking injuries. Last December I piped over 160 gingerbread snowflake cookies and gave myself an awful case of carpal tunnel syndrome. Just a simple matter of overuse of some very small, not often used muscles. It finally healed by late February but then this summer, after finishing the Bread Baker’s Apprentice Challenge, I noticed pain in my elbow. Of course I ignored it and by September it was so bad I could not lift a coffee mug or squeeze toothpaste without terrible pain. I went for to the Baking Sports Medicine Clinic and began physiotherapy for tendonitis (also known as tennis elbow, or in my case, bakers elbow).
It was getting a little bit better but not much. After 10 weeks I asked my therapist what else I could try as I was starting to get desperate. I had over 40 gift baskets to bake for the holidays. I blogged about this briefly last year. Rather than shop for gifts for all the people in my life for whom I am grateful, I decided many years ago to bake. And I had to get going. Thus the cortisone shot. I have heard from many people that a cortisone shot does not hurt. They are liars! My arm felt like it was going to fall off for the first 2 days but then magically, by the 4th day, the pain was gone. It is my own personal holiday miracle.
So here, for the next 7 days you can follow along with me on my baking frenzy.
On day one I tackle Almond Pecan Caramel Corn. I found the recipe for this addictive treat many years ago, in a sweet little book called, “Gifts of Food” by Susan Costner. I only make this recipe when I have somewhere to take it as I have absolutely no willpower at all when it comes to this popcorn. Each recipe uses a pound of butter. Do not tell people this when you give it to them as they will hate you for life. I have altered the recipe slightly and add about 2 teaspoons of kosher salt to each batch when I am making the caramel. A tall heavy non-stick soup pot is ideal for making this. A candy thermometer is helpful as well. I like this one as it has a ledge at the bottom so the bulb can not touch the bottom of the pot and give you a false reading.
I popped some microwave popcorn. I toasted the almonds and pecans and mixed everything together in a big bowl. If your counter is not heatproof, place the bowl on a cooling rack.
The caramel contains sugar, corn syrup, water, salt and butter.
When the caramel reaches 280 – 300º F, it’s time to pour it onto the popcorn and mix well. Then it gets spread out on a parchment lined cookie sheet and you wait (or not) for it to cool. If you are impatient and try to eat it before it cools and totally hardens, it is still quite sticky and can pull out a filling! Don’t say I didn’t warn you.
Today is the first night of Chanukah. When I was growing up, Chanukah meant potato latkes with sour cream and applesauce. My mother would make them and then complain for days about the smell of oil from frying which lingered in the house for days.
My mother has an incredible sense of smell. In our family, we joke that she can smell foul odours a day before they actually occur. My childhood memories are filled with her going from room to room, sniffing and muttering, “What’s that smell?” One of her least favorite smells was that of food cooked in oil. She claimed that she could smell the oil for weeks afterwards. Now I must be honest here and admit that I inherited my father’s sense of smell – that is to say, his lack of sense of smell. He had sinus problems and his nose malfunctioned often.
That said, once a year, on Chanukah, we had latkes. My mom’s latkes are fantastic. They are lacy shreds of potatoes, fried until crisp. The lingering smell of frying oil was quickly chased away by my mother’s secret blend of cleaning agents, a potent, lethal combination of Joy and Ajax. Do not try this at home unless you are wearing a gas mask. I do recall one year, she set up the electric frying pan on the ironing board in the garage, plugged it in with 5 extension cords snaking all the way from the front hall, all so so she could keep the smell out of the house.
When my husband and I first began dating, he took me home to celebrate Chanukah with his family. His family did not shred their potatoes for latkes. They pulverized them in the Cuisinart so the resulting latkes were thick and creamy, not the thin lacy crispy shredded latkes that I grew up with. And, if you can actually imagine this, they served them with ketchup!! I almost broke up with him. After we were married we had our families over for a Chanukah party. Of course, we could not agree on which kind of latkes to make, so we ended up making both. The guests were starving by the time the latkes actually appeared at the table so both kinds were gobbled up very quickly. We have since agreed on a “Compromise Latkes Recipe” that makes us both happy.
On my last trip to Israel, I discovered that Chanukah there is celebrated with jelly doughnuts (sufganiyot). The word, sufganiyot, comes from the Greek word sufgan, meaning “puffed and fried.” In Israel doughnuts, fried in oil, commemorate the miracle of the oil that burned in the temple in Jerusalem for eight days, although the supply appeared to be enough only for a single day. Most people shy away from making their own doughnuts. It is usually a fear of frying (too dangerous or too fattening) or a fear of working with yeast, as most traditional doughnut recipes call for yeast.
I have never made doughnuts but not because I fear frying or yeast. I own a deep fryer, which gets used once or twice a year for French fries. And I am not afraid of yeast, especially after baking my way through 43 bread recipes in the book “The Bread Baker’s Apprentice.” No, I shy away from doughnuts because when I was pregnant with my daughter, I ate too many of them. I would go for my doctor’s appointment, and then, only after I was weighed, I would stop at Lady Jane Doughnuts for a chocolate doughnut topped with coconut. Sadly, Lady Jane, is gone, replaced by a Pizza Pizza franchise. And curiously, to this day, my daughter, who is now 19 years old, does not like doughnuts.
But, a lot of years have passed since I overindulged on doughnuts and with Chanukah coming up; I decided it was the perfect time to enjoy them again. And, I was fairly certain that my husband would not top his doughnut with ketchup.
As doughnuts are best served fresh from the fryer, I wanted an easy recipe for entertaining which did not require too much fussing or time. While doughnuts are traditionally made with yeast, I have uncovered a wonderful recipe which relies solely on baking powder and baking soda for leavening. No rising necessary. The dough mixes up quickly and the donuts can be formed and set aside for frying up to 2 hours in advance. Then all you have to do when guests arrive is fry the doughnuts and serve them fresh and hot! These are old-fashioned doughnuts; crunchy on the outside and tender yet sturdy on the inside. The addition of buttermilk to the batter helps to create this wonderful texture.
When I started researching doughnut making, every recipe I read, used oil for frying the doughnuts in. However, Cook’s Illustrated, did a head to head taste off between Crisco and peanut oil and found that the doughnuts fried in Crisco absorbed much less fat than the ones cooked in oil. The Crisco fried ones also held up better, staying fresh longer than the ones fried in oil. So although Crisco was not used at the time of the rededication of the second temple, I am recommending it anyways, for superior doughnuts.
Just a little aside here. If you are planning to use a countertop deep fryer, melt the shortening first in a pot on the stove or in the microwave. Do not put the entire block of shortening right into the deep fryer. You will damage the heating coils, short out your fryer and lots of smoke will fill your kitchen. Not that I know anything about that. You will notice in the video below, I just used my Le Creuset porcelain enameled cast iron pot on the stove. My countertop deep fryer was broken missing.
Yo print the recipe for these doughnuts, click here.
The batter comes together very quickly. Buttermilk, melted butter, eggs, flour, baking powder, baking soda, nutmeg, salt.
It makes a very sticky batter. Flour the counter and your rolling-pin well.
There are special doughnut cutters but I just improvised with a glass and piping tip. It worked quite well.
A candy thermometer is essential if you plan to deep fry on the stove. They are readily available, and, if you are going to invest in one, I recommend this one, by Wilton. It has a foot at the bottom to prevent the thermometer bulb from touching the bottom of the pot. You want to avoid this as you will get a false reading.
Since I am not a jelly doughnut kind of girl, I just gave my doughnuts a quick bath of sugar and cinnamon. My husband devoured several (without ketchup, for the record).


