Monthly Archives: February 2011

The Case of the Disappearing Oreo

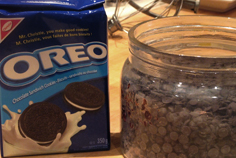
A few weeks ago, my daughter sent me a BBM from her dorm room at College, asking me to please buy a bag of Oreo cookies for when she came home for the long holiday weekend. Huh???  Usually she asks me to bake some decadent cookie, so the store-bought request was odd. When I asked her why she wanted Oreos she said her roommate had seen something unbelievable, using Oreos, on a food blog and wanted my daughter to bake it for her when she went home.

The next day, while surfing food blogs, I came across this and this and this and this, well, you get the idea. Apparently this is the new food blogging darling. Everyone’s doing it! I sent the links to my daughter and asked her if this was what she planned to make. Her reply was an effusive “YESSSS!!” She went on and on about how amazing these looked and yada yada yada.

My first reaction was, “This, in a nutshell, is what’s wrong with America (and Canada too) these days. Supersizing everything. As if a double stuffed Oreo isn’t gluttony enough, now we’re shoving an Oreo inside a huge ball of chocolate chip cookie dough and baking it. No wonder our kids are obese and diabetes and heart disease are killing us.” Then I got off my high horse, and of course, went out and bought a bag of Oreos – not the double stuffed ones though, I have my limits.

I have to admit, the baker in me was very curious to see how this was actually done and what exactly would happen when you stuff SUGAR, ENRICHED FLOUR (WHEAT FLOUR, NIACIN, REDUCED IRON, THIAMINE MONONITRATE {VITAMIN B1}, RIBOFLAVIN {VITAMIN B2}, FOLIC ACID), HIGH OLEIC CANOLA OIL AND/OR PALM OIL AND/OR CANOLA OIL, AND/OR SOYBEAN OIL, COCOA (PROCESSED WITH ALKALI), HIGH FRUCTOSE CORN SYRUP, CORNSTARCH, LEAVENING (BAKING SODA AND/OR CALCIUM PHOSPHATE), SALT, SOY LECITHIN (EMULSIFIER), VANILLIN – AN ARTIFICIAL FLAVOR, CHOCOLATE. CONTAINS: WHEAT, and SOY  inside chocolate chip cookie dough and bake it.

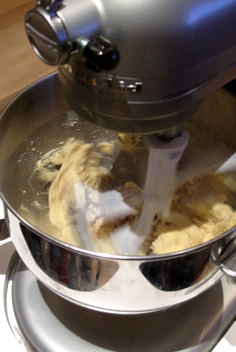
For this post, I had two guest bakers, my daughter and her best friend, who is may as well be my second daughter, as she spends a lot of time at our house. I was just documenting this experiment with the camera. The pictures are less than my usual stellar quality as the girls decided to begin baking at 9:00 pm, and I was lacking daylight, which I like to shoot with.

We thought about substituting our favourite chocolate chip recipe, but we thought they might spread too much and the Oreos would ooze out and make a mess. So we stuck to Jenny’s (The Picky Palate) original recipe, since she created them, she ought to know best.

We made a little video to demonstrate how to form these cookies. It’s not rocket science, but we were on a bit of a sugar high and having a little fun, so we made a video.

We had a bit of a debate on whether or not to flatten out the Oreo balls after they were formed. We took a vote and flattening won by a 2:1 margin.

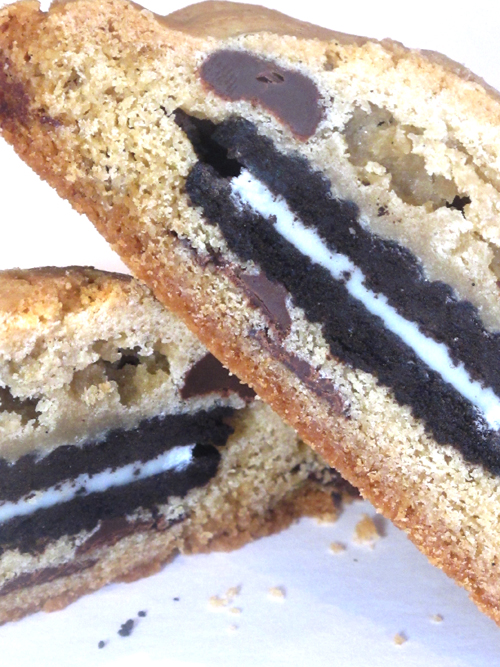
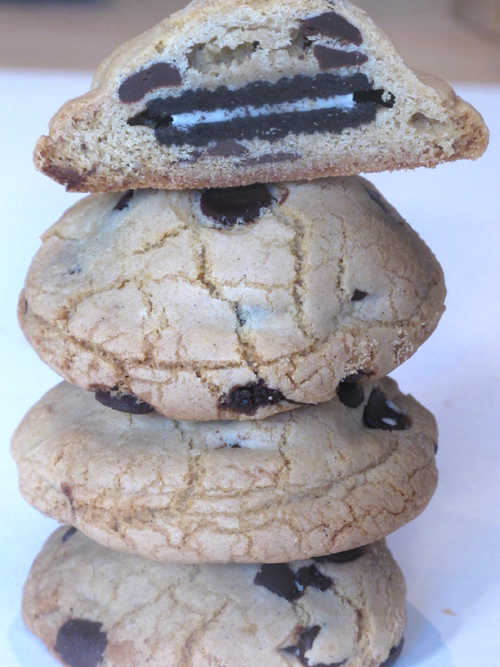
We waited a few minutes and then we cut one open. The chocolate chips were warm and gooey and the Oreo filling had melted slightly. I have to say, I didn’t like them very much. Part of the reason was that I do not like warm chocolate chip cookies. I like them to be totally cooled so the chocolate is not at all melted anymore. I like them even better frozen. I know, I am strange. The girls declared them, not bad and continued to nibble away at them. I went to bed, secretly glad I didn’t love them because I was not really tempted to eat anymore.

When I got up in the morning, I cut another one open, so I could photograph them in daylight. They had totally cooled by this point and the cookies lost their chewiness. To be fair, I think we overbaked them. The recipe said to bake 9-13 minutes but we went longer, about 16 minutes. They were more crunchy now. I took a bunch of shots and then decided to taste them again. Not bad! Damn!!! I quickly wrapped the remainder up and made my daughter pack them in her bag to take back to school that afternoon. I’m looking forward to seeing what Jenny of the Picky Palate comes up with next.

To print the recipe, click here.


Wheat Berry Salad


Like most of you, I suspect, I sometimes fall into a rut and eat the same things over and over again. It’s just easier that way sometimes. But, this year I have decided to try cooking with a new grain every month. Sort of expand my culinary horizons. However, that goal kind of runs counter to a second goal of mine, to eat my way through my pantry, without buying any new staples.

I was inspired in this second goal by a good friend. Last time I visited her at the cottage she shared with me, that for the month of August, she was planning to empty out her pantry. On days when she had company, everyone usually gathered on the dock around 5 pm for drinks. Instead of agonizing over what to serve with drinks, she would just use whatever she found in her pantry cupboard. One day, she confessed, she opened up a can of chickpeas, rinsed and drained them and served them with a sprinkling of black pepper. Along side this she served some dried apricots she spied lounging at the back of the shelf in a plastic bag. Apparently these offerings were gobbled up quite happily with a glass of chilled Prosecco.

So here I was with the good angel on one shoulder, whispering in my ear, “Come on, clean out the pantry. You have 5 different kinds of grains here. Eat us!”. On the other shoulder I had the devil, tempting me to be wasteful and go out and seek a new grain.  Most of you know I have very little willpower, so it should come as no surprise to you that I went out and bought some wheat berries. I had never cooked with them before and a recipe by Globe and Mail nutrition reporter, Leslie Beck, caught my eye.

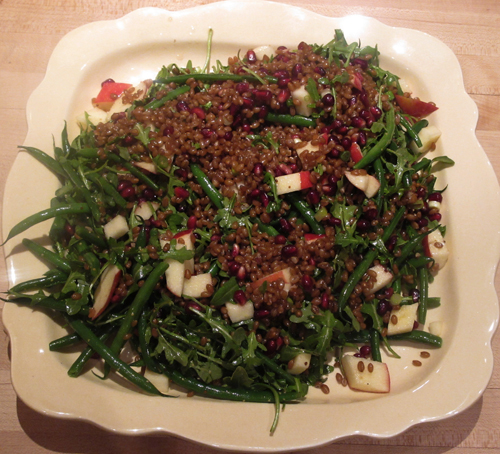
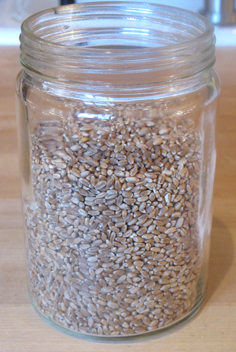
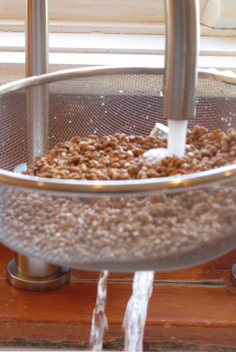
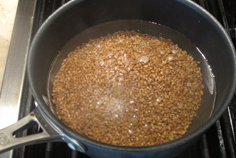
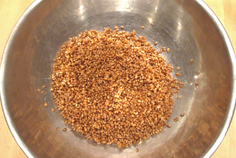
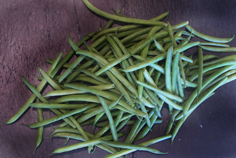
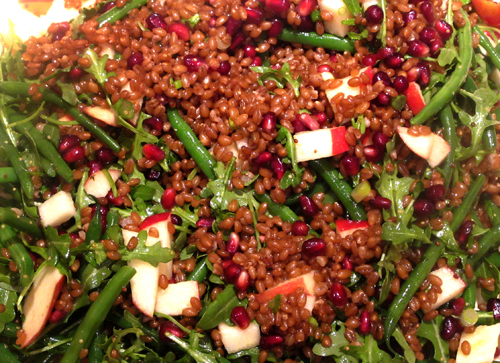
Wheat berries are essentially whole unprocessed wheat kernels, containing all three parts of the grain (germ, bran and endosperm). Only the hull is removed. They sort of look like barley but have 75% more protein and 40% more fibre than barley. All in all, a nutritional powerhouse.  Wheat berries need to be rinsed and then they are cooked in simmering water, about a 2:1 ratio, like rice. They take about 40 minutes to cook and have a wonderful nutty taste and chewy toothsome texture. I added some french green beans to the original recipe as I happened to have some wilting in my fridge!

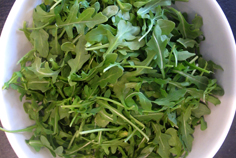
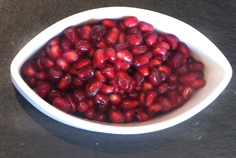
The other ingredients are arugula, pomegranate seeds and diced red apples. The dressing is made from olive oil, cider vinegar, apple juice, maple syrup and grainy mustard.

Chewy, crunchy, tangy and sweet. And healthy too! Feel free to substitute whatever grain you have languishing on the shelf of your pantry. This would be great with Farro as well.

To print the recipe, click here.
Smoky Corn Chowder

Warning… I’m going to rant like an old person, about the good old days, when you could count on certain things to same. When companies built things to last and when product consistency was a highly regarded value.  Don’t you just hate it when companies change a product, when it was perfect already. Then they go and slap a “new and improved” label on it and when I try it, I discover that the improvement has actually made the product worse, not better. Why do they insist on tinkering with something when it isn’t broken. I am referring, specifically, to Imagine Organic Creamy Sweet Corn Soup.  It used to have a mild corn flavour that I used as a base for corn chowder. I am not sure what they changed but it now has a nasty chemical aftertaste. I stopped making corn chowder after this.

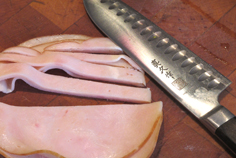
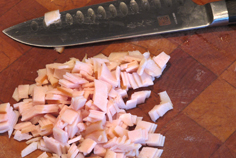
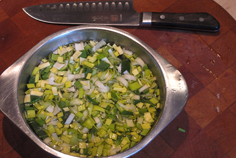
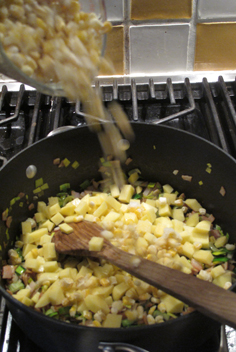
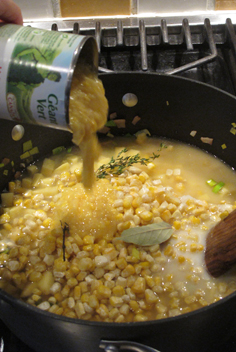
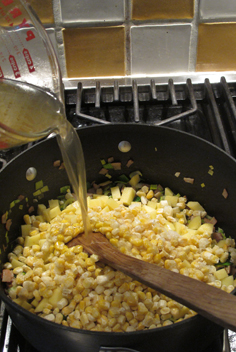
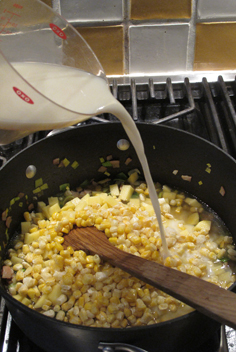
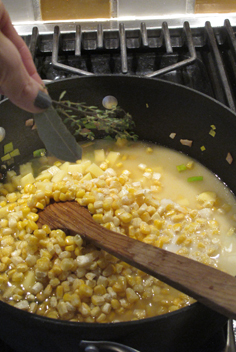
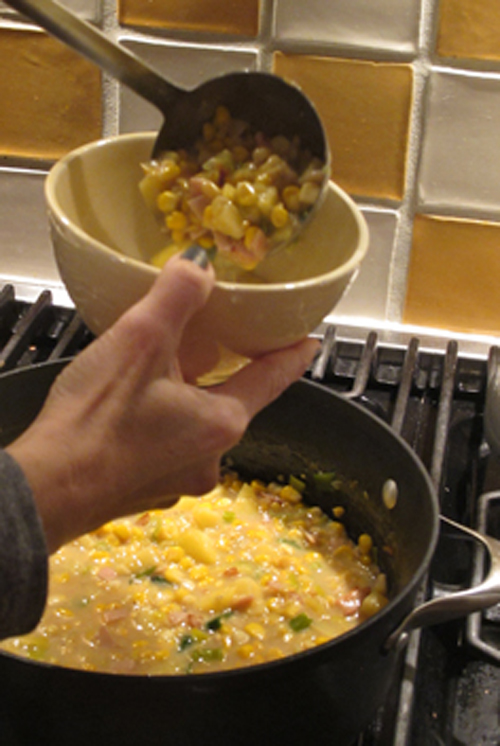
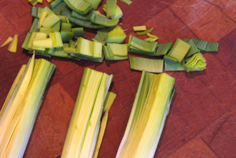
But then I found a recipe in Chatelaine Magazine that uses canned cream style corn to give the soup thickness and body. I had always thought that cream style corn was corn puréed with cream, but it turns out it contains corn, water, sugar and cornstarch. It is low in fat and works beautifully to thicken a corn chowder with very little effort. The original recipe used bacon to get that smoky flavour. We keep kosher, so bacon was out of the question. For a cold winter day (like every day this winter!) I wanted to have the heaviness of a smoky soup. I decided to experiment with smoked turkey breast. I chopped up a few slices and sautéed them in some vegetable oil. Instead of onions, I opted to use leeks.  Sometimes leeks can be quite sandy, so I quarter them, slice them and then soak them in a bowl of cold water.

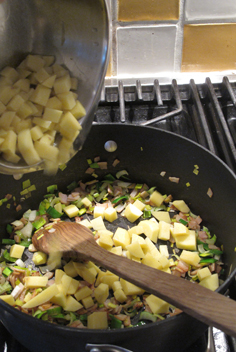
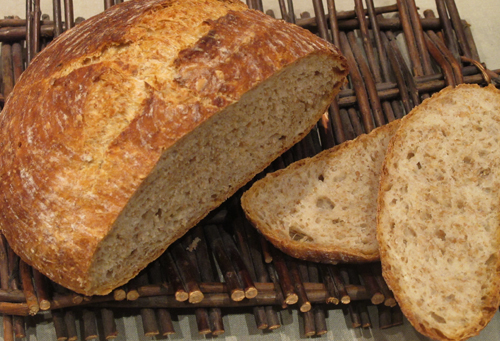
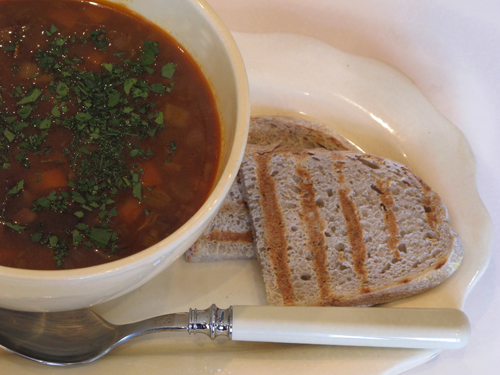
This is one of those simple chop and dump soups. It simmers for 20 minutes and you have a thick and hearty chowder. A bowl of this is like a big hug, warm and comforting. Add a slice or two of no-knead bread and dinner is done.

I also popped in a finely diced jalapeno pepper when I was sautéing the leeks to wake things up a bit. You could use sweet potatoes instead of white potatoes for a pretty colour contrast and to up the vitamin content. Make it today, you’ll thank me.

To print this recipe, click here.


You’ve Stolen a Piece of my Heart!

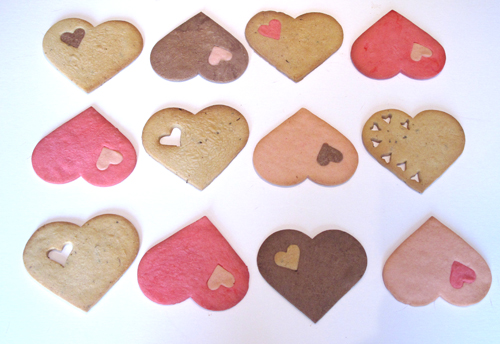
This week I discovered something not very nice about myself. I get cranky if I don’t bake something every few days. I don’t necessarily have to eat it, I just have to bake and create something. I was feeling extra cranky on Friday so I pulled some butter out of the freezer, and already I felt a little nicer. I decided to bake something for Valentines Day. We’re not big on celebrating the holiday in our house, but as an excuse to bake, it’s a good one. I  decided to bake sugar cookies in the shape if, what else, hearts! While I love the look of iced sugar cookies, I don’t love the taste. I find them too cloyingly sweet with all that royal icing.

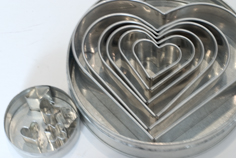
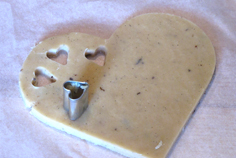
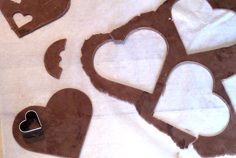
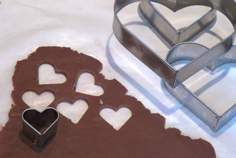
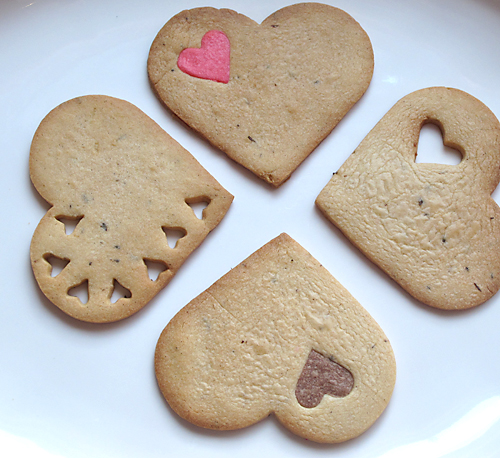
Leaving the cookies plain just didn’t satisfy my creative needs, so I pulled out my heart cookie cutters and inspiration struck. I would cut little hearts out of the big hearts and fill them in with different coloured doughs. The tiny cookie cutters on the left are really aspic cutters, left over from my cooking school days when we had to make gross things like aspic. For those not familiar with this culinary delight, aspic is a jelly made from meat or fish stock. Often the fish one was poured into a fish mould and then decorated with little aspic shapes.

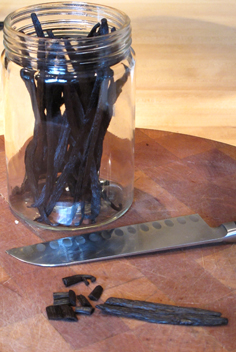
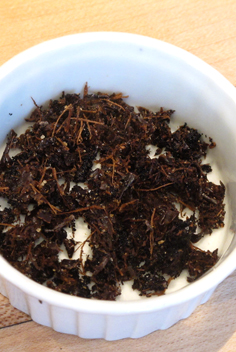
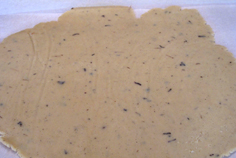
I knew I wanted to make my favourite sugar cookie dough, from Bon Appetit’s December 2000 issue. It is the only sugar cookie recipe I have seen that uses brown sugar instead of white sugar, and it gives the cookies a depth of flavour that white sugar cookies are missing. I decided to try out a new idea I recently learned from Alice Medrich in her book “Chewy Gooey Crispy Crunchy Cookies”. Alice suggests grinding whole vanilla beans in a spice grinder and using it in place of vanilla extract. I was intrigued. Once all ground up, I have to admit it looked like something you might roll and smoke. 3/4 of a teaspoon of ground beans is the equivalent of 1 teaspoon of extract. It looked so cool in the dough, and the aroma and taste were so authentically vanilla.

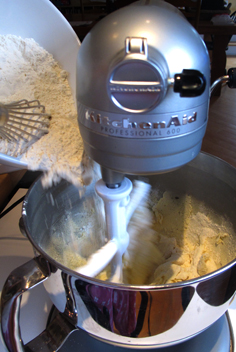
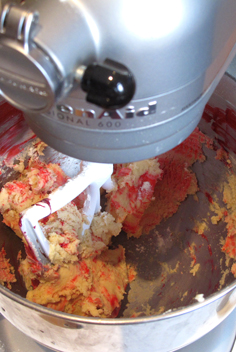
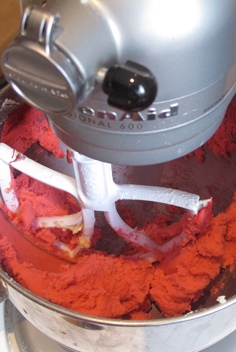
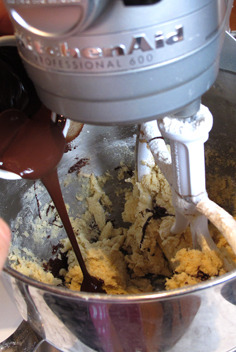
I knew I wanted to have chocolate dough and some pink dough as well. The Bon Appetit recipe isn’t great for adding colouring to as the brown sugar muddies the colours. I made the Simple Sugar Cookies from my latest obsession, Karen DeMasco’s “The Craft of Baking.” I added melted bittersweet chocolate for the chocolate dough and pink paste food colouring for the pink dough. I made two versions of pink, one pale and the other shocking fuchsia .

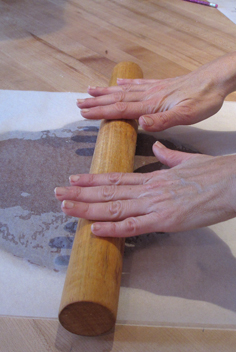
After making the dough, I roll it out right away, between 2 sheets of parchment paper, and then chill it in the freezer for 20 minutes (or the fridge for about an hour). Then the artistry begins. I felt like I was playing with Play-Doh.

The finished cookies were just adorable and way less work (and way more delicious) than iced cookies. How could anyone feel cranky after receiving these cookies?

To print recipe for Brown Sugar Cookies, click Here.

To print recipe for Simple Sugar Cookies, click Here.

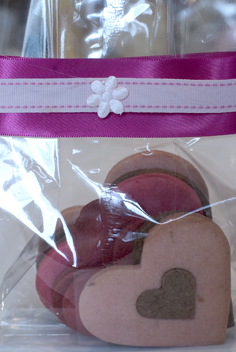
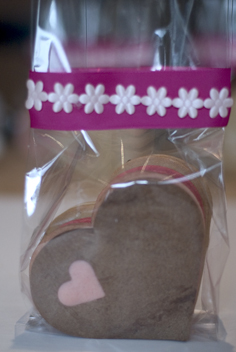
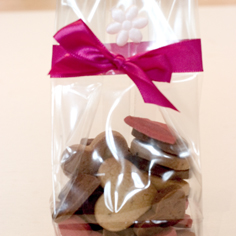
Of course, in keeping with my promise to eat healthier, we kept a few cookies to eat and packaged the rest of them up to give away. If my children are reading this, I have stashed a few away in the freezer for you when you come home!


No Knead Bread


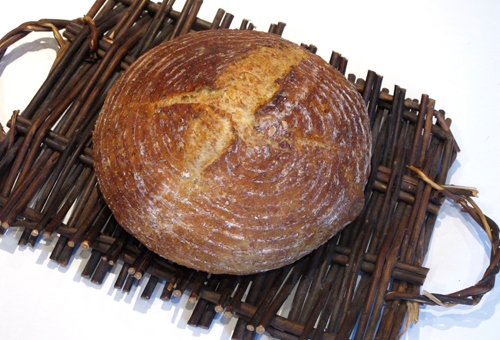
After reading the title of this post you may have either one of two reactions. If you are a fellow bread freak you may be saying to yourself, “What?? Who is she kidding?  That is so last decade. Mark Bittman wrote about Jim Layhey’s revolutionary no-knead bread in 2006! Every food blogger worth her salt has reported on this bread.” If you are not a bread freak, you may be saying, “What?? No knead bread. She’s been inhaling too much bleached bread flour.  How could that be possible?” So, to the bread freaks reading this, I apologize for reporting on something you have already heard about ad nauseam. To the rest of you, I say, yes, this is possible and it’s spectacular. (sorry, couldn’t resist that link!)

Although I first heard about this no-knead bread over two years ago, I only just tried it for the first time last week. I then made it a second time, 4 days later because I just couldn’t get over how simple it was to produce such amazing bread. There are 2 major factors at play here that help create this wonderful bread. The first is mixing up a very wet dough and letting it sit, at room temperature for 18 hours. Food scientist, Harold McGee, explained it like this, to Bittman,

“It makes sense. The long, slow rise does over hours what intensive kneading does in minutes: it brings the gluten molecules into side-by-side alignment to maximize their opportunity to bind to each other and produce a strong, elastic network. The wetness of the dough is an important piece of this because the gluten molecules are more mobile in a high proportion of water, and so can move into alignment easier and faster than if the dough were stiff.”

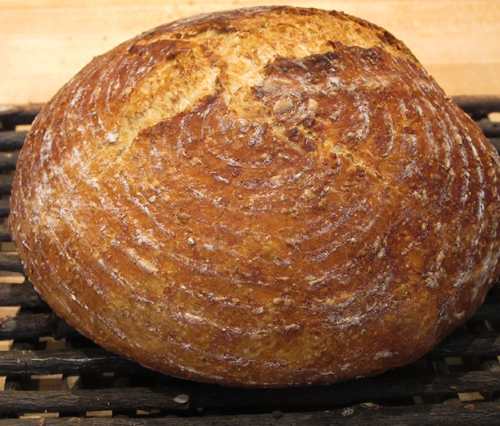
The second major factor involved in making this bread is where Jim Lahey’s real genius comes into play. He discovered that by baking the bread in a covered preheated cast iron or enamel pot (like a Le Creuset), you mimic the steam ovens that professional bakers use to develop that crisp crackling crust so desirable on artisan breads. During my 18 month journey through the Bread Baker’s Apprentice Challenge, I tried all sorts of methods to produce steam in my home oven. I put a pan of hot water at the bottom of the oven, I sprayed the sides of my oven wall with a plant mister during baking, I added ice cubes to the oven during the baking process and I even tried adding lava rocks to the pan of hot water, to mimic a sauna. I never did achieve that holy grail of crackling crust.

I discovered a version of the original recipe with some wheat bran added to the dough. (Chatelaine Magazine Feb. 2011 issue)  I really loved the addition of the wheat bran. Truly, the only thing difficult about making this bread is remembering to start the night before you want to serve it. It had been awhile since I last baked bread so I was excited to get back to it again.

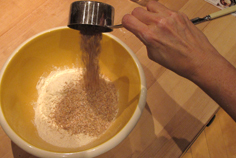
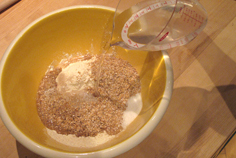
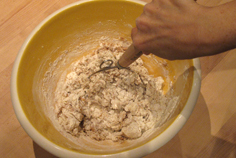
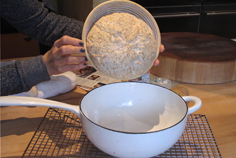
Over the past two years I have accumulated quite a bit bread making paraphernalia, so it was great to use some of it again. In Jim Lahey’s video he says to just use your hands to mix up the dough but I was excited to use my special King Arthur bread whisk again. If you plan to make lots of bread, get one of these. If not, your hands work just fine.

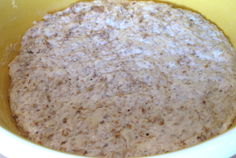
Once mixed, the dough will appear quite shaggy and rough-looking. That’s ok, it’s supposed to look that way. Just cover the bowl with plastic wrap and leave it on the counter for 18 hours. It is a big leap of faith to take, I know, but trust me, it works. After 18 hours, it will have all smoothed out and the surface will have fine bubbles on it.

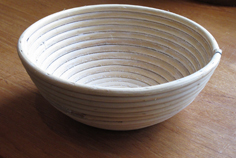
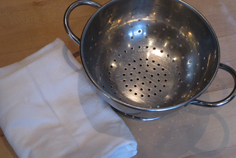
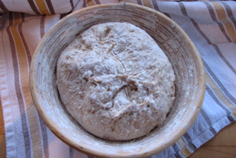
In the original recipe, Jim says to just form a ball and place it on a cotton towel, cover it and let rise. Since I had a special bread rising basket in my cupboard (a banneton) I decided to use that. A banneton is woven bread mold, usually made of made of cane and is used to form and shape artisan loaves during the proofing/raising stage. The basket imprints its shape and ribbed design on the finished loaf. They can be ordered online from Brotform (U.S.) or Goldas Kitchen (Canada). You can also just line a colander with a clean cotton towel, although you won’t get the cool design on your bread.

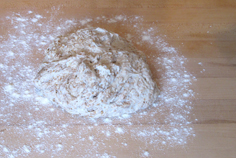
I found it best to lightly flour the counter and then wet my hands to scrape the dough out of the bowl. I did not want to add too much more flour as the high hydration level of the dough is what gives you the big open crumb structure (ie: big holes) of the finished bread. Bread freaks aim for big holes in their finished bread. If you are at all interested in reading more about this subject and finding our why big holes are desirable, visit The Fresh Loaf’s website. A very animated discussion on this very topic has been raging for the past week. Yes, bread freaks are a strange and wonderful breed!

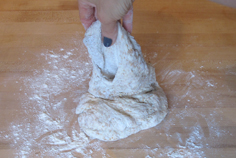
Once the dough is dumped out onto the counter, just fold it over itself, sort of like a business letter. Then, cover with plastic wrap and let rest for 15 minutes.

Then you want to shape the dough into a ball.

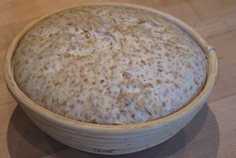
After dough is shaped you can just place it on a floured towel and cover it with a second towel, or you can put it in a basket or colander to let it rise for about 2 hours. I heavily floured my banneton with rice flour and then dumped out the excess, and set my dough in there to rise. You will notice I put the dough in seam side up. That is because after it has risen, I will dump it into the hot pot for baking and the top (with the pinched seam) will hit the pot first and become the bottom and then my pretty ribbed design, from the basket, will become the top.

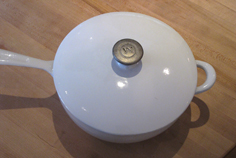
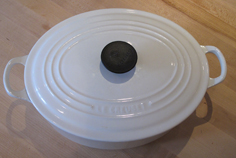
A few words about the pot to cook the dough in. Just about any covered 6-8 quart covered pot will work here. Cast iron or enameled cast iron (like Le Creuset) work very well for this job. I have also read that ceramic and Pyrex would work also, but have not tried them. These are the kind of pots I am talking about.

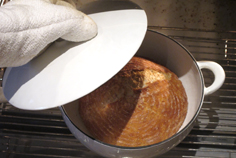
The pot with lid must be preheated in a 450º F oven for at least 30 minutes before baking the bread. It is a bit scary dumping the bread into the hot pot, but just wear oven mitts and dump quickly. If it goes in a bit uneven, just wiggle the pot back and forth a bit to straighten it out. It will all turn out fine.

Resist all temptation to slice the bread as soon as it comes out of the oven. It continues to cook a bit more as it cools. It will be gummy in the centre if you slice right away.

To print recipe for No-Knead Bread, click here.

Mushroom Barley Soup


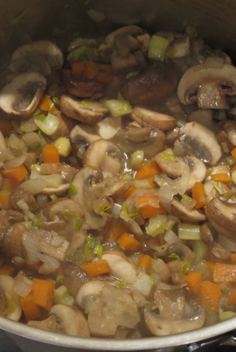
Let me begin by saying, very unapologetically, this is not a vegetarian soup!  I have made this soup, for many years, with vegetable stock, and it was quite delicious.  But this time I made it with homemade beef stock. This soup was savory and meaty, with a richness, fullness and complexity of flavour that I had not tasted in a very long time. I had forgotten how good soup made with homemade beef stock could taste.  About 9 years ago my daughter announced she was going vegetarian.  I thought it was a phase, but by year 3 I finally wised up to the fact that she meant business. As a result, I vegetarianized all my soup recipes. And I just got used to them that way. It’s amazing how you can get stuck in a culinary rut this way and not even realize it.

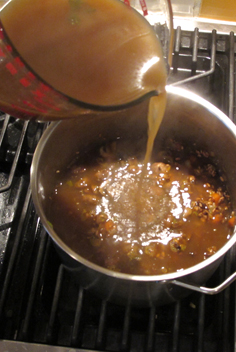
It was only after volunteering at a Soup Sisters event last week that I was reminded of how much I loved soup made with beef and chicken stock. I used to make chicken stock weekly and beef and veal stock once in a while. With my daughter is away at university and I decided to embrace the beef. I got some beef bones at the butcher and roasted them with aromatic vegetables until they were all golden brown. I have to admit, I sort of felt like I was cheating and as the aroma of roasting beef bones was wafting out of my oven, I worried she would come in at any moment and catch me in the act of infidelity. I simmered everything for about 5 hours, strained the broth and chilled it overnight. The next day I spooned off the hardened fat, and heated up the stock. It was gorgeous.

I found this recipe for mushroom barley soup in Gourmet magazine (a moment of silence please)   many years ago (September 1998 issue).  The original recipe comes from Zingerman’s Deli in Ann Arbor Michigan. I have adapted it slightly. If you plan to make it with homemade beef stock (and I implore you to try it, just once, you’ll be hooked!) start a day ahead of time.

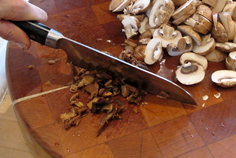
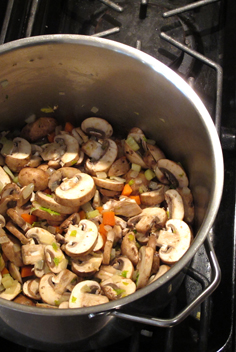
Just a few words about mushrooms. I had always been taught that mushrooms should never be washed under running water as they act as a sponge and will become waterlogged. I was instructed to just wipe them with a damp cloth or paper towel. What a tedious task. Well, Cook’s Illustrated has dispelled the washing myth. They did a test (of course they did, you gotta love Cook’s!) where they soaked 6 ounces of mushrooms in a bowl of water for 5 minutes.  Then they drained the mushrooms and weighted them again. They only absorbed 1 1/2 teaspoons of water. So go ahead and rinse your mushrooms under cold water. I used regular brown button mushrooms (called crimini) in my soup.

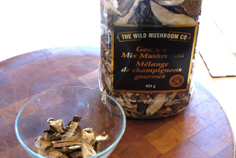
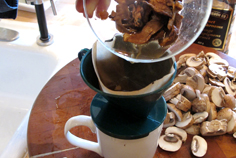
Regarding dried mushrooms, they should be soaked in boiling water for about 10 minutes. Sometimes there is grit in dried mushrooms. If you want to use the flavourful soaking liquid in the soup, strain the liquid through a paper coffee filter if you don’t have any cheesecloth.


I added about a tablespoon of tomato paste to the original recipe. Tomato paste is one of the several foods that contribute to umami. Umami (pronounced oo-mommy) is known as the 5th taste. We all learned about sweet, sour, salty and bitter when we were in school. Turns out the Japanese discovered a 5th taste our tongues could recognize. They maned it umami. It is best described as a savoriness. Simply put, it just makes food taste more delicious. Other foods that contribute to umami include Parmesan Cheese, anchovies, mushrooms, soy sauce and, brace yourself, breast milk. No wonder humans crave this 5th taste!

I finished the soup off with some freshly chopped dill and parsley as well as a spoonful of sherry vinegar. I remembered making beef consommé in culinary school. It was an all day affair involving ground beef and egg whites. Really gross but kind of cool to watch it being made. We finished the consommé off with some dry sherry. I had none in the house so I tried a splash of sherry vinegar and really liked the brightness it added to the soup.

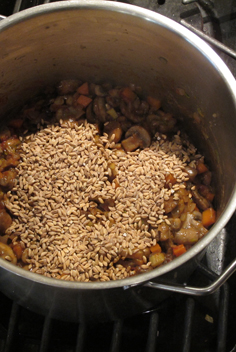
The day I decided to make this, I had no barley so I substituted farro. I really loved the chewy texture of this grain in the soup.

Click here to print recipe for Mushroom Barley Soup.

Click here to print the recipe for Beef Stock.

Betrayal on Big Rideau Lake


So this is a story about betrayal, deception and denial. But it’s not all dark and horrible. It takes place in a very bucolic setting. Take a look.

We decided to go up to our cottage last weekend. All this cold weather and snow has been starting to get to me and I figured if you can’t beat it, join it. We were joined by one of my oldest and dearest friends, and her husband. We have been friends since we were 13 years old and now that we live in different cities, we just don’t get to see each other enough.  Leading up to the weekend were a flurry of phone calls and e-mails to discuss, what else, the food! She offered to bring Friday night dinner and I graciously accepted. (YAY!!)

As we were discussing menus we slipped into the obligatory January discussion about overindulgence in December. We agreed that we would not do appetizers before dinner. We always eat too much of them and then by the time dinner is over we both feel stuffed. We would, however, allow drinks before dinner.  Clearly we have our priorities in order. Feeling virtuous we said goodbye and hung up. The next day, she inquired in an e-mail, “If we’re not doing hors d’oeuvre, does that mean we aren’t doing dessert either? I have a banana recipe that I really want to try out.” I shot back a reply, “Bananas are fruit. That’s allowed. I’ll do apples for Saturday night dessert .”

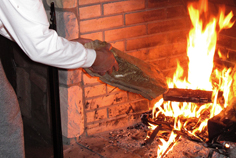
About an hour after we arrived at the cottage on Friday afternoon, it began to snow. Big fat fluffy snowflakes, with no wind at all. My friend said it was as if someone had turned on a tap up above and let these snowflakes fall. And they continued to fall, in their lazy steady way all weekend long. It looked like something out of a Disney movie set. We built a fire and poured out some red wine to let it breathe.

We were vigilant in our no hors d’oeuvre pledge and proceeded to dinner after a glass of wine. I sat back and relaxed as my friends served a beautiful dinner. We all cleaned up together after dinner and reminisced about when we used to rent a cottage together in the mid 80’s. It was a beautiful cottage on Lake Simcoe. The house was set high on a hill, and you had to walk down stone steps through a forest to get to the sandy beach. We spent many happy hours there sunning and listening to the Blue Jays on the radio (Those were the good old days!!).

After doing the dishes we collapsed on the couch and dessert was served. My friend brought out a banana cake. Cake??? I thought we were having fruit for dessert. So either I had been deceived or my friend was in complete denial. Either way, my brain was way too happy humming on a sugar high to care. This banana cake was better than Sarah Lee! You have to understand that this is very high praise as I grew up on Sarah Lee Banana Cake and consider it the gold standard. I feel compelled to disclose that  I also grew up on TV dinners and Swanson’s Chicken pot pies. It was an idyllic childhood.

The next day, those big fat flakes of snow continued to fall. We decided to take a walk on the frozen lake. My friends strapped their snowshoes on (yes, they’re those kind of people), and I got to try out my brand new winterproof boots. We almost fell into an ice fishing hole, but aside from that, the 90 minute hike was beautiful. And I am happy to report that my feet stayed warm and dry.

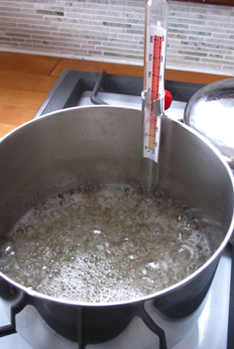
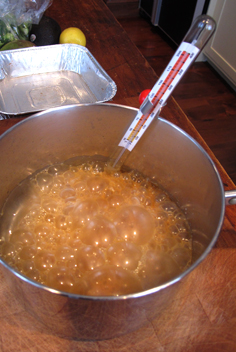
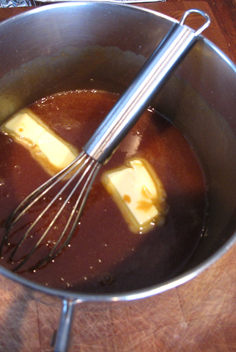
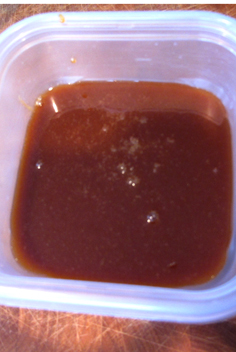
When we got back, I took a shower and upon entering the living room discovered an empty bowl with a few orange crumbs clinging to the bottom of it. I licked the crumbs from the bottom of the bowl. Aaargh…Honey Barbecue Chips. Betrayal!! In her defense, my girlfriend swore they were the  baked variety. After that, it was a slippery slide into Prosecco and  red wine. I tried to stem the tide by bringing out edamame pods and carrot and celery sticks but it was clear at this point we were into full-scale deception and denial. I did what any self-respecting woman would do and trooped off to the kitchen to make salted caramel sauce.


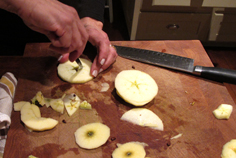
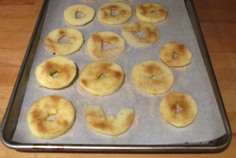
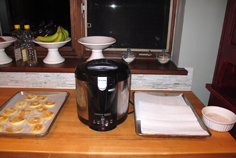
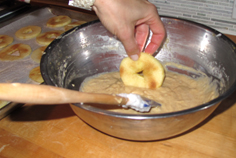
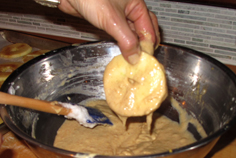
To serve with the caramel sauce…Apple Fritters, from Karen DeMasco’s new book, “The Craft of Baking.”

We dipped the fritters into a cinnamon-sugar mixture and skewered them with a cinnamon stick. Salted Caramel Sauce was drizzled onto vanilla ice cream. Deception never tasted so good!


To print recipe for Salted Caramel Sauce, click here.
To print recipe for Apple Fritters, click here.