Savoury Apple Galette with Caramelized Shallots and Brown Butter Pastry Crust

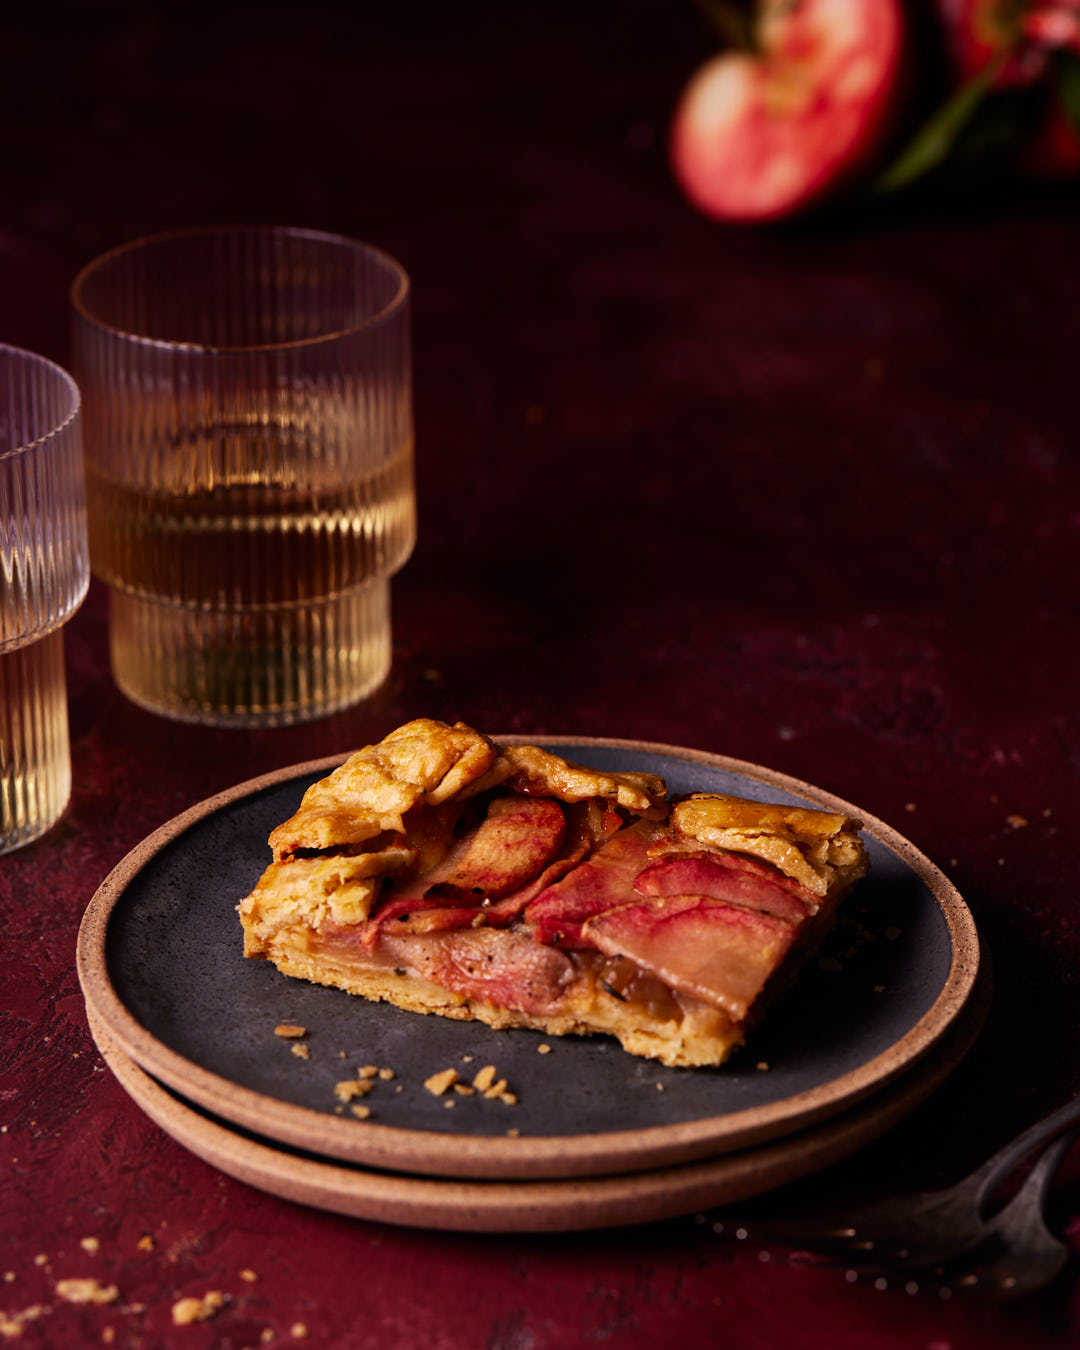
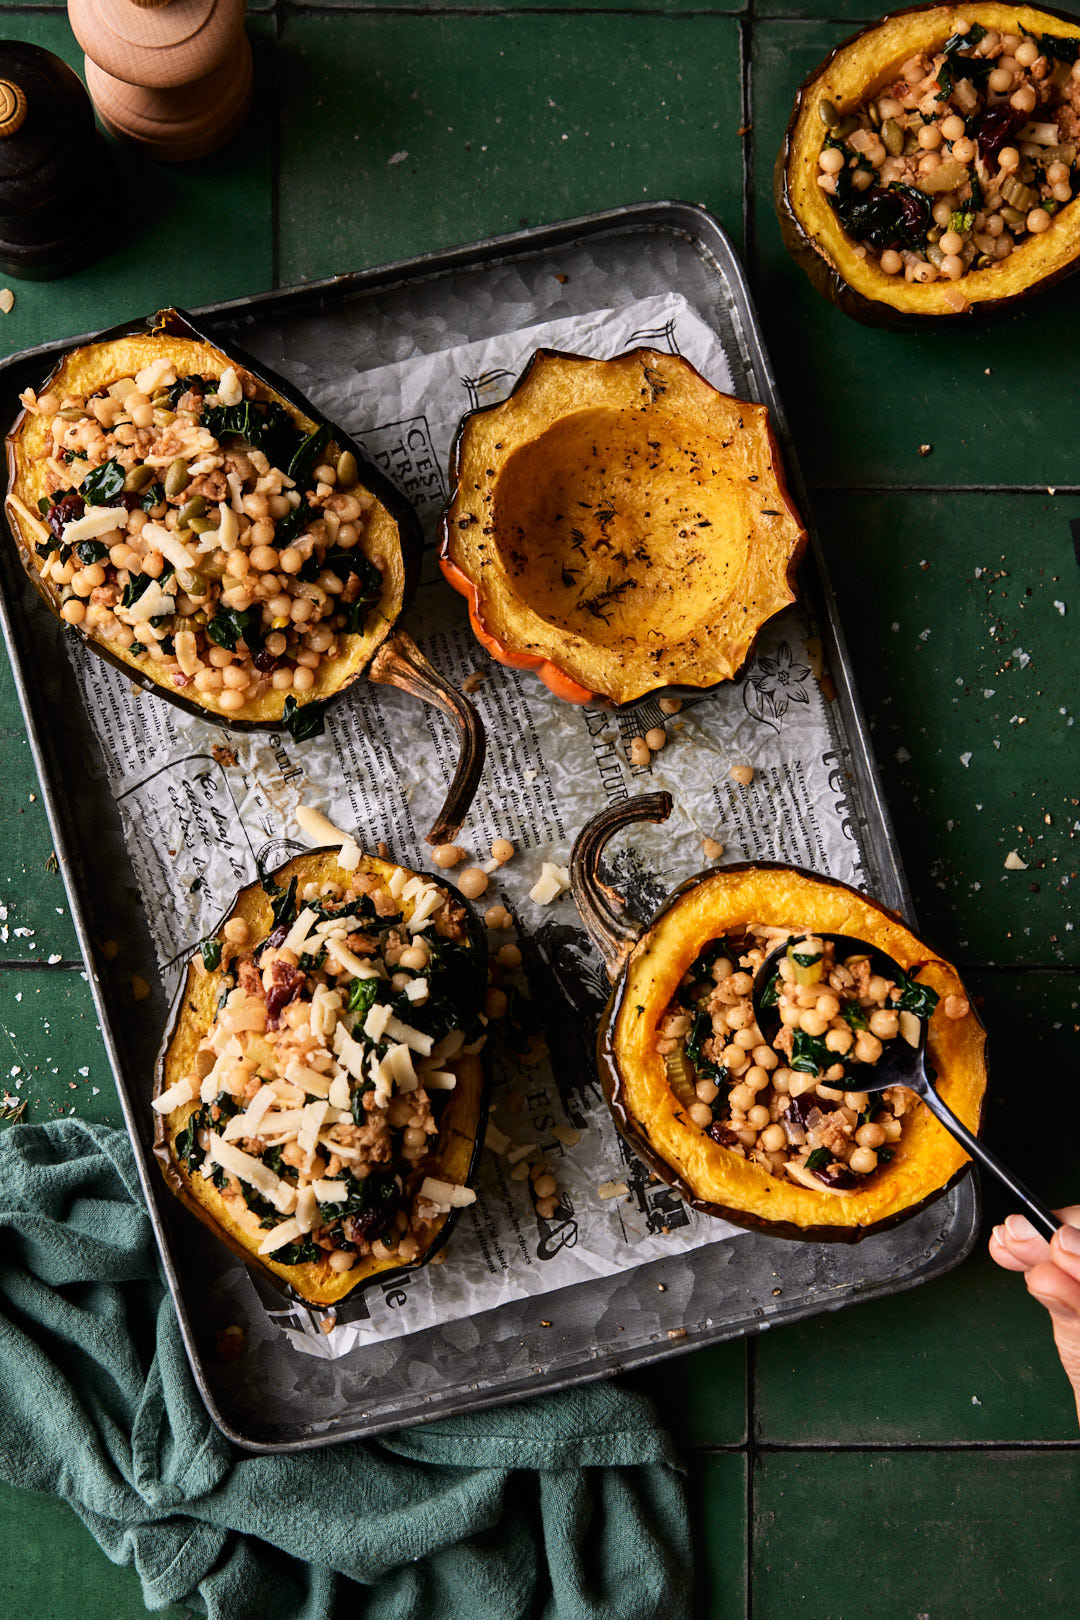
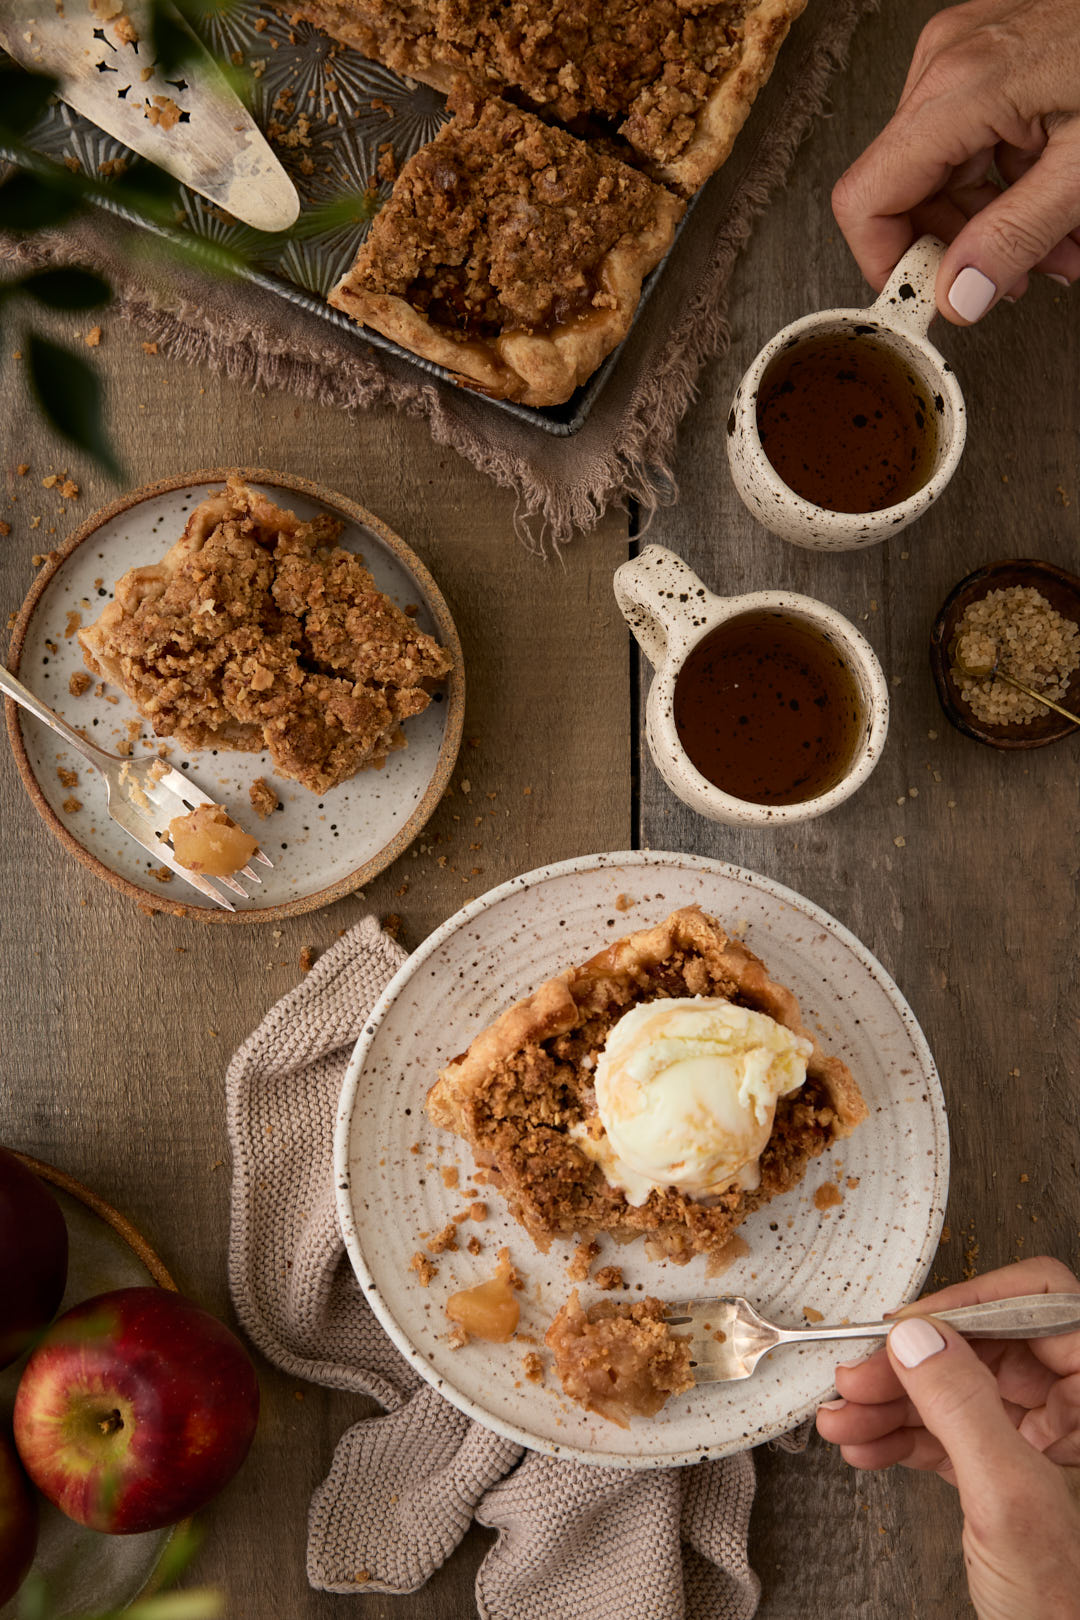
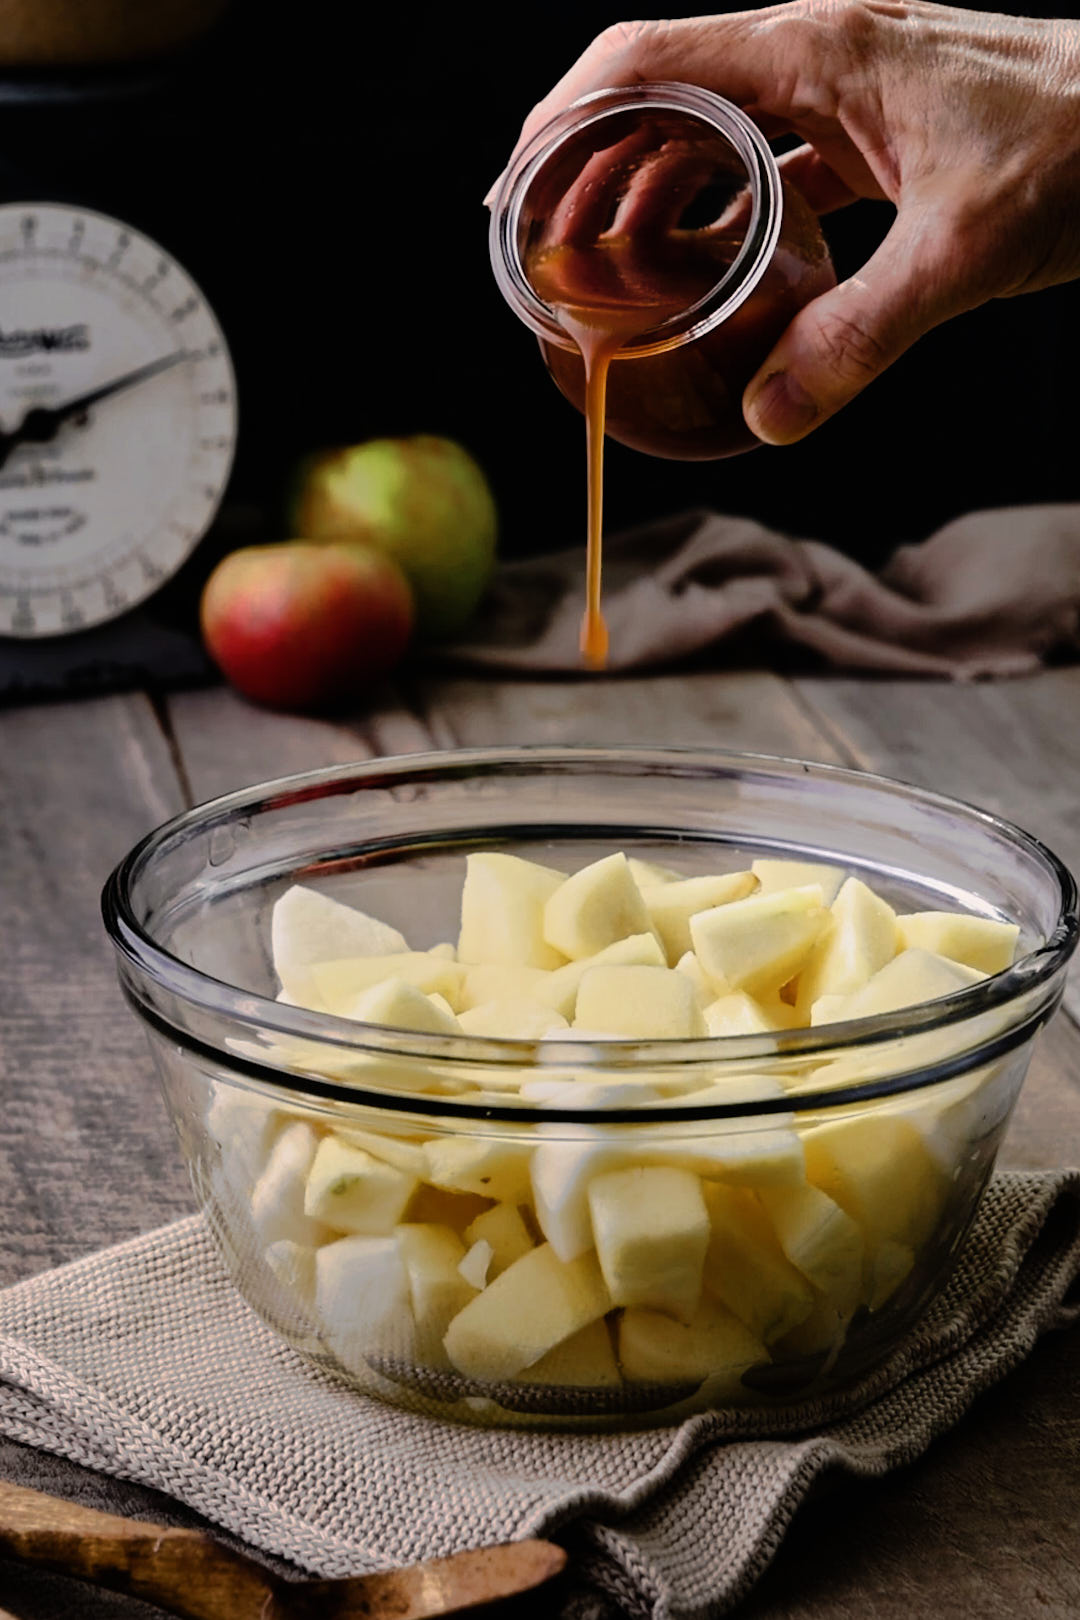
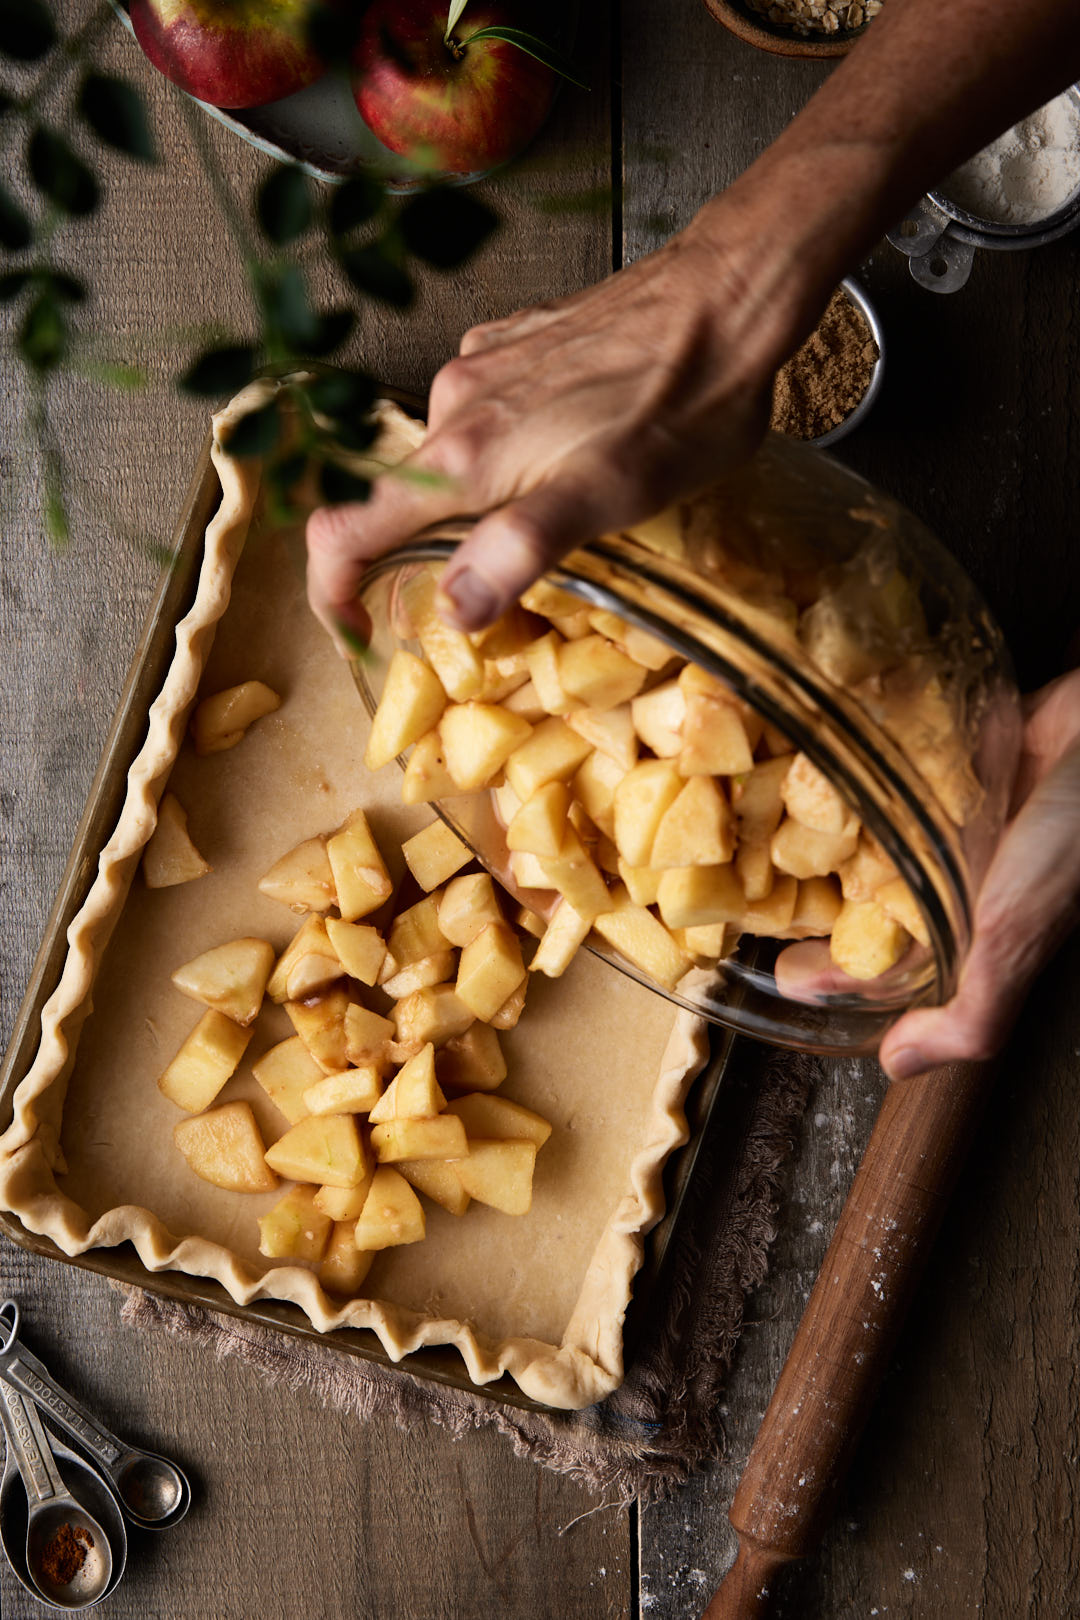
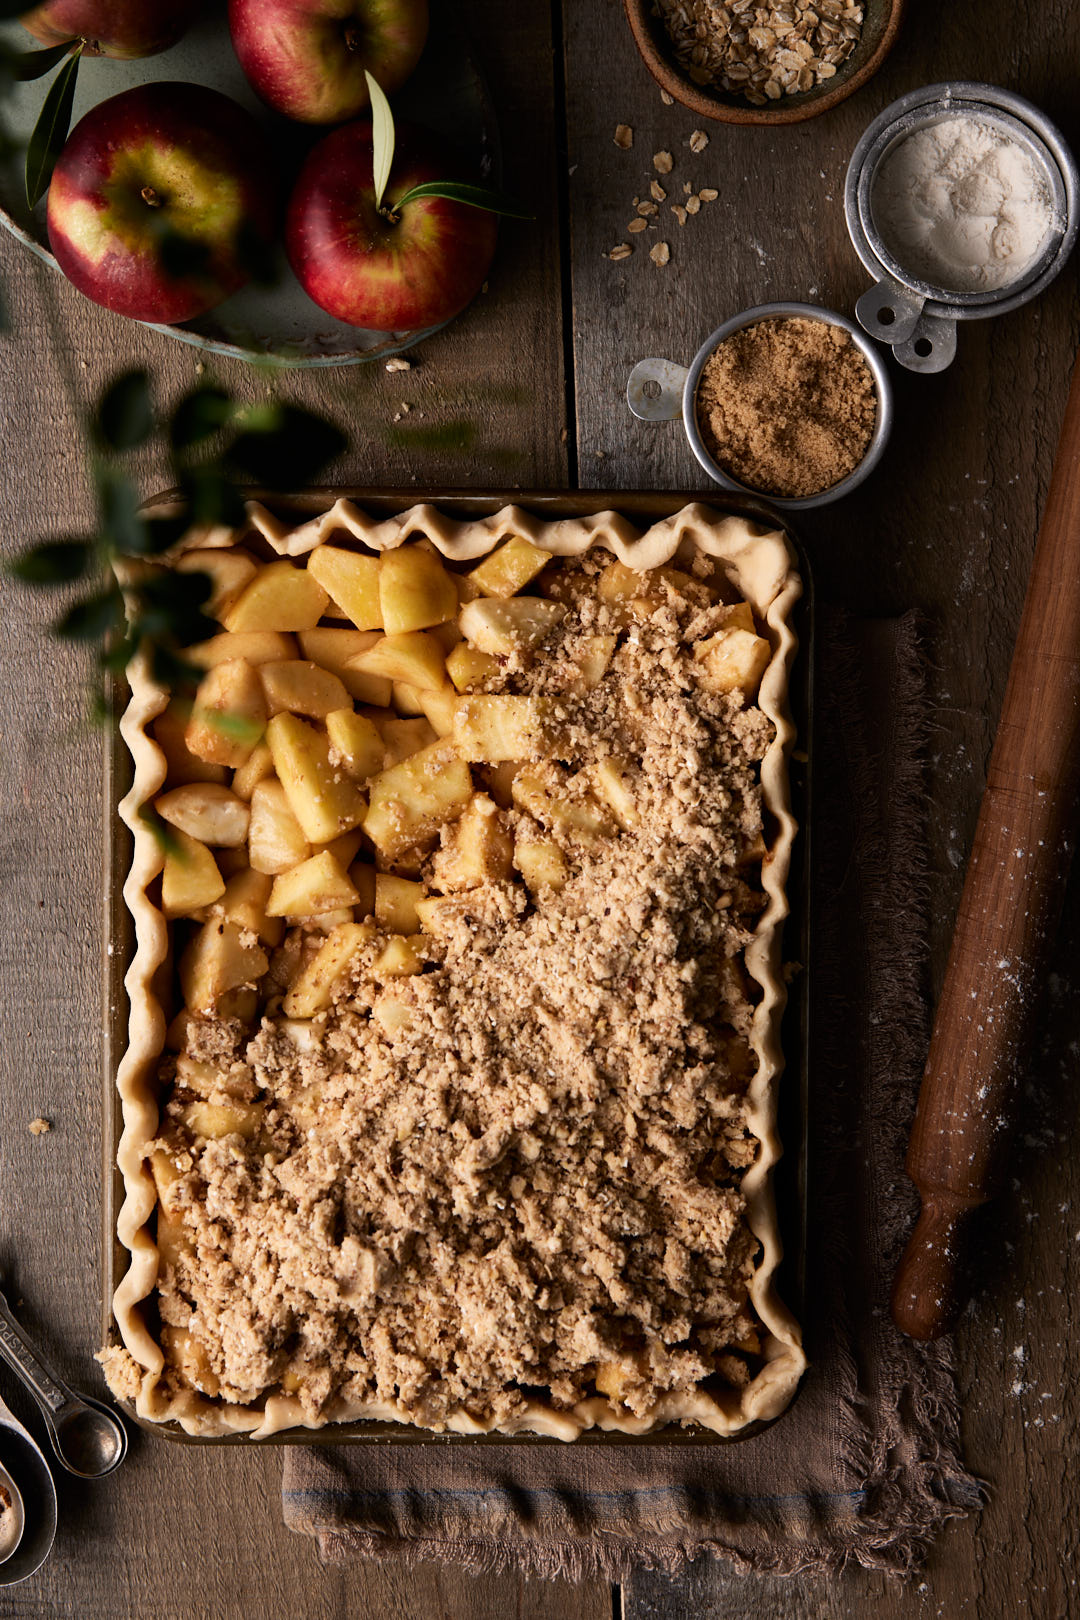
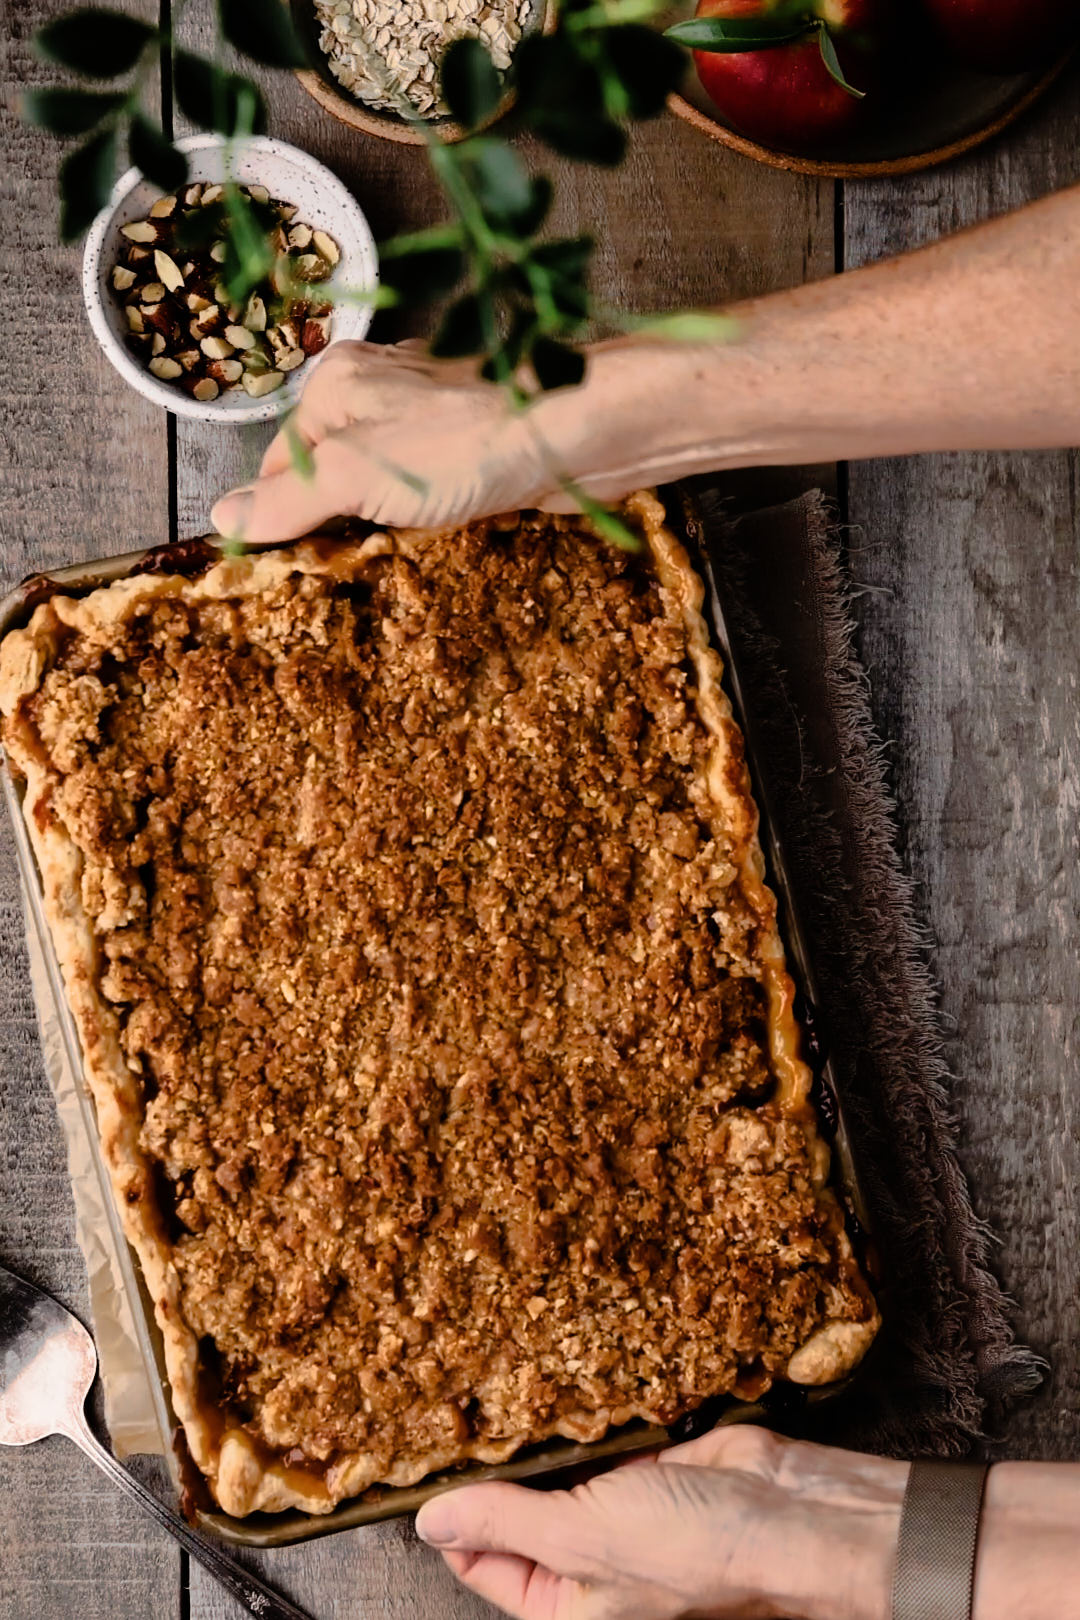
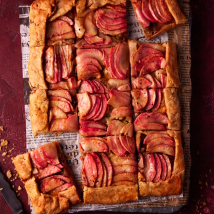
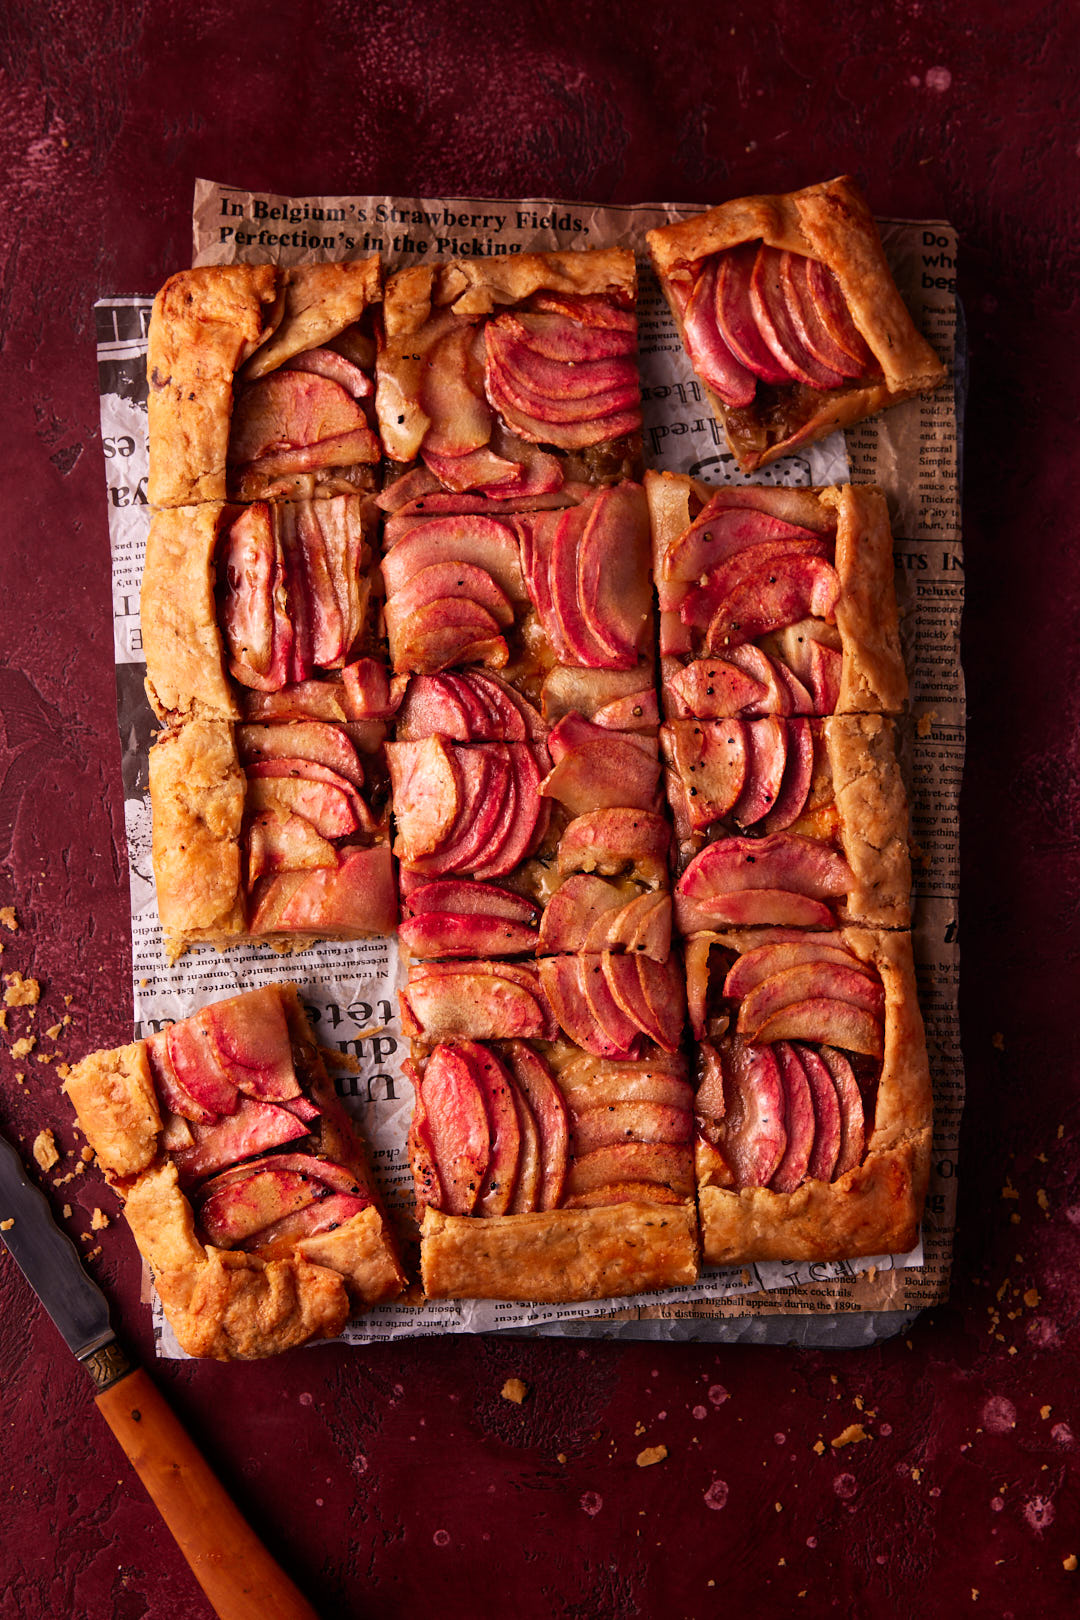
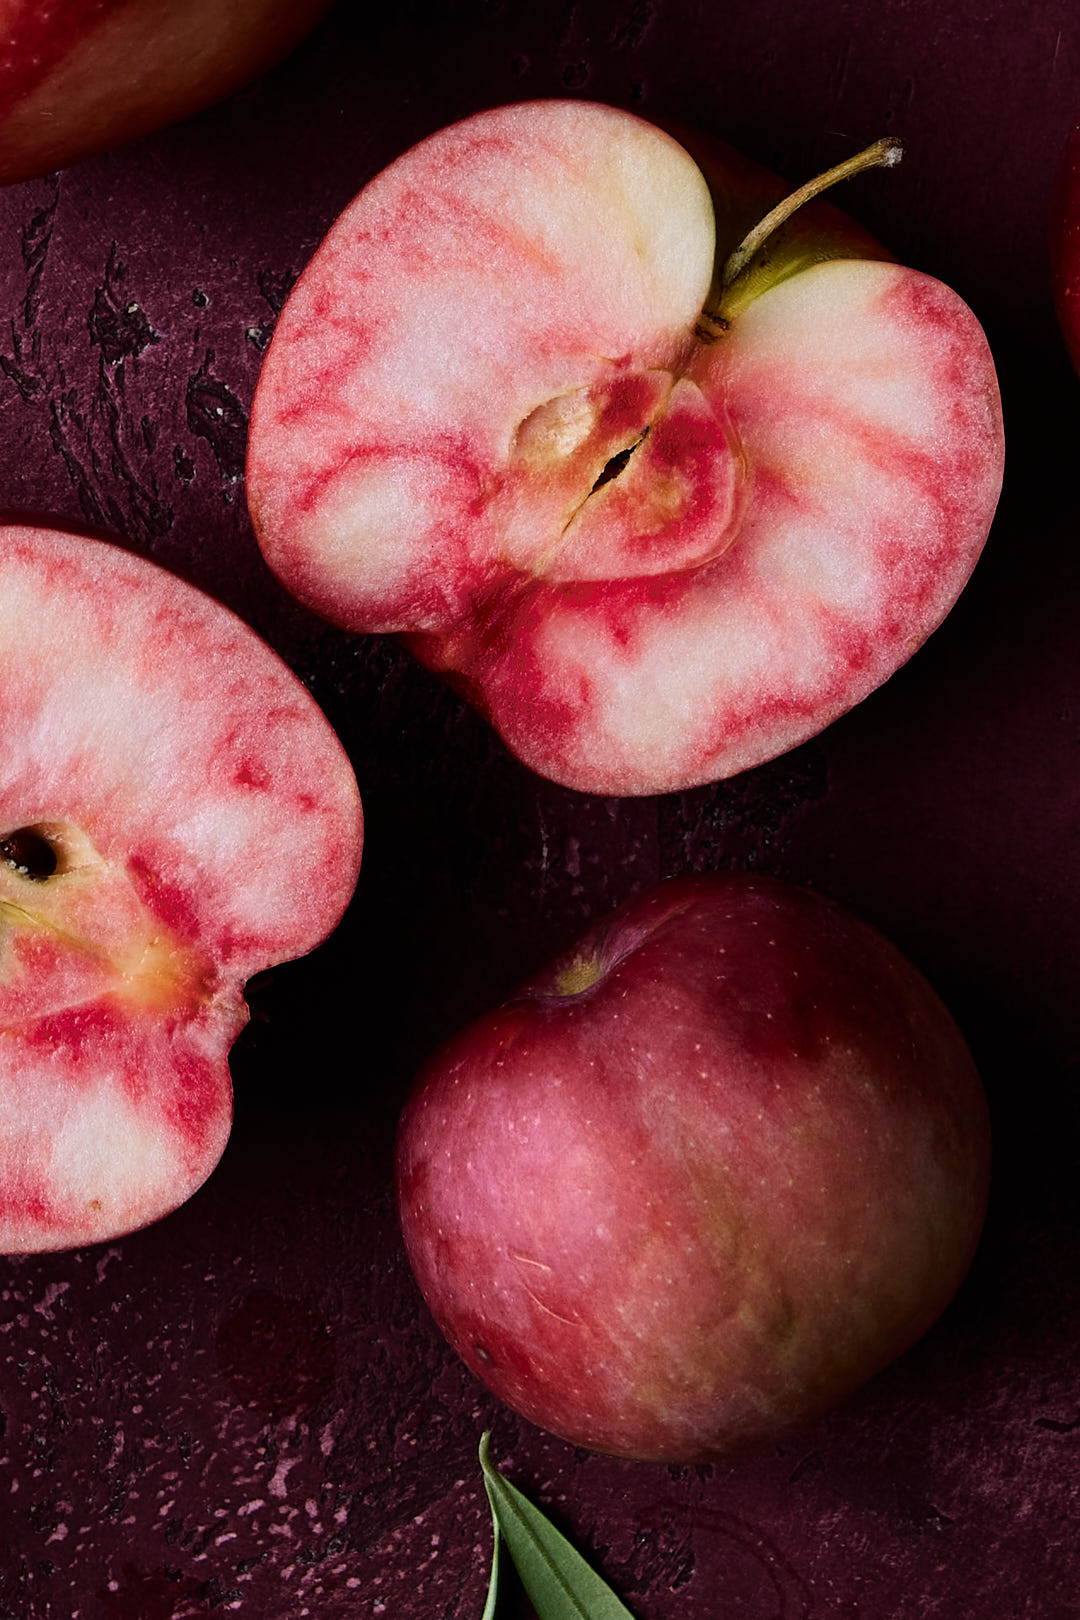
I still had a few of these beautiful Lucy Rose apples in the fridge after creating this Kale and Apple Salad so I decided to bake a savoury apple galette this week. I paired the apples with caramelized shallots and Gruyere and Fontina cheese. This galette is in the running for the best thing I’ve baked this year. Honeycrisp apples are a perfect substitute if you can’t find Lucy Rose apples. They are elusive. It took me 5 years to find them in Ottawa.

I’ve really been into baking with brown butter lately, so I made a brown butter pastry crust, using a fantastic recipe from King Arthur baking. Brown butter is the secret sauce of baked goods. It amplifies all the flavours. It adds depth, richness and a nutty caramel flavour. Browning butter is not difficult, but you do need to allow some time to brown and then chill it, before making the dough.

Butter is composed of butterfat, milk protein and water. When you brown butter, you are essentially toasting the milk protein. As you heat the butter, and it begins to bubble and sputter away, the water evaporates and the hot butterfat begins to cook the milk solids, turning them from creamy yellow to a splendid speckled brown colour and your whole kitchen smells like toasted hazelnuts. It’s insanely gorgeous!

For the savoury part of the galette, I chose shallots. I prefer their more delicate flavour to onions. Caramelizing the shallots takes time and patience. Turn the heat to medium low and don’t rush it. If the shallots start getting too brown before they are tender, splash in about 1/4 cup of water to slow things down. Choose a good melting cheese. Cheddar, gruyere, or fontina are all good choices.

Watch how it all comes together.

Once the galette comes out of the oven, brush the apples with some warmed apricot or apple jelly, for shine and a hit of extra sweetness. The galette is delicious warm or at room temperature. Buttery flaky crust gives way to salty gooey cheese, savoury shallots and sweet apples. It’s the perfect balance of flavour and texture. Brushing the crust with dijon gives a bit of a tang to help balance out the sweetness of the apples.

Click here to print recipe for Savoury Apple Galette with Caramelized Shallots and Brown Butter Pastry.

Kale, Apple and Brussels Sprouts Salad

If you had told me a few years ago that I would actually crave a kale salad, I would have thought you were crazy. I used to hate kale. It made my throat itchy.

Apparently, I was doing it all wrong. I was buying curly kale, and using it raw, in salads. Curly kale is best for blending into smoothies or sauteeing, stews and soups, where the heat can mellow it’s bitter bite.

For eating raw, Tuscan Kale (aka Lacinato Kale or Dinosaur Kale or Cavalo Nero/Black Kale) is a better choice. It is a bit more tender than the curly variety and the flavour, while still quite earthy, has an almost nutty sweetness. You need to remove the stems, slice it quite thin and let it sit in the dressing for about 10 minutes before serving. That will help to tenderize the leaves.

Since discovering Tuscan kale, I now crave it. I have made this salad a few times this month. Last time I made it I added some raw shredded Brussels sprouts for extra crunch. (Not shown in video). Highly recommend the addition.

The dressing for this salad is a spiced apple cider vinaigrette. I got the dressing recipe from thecozyapron.com. A few pinches of cinnamon, curry powder and cumin create a wonderful depth of flavour that really holds up under the weight of the kale and sprouts. Gouda cheese adds a richness and the spiced nuts add crunch, an essential component of any salad as far as I’m concerned.

The apples I used in this salad have a surprising pink flesh. They are called Lucy Rose. I have been seeing them on Instagram for a few years now and became obsessed with finding them in real life. I finally found them last week at Hintonburg market in Ottawa.

They are a cross between a Honeycrisp and Airlie apple. They have a sweet-tart taste with a crunchy texture, very similar to a Honeycrisp. While they are quite dramatic, the salad will still be delicious with a Honeycrisp apple.

Click here to print recipe for Kale Apple and Brussels Sprouts Salad with Spiced Vinaigrette.

Kale and Sausage Stuffed Squash

It’s finally sweater weather here in Ottawa, so I’m leaning hard into this stuffed squash recipe. I’m not normally a fan of stuffed vegetables. It always seems like too much work for too little flavour payoff. But this kale and sausage stuffed squash really delivered big with taste and comfort. These were inspired by Lena Abraham’s recipe on delish.com.

The squash needs to be roasted before stuffing. I made this with acorn squash, but it would also be delicious with honeynut squash (mini butternuts), delicata squash or sweet dumplings. The skin on most of these small squash get quite tender with roasting, so they are completely edible.

While the squash is roasting, make the filling. This recipe is infinitely customizable. Start with the carbohydrate element. Farro, barley, rice, wheat berries, freekeh or Israeli couscous can be used. You could cook them in water, vegetable or chicken stock, but try using apple cider as Lena did. I simmered some Israeli couscous in apple cider and added a big splash of apple cider vinegar to balance out all that sweetness.

Next select your aromatics. Shallots, onions, garlic, leeks are all good choices. Celery is a traditional stuffing ingredient for good reason. It adds great taste and texture.

To bulk the stuffing up you can add ground meat of some kind (beef, turkey, chicken or lamb) or some spicy sausage. I used a plant based Spicy Italian Sausage to keep it vegetarian. If you leave out the cheese, it could also be served to your sweet vegan nieces.

A hearty green is the next component. Kale or Swiss chard are perfect. Just stir them in and mix until they wilt. You need that hit of bitterness to balance the stuffing. Cheese is optional but I love the richness it brings. I used a mix of Havarti, Gouda and Monterey Jack. Mix some in but save a bit to put on top for a molten golden crust.

The final component is the garnish. I’m all about texture so after filling and heating I topped mine with roasted salted pumpkin seeds and some ruby red juicy pomegranate seeds.

Click here to print recipe for Kale and Sausage Stuffed Squash.

Apple Cider Caramel Slab Pie with Oat Almond Crisp Topping

If you can’t decide between apple pie or apple crisp, have both! This Apple Cider Caramel Slab Pie with Oat and Almond Crisp topping is the best of both worlds.

The apples, I used a mix of Honeycrisp and Granny Smith, get a coating of apple cider caramel before baking. The filling recipe for this dessert was created by the pie queen Erin Jeanne McDowell. She literally wrote The Book on Pie. She had the brilliant idea to reduce apple cider to a caramel-like consistency. It creates the most intense apple flavoured pie you will ever eat. It takes about 20 minutes to cook down the cider to a thin caramel.

Check out this video on how it all comes together.

I adapted Erin’s recipe and baked it in a quarter sheet pan to make a slab pie. I decided to forgo the top pie crust and finish mine with an Oat and Almond Crisp Topping.

This is my go-to crisp topping. I always have a bag of it in the freezer ready to top whatever fruit is in season. Crumbly and buttery, packed with chopped toasted almonds, oats, brown sugar and flour, it never fails to satisfy.

A scoop of salted caramel or butterscotch ice cream would be very welcome.

Click here to print recipe for Caramel Apple Cider Slab Pie with Oat and Almond Crisp Topping.

Lemon Poppyseed Scones from Neddies Harbour Inn

Our annual sojourn with our friends, The Grizzlies, commenced right after Labour Day. We had been on a several year hiatus because of the pandemic, but in early September we visited Gros Morne Newfoundland. On the West coast of the province, it is home to some of the most breathtaking fjords and coastal landscapes in Canada. It has been on my husband’s bucket list for quite a while now.

The Grizzlies is not their real name. It’s our nickname for them, to protect their identity. They are such fabulous travelling companions, I worry that if I reveal their identity, others will want to travel with them and they will never be free to travel with us. I mean, Mr. Grizzly travels with a Costco sized bag of twizzlers, 3 different flavours of potato chips and Monkey 47 gin. Who wouldn’t want to be his travel companion?

This was our second trip to Newfoundland with the Grizzlies. If you’re curious, you can read more about our adventures together in St Johns and Fogo Island.

This time we stayed at the charming Neddies Harbour Inn, in Norris Point.

Through our travel agent, we worked with Kathryn of Gros Morne Adventures to plan an action packed 3 day trip filled with hiking, kayaking and touring.

Neddies Harbour Inn is home to The Black Spruce Restaurant, where Chef Jason Lynch is cooking up some of the most delicious food I have eaten in a long while. While he is a wizard with cod and all nature of seafood, his breakfast scones just blew me away.

Can we chat for a few minutes about the anatomy of a perfect scone? If your eyes are beginning to glaze over, feel free to jump straight the recipe.

  • A perfect scone should be tall, light and flaky.
  • The interior should have a soft and tender texture. It should not be doughy or stodgy or claggy.
  • The exterior should have crisp, crumbly edges.

Luckily for us, Chef Jason shared his recipe and method for making perfect scones. Here is how they come together:

Tips for success:

  • Using frozen butter in the dough is key to flaky tall scones. The easiest way is to grate the frozen butter into the dry ingredients, using the large holes of a box grater. When mixing the dough, use your forefinger and thumb to flatten out the grated butter into thin slivers. When the dough hits the hot oven, these slivers of butter will melt, releasing water which creates steam. That steam causes the dough to rise, forming air pockets, which then result in majestic flaky layers.  
  • Don’t knead the dough. You will see in the video that the dough is quite shaggy. That is what we want. I have used the process of “lamination” to get flaky layers. Essentially I folded the dough over onto itself, like a letter before stuffing it into an envelope. This builds layers. Repeat this folding 2-3 times.
  • Don’t spread the scones too far apart when arranging them on the baking sheet. About 3/4″ space apart is perfect. This encourages them to rise nice and tall. They essentially support each other during baking.
  • Pop the scones into the freezer for about 10 minutes before baking. This will firm up the butter and prevent the scones from slumping.
  • Brush scones with a bit of heavy cream and sprinkle with coarse white sugar or turbinado sugar, for a crunchy exterior.

I flavoured my scones with lemon zest and poppyseeds. Feel free to get creative with your flavours.

Click here to print recipe for Lemon Poppyseed Scones.

Roasted Tomato-Chipotle Soup with Grilled Cheese Croutons

While calendar says summer is officially over, here in Ottawa, the weather has been glorious and tomatoes are still ripening on the vine. The farmers market stalls, once I waded through the piles of pumpkins, were overflowing with plum and heirloom tomatoes this week.

I have updated a comforting childhood classic, tomato soup with grilled cheese, by giving the soup a kick of heat with chipotle peppers in adobo and turning the grilled cheese into croutons. A drizzle of basil oil makes for a very beautiful bowl of soup.

Start with roasting tomatoes, shallots and garlic in the oven. No need to peel the tomatoes or garlic. It’s easy to slip the peels off once everything is roasted. Tuck the garlic under the tomatoes to protect the papery skin from burning.

Once the veggies are roasted, tip everything into the blender and puree until smooth. This is the time to add the spice. Chipotle Peppers in Adobo sauce, are jalapeño chiles that have been dried, smoked and packed in a flavourful sauce made from tangy tomatoes and spices. They are sold in a small tin and are readily available in most supermarkets.

Each tin contains about 10-12 peppers, way more than you will need for this recipe. Here is how I store the leftovers. My heat tolerance is fairly low, so I like to remove the seeds from the peppers. Working over a bowl, gently open each pepper and, using your fingers, slide out the seeds and discard. Place deseeded peppers and sauce from the tin into a food processor. Process until smooth. Spread puree out on a parchment lined baking sheet and freeze until solid. Break puree into a few pieces and freeze in zip loc bag. It will keep in the freezer for a few months. Just break off a little piece as needed.

Here are some other ways to use up the chipotle in adobo:

The roasted veggies make quite a thick puree. Thin it out with a bit of vegetable stock and some 35% cream. As a finishing touch, I like to add a squeeze of honey and a splash of sherry wine vinegar to wake everything up.

It’s not difficult to make a mediocre grilled cheese sandwich, but for an outstanding version, follow these rules:

  • Rather than adding butter to the pan, butter the outside of each slice of bread.
  • Use a cast iron pan if you have it, for perfect browning.
  • Use medium or old cheddar for best flavour.
  • Cook on low heat and cover pan to assist in melting the cheese.

I used a serrated knife to cut my sandwiches into adorable little croutons and finished the soup off with a drizzle of basil oil.

Basil oil is simple to make. Puree basil, a bit of spinach (helps keep the green colour) and a neutral oil. Strain for a clear smooth oil. It will keep in the fridge for 2 weeks. If you don’t want to bother making the basil oil, just finish the soup with some chopped fresh basil.

Click here to print recipe for Roasted Tomato-Chipotle Soup with Grilled Cheese Croutons.

Corn, Broccoli, and Spicy Italian Sausage Pasta

I have always struggled with transitions. The bridge between summer and fall is a tough one for me. I don’t put on socks until November. 

Markets here in Ottawa are still selling local sweet corn and I’ll be buying for as long as they’re selling. I’m in no hurry to say goodbye to summer. 

The fall produce is starting to arrive but I’m not quite ready to be rushed into pumpkins and squash. I’ll start slow with a verdant head of fresh broccoli. 

This Corn, Broccoli and Spicy Italian Sausage and Shells is the perfect dish to make for dinner this week. It bridges that gap between summer and fall perfectly. 

Featuring sweet local corn, it satisfies our desire to stretch the summer season for as long as possible. Hearty spicy Italian sausage (I used plant based) and earthy broccoli are firmly rooted in the comfort food zone of fall. 

I adapted this recipe from Chris Morocco’s Corn and Sausage Pasta from the September 2022 issue of Bon Appetit. I added a large head of broccoli, cooked it for 2 minutes in boiling water and then chopped it up into rubble sized pieces so that each bite has lots of broccoli bits. There is never enough broccoli for me.

The second change I made to Chris’ recipe was too add some Crunchy Garlic Breadcrumbs as a garnish. I love to play with textures, and these light, fluffy and crunchy crumbs make the perfect garnish. Totally optional, but worth the extra few minutes of time.

The pasta cooking water, Parmesan cheese and a small knob of butter make for a creamy and satisfying sauce. 

Click here to print recipe for Corn, Broccoli, and Spicy Sausage Pasta.

Fig, Olive and Halloumi Babka

My husband’s frame of reference for Babka is a Seinfeld episode. Jerry and Elaine debate which babka, cinnamon or chocolate, is the lesser babka. In case you’re curious, my husband believes that chocolate is the lesser babka and cinnamon reigns supreme.

When I told him I was developing a recipe for a savoury babka, filled with figs, olives and halloumi cheese, he said, “that sounds interesting”, but we have been married for almost 39 years and I knew exactly what he was thinking. “Why would you mess with perfection?”

Olives and halloumi cheese add a salty note and dried figs and a drizzle of honey add a touch of sweetness. A generous dusting of za’atar takes the Babka fully into Mediterranean territory.

The finished loaf was so yummy. The buttery brioche dough baked up soft and tender. Little pockets of salty melted cheese combined with honey-sweet dried figs and briny olives to create the perfect bite. I served this with drinks one night for aperitivo and then toasted the leftover slices the next day to serve with a fruit and cheese plate for lunch. It freezes beautifully.

My husband ate his slice very quietly and then suggested that while it was delicious, he couldn’t wrap his mind around the fact that it was savoury and contained no sugar or cinnamon. He suggested that I just name it Fig, Olive and Halloumi Loaf, so that those with a similar mindset wouldn’t be disappointed when you promise Babka. I guess you have to know your audience. Whatever you call it, it’s just plain delicious.

Click here to print recipe for Fig, Olive and Halloumi Babka.

Rainbow Pan Con Tomate (Spanish style grilled bread with tomato)

I discovered pan con tomate in 2013 on a trip to Barcelona. I was blown away by how 5 simple ingredients (bread, tomato, olive oil, salt, and garlic) could combine to create such a joyful bite.

A Catalan specialty, pan con tomate starts with toasted or grilled bread which gets rubbed with a clove of garlic. This is followed by a ripe tomato, cut in half and roughly rubbed over the surface of the toasted bread until all you are left holding in your hand is the skin of the tomato. It’s finished with a drizzle of fruity olive oil and a generous sprinkling of flaky sea salt.

Although it has been 10 years since I first tried it, it is one of my most vivid culinary memories. The crunch on the outside surface of the warm bread and the yeasty scent assaulted my senses. The center of the bread, so chewy, was filled with little nooks and crannies. These little air pockets were bursting with the sweet and fragrant tomato essence and the fruity nutty olive oil. The little crystals of sea salt on top just melted on my tongue. How could something so simple be so good?

During that week in Barcelona I sampled many versions of pan con tomate and came home inspired to recreate it in my kitchen. Over the past decade I have learned a few tips and tricks for a successful version.

  • Do not attempt to make this unless it is the height of summer tomato season. Search out the ripest tomatoes you can find. I found some beautiful/ugly heirloom tomatoes at my market and bought them in every hue I could find.
  • While the traditional way is to rub the bread with the tomato, I found that grating the tomato on the large holes of a box grater made a raw sauce that the bread can really soak up.
  •  The bread component is just as important as the tomato. You need to use a bread with an open crumb structure (i.e.: lots of air pockets and nooks and crannies) on the interior of the bread, so that the tomato pulp and olive oil have somewhere to soak into. Ciabatta is an ideal candidate. I used Ace Bakery’s Ciabatta loaf. It’s readily available in many supermarkets now.
  • Deeply toast or grill the bread. Crunch is important to stand up to the raw tomato sauce. Don’t skip the garlic.
  • This is the time to break out the fancy bottle of extra virgin olive oil. it makes a big difference.
  • Use a flaky sea salt, such as Maldon. You need the crunch of the salt crystals.

It’s fun to do a rainbow version of this dish. Grate each colour of tomato separately and bring them to the table in little bowls. Grill and rub garlic on the bread for your guests and let them top the toasts themselves with whatever colour tomato they desire. A pretty bottle of olive oil and a tiny dish of sea salt make for a fun presentation.

Click here to print recipe for Rainbow Pan Con Tomate.

Wild Blueberry and Peach Pie

I have a complicated relationship with pie. It’s not a category of baking I feel especially passionate about. Cookies and buttercream are more my love language. But my husband is a pie person. His mom used to bake him peach pies every summer. The last summer she was alive, she was quite ill, but lovingly baked him several pies, which he tucked away in the freezer, The following spring she died. We still had one peach pie left in the freezer. My husband could not bring himself to eat it. He got comfort from seeing that last peach pie, every time he opened the freezer door. I understood completely.

And then, the unthinkable happened. I accidentally left the freezer door ajar when we went away for a long weekend. We came home to puddles on the floor and a totally defrosted and smelly freezer. I felt terrible. He said all the right things, “It’s ok, it was just an accident, don’t worry about it….” but I felt terrible.

I now make him pies twice a year. An apple crumble pie in the fall for his birthday and a peach or peach and blueberry pie every summer. After 34 years, my pie making skills have improved. He greatly appreciates when I bake pie for him.

Here is how this summer’s version came together. Peaches and blueberries are a beautiful flavour combination. I love to use the tiny wild blueberries for this pie. It will still be perfectly delicious with regular cultivated blueberries if you can’t get wild ones. This year I did not even bother to peel the peaches. Turns out that the skins completely break down when baking, so no need to peel them.

I got extra fancy and made a lattice top and braided crust. You could, of course, omit the lattice and just do a plain lid. It will still be delicious. If you decide you want the braided edge, you’ll need to make an extra 1/2 recipe of pie dough.

My thickener of choice is Minute tapioca (also called instant tapioca). I find that cornstarch or flour make a cloudy filling. Tapioca makes for a thick and glossy filling that slices beautifully.

Please be patient and wait at least 4 hours for the pie to set and cool before slicing. You will be rewarded with picture perfect slices. A scoop of vanilla ice cream would not be overkill.

Click here to print recipe for Wild Blueberry and Peach Pie.

Tater Tot Waffles

I like to have fun in the kitchen. One of my favourite games to play is “will it waffle?” I have had great success with croissant dough and halloumi cheese. It’s just so amusing to put stuff, other than waffle batter, into the waffle iron and see what happens. I have had less success with my other favourite kitchen game, “can you blend it?” Let’s just say that apple pie milkshake was not one of my greatest creations, and leave it at that.

I discovered the idea of using Tater Tots on bonappetit.com. They did a loaded tater tot waffle version, complete with bacon, chives, sour cream and cheddar. I left out the bacon and topped mine with a fried egg, because everything’s better with an egg on top, right?

The amount of Tater Tots you need to fill your waffle iron depends on the size and type of waffle iron you have. I have made it twice now, once in a Cuisinart Belgian waffle maker and once in a regular President Choice waffle maker. You will need to add a second layer of Tater Tots for a Belgian waffle maker, as the grooves are deeper.

Here’s a video to show how it all comes together:

The Tater Tots go in frozen. I discovered that the best way to ensure an even waffle is to let the tots cook for about 2-3 minutes. Then open the waffle iron and see if there are any gaps or holes. Fill them in with more tots and continue cooking for a total of about 9-12 minutes. I used a medium high heat.

Click here to print recipe for Loaded Tater Tot Waffles.

Everyone I made them for loved the nostalgia factor. Most had not had Tater Tots since they were a child. Shockingly, my friend Ed had never even heard of Tater Tots! Clearly a deprived child. I will be making these for hm very soon.

Tomato Peach and Burrata Tartine

We are awash in an embarrassment of seasonal produce right now. This week, the tables at the Farmer’s Market near me were groaning under the weight of local peaches and multi-coloured grape and cherry tomatoes. No heirloom tomatoes yet, maybe in a few weeks they told me.

I bought a big basket of peaches and some of them will make their way into peach hand pies for my son-in-law, a hand pie aficionado. Some will be turned into peach-blueberry crisp, for my husband. Some of the peaches will be diced and mixed into my morning yogurt and some will be just eaten out of hand, juices dripping down my forearm.

The rest of the peaches will be used for lunch. We’re making tartines. Tartine is the French word to describe any open-faced sandwich. Start with roasting the little tomatoes. It really enhances their sweetness and adds a lovely texture to the dish. Anoint the tomatoes with olive oil, honey, thyme and a pinch of red pepper flakes.

Luckily my peaches were freestone and not the annoying cling variety. Freestone and cling refer to the peach flesh either coming away cleanly from the pit (freestone), like in the video below, or clinging stubbornly to the pit (cling).

The cheese variety in this video is burrata. Burrata, is the Italian word for “buttered”. It is made from fresh mozzarella. While it looks quite similar to a ball of fresh mozzarella, what differs is what’s on the inside . It is filled with a soft, stringy curd and fresh cream. It has a milky, buttery delicate flavour that’s rich and creamy. If you can’t find burrata, fresh mozzarella or bocconcini will also be quite delicious.

I made a basil oil to drizzle over the tartine, as a finishing touch. It’s as simple as whizzing some fresh basil, spinach (helps to preserve the green colour), and oil in the blender for 3 minutes. Strain it and you have a gorgeous finishing oil. Don’t forget the sprinkle of flaky sea salt.

Click here to print recipe for Tomato Peach and Burrata Tartine.