Tag Archives: Brown Butter

Brown Butter Chocolate Chunk Coffee Toffee Cookies

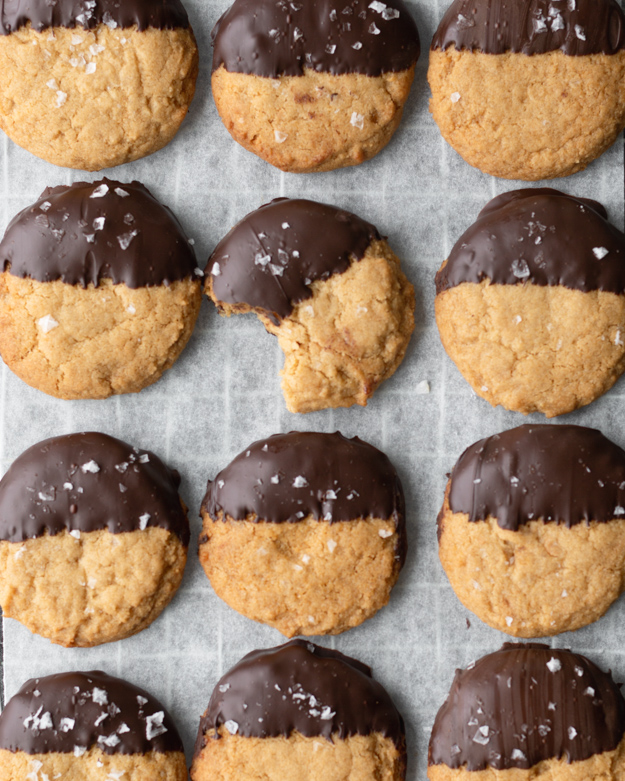
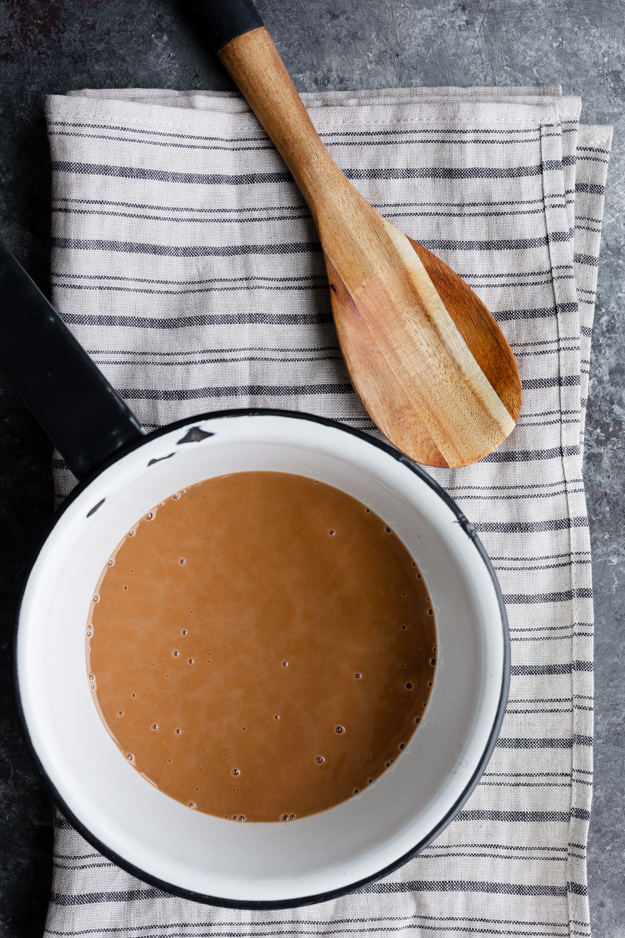
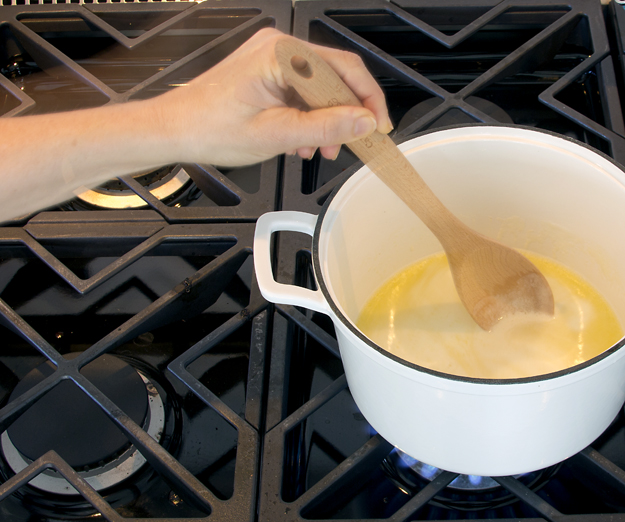
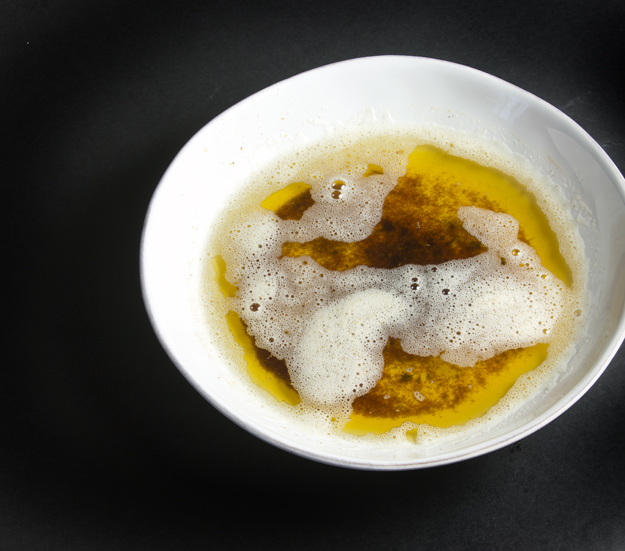
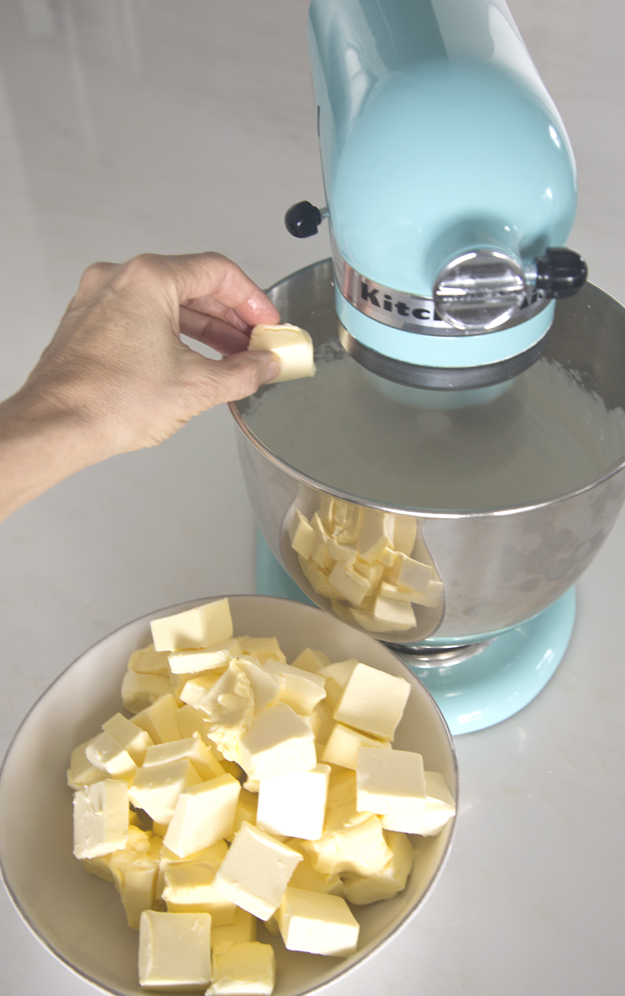
When a cookie title contains the words brown butter, it better deliver that toasty, nutty flavour profile. If you’re curious about the science behind brown butter, here’s a quick primer. Butter is composed of butterfat, milk protein and water. When you brown butter, you are essentially toasting the milk protein. As you heat the butter, and it begins to bubble and sputter away, the water evaporates and the hot butterfat begins to cook the milk solids, turning them from creamy yellow to speckled brown and your whole kitchen smells like toasted hazelnuts. It’s these toasted milk solids (not the fat itself) that give brown butter its nutty taste 

The issue I have with using browned butter in baked goods is that once it is mixed with the sugar, flour, and eggs, the brown butter flavour becomes quite subtle. So I’m always left wondering if it’s worth it to take the time to brown butter when baking. And then I came across this Bon Appétit article, “For the Best Brown Butter, You Need Milk Powder.”

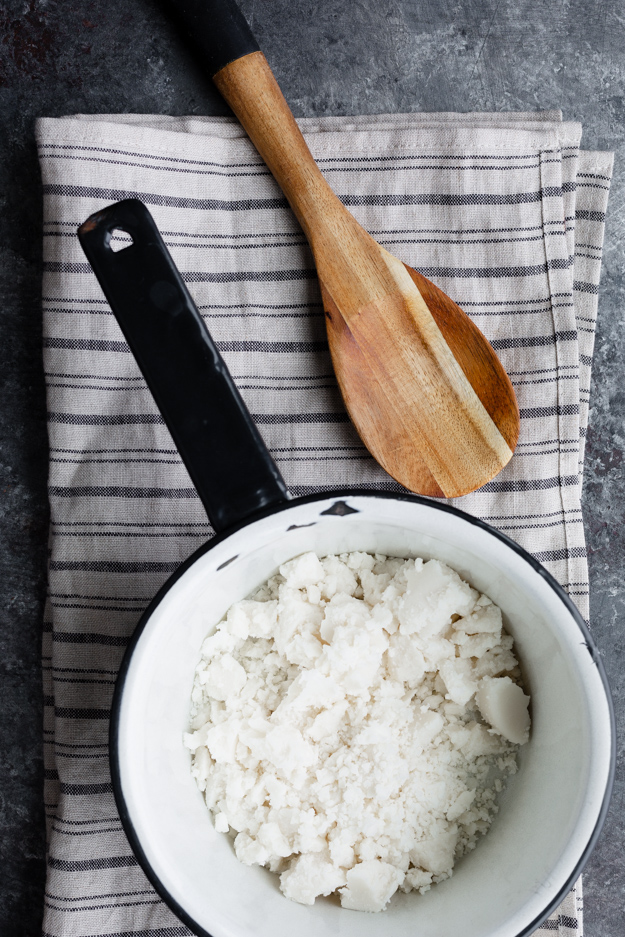
Author Shilpa Uskovic explains, “If you want brown butter to be the mayor of Flavourtown, the main character of the story, you’ve got to maximize those milk solids. Enter from stage right: nonfat dry milk powder. Milk is mostly water with some fat and milk solids (same building blocks as butter, just different ratios). Remove the water and fat and you get nonfat milk powder—what is essentially pure milk solids. The very same milk solids that play a starring role in brown butter. Which means all you have to do is add a scoop of milk powder to melting butter, and you’ll go from brown butter to brownest butter.”

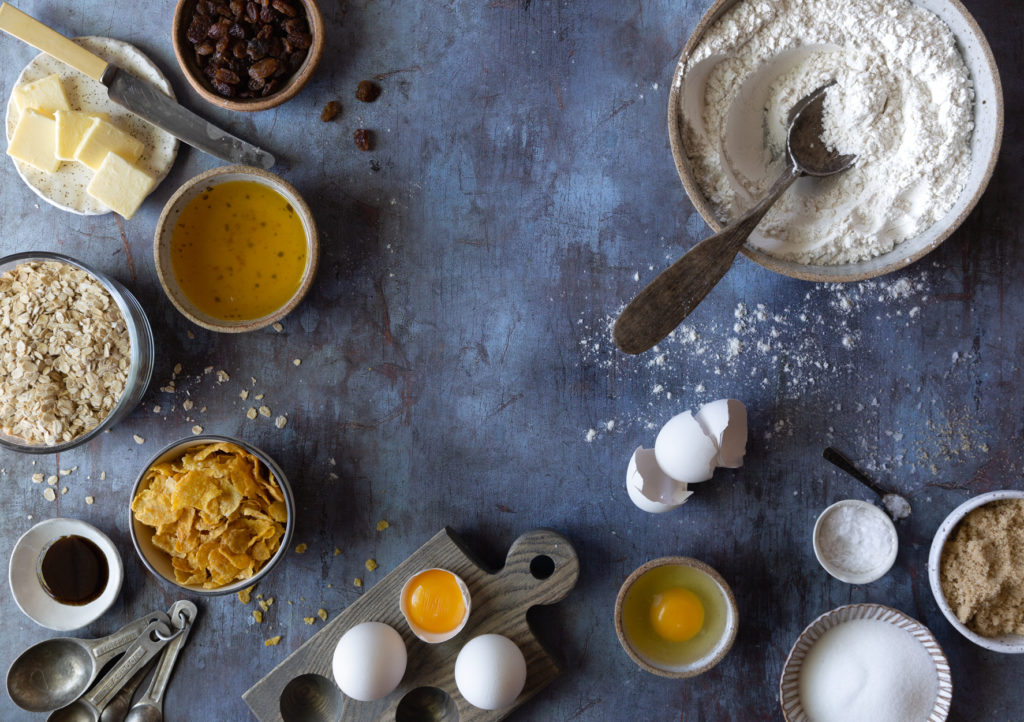
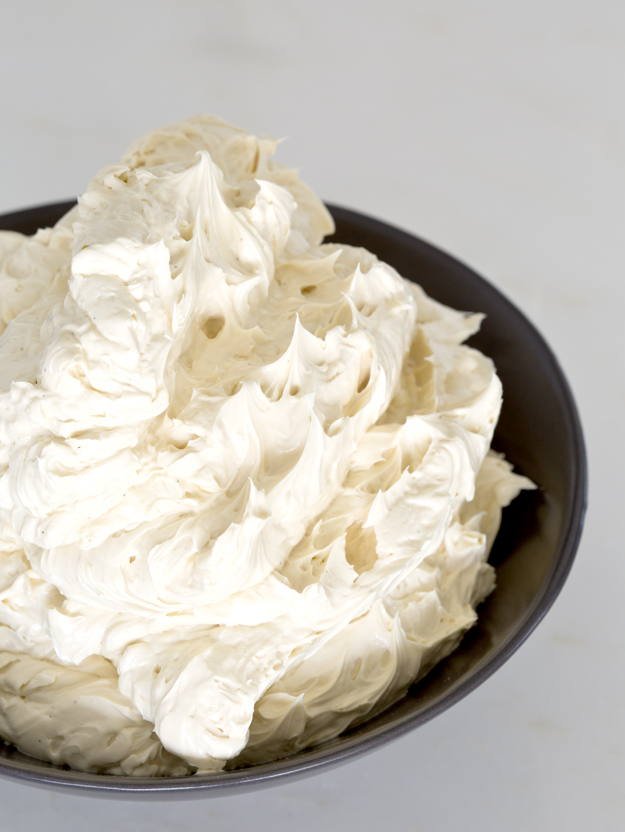
The brown butter flavour of these cookies is quite pronounced, and certainly worth the effort of taking the extra time to prepare the toasted milk powder. Most supermarkets carry milk powder. It is most commonly sold as skim milk powder. Here in Ontario I buy it at Bulk Barn. I include detailed instructions in the recipe for how to make your own toasted milk powder. The recipe makes more than you will need for one batch of cookies. Keep it in the fridge and use to boost the flavour of a buttercream or frosting.

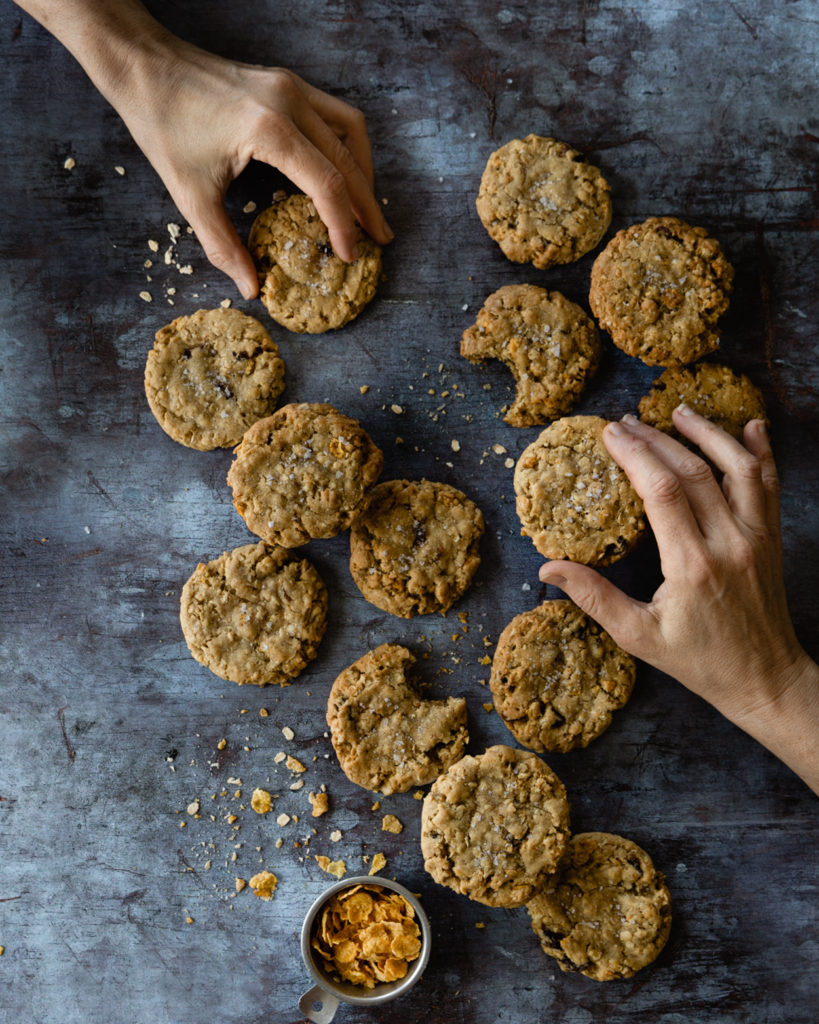
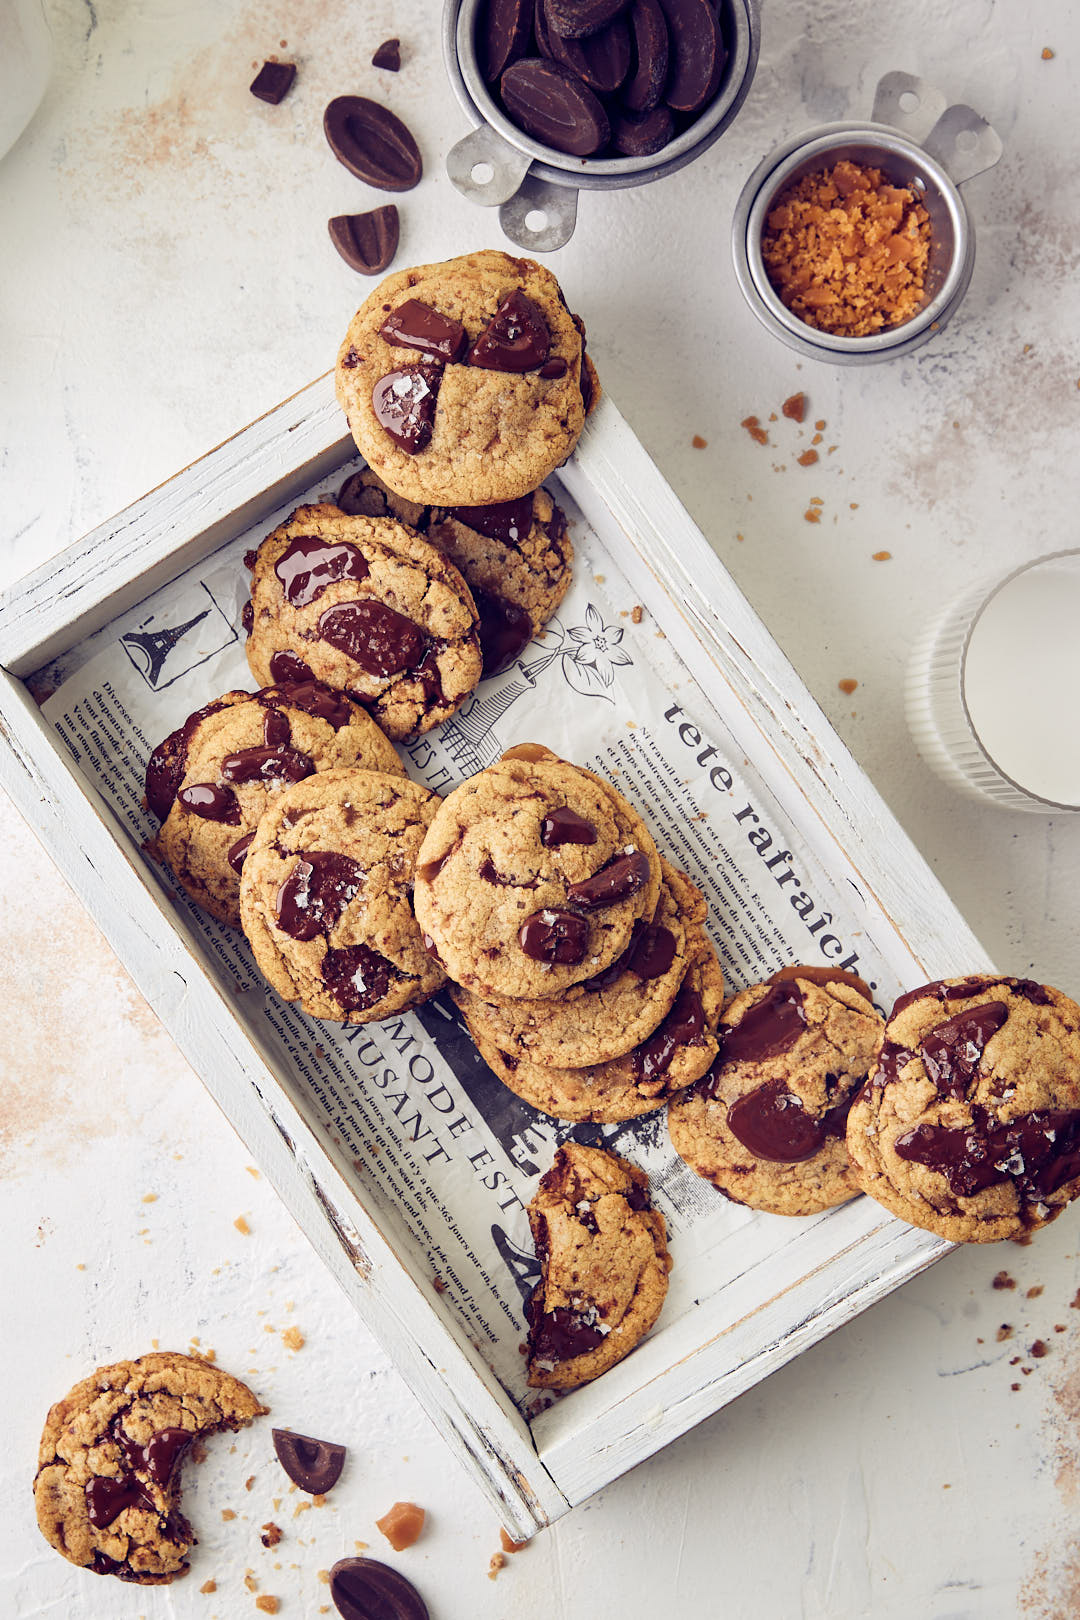
The recipe incorporates a mix of all-purpose flour and bread flour. The higher protein content of bread flour will make the cookies a bit chewier. A heaping teaspoon of instant espresso powder will give the cookies a more adult flavour profile and help temper the sweetness. I also added some toffee chips. You could use Skor Bits or make your own toffee. I have included the recipe if you’re keen to try. If you have a candy thermometer you can make your own toffee.

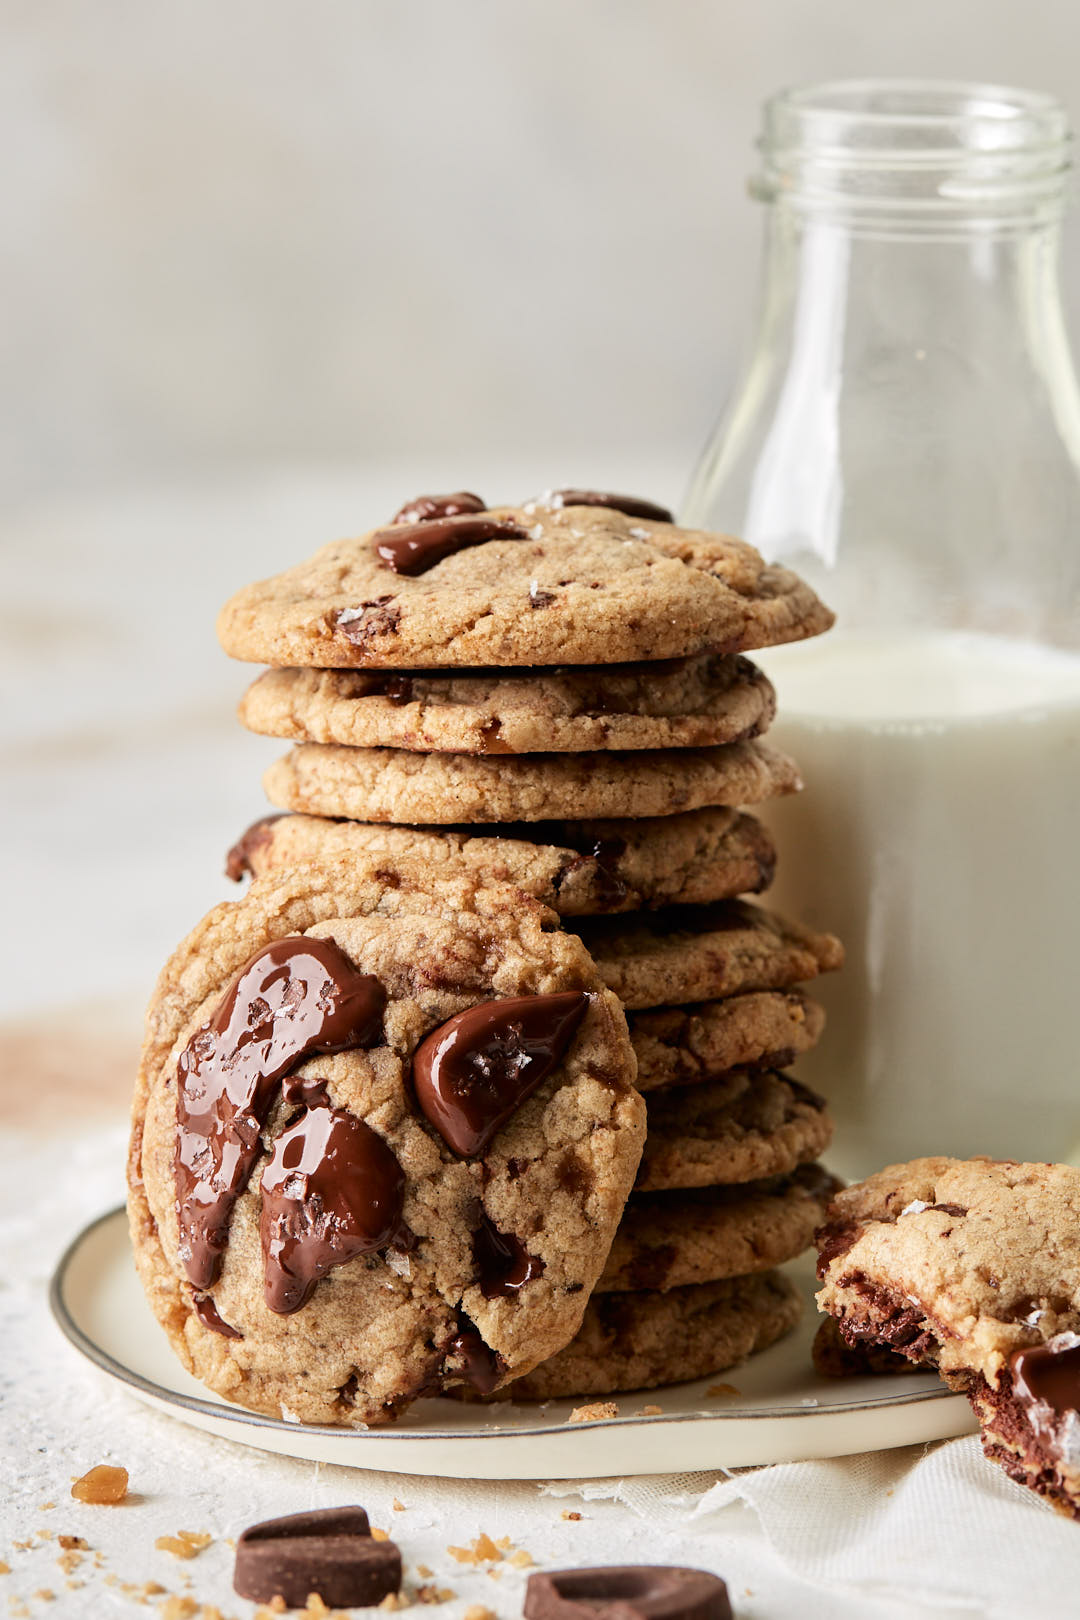
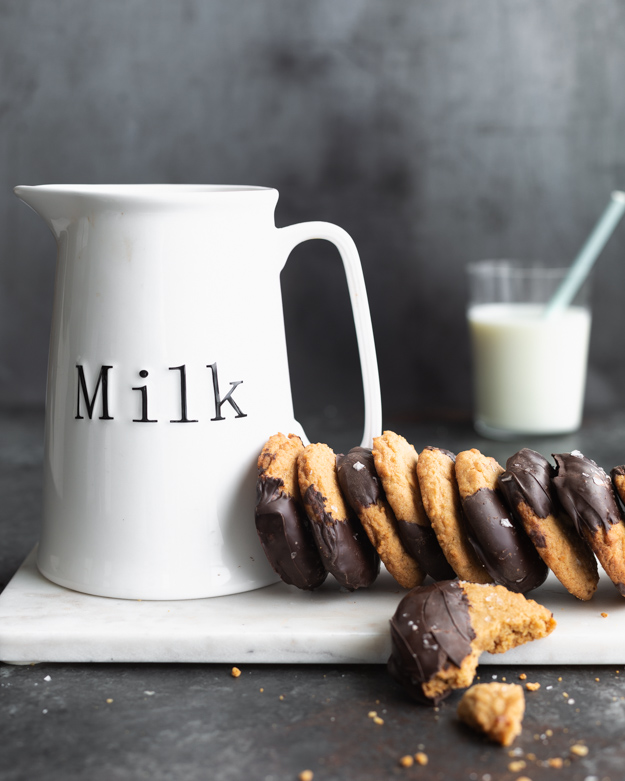
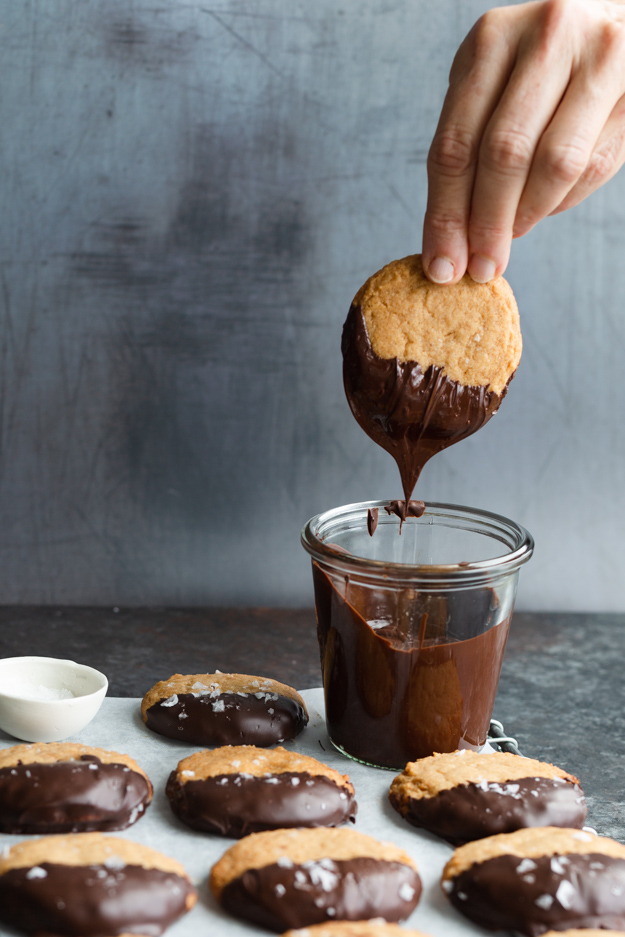
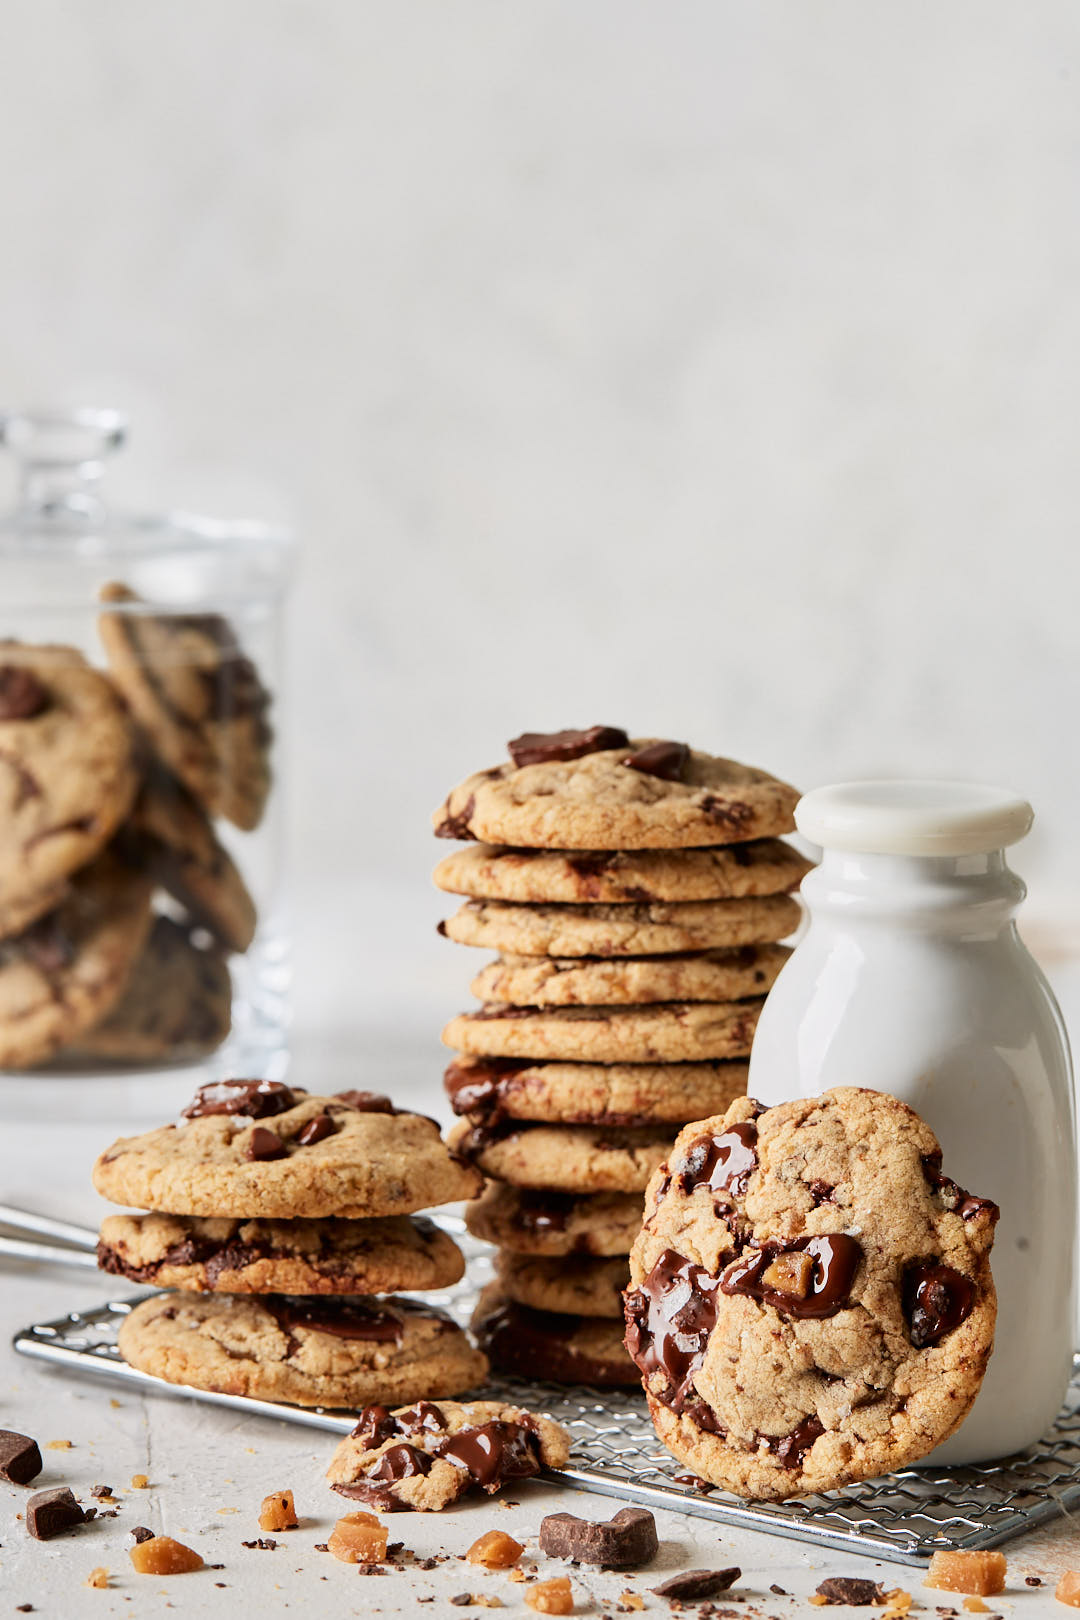
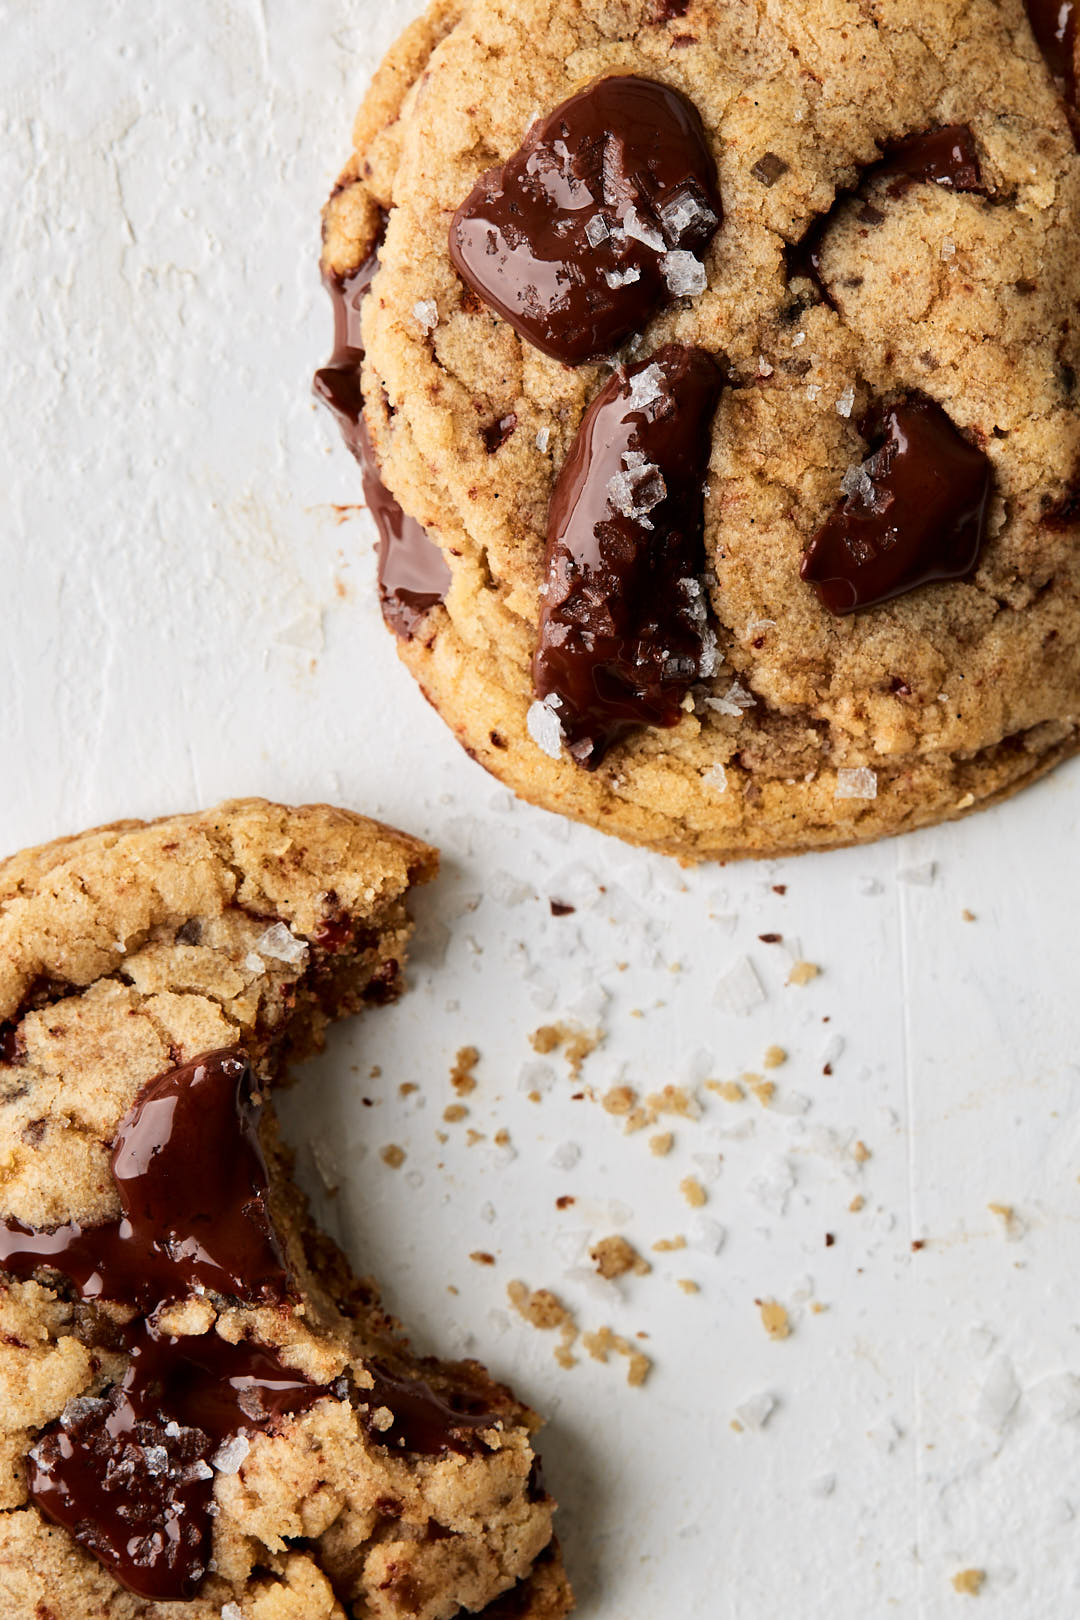
What is really critical here is to avoid using regular chocolate chips from the supermarket. You want the very best quality chocolate here. My favourite are from Valrhona. I love their 64% Manjari bittersweet feves (discs).

Here are a few tips for cookie success:

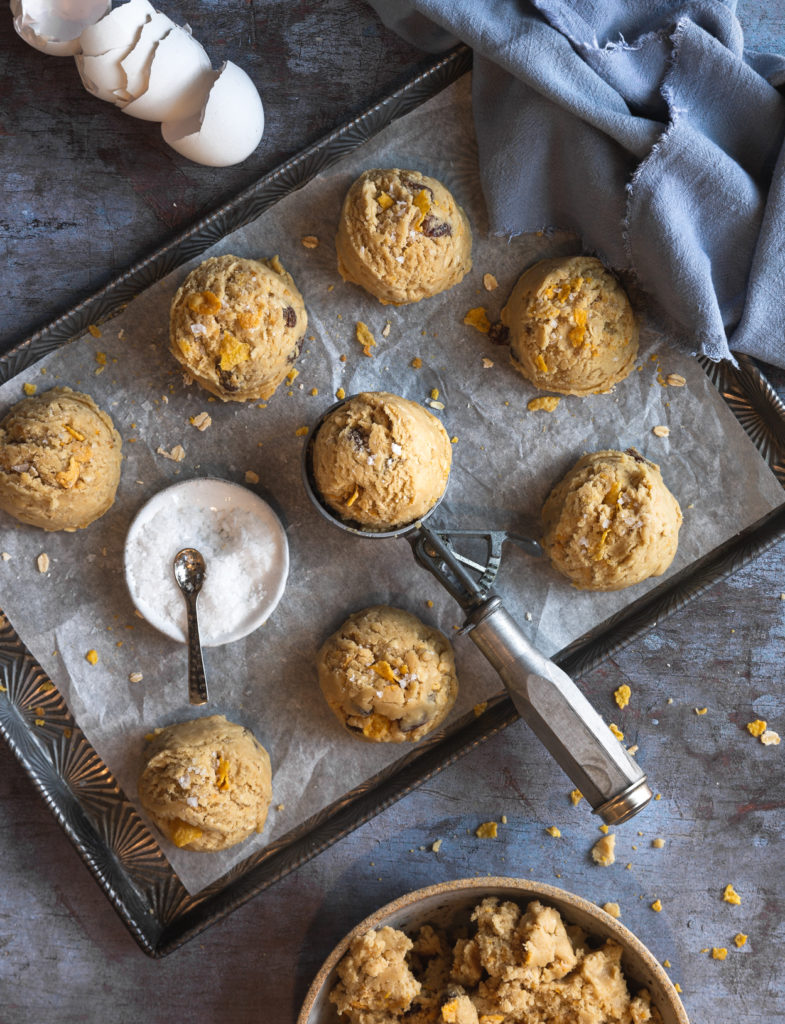
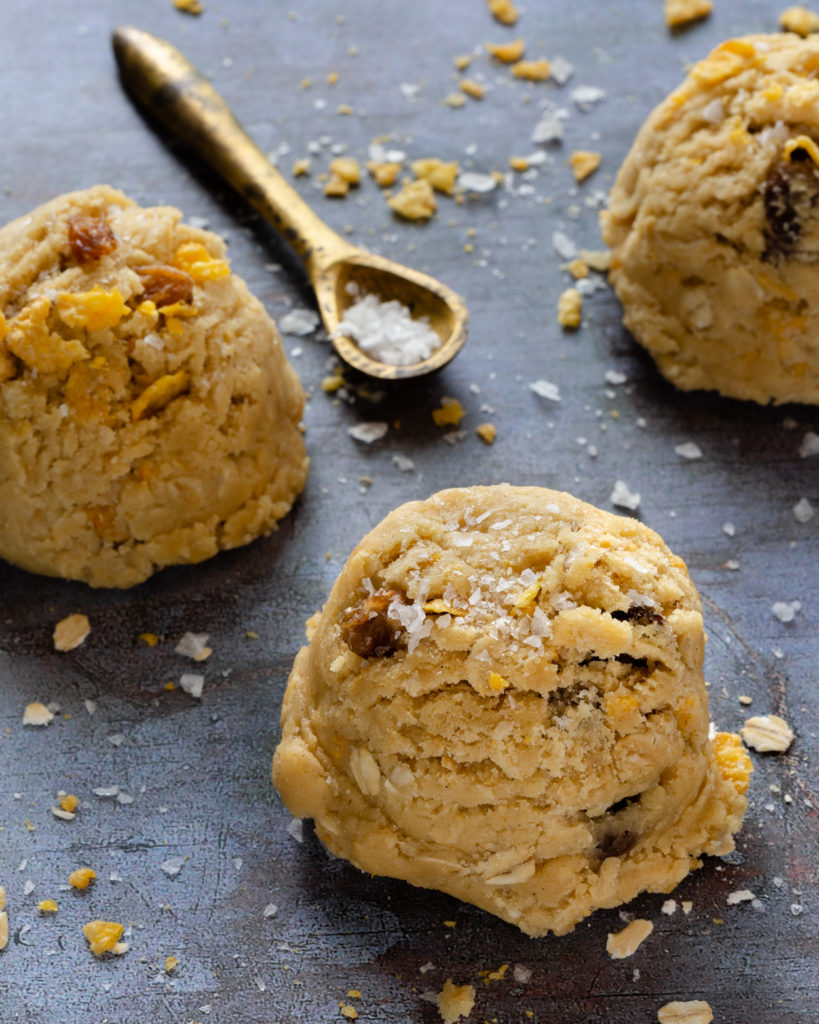
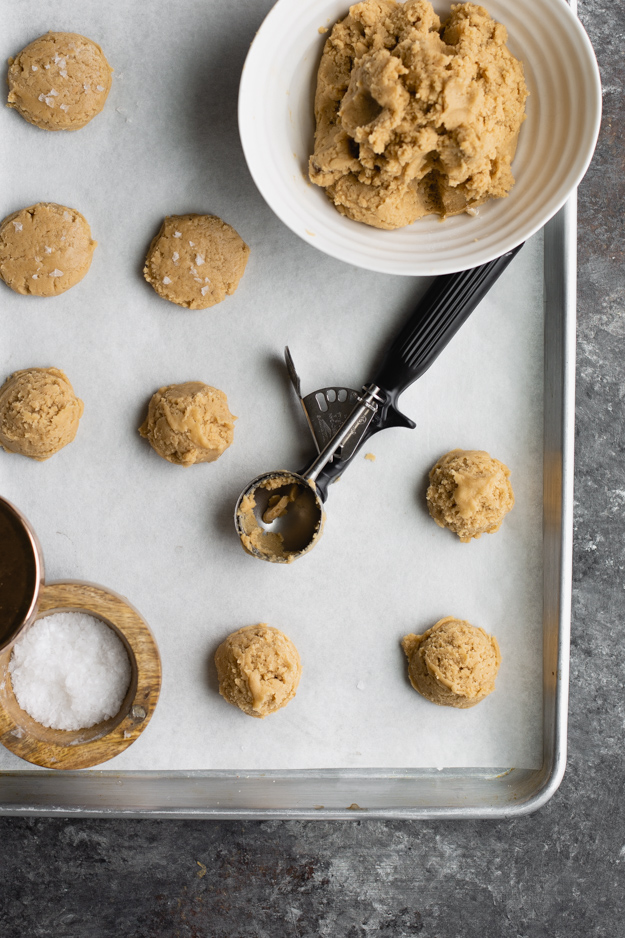
  • Scoop your cookie dough with an ice cream scoop for consistent size. Scoop the cookies while the dough is still soft, before chilling.
  • Chill the cookie scoops for at least 3 hours or up to 72 hours, so that all the flour in the dough has a chance to hydrate. Make sure you wrap the cookie dough balls well with plastic wrap so that they do not dehydrate.
  • Double up your baking sheets when baking the cookies, so that the bottom of the cookies do not get too brown.
  • Don’t add all the chopped chocolate to the cookie dough. Hold back about 1/3 of the amount. After the cookies have been baking for about 5 minutes, remove from oven and stud each cookie with an additional few chunks and then continue baking. You will get Instagram worthy melting pools of chocolate on top of each cookie.
  • For perfectly round cookies, all you need is a round cookie cutter larger than the size of the baked cookies. As soon as the cookies come out of the oven, place the cookie cutter over each cookie and give the cookie inside a spin. This quick swirl will help smooth any uneven edges.
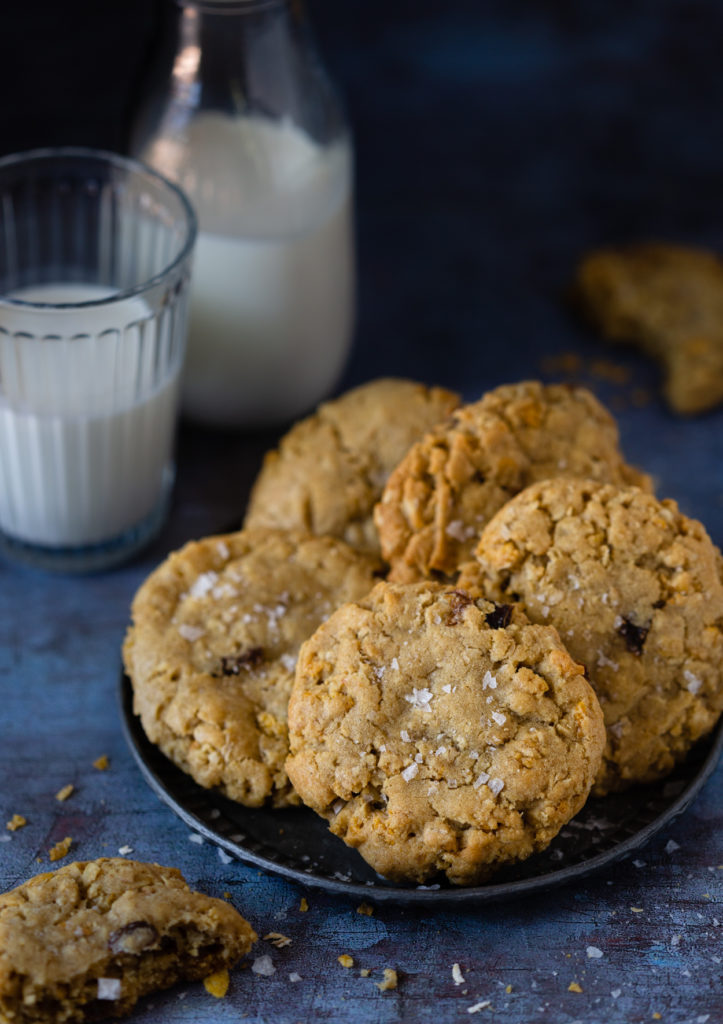
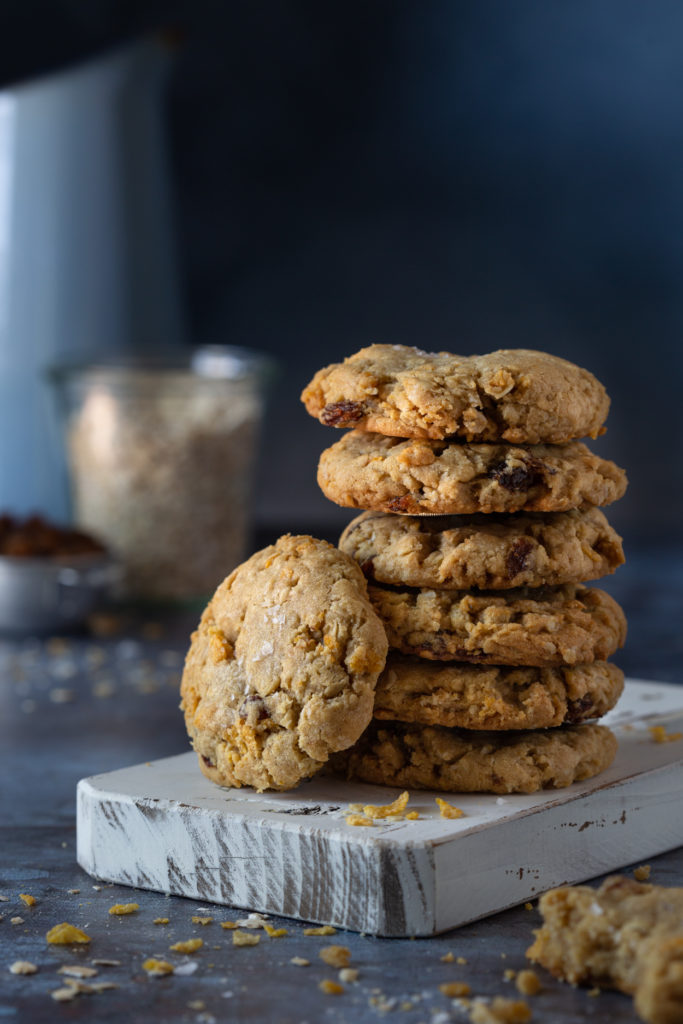
  • Use a good quality flaky sea salt to sprinkle sparingly on the just baked cookies.

Click here to print recipe for Brown Butter Chocolate Chunk Coffee Toffee Cookies.

Brown Butter Oatmeal Cornflake Cookies

When Robyn over at Sweetish Co. posted about these cookies on Instagram a few weeks ago, my brain went on high alert. Oatmeal and cornflakes together in the same cookie? Sounded like breakfast to me!

I tweaked her recipe a bit and browned the butter first. Brown butter is the like the secret sauce of baked goods. It amplifies all the flavours. It adds depth, richness and a nutty caramel flavour to these cookies. Browning butter is not difficult, but you do need to allow some time to brown and then chill it, before making the dough.

I also added some raisins to the cookie dough, because according to my family, raisins are mandatory in oatmeal cookies. I think that they would also be excellent with dried tart cherries instead of raisins. If you are a more is more kind of person, a handful of milk or blonde chocolate chunks would not be amiss. I think that dark chocolate would be too overpowering though.

Butter is composed of butterfat, milk protein and water. When you brown butter, you are essentially toasting the milk protein. As you heat the butter, and it begins to bubble and sputter away, the water evaporates and the hot butterfat begins to cook the milk solids, turning them from creamy yellow to a splendid speckled brown colour and your whole kitchen smells like toasted hazelnuts. It’s insanely gorgeous!

Pro tip: If you want to adjust any of your cookie recipes to incorporate brown butter, remember that as the water evaporates during the browning process, the butter loses some moisture, 15-20-% loss. You need to make up for that lost moisture by adding some water to the dough. For every 113 grams (1 stick) of butter you brown, add 1 tablespoon water to the dough.

Although you can certainly bake the cookies right after making the dough, I would encourage you to chill the dough overnight. A 12-24 hour rest will really result in a better cookie. Chilling cookie dough does 3 things:

  1. Helps control spreading: Chilling solidifies the butter in the dough. Butter in chilled cookie dough takes more time to melt than butter in room temperature dough. The longer the butter stays solid, the less the cookies spread.
  2. Affects Flavour: As the dough spends time in the fridge, it dries out, thus concentrating the flavours of all the ingredients, and resulting in a more delicious cookie.
  3. Affects texture: Chilling allows the dry ingredients time to absorb the wet ingredients in the dough. This change in texture results in a chewier cookie with crispy edges. Cookies baked right after making the dough tend to be softer and doughier.

If you are a member of my youngest sister’s family, please feel free to omit the sprinkling of Maldon sea salt flakes. (Imagine my excitement when I discovered the jumbo tub!) The rest of you, please sprinkle a few flakes on each cookie before baking. It’s sublime.

Let me know if you bake these and what you think.

Chewy Browned Coconut Butter Cookies

These cookies are vegan. If you don’t follow a vegan lifestyle, I realize that’s probably not the best opening line if I’m trying to pique your interest and keep you reading this post, but stay with me here. I promise you it will be worth it.

My experiences with vegan baking have been lacklustre. I will take the proffered sweet, politely take a bite, and say “it’s good”. And what I really mean is, it’s good, for vegan. You need that qualifier.

With these cookies, that qualifier is not necessary. These cookies are good. Actually, they’re great. They’ve become one of my favourite cookies. And that’s high praise coming from someone who has over 75 cookie recipes on her blog.The secret ingredient is coconut butter, not to be confused with coconut oil. Coconut oil is just the oil extracted from coconut, whereas coconut butter is ground-up coconut. Coconut butter is available at many health food stores, and online, or you can make it yourself. The talented Dana, over at at minimalist baker has a foolproof recipe.

Those clever folks over at Cooks Illustrated figured out that if you melt and cook the coconut butter, it becomes brown and nutty and delicious. Right out of the jar, it’s almost pure white.Give it some heat and about 7 minutes and this is what happens. And big bonus, your house will smell amazing!No need to pull out the mixer for these cookies. Just stir everything together in a big bowl. You need all purpose flour, of course. Some brown sugar adds to the chewiness. Baking soda and baking powder give lift. No eggs or butter are needed. The coconut butter holds these cookies together. Oh, and don’t forget a pinch of salt!Pro-tip: Use an ice cream scoop to get even sized cookies that will bake evenly. Gently flatten the cookies and sprinkle lightly with flaky sea salt. Not too much, as you’ll add more after dipping in chocolate.The original recipe at Cook’s Illustrated did not include dipping them in chocolate, but coconut and chocolate just belong together! I tempered my chocolate for dipping, and if you have an instant read thermometer and a bit of patience, you should temper your chocolate as well.

Tempering the chocolate before dipping will give the cookies a smooth, glossy evenly coloured coating. Biting into into the chocolate coating, will produce that crisp satisfying snap . Without the tempering process, the cocoa butter separates out and you get a streaky, dull grey coating. I give detailed instructions on how to temper, in the recipe.

Click here to print recipe for Chewy Browned Butter Coconut Cookies.

Rhubarb and Pistachio Bundt Cake

Pretty soon, we will be winging our way from rhubarb season straight into strawberry season. I am a little sad about it, my husband, less so! This pretty bundt cake was inspired by a brown butter strawberry-rhubarb glazed donut over at the charming blog, Adventures in Cooking. If you don’t know about Eva’s blog, you should check it out. It’s stunning.

Eva baked buttermilk donuts and dipped them into a pretty pink glaze, concocted from brown butter and pureed strawberries and rhubarb. I adapted her glaze and put it on this amazing rhubarb-pistachio bundt cake. Truthfully, the cake was almost faster to put together than the glaze, but taking the time to brown butter and roast the berries and rhubarb is worth it.

The first time I made the glaze, (yes, I ended up making it twice!) and poured it onto the cake, it was too thick and a bit fibrous from the strawberry seeds and stringy rhubarb pulp. So on the second go-round I strained the glaze through a fine mesh strainer and got the perfect consistency.

Oh, I forgot to tell you, the glaze is enriched with a bit of melted white chocolate to give it that extra oomph! You could, of course, make the cake plain, without the glaze, but why would you want to?

Studded with tangy rhubarb and crunchy pistachios, this cake is not too sweet. A little slice is the perfect afternoon pick-me-up.

Click here to print recipe for Rhubarb and Pistachio Bundt Cake.

Pan Fried Butternut Squash and Apple Salad

black-round-serving-platter-2Guys, I have big news! Perhaps not internet breaking caliber news, but still, kind of exciting. Did you know you could make a vinaigrette with melted browned butter instead of oil? Kind of mind blowing, I know!

There are no shortage of butternut squash and apple salad recipes out there. A quick Google search unearthed 613,000 of them! What makes this one special is the dressing. It’s a brown butter and apple cider vinaigrette and it’s bonkers awesome.

Regular readers of this blog know my love for brown butter. I have used it in seven different desserts. But it had never occured to me to use it as the fat in salad dressing. I have to give credit for this genius idea to Toronto chef Haan Palcu Chang.

If you have never had brown butter before, you are in for a treat. It adds a layer of toasty, nutty deliciousness to anything it touches. Making it couldn’t be simpler. Butter is composed of butterfat, milk protein and water. When you brown butter, you are essentially toasting the milk protein. As you heat the butter, and it begins to bubble and sputter away, the water evaporates and the hot butterfat begins to cook the milk solids, turning them from creamy yellow to a splendid speckled brown colour and your whole kitchen smells like toasted hazelnuts.

The squash is thinly sliced and pan fried until is is almost charred. A cast iron skillet is perfect for this, but a non-stick skillet will also do the job.charring-in-cast-iron-panYou can cook the squash ahead of time and warm it in the oven just before assembling the salad. A tart apple like Granny Smith is a wonderful contrast to the sweet squash. Brown the butter just before you are ready to serve the salad. If you make it ahead of time the butter will start to solidify.black-round-serving-platterWhile the vibrant orange hue of butternut squash is gorgeous on its own, adding a crunchy topping of toasted hazelnuts, a verdant shower of mint and green onions and ruby red jewel-like pomegranate seeds turn this salad into a pretty stunning masterpiece.dinner-for-2

Click here to print recipe for Pan-Fried-Butternut-Squash-and-Apple-Salad.

on-white-plate