Tag Archives: Browned Butter

Flaky Buttermilk Biscuits with Whipped Brown Honey Butter

I did not grow up with the tradition of buttermilk biscuits. We were more of a party sandwiches and whipped Jello mold kind of a family. (My mom was fancy like that!)

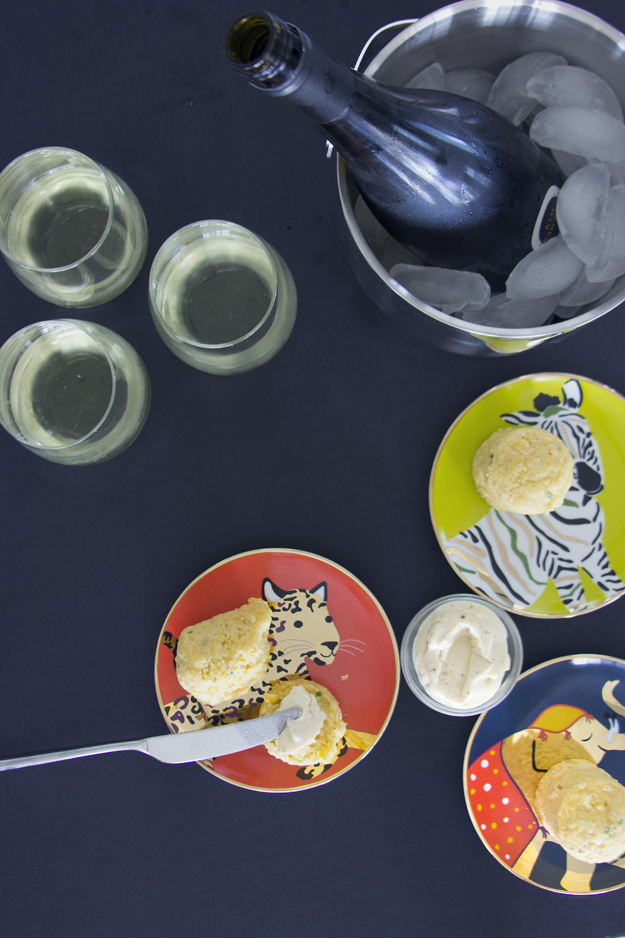
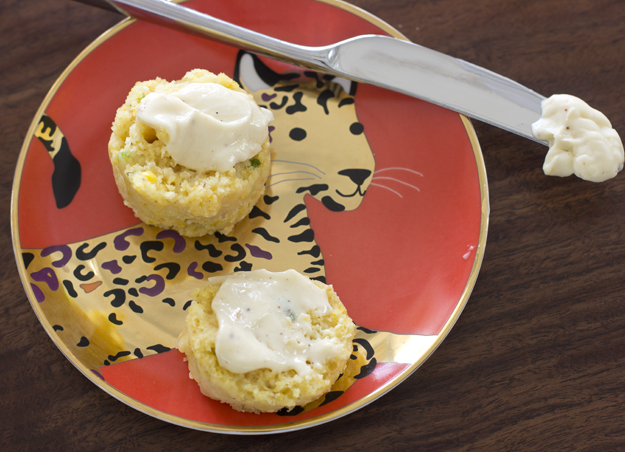
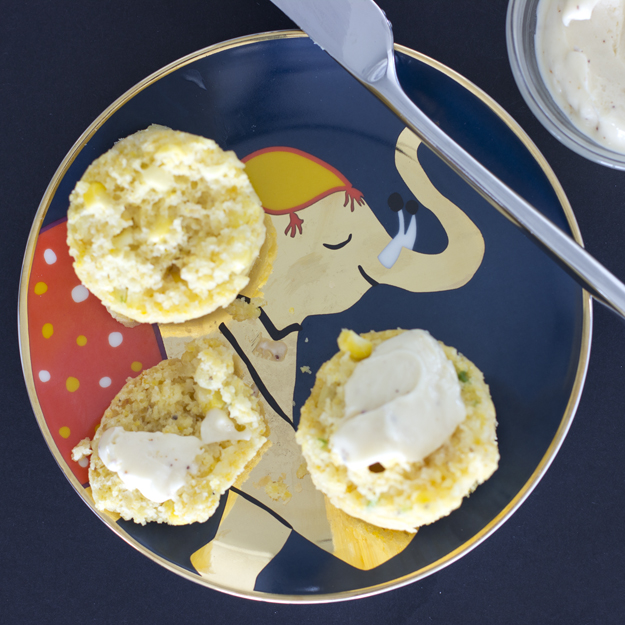
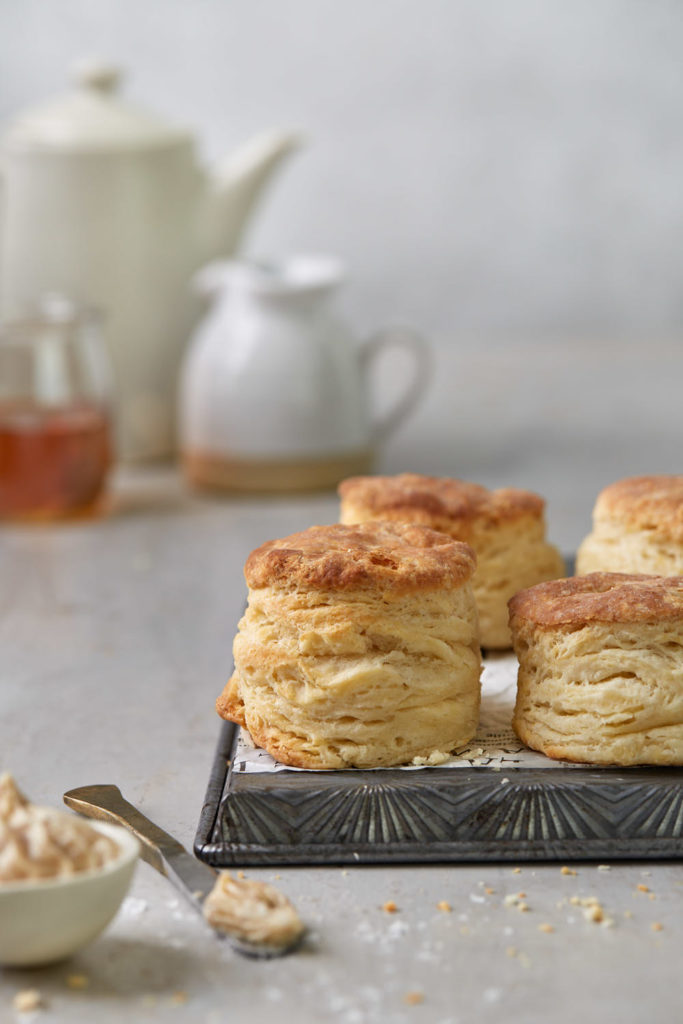
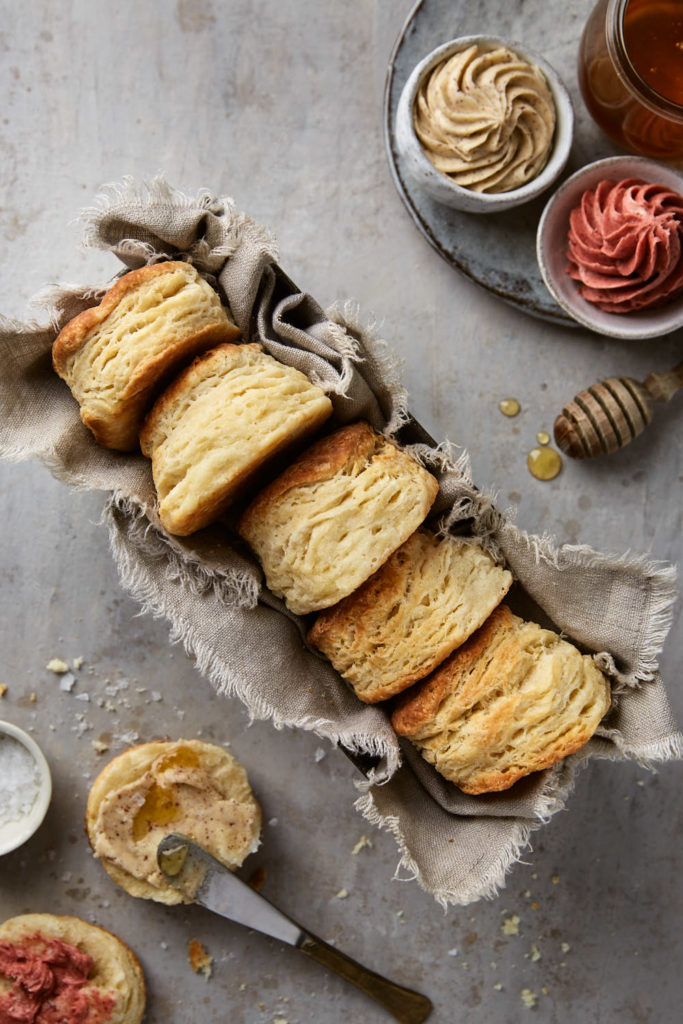
I have been to Nashville and eaten some incredible buttermilk biscuits and wanted to learn to recreate them at home. In my quest to learn, I spent last week baking buttermilk biscuits every day. My husband was thrilled and I think I have succeeded. Just look at these babies. Lofty, light, fluffy and flaky AF. We froze the extra biscuits and discovered they are quite delicious toasted.

I learned a few things along the way and I’d love to share those lessons with you.

The type of flour you use makes a difference. All-purpose flour has a higher protein content than cake and pastry flour. More protein means more gluten, which gives the dough enough structure/body to create flaky layers and a nice crusty exterior. But using all-purpose flour exclusively led to a biscuit that was a bit tough. Cake and pastry flour, with its lower protein content, does not develop gluten as well as all-purpose flour. This results in light fluffy biscuits but those made exclusively with this flour did not rise as high or achieve the flaky layers I desired. The ideal was a 55%/45% (by weight) mix of all-purpose and cake and pastry flour.

Use both baking soda and baking powder. Baking soda has an alkaline base, which means it is not acidic. It needs acid to activate it and create carbon dioxide, which provides the leavening. Buttermilk plays the role of acid in these biscuits. It also adds a nice tangy flavour. Too much baking soda would completely neutralize that tangy flavour and leave behind unactivated baking soda which tastes metallic. Baking powder is made up of baking soda plus a dry acid. That additional acid will help give the biscuits their characteristic tang, plus provide extra leavening insurance.

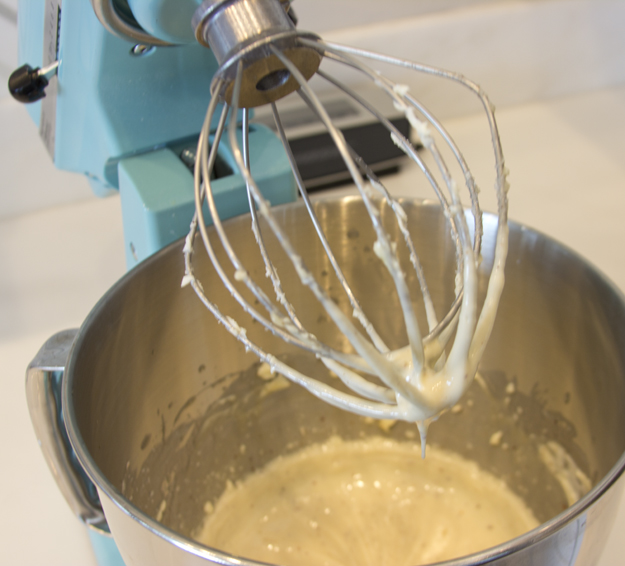
The butter must be very cold. If you tend to have hot hands, I would suggest investing in a pastry blender. They are inexpensive and do a great job of working the butter into the flour. Make sure that you don’t totally work the butter into the flour. leave a few pea sized bits of butter. Butter is 20% water, so when those little knobs of butter hit the hot oven, they will melt and release steam, which creates pockets of air for maximum lift.

Don’t over knead the dough: You are not looking for a ball of dough that is as smooth as a baby’s bottom. After adding the buttermilk, the dough will look like a shaggy mess. That is correct. Just knead the dough 6-7 times until there is no dry flour visible. You will still see little knobs of butter in the dough.

Building layers is the key to flaky biscuits. Shape the dough into a rectangle, roughly 11×7 inches. I used a rolling pin to start and then used my bench scraper to help me straighten the edges. A ruler would also be an excellent tool for this. Next, fold the dough into thirds, as if you were folding a sheet of paper into thirds to fit into an envelope. Repeat this flattening and folding twice more and you have built in your layers.

Don’t twist the biscuit cutter. Press the cutter down into the dough and then lift it straight back up again. If you twist it, you seal off the edges of the dough, prohibiting the biscuits from rising evenly.

Snuggle. Place biscuits close together on baking sheet, almost touching. When they are in close proximity they provide support to each other and can grow up nice and tall.

Chill. Place unbaked biscuits in fridge for a 15 minute rest before baking. This gives the gluten time to relax, resulting in more tender biscuits and the butter can harden. If the butter is too soft, the biscuits will spread and slump more readily.

Here’s a video to show you how it all comes together.

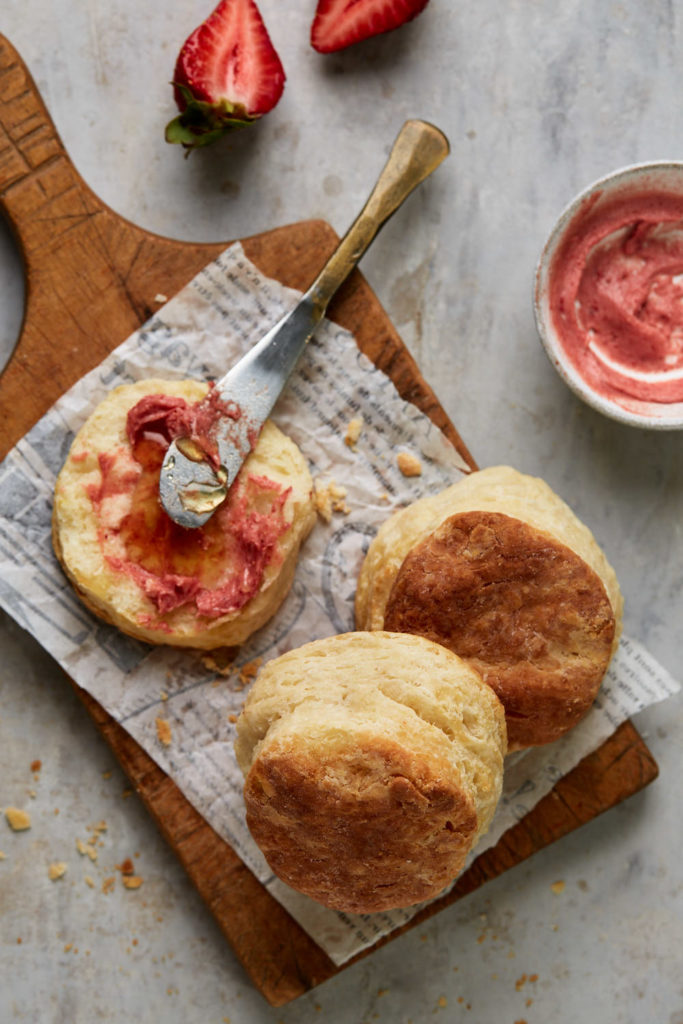
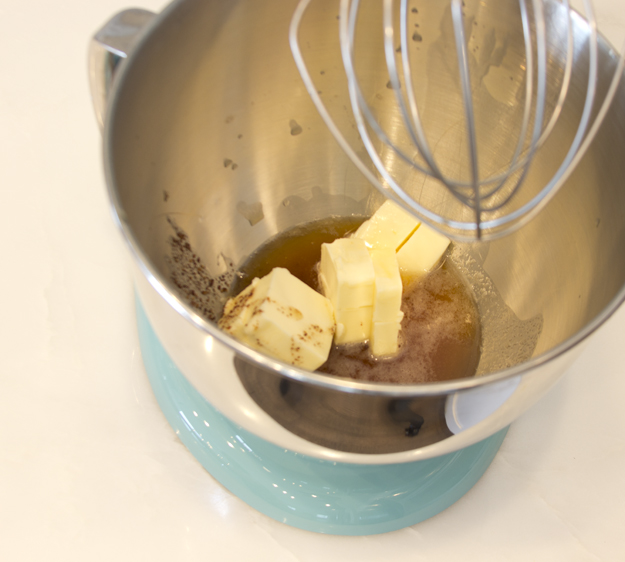
Don’t skip making the whipped brown honey butter. I have included a recipe for how to make it. Once you brown the butter, chill in the fridge to solidify. Then whip it with a hand mixer and add a bit of honey and salt to taste. Leftover butter freezes perfectly. I also made some strawberry butter by whipping 125 grams unsalted butter (not browned butter) with 3 Tablespoons freeze dried strawberry powder, 2 teaspoons of honey and a pinch of salt.)

Apple Cider Browned Butter Baked Doughnuts

These Apple Cider Browned Butter Doughnuts are the best thing I have baked all year. Yes, I realize that’s a bold statement, given the number of things I have baked in 2020. (It’s been a heavy baking year… we all deal with stress in our own way, don’t judge!)

Granted, these doughnuts are not as pretty as my black and white ones from a few weeks ago, but OMG, the taste and texture of these is off-the-charts fantastic. I was inspired to bake these after seeing a recipe for Apple Cider Doughnut Cake from food writer Tara O’Brady. I subscribe to her newsletter and every week I get a charming, informative and beautifully crafted email.

Tara baked the batter in a loaf pan. Her description of this loaf is so lyrical. I want to write like this when I grow up.😉 “Out of the oven the texture is almost spongy; jaunty and open. As the cake sits, it settles, relaxing into a sturdiness that is exactly right and as it should be. The crust establishes itself with a gentle crunch as it meets the teeth, while the centre fluff gives way with a velvet weight.

I made the loaves and fell in love with her recipe. Apples are featured prominently. The batter calls for reduced apple cider and applesauce. I wondered what would happen if I baked the batter in doughnut pans. You could also bake them in muffin tins, but they will take a few minutes longer to bake.

As I was assembling the ingredients, I realized I had run out of applesauce, but I had a jar of apple butter leftover from baking this.

There is no actual butter in apple butter. Apple butter is basically concentrated applesauce, or as I like to describe it, “applesauce on steroids“. Alex Delaney wrote a brilliant article explaining the difference.

The doughnuts come together fairly quickly. You will need to reduce the apple cider and brown the butter in advance.

While the doughnuts are delicious plain, dipping them in browned butter and then rolling them in cinnamon-sugar takes them over the top, so don’t skip this step!

I baked these doughnuts several times, the first time to just test the recipe, the second time to shoot the photos and the third time to shoot the video. Luckily I live in a condo and have several neighbours who happily take the leftovers. I also discovered that they freeze beautifully. Wrap individual doughnuts in plastic wrap and place them all in a freezer bag. They will thaw at room temperature in about 45 minutes.

Brown Butter Salted Caramel Crunch Cake 2.0

I first baked and posted about this cake in 2016, for my own birthday. It was probably one of the most delicious things I have ever baked. However, my photos from that post (see below) do not do it justice.

The lighting is awful, the white balance is off and the angle I shot the cake at is just wrong. It does nothing to showcase the majestic height of this beauty. I have learned a thing or two about lighting and composition since then. It’s always a very satisfying thing to look back and see your own progress, no matter what you have chosen as your life’s work.

This cake was inspired by Bobbette and Belle’s Salted Caramel Toffee Cake. 

This was my starting point, but I made a few changes. I browned the butter for the cake. Brown butter adds a layer of toasty, nutty deliciousness. Making it couldn’t be simpler. Butter is composed of butterfat, milk protein and water. When you brown butter, you are essentially toasting the milk protein. As you heat the butter, and it begins to bubble and sputter away, the water evaporates and the hot butterfat begins to cook the milk solids, turning them from creamy yellow to a splendid speckled brown colour and your whole kitchen smells like toasted hazelnuts. It’s insanely gorgeous!

In addition to the salted caramel buttercream between each layer, I decided to slip in an extra layer of almond meringue. The textural difference of pillowy soft cake layers is fantastic with the chewy crunchy meringue. 

The cake is topped with a crown of English toffee. I made my own, because I could not find any in Ottawa this week. Laura Secord used to make an excellent version, but they are closed now. Purdy’s Chocolates normally carries it, but they were out of stock. If you live near a Trader Joes, they make an excellent English Toffee.

I made the cake again this weekend for my daughter’s 29th birthday. One of the pitfalls of having a mother who is a food blogger, is that your birthday cake is usually presented with a few slices removed and looking a bit rough around the edges from being photographed for a few hours. I always felt slightly guilty about this, so this year I made 2 smaller 6 inch cakes. One for me, to slice and shoot and the other just for the birthday celebration. Everyone loved this idea. More cake for all and no mom yelling, “don’t touch the cake yet. I need just a few more shots.”

This cake is a labour of love. Split the work over a few days and enjoy the journey. It’s worth it.

Browned Butter Pretzel Toffee Chocolate Chunk Cookies

Cookies are a subject I take very seriously. They are my passion. I won’t waste your time by posting meh cookies. I’m really stoked to share this cookie recipe with you. Created by Molly Adams over at thefeedfeed.com, they are an outrageous, over the top indulgence. Make them this week for someone you love.

I’m not gonna lie, these cookies are a bit of work. Start by browning the butter. I promise, it’s worth taking the extra time and and dirtying another pot. If you have never browned butter before, here’s an excellent tutorial to guide you. You could skip this step, but why would you want to? It adds a deep, rich, nutty flavour and everyone will ask why your chocolate chip cookies are so good.

The browned butter needs to chill in the freezer for about 30 minutes, before creaming with brown and white sugar. Eggs and vanilla are added, then flour, baking soda and salt. And then, it gets exciting!

Let’s talk about chocolate. So often, friends have told me, “My cookies never taste as good as yours. I followed the recipe. What went wrong?” 90% of the time, the answer is the kind of chocolate they used. (The other 10% of the time, its the temperature of the butter – too warm). Avoid regular chocolate chips and spring for the good stuff. I have made these with chopped Lindt 70% bittersweet bars, Valrhona 64% bittersweet feves, and this week, I discovered these delicious Belgian bittersweet wafers at Bulk Barn.

Mini pretzel twists work best in this recipe. Chopped pretzels go into the dough and then after scooping the cookies, I topped each one with a whole pretzel.

Let’s chat about the toffee addition. Molly suggests making your own toffee bits to add to the cookies. It’s not a difficult process, if you have a candy thermometer. Using Skor bits is an excellent ready-made option, if homemade is not for you. No judgement! if you decide to make it, here’s a how-to video.

Canned Cornbread

Yes I’m fully aware that baking cornbread in tiny tomato paste cans is a bit twee, but I just couldn’t help it. After being served “canned” cornbread at The Tasting Room, I just knew I had to  come home and recreate the experience. Just imagine the surprise on your friends and family’s faces when you lift up the can to reveal cornbread inside. It’s just so much fun. And really, who couldn’t use a little more fun in their day? output_WdoSLZThe most time consuming part of this project is preparing the cans. They need to be greased and floured very well.prepping cansThis cornbread recipe is an old favourite, created by my friend, Pam. I have tried many different recipes in the past 20 years, and I always come back to this one. With both cornmeal and cornflour in the batter, the texture of this cornbread is fantastic. The addition of corn and jalapeño add sweet and heat.ready to bakeThe batter mixes up quickly in one bowl. mixing batterA spring loaded ice cream scoop makes easy work of getting the batter into the cans. DO NOT FILL EACH CAN MORE THAN HALFWAY!filling cans

ready for ovenIf you greased and floured properly, the cornbreads will slide right out. If you missed a few spots like me, some “gentle” coaxing may be necessary.

They are delicious as is or mix up a batch of whipped browned butter to slather on them.

whipped brown butter 1whipped brown butter 2I served them on these adorable safari plates my daughter bought for me. with a glass of wineleopardelephant 625 sq

Click here to print recipe for Canned Cornbread with Whipped Browned Butter.

on blue rectangular platter

Ambivalent Birthday Cupcakes

You always remember your first. No, I’m not talking about THAT first. This is a not that kind of blog!

I have the good fortune of being blessed with 14 nephews and 9 nieces. I have a special place in my heart for each and every one of them, but there is something quite special about becoming an aunt for the first time. My oldest nephew was an adorable, sweet-natured baby and has turned into a wonderful, responsible, very funny young man with a strong sense of family. His 29th birthday coincided with a visit to our cottage last week. I wanted to make a family dinner for him. I know he has been following the Paleo diet for some time now, and birthday cake is not really on the approved Paleo list. However, a birthday without cake is just too sad for me to contemplate, so last week I sent him the following e-mail:

Would you eat cake on your birthday? If so, what would your preference be? Chocolate, Berry Shortcake, Carrot, or anything else.

I got the following response:

Well, I would have some cake if there was one in front of me, but I’d rather not.  I know I’d enjoy it in the moment, but I’d probably regret the sugar and gluten the next day.  But if I had to choose?  Chocolate or Berry Shortcake sounds great.

As far as what I eat…pretty much meat and veg these days – still on the Paleo diet.  I basically stay away from gluten/grains, dairy, and most processed food.  That being said, however, given your penchant for baking (I don’t remember the last time I was at your cottage and didn’t see something delicious cooling down on those huge racks you’ve got) I’d imagine I’ll be doing a bit of cheating those few days.
Anything I can bring?
WHAT???? Talk about an ambivalent response! How was I to interpret that?
This party was beginning to look like no fun at all. I fired off a quick e-mail:
Do you still drink alcohol?
He responded:
Yes, just wine and tequilla. 
Whew, he hadn’t completely lost his mind.
Now I had to decide if I would be the Evil Aunt and tempt him with something anti-Paleo, or should I be considerate and respectful of his diet and make him a Paleo Chocolate Birthday Cake with Coconut Honey Frosting?
I decided that to go with a full-on, loaded with gluten, dairy and sugar cake would be cruel, but it really seemed to me that he was asking me to help him cheat. So. I decided to make cupcakes, because they’re small and not really a true cake. Sort of an ambivalent cake for his ambivalent response.
For the base of the cupcakes, I knew chocolate was the right road to follow. I have tried many different chocolate cake recipes over the years, and have come to the conclusion that butter is not always better when it comes to the moistest cake. Vegetable oil really does make a better cake. Our family’s go-to chocolate cake comes from Noreen Gilletz’s “Pleasures of Your Food Processor.”  Rich, moist and very deeply chocolate, but not too sweet, it makes a perfect cake or cupcakes every time.

I am thrilled with the Cocoa Barry brand of cocoa powderI just bought. (Cocoa Barry is the French division of Callebaut)

I wanted to try a different buttercream this time. A few years ago I had dinner at a wonderful restaurant in Ottawa called Beckta. Before the meal they brought bread and some type of butter spread to the table. I was smitten from the first bite! I begged the waiter for the recipe for this spread. He told me that they melt butter until it turns a medium nutty brown colour. Then they chill it ao that it becomes a solid again and whip it with a little regular butter. This was my first foray into the land of browned butter (the French call it beurre noisette) and I must say that it has haunted my dreams ever since.
Given my success with browned butter berry tarts, I suspected that browned butter in a buttercream would be fantastic. Something magical happens when you brown butter. It enhances the flavour of just about anything you add it to, and the aroma will drive you wild. Making brown butter is quite simple. Use a saucepan with a light coloured bottom, so that you will be able to judge when the butter is browned to perfection. A dark bottom pan can lead to burned butter and trust me, that aroma and taste will not leave you craving more!

As the butter melts, it will begin to foam. Swirl the pan to ensure even melting. The color will progress from pale yellow to golden-tan to, finally, a burnt sienna (remember that crayola crayon colour?). Once you smell that nutty aroma, take the pan off the heat and transfer the browned butter into a heat-proof bowl to cool.

The milk solids will cook faster and you’ll see them settle on the bottom of the pan. You can strain the brown butter through cheesecloth to leave those milk solid particles behind, or you can incorporate them into the buttercream. I really like the almost burnt taste of them as well as seeing the specks of browned butter in the icing, so I did not strain mine.

The brown butter is chilled for about an hour until it becomes solid again. The ideal temperature of the brown butter for making the buttercream is room temperature. If it becomes too hard in the fridge, leave it on the counter to soften a bit. Beat the brown butter with icing sugar, a pinch of salt and a little vanilla extract.

Fit a disposable piping bag with a large star tip and frost the cupcakes.

The cupcakes were a huge hit. My nephew inhaled two of them and asked for two more to be wrapped up to go. I have a feeling he may have had a bit of a gluten-sugar hangover the next morning, but I think he will agree that they were worth it.

Click here to print the recipe for Chocolate Cupcakes with Browned Butter Icing.

P.S. Just read about browned butter on field fresh tomatoes. Check it out!