Tag Archives: Cook’s Illustrated

Israeli Couscous with Pickled Shallots, Peas, Mint and Ricotta Salata

in green bowl 1 625 sqI have never understood the appeal of traditional couscous. It simply does not have enough texture or heft for me. Even when steamed and fluffed properly, so that the grains stay separate, it fails to satisfy me. I like my carbs with a bit of bite to them. Israeli couscous is more my jam. It is dense with a bouncy, chewy texture. I had always assumed that Israeli couscous was just bigger balls of regular couscous. I only recently learned the true difference.

Traditional couscous is actually tiny ground pasta made from semolina flour. It is made by rubbing semolina between wet hands until teeny-tiny balls are formed. The couscous is then dried and steamed. Israeli couscous is also made from semolina flour, but the similarities end there. Israeli couscous is made by mixing semolina flour with water, into a dough. The dough is then machine extruded through a round mould, about 1 millimetre in size.  These tiny pearls are then toasted dry, which adds a nutty flavour. 

Traditional couscous has been around, some believe, since the 9th century, but Israeli couscous is just a baby. It only came into existence in the 1950’s. Following the War of Independence in 1948, many immigrants arrived in the newly formed country from all over the Middle East. Most of them relied on rice as a staple in their cuisine, but there were rice shortages. Israel’s first Prime Minister, David Ben-Gurion, asked the Osem food company to develop something that they could substitute for their beloved rice. They created “Ptitim“. It was nicknamed Ben Gurion rice, since it was originally extruded in the shape of rice grains. They later introduced a round version which they called Israeli couscous.

This delicious salad is my adaptation of a Cook’s Illustrated recipe. I have only made a slight change. I substituted ricotta salata for the feta cheese they suggested. I prefer the drier texture and less salty taste of ricotta salata. Many Italian grocers carry it. Feel free to use feta if you like, or even some crumbled goat cheese, if that’s your thing.

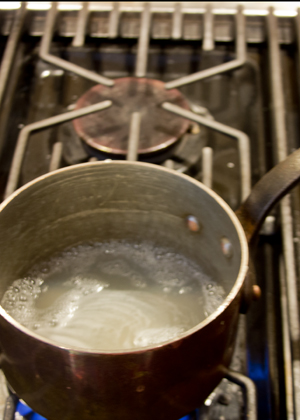
Begin with pickling the shallots. Nothing too complicated here. You will need red wine vinegar, sugar, a pinch of salt and some thinly sliced shallots. ingredients for pickling
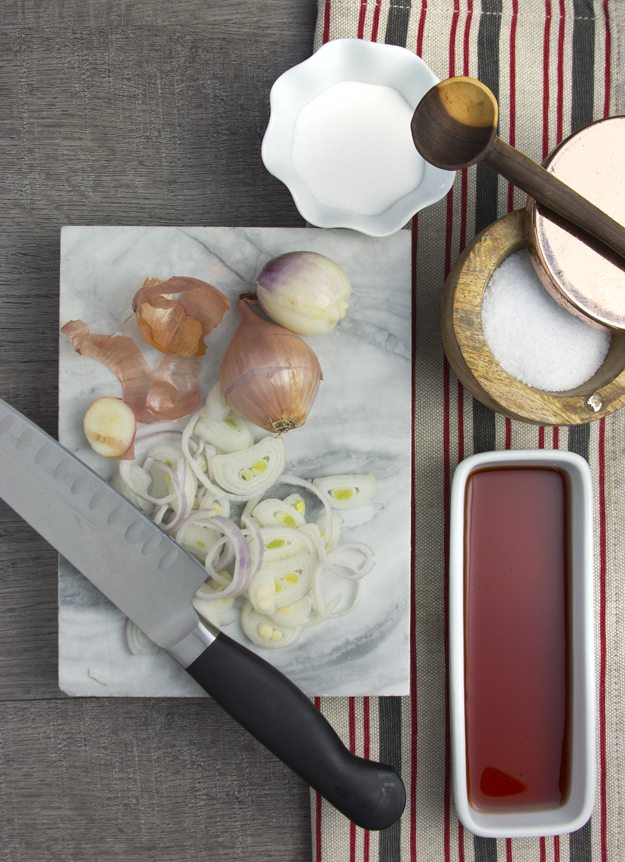
Simmer vinegar, sugar and salt until the sugar dissolves. Add shallots, turn off heat, cover pot and let macerate for 30 minutes. That’s it. I always thought pickling was so complicated. pickling shallots
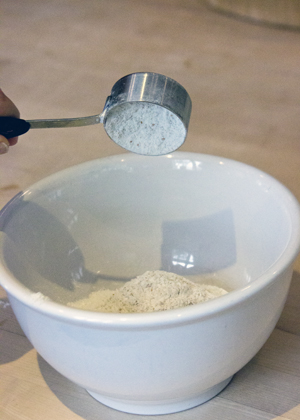
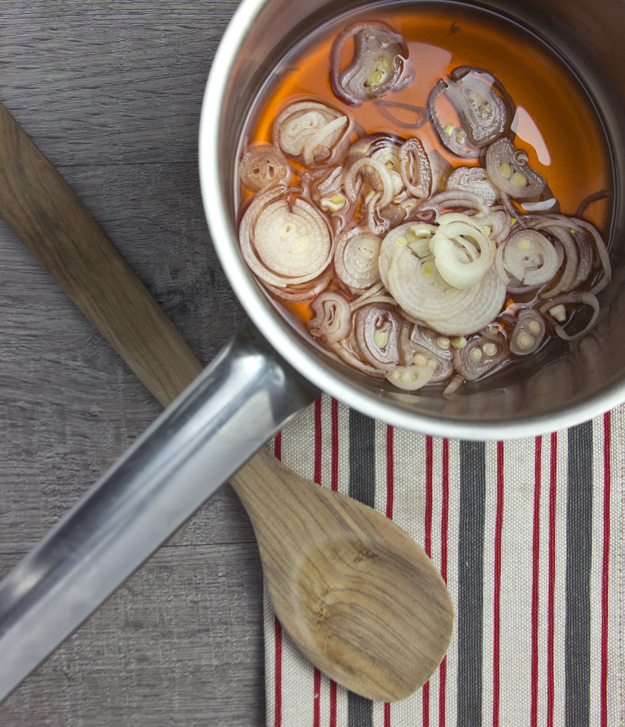
To properly cook Israeli couscous, begin by sauteeing in a bit of olive oil until about half the grains turn brown. Then add water and a pinch of salt and bring to a boil. Reduce to a simmer and cook covered for 12 minutes. The ratio of Israeli couscous to water is 1:1.25.  (For every cup of couscous, add 1¼ cups water)toasted cous cous
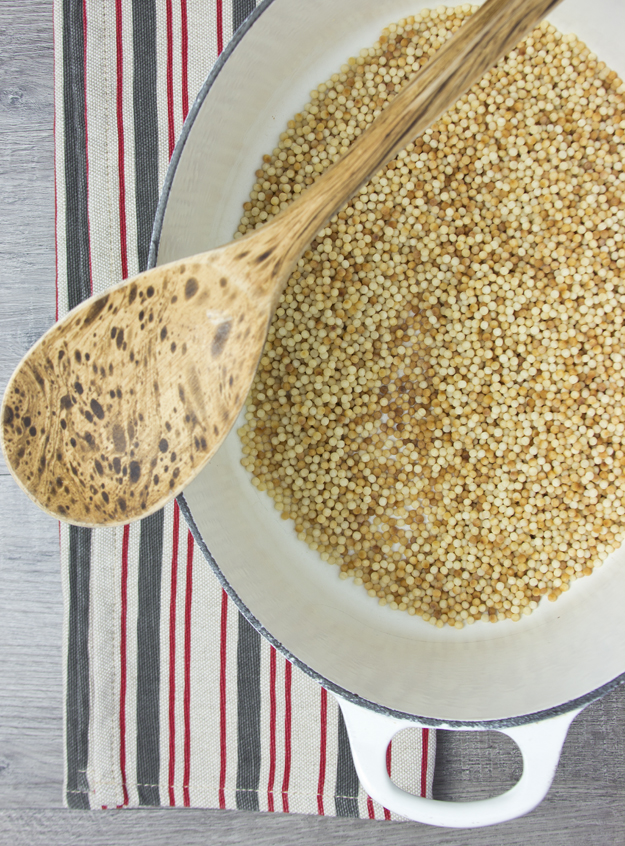
Once cooked, spread couscous out on a baking sheet to allow it to cool before tossing with other salad ingredients. cooling couscous
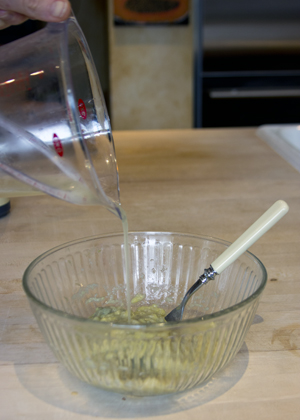
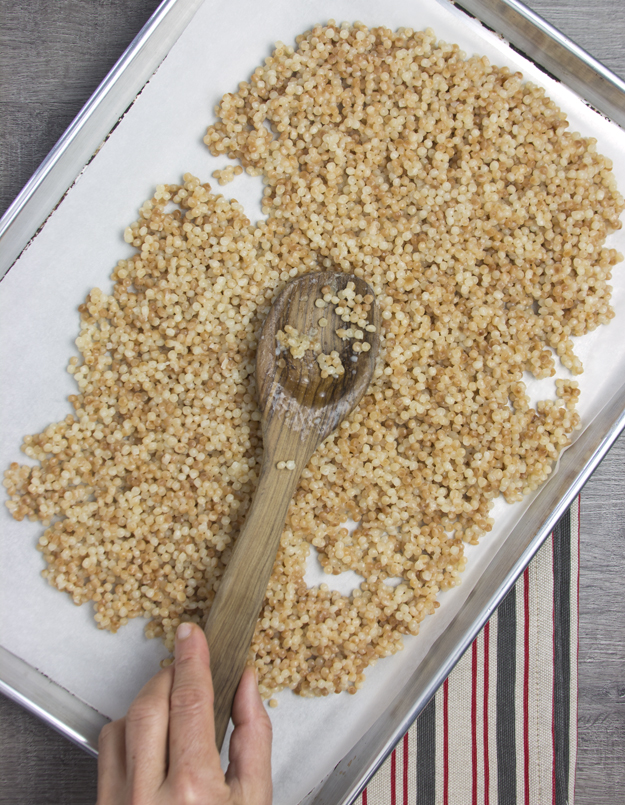
Prepare the dressing. The mild flavour of couscous can stand up to a bracing dressing of Dijon, lemon juice, red pepper flakes and olive oil.making dressing
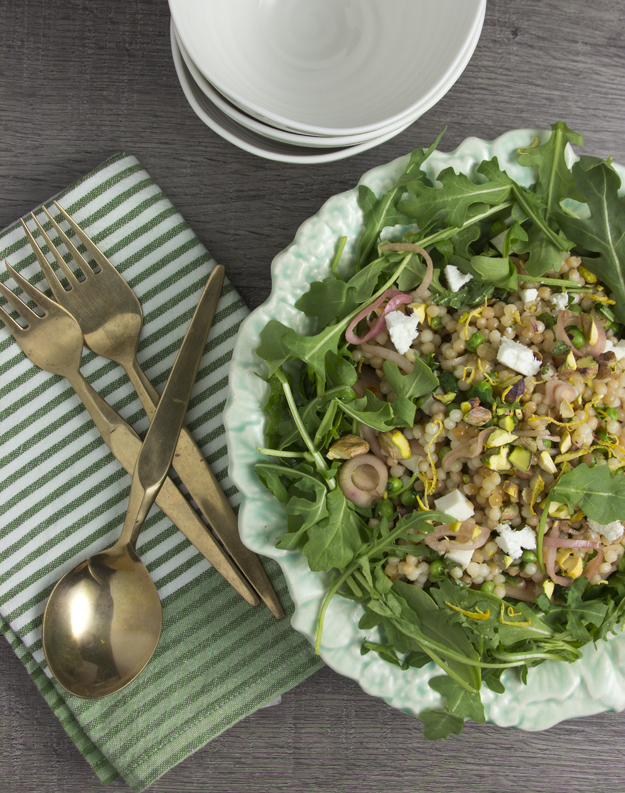
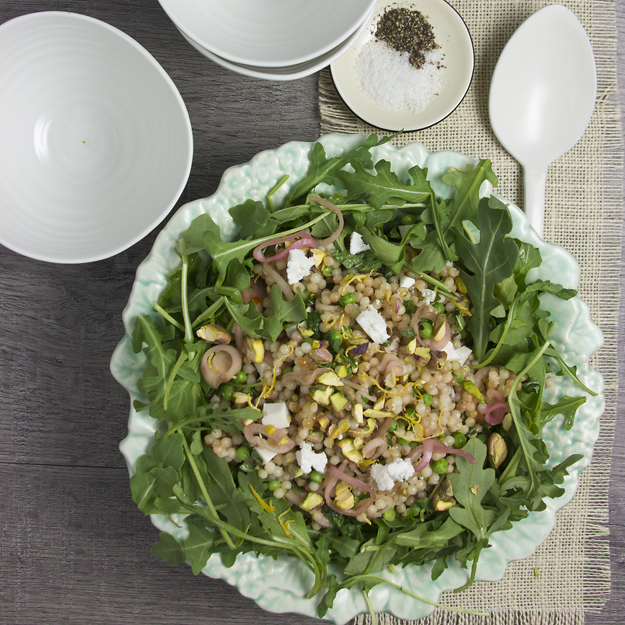
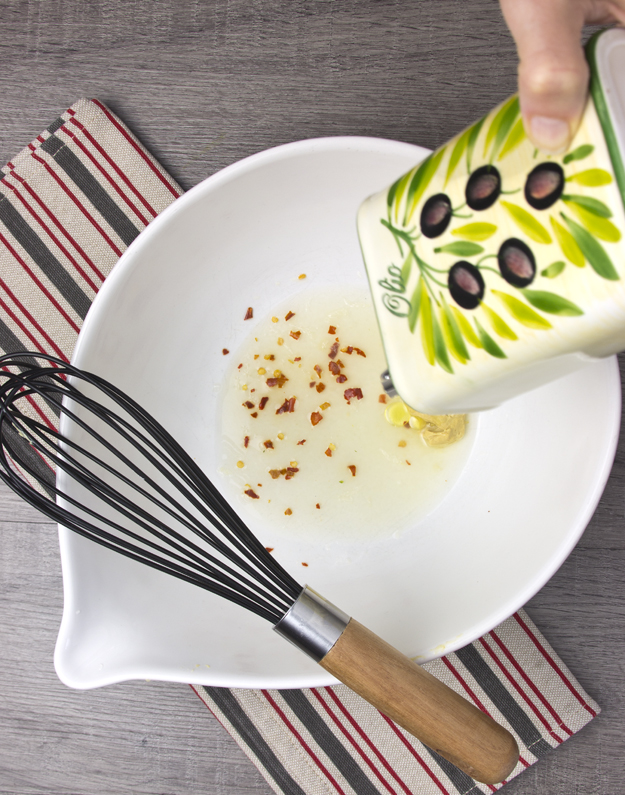
Then it’s simply a matter of assembly. I thawed some green peas (no cooking necessary), drained the pickled shallots, washed some baby arugula and mint, toasted and chopped pistachios and diced up the cheese. Sugar snap peas or asparagus would also be excellent friends with this salad. ready to assemble
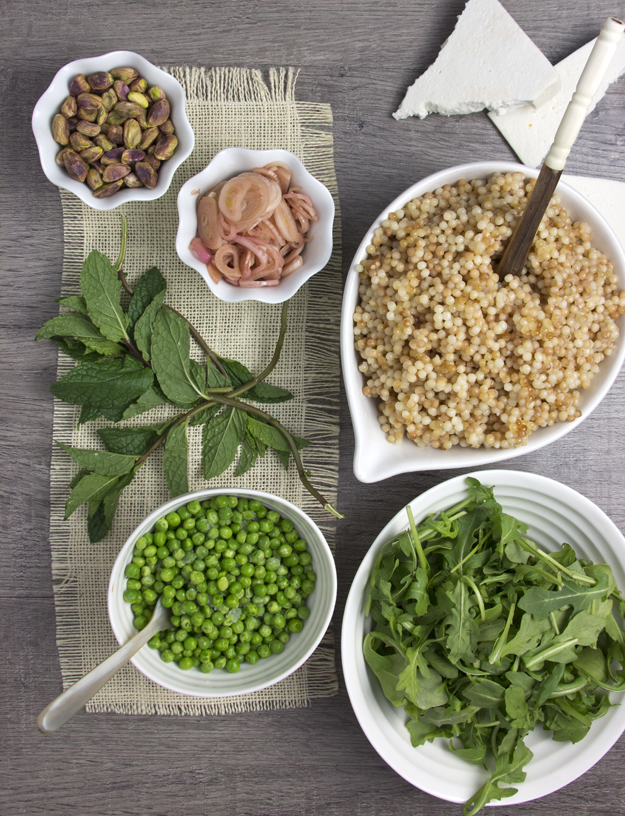
I loved the combination of all these ingredients. Chewy, nutty couscous, bitter arugula, sweet mint, crunchy pistachios, salty cheese and the zingy pickled shallots. Each bite had me craving more. in white bowl

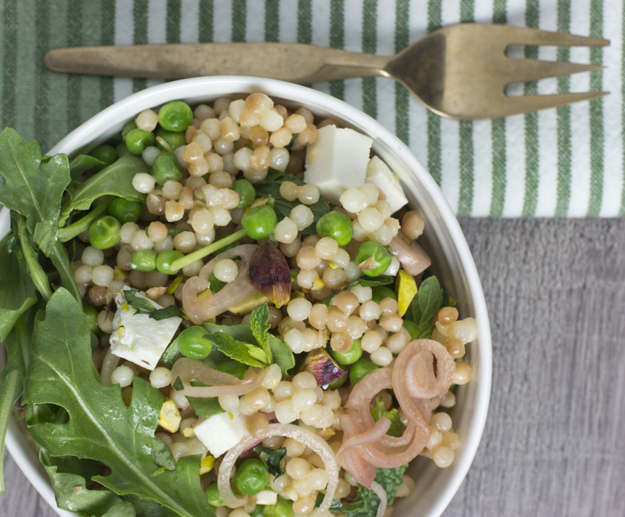
Click here to print recipe for Israeli Cous Cous with Pickled Shallots Peas, Mint and Ricotta Salata.

in green bowl 2

On the first night of Chanukah: Pecan Toffee Squares

pecan toffee bars stacked up 625 sqOn the first night of Chanukah I baked Pecan Toffee Squares for my true love. He thought they were pretty fantastic. I mean, what’s not to love? Buttery, crumbly shortbread base, crunchy toasted pecans in a sticky toffee filling, topped with a drizzle of milk chocolate and a light sprinkling of coarse salt, because that’s how we roll around here.ready to bakeHere’s a quick tutorial on how to line a baking pan with parchment paper.


flatten dough with bottom of measuring cupspreading toppingBecause the holiday of Chanukah lasts for 8 nights, I thought it would be fun to post sweet treats for 8 days in a row. The true meaning of Chanukah has nothing to do with sweets.on cooling rack The celebration of Chanukah is beautifully explained by Rabbi Andrew Jacobs, on “Blog Shalom”, “The Maccabees were a tiny group of Jews who should not have been able to defeat the powerful Greeks. But they did! And because of this miracle, Judaism survived and did not become consumed by Greek culture. This story of miraculous survival repeats itself many times throughout Jewish history. Despite tremendous powers that have raged against us, nothing has stopped the Jewish people. This is a miracle.”

In our family, gifts are not traditionally exchanged, although there was one year when my husband shocked me by giving me one perfect gift after another for each of the 8 nights. I was going through a bit of a dark time and he thought the gifts might cheer me up a bit. By the fourth night I became suspicious, and realized he had a bit of help in choosing the gifts. He had enlisted the aid of his sister to be his shopping elf! In all honesty, the best gift he gave me that year was an introduction to a great therapist who helped me work through this difficult time. I am forever grateful for that.pecan squares with milk

Click here to print recipe for Pecan Toffee Bars.a slice removed


Ultimate Potato Latkes

platter of latkesI realize that Chanukah ended last week and I’m a little late to the party, but you may forgive me when you find out that I am sharing the ultimate latke recipe with you. So, if you only make latkes once a year, do yourself a favour and bookmark these for next December. You will thank me!

The first time I posted about potato latkes on this blog Taylor Swift was dating  Jake Gyllenhaal. The second time, a month later, Taylor and Jake were still being spotted canoodling in public.  The third time I posted about latkes, Taylor was keeping company with Harry Styles. My final latke posting was last November and Taylor was trying to make Harry Styles jealous by stepping out with Douglas Booth.

From the above paragraph you might conclude that: a) For a woman over the age of 50, I have an inappropriate fascination with Taylor Swift. (Sadly true!), and, b) I also have an unhealthy love of potato latkes (also, sadly true).

I used to believe that I had the very best latke recipe. And then I tried the Cook’s Illustrated version and discovered that I was wrong! These latkes were light, not at all heavy or greasy. The outer crust was crunchy to the point of almost shatteringly crisp and insides were creamy, tender and pillowy soft. These are everything that all self respecting latkes aspire to be.

Leave it to Cook’s Illustrated to crack the code and perfect the latke.  A typical tuber contains 80% water by weight! The secret, it seems, is to rid the potato of as much of it’s water content as possible. This means a little extra work to squeeze out all the moisture that potatoes exude, but trust me, the effort is worth it.

Russet potatoes are the best variety to use. Grating them by hand on a box grater will give you the best texture. Just scrub the potatoes. No need to even peel the potatoes, just scrub well.gratingThe grated potatoes are mixed with a small grated onion and some salt. The mixture is transferred to a tea towel and all the moisture is wrung out. Let the drained liquid sit for 5 minutes and all the potato starch will sink to the bottom of the bowl. Drain off the liquid and save the starch. This starch is what will hold your latkes together. No need to add any additional flour or matzoh meal.sqeezing out liquidThe potato mixture gets heated in the microwave for 2 minutes. This allows the potatoes to release even more moisture and assists in making the latkes crispier and prevents them from becoming greasy by absorbing too much oil. microwavefrying

Click here to print recipe for Ultimate Potato Latkes.

stack of latkes

Triple Coconut Macaroons

pyramid 2 625 sqThese are my absolute favourite macaroons. That’s macaroon, with 2 o’s – the coconut variety, not the pain-in-the-ass Diva, ground almond and meringue variety, which are macarons, with one o. This recipe for Triple Coconut Macaroons, comes from Cook’s Illustrated Magazine. I have been making these since the recipe first came out in 2000. Why I have waited so long to share with you is a mystery to me. I promise you, I’m reallly not a petty person.

Although I could make them any time of year, I always associate coconut macaroons with Passover. As a child we bought our macaroons from Open Window Bakery in Toronto. They made both vanilla and chocolate coconut macaroons. I preferred the simplicity of the vanilla ones. I found the chocolate ones too chocolatey for me. The cocoa powder masked the flavour of the coconut, which is exactly the point of coconut macaroons. I always felt sorry for those families that had to get their macaroon fix from the can. They were gummy and chewy, in short, just awful.
00091_chocolatemacaroons_10coconut macaroons in can
The quintessential coconut macaroon is slightly crunchy on the outside and chewy in the middle, without being gluey. They should be sweet, but not cloyingly so, and they should be bursting with shreds of sweetened coconut. A final dip in a melted chocolate bath, to cover the lower third of the macaroon would not be a bad thing.
in polka dot bowl
Cook’s Illustrated’s test kitchen discovered that the choice of coconut in the macaroon makes a big difference in both taste and texture. Unsweetened shredded coconut, which is drier than sweetened, solved the gluey texture issue.  Sweetened shredded coconut packed more flavor than unsweetened, and together they worked very well. To add one more layer of coconut flavor, they tried cream of coconut and cracked the coconut macaroon code.

Cream of coconut, is not to be confused with coconut cream or coconut milk. Here is a little coconut product primer:
coconut milkcream of coconutKTC-Creamed-Coconut-Big
Coconut cream is very similar to coconut milk but contains less water. Coconut cream is made by simmering equal parts of shredded coconut and water until frothy,  then straining the mixture through a cheesecloth, squeezing out as much liquid as possible; this is coconut milk. The coconut milk is refrigerated and allowed to set. Coconut cream is the thick non-liquid part that separates and rises to the top of the coconut milk.

Cream of coconut is coconut cream that has been sweetened. It is used most commonly in piña coladas. This is the one you want for this recipe. I usually find it in Asian supermarkets, although some larger stores carry it in the drinks aisle.

Creamed coconut is a compressed block of coconut flesh which has been slightly dehydrated and sold in a waxy lump.

This recipe does contain corn syrup, so if you keep strictly Kosher for Passover, here is a recipe for a corn syrup alternative.

Lately, there has been much written about the evils of high fructose corn syrup. This is not the same as the regular corn syrup you buy for baking. If you are at all concerned and want to know more about the science behind it, this article clears up the confusion.

The canned cream of coconut has liquid at the bottom, so it is best to empty it out into a bowl and mix it up with a spoon before measuring and adding to the batter.
Adding cream of coconutadding coconut
The batter should be chilled for about 15 minutes before shaping macaroons. here is a video demonstrating how to shape them.


The chocolate should be chopped fairly fine. I melt about 3/4 of it in the microwave on medium power. When it is totally melted, stir in the remaining 1/4 of chocolate. This is a quick and dirty tempering method but it works quite well.chopping milk chocolatemelting milk chocolateadding second amount of chocolate
I like to dip the bottom third of the cookies in chocolate.
dippingput on parchment

dipped

Click here to print recipe for Triple-Coconut-Macaroons.

in polka dot bowl


Broccoli Cheddar Soup.

soup 4 w cheddar 625 sqMy youngest son is a linguaphile. For those of you who are not linguaphiles, it means “a lover of languages and words.” I was visiting him a few weeks ago while he was playing his favourite vocabulary game, “Word Smart.” The word “spleenful” came up on the screen and when I asked him what it meant, he defined it as “bad-tempered or irritable.” What a great word! I could not wait to find an opportunity to work it into a conversation.

Then last week, around 10:30 p.m. on Monday night, I was going down the stairs in the dark. I misjudged where the last step was and I ended up crumbling to the floor. Fast forward to Tuesday at 3:00 am when we arrived home from the hospital.castI had broken 2 bones on the top of my foot. The doctor at the hospital told me I was very lucky the break was not at a joint, as they do not heal very well and most often result in arthritis complications. I was also very lucky that they chose to put an air cast on me, rather than a plaster cast. I can take this one off for showering. I must confess, using crutches is not my forte. I look like I am about to lurch forward and stumble with every step I take. I make my husband very nervous.  The cast has been on now for almost a week, and I must say I have had some “spleenful” moments.

I wanted some comfort food. For me, that means Broccoli Cheddar Soup. I still recall, with great fondness and longing, the Cheddar Broccoli Soup I ate at “Say Cheese in London Ontario, in the late 1970’s. Say Cheese was a restaurant and specialty cheese shop, located in downtown London, on Talbot Street, across from Covent Market. There was no other place in the city quite like it. They were known far and wide for their cheese soup, but I preferred the Broccoli Cheddar. For a student living away from home for the first time, that soup wrapped me up like a big hug from home. Sadly, the restaurant is no longer there.

The soup was a verdant green colour and had a pure broccoli flavour that wasn’t overpowered by cream or too much cheese. The cheddar was perfectly melted into the soup and the texture was so silky. Every few spoonful would yield some cheesy stringy bits when you pulled your spoon up for a mouthful. Definitely not a soup to order on a date, but perfect for lunch with your girlfriends! It was a touch spicy and just so fragrant.

For years afterward, I would order Broccoli Cheddar soup any time I saw it on a menu. I was always disappointed. These soups were various unappetizing shades of green-grey, and they had a strong sulphur odour. The cheese was usually grainy and not at all melted into the soup. Eventually I just stopped ordering it.

For some reason, I never thought of trying to recreate it at home. Then, last week Cook’s Illustrated dropped a recipe for Cheddar Broccoli Soup into my inbox. I was psyched! Cook’s has yet to let me down.

Since I am unable to bear weight on my left foot yet, I talked my husband and oldest son into being guest cook and photographer for this post. I perched myself on a barstool, at the counter, and chopped, diced and shredded, while calling out instructions to my sous chef. I knew we were in trouble when after reading step 1 in the recipe, “Heat butter in a large Dutch Oven over medium-high heat”, he pulled out the smallest saucepan in the cupboard. We had a quick lesson on what a Dutch Oven is and proceeded to step 2.dicing onionschopping broccolishredding cheddarshredding parm

cooking

pouring into blender 2Things were going swimmingly until we got to the part where it says to blend half the soup. We could not find the blender lid. My son, who is the rugged outdoors type, said no problem, we will improvise. He covered the blender with a plate. If you lose your blender lid, DO NOT , I repeat, DO NOT, attempt this solution.  It does not make an airtight seal. Enough said.

We found a mini-chopper languishing in the back of the cupboard and used that instead.mini blender 2Success! This soup took me right back to my youth. For a few minutes I was feeling anything but spleenful. Cook’s Illustrated has cracked the code! The magic, it seems, is to cook the living daylights out of the broccoli. Overcooking does produce that awful smell, but when you take it past the point of overcooked, the sulphur compounds breakdown, eradicating any bitterness, leaving behind the sweet and nutty flavour of broccoli. It takes almost an hour of cooking to get to that point, but Cook’s figured out a shortcut. Adding a mere ¼ teaspoon of baking soda helped the broccoli break down in about 20 minutes.

They solved the problem of the drab green grey appearance by adding some fresh baby spinach at the end of the cooking period. Some aged cheddar and finely grated Parmesan added the final bit of richness and flavour.

Click here to print recipe for Cheddar Broccoli Soup.

soup 3 w cheddar

A Modern Banana Bread

sliced on white plate 1I had a friend in seventh grade whose long straight shiny hair I envied. It reached down to her lower back and was a beautiful shade of butterscotch. I had short, wiry, curly black hair and would have given anything for hair like hers. She seemed so exotic to me. As I spent more time at her house I came to appreciate how different our families were. She only had one sibling and her mom was quite involved in all aspects of her life. I had 5 siblings and my mom was busy just trying to keep all our names straight.

One of the strangest things about my friend’s mom was that every week she would buy a huge bunch of bananas and leave them in a pretty bowl on the kitchen table. By the end of the week, they would be ripe and almost black and she would throw the bunch away and buy a fresh one to replace it. No one in their family liked the taste of bananas, yet her mom just loved how they looked, so she continued to buy them.speckled bananasAt the time it never occurred to me that you could make banana bread with ripe bananas. In our house, banana cake came from Sara Lee. Oh how I loved the icing on those frozen cakes!sara Lee banana CakeI only came to discover the joy of homemade banana bread many years later, during my University years, when I worked part-time as a Cuisinart demonstrator. I was given Noreen Gilletz’s book “The Pleasures of your Food Processor” as a gift. And there on page 208 was a banana bread recipe so perfect that it became my gold standard by which I judged all other banana breads for the next 30 years.

My mom was a student of the “more is more” school, and she revised Noreen’s recipe by using 5 or 6 bananas, instead of the 3 called for in the recipe. We dubbed her version, “Banana Brick.” It was wet and heavy.

Little did my mom know that with her addition of more bananas, she was onto something big here. She wanted to intensify the banana flavour but she just lacked the correct technique to do it without ending up with a sodden heavy mess.

Cook’s Illustrated Magazine figured out a way to ramp up the banana flavour without introducing too much additional moisture. They started with five very ripe bananas (versus the usual three in most typical recipes) and proceeded to microwave them to release their juices. The next step was to drain all the juices that had accumulated during microwaving and simmer that liquid in a saucepan until it reduced.

peeling bananaspoking hole in saran

after microwavingstrainingmashing bananas reducing liquid 2This reduced liquid is then added to the batter, a sort of intensified banana essence.adding liquidcracking egg

adding a touch of whole wheat flourmixing batterCooks Illustrated decided to further boost the banana flavour by adding a sixth banana, sliced thin and caramelized on top of the loaf gave this banana bread an enticingly crisp, crunchy top.sprinkling with sugar

top view

I tasted the bread warm from the oven and to be honest, I wasn’t sure I liked it better than my classic recipe from Noreen. But I went back for a second taste after it had cooled for about 6 hours and I was astounded at how different it tasted. All the buttery goodness was now front and center. It was moist, but not wet. The slices, heavy for their size, had the perfect density.

There were several layers of sweetness to this banana bread. It tasted of bananas but the sweetness was not overpowering. The addition of brown sugar to this version added a molasses undertone that helped balance the sweetness.  Cook’s Illustrated called for walnuts in their recipe and not being a walnut lover, I hesitated over this addition. In the end, I added them and their slight bitterness provided just the right contrast with the sweet bananas.

The sliced bananas and granulated sugar on top of the bread caramelized and they added a crunch to the top that was such a nice surprise and contrast to the moist interior. This banana bread continued to improve over the next 3 days, much like a fruitcake. Sometimes it does pay to mess with the classics! I think even Noreen Gilletz would approve.

Click here to print recipe for Ultimate Banana Bread.sliced on wire rack

Homemade Marshmallows and Hot Chocolate Mix

mug and marshmallows 3

This morning I had the opportunity to bike the countryside of the Emerald Isle (Ireland). The lush pastoral landscape offered endless hills in 40 shades of green. The climbs were steep, with very little opportunity for cruising. My heart rate went into the red-line zone (gasping for air and unable to speak a coherent word) and I was dripping in sweat.

Sadly, this was just a virtual tour of the Irish countryside. Our instructor at today’s spin class, the very funny Roger, has quite the active imagination. He took us for a ride in the stunning Irish countryside and promised us that if we pedaled hard, there would be a pub at the end of the ride with a cold pint waiting as our reward. About halfway through the ride Roger sang out, “put your arms up in the air”. I raised both arms and gave him fist pumps. My husband and daughter looked the other way and pretended they did not know me. Apparently instructors always yell out these instructions, but no one ever follows them. Oops!

Roger kept talking about a bonus track. I had no clue what he was referring to until 45 minutes into the class, when we normally begin the cool down, he told us to ratchet up the tension on our bikes for one final hill. This was a special 60 minute class. Lucky me! I survived. Sadly there was no pub at the end of the ride. Just the dregs of my now lukewarm water bottle.

Annoyed that I didn’t get my visit to the pub, I decided that I deserved a treat when I got home. Hot chocolate and marshmallows seemed like the perfect way to cap off my morning.

To be honest, growing up,  I was never really a marshmallow fan. At overnight camp I would stick my marshmallow into the camp fire and set it on fire. I would remove it, blow it out and eat the carcinogenic burned crispy part and throw the fluffy inside away. I never did have the patience for toasting them golden brown. Yet another quality I admire in my husband. He will wait until the fire has burned down to low embers and hold his marshmallow just at the right height to obtain that perfect burnished bronzed colour.

I only recently began a love affair with marshmallows several years ago, after a lunch at Jean Georges in New York City. The meal was delicious but my favourite memory of that lunch was the Bon Bon trolley that they wheeled to our table at the end of our lunch. As the waiter approached our table with the trolley  he opened a huge glass jar filled with handmade pink marshmallows and lifted one out with tongs.  Then he proceeded to cut each one in half with very fancy silver scissors.  I inquired whether marshmallow cutting was a position you had to be promoted to.  He responded that it was an entry-level job. I am still thinking about applying! Just in case you are wondering, the Bon Bon trolley also held cotton candy, salted caramels and assorted chocolates. It was a pretty special day for me! Ever since that day I have wanted to try my hand at making my own marshmallows.

I knew that making marshmallows requires precision and a candy thermometer. I turned to my favourite culinary scientist for the how to, Alton Brown. Gelatin and ice-cold water are placed in the bowl of the stand mixer. Then sugar, water, corn syrup and salt are placed in a heavy bottom pot and brought up to 240° F. The mixture should then be allowed to cool to 210° F and then poured into the stand mixer bowl while it is mixing on low-speed.

adding gelatinadding cold water

boiling sugaradding sugar syrup

Then you turn the machine up to high-speed and mix for 12-15 minutes until the mixture cools to lukewarm. In the last minute of mixing you can add any flavourings you like. I added some vanilla bean paste. While it is mixing, prepare a 9 x 13 inch pan by spraying it with Pam and then coating it with a mixture of cornstarch and icing sugar. Then tip the goo into the pan and spread it out with an oiled spatula. This is a very gooey mixture. Dust the top with more cornstarch and icing sugar and put it aside to set for at least 4 hours or overnight. Resist the urge to lay your head down on this pillowy softness. It will not end well.

icing sugar and cornstarch

marshmallow mix pouring into pan

spreading marshmallow smooth

I topped half of my mixture with some toasted coconut.

half plain half coconut

A serrated knife does an excellent job cutting the marshmallows, once they have set up. You will have to wash the knife off fairly often while cutting.

cutting marshmallows

Now, onto the hot chocolate:

mug and marshmallows 2

When my kids were little the only way I could get them to go outside to play in the winter was to bribe them with hot chocolate when they came back in.

They would indulge me and play for about 20 minutes and then come inside on the pretext of having to go to the bathroom. After helping them struggle out of their snowsuits we were all sweating and no one was anxious for the dance that required getting back into all those layers. And then it was time for hot chocolate.

I will admit that I resorted to a packaged hot chocolate mix. Truthfully, the kids didn’t even like the hot chocolate either. It was really all about the marshmallows. They would scarf down the marshmallows I let them heap in the hot chocolate and I would end up pouring the hot chocolate down the drain.

At the time, it never occurred to me that you could make your own hot chocolate mix. But you can, and it’s spectacular! This recipe, from the folks at Cook’s Illustrated, makes enough powdered mix for about 20 cups of hot chocolate. It can be stored in the cupboard for about three months, so when the craving for a cup hits you, simply stir 1/3 cup of the mix into some hot milk!

The uniqueness of this mix is that it contains two kinds of chocolate. The first, of course, is cocoa powder. There are two types of cocoa powder, natural and dutched, (also known as Dutch processed). For this recipe you want to seek out the Dutch processed kind. Camino makes an excellent dutched process cocoa powder that is available in the organic section of the supermarket.

Dutched cocoa powder has gone through an alkalizing process, which gives it a darker color and makes it less acidic.  The result is a richer, more intense chocolate flavor and a nice deep chocolate color.  You will sometimes see Dutched cocoa powder called for in recipes for beverages or desserts that aren’t baked since the flavor is less bitter than regular cocoa powder.

The mix also contains white chocolate, which gives the final drink a soft creamy texture.

The final ingredients in the mix include skim milk powder, which adds a sweet dairy flavour, confectioners’ sugar, which dissolves more easily than regular granulated sugar and cornstarch, which is added to the powdered sugar to help thicken the cocoa. All the ingredients get pulverized in the food processor.

hot choc ingredients

jar and marshmallows

Click here to print recipe for Homemade Marshmallows.

Click here to print recipe for Best Ever Hot Chocolate Mix.

group shot 1

Battle Corn Chowder vs. Corn Vichysoisse

I have been meaning to post about corn soup for a few weeks now but some tomatoes and blueberries got in my way! In a battle of epic proportions (well, epic in my mind anyways!), I pitted the legendary champion, Cook’s Illustrated against fledgling culinary newcomer Gwyneth Paltrow. Yes, that Gwyneth Paltrow. Academy Award winning actress, singer, wife of Coldplay rocker Chris Martin, mother to Apple and Moses and possessor of gorgeous hair. She recently released a cookbook called “My Father’s Daughter.”

Here’s how this battle came about.  When the July 2011 issue of Cook’s Illustrated came out I quickly leafed through it to see what caught my eye. I was stopped dead in my tracks by a recipe for corn chowder. You see, I love corn chowder. I used to make an incredible one, using  Imagine Organic Creamy Sweet Corn Soup as the base for the soup. But then the company went and changed the formulation of the product.  They slapped a big “New and Improved Taste” banner  right on the front of the box! Yeah right! New maybe, but improved? Only if you happen love the taste of dirty dishwater!

So imagine my joy when I found a new corn chowder recipe. I was all set to make the Cook’s Illustrated recipe when I came across a second corn soup, a cold corn vichysoisse in the July issue of Bon Appetit Magazine. This recipe was created by Gwyneth herself, from her new cookbook, “My Father’s Daughter.” Unless you’ve been living under a rock, you will undoubtedly have seen Gwynnie making the rounds on all the daytime talk shows, promoting her book.

She has very sweet and touching memories of cooking together with her dad, and this book is a sort of tribute to her late father (Bruce Paltrow). It is a cookbook that celebrates family and togetherness. And try as you might to hate her, because she seems so perfect, she admits that her quest for perfection comes from self-doubt and insecurity. And who can’t relate to that?  And I must admit, I was intrigued. After spending all that time in Spain with Mario Batali and Mark Bittman, I wanted to see what she had learned.

To be honest, I fully expected to prefer the corn chowder from Cook’s Illustrated over the corn vichysoisse from Gwyneth. To level the playing field, I immediately omitted the bacon from the Cook’s version. After all, it wouldn’t really be a fair fight if only one side got to use bacon. Everything always tastes better with bacon. And besides, we keep kosher at home, so bacon would be a big no-no in my kitchen.

I made the corn chowder from Cook’s first. They used an intriguing method of stripping the corn from the cob. Fisrt. going over it lightly with a sharp knife to remove just the kernels and then going over the cob again with the back of a table knife to remove all the pulp. Then they instruct you to put all the pulp into a clean tea towel and wring it out. The liquid that comes out from the towel is referred to as the “corn liquor” and apparently it is what gives the final soup its bright fresh CORN flavour.

The corn chowder from Cook’s Illustrated was very good, although I expected a brighter corn flavour, and to be honest, I thought the  half and half cream kind of muddied the fresh corn taste I was expecting. Then I made Gwyneth’s vichysoisse. She suggests throwing the stripped corn cobs into the pot, while the soup is simmering, to add extra flavour, sort of like the vegetarian version of chicken bones I guess. The recipe calls for good quality vegetable stock. I used homemade vegetable stock, a fabulous roasted vegetable stock courtesy of Mark Bittman. I was blown away by the pure corn essence of this soup. Sweet and silky and tasting of pure late summer. Folks, we have a winner in battle Corn Soup.

You can serve it chilled with a dollop of sour cream or heat it up and just garnish it with some chopped chives. I liked it best hot.

Final score: Gwyneth 1 and Cook’s Illustrated 0.

I have adapted Gwyneth’s recipe by adding jalapeño, thyme and a bay leaf. I also added some fresh corn kernels after pureeing to give a bit of crunch.

Click here to print the recipe for Corn Vichyssoise

Click here to print the recipe for Roasted Vegetable Stock.

And, if you’re keen to create your own Battle Corn Soup at home,

Click here to print recipe for Cook’s Illustrated Corn Chowder.