Tag Archives: Grilling

Lamb Sliders

Have you ever noticed that miniature food always seems to taste better? I’ve got a delicious recipe for you today using ground lamb to make sliders. The recipe is slightly adapted from Iron Chef Geoffrey Zakarain. He made them on The Kitchen a few weeks ago and I had to try them.

These little sliders pack a big flavour punch. The ground lamb is seasoned with shallots, garlic, mint, parsley, cumin and paprika.

Here are a few tips for success:

  • Use a light hand when mixing everything into the ground lamb. Form your hand into a claw and use your fingers like a rake to incorporate the seasoning ingredients into the lamb. Over-mixing leads to tough burgers. According to tasting table.com, “Mixing ground beef releases myosin, which is a protein that causes muscle contraction. It’s important for burger making, as myosin binds fat and water to the meat, leading to a more tender burger. So you want to retain as much of the protein as possible — but when you mix too much and let too much myosin escape, you can be left with chewy meat.”
  • Salt burgers just before grilling.
  • I used a 2.5 inch round cookie cutter to form my sliders. But feel free to form by hand if that’s more your style.
  • Cook lamb burgers to an internal temperature of 135°F. Insert instant read thermometer into burger from the side, not the top, and push it until it reaches the centre of the burger.
  • The pickled onions can be made and stored in your fridge up to 2 weeks ahead of time. This recipe makes more than you will need, but they are great on sandwiches and in all kinds of salads.
  • If you prefer to keep the tzatziki sauce dairy free, look for a plain vegan yogurt or sour cream that does not contain coconut as the main protein. The coconut flavour will not work for this application. I like Tofutti brand Sour Supreme

Click here to print recipe for Lamb Sliders.

Zucchini Halloumi Skewers with Lemon Parsley Dressing

I have never understood the appeal of raw zucchini. Watery and flavourless are not attributes I look for in my food. But, put zucchini on the grill, and it transforms into something very special. The heat of the BBQ evaporates the moisture, and, as the zucchini becomes charred, the natural sugar in the zucchini caramelizes and becomes intensely flavourful. Bland becomes bright.

You’ll need to slice the zucchini very thin for these skewers, about 1/8 of an inch thick. If you have stellar knife skills, go ahead and do it by hand, but if you have a mandoline, now is the time to bust it out. It slices the zucchini quickly and very evenly.

Now, for the star of these skewers, halloumi cheese. It’s a semi-firm brined cheese, traditionally made from sheep’s and goat’s milk. Originally made in Greece, Turkey and Cypress, it’s now also made in North America, often from cow’s milk. What makes halloumi unique is the way it’s made. The curds are cooked at a very high temperature for at least an hour. This creates a cheese with a rubbery, semi-firm texture. When you bite into halloumi, it “squeaks” between your teeth. So much fun to eat!

Halloumi has a high melting point, making it ideal for frying or grilling. The exterior develops a golden crust, and the inside becomes soft, but never melts completely.

Before they hit the grill, give them a light brushing with some good olive oil, and a light sprinkle of salt and pepper. I served them with a parsley-lemon dressing which adds a welcome hit of bright freshness and mild jolt of acid.

I’m excited for you to try making these. They’re bound to become a summer favourite.


Skirt Steak with Pomegranate Tomato Relish

Skirt steak, prized for its deeply rich flavour, is one of my favourite cuts of meat to grill in the summer. I have been making a version of this recipe for years now, and it ocurred to me that I have never shared it with you. My bad. So sorry.

You all know that I love salt, but if you buy kosher meat, be aware that kosher skirt steak is super salty. Proper koshering technique requires that the salt be put on all sides of the meat. Skirt steak is a very thin cut, so it absorbs more salt than a thicker cut. My butcher friend Joel suggested that I soak the skirt steak in cold water, for about an hour in the fridge before marinating. Change the water every 20 minutes. This works really well in reducing the saltiness. Of course, if you don’t keep kosher, skip this step.

Start with a really flavourful marinade. I whisked together an assertive blend of olive oil, red wine, red wine vinegar, pomegranate molasses, honey, garlic, thyme and bay leaves. Overnight is ideal, but if you are short of time, a few hours in the fridge is fine.

While the meat is marinating, prepare the salsa. Pomegranate and tomatoes are mixed with lime zest, lots if parsley and some olive oil for a sweet-tart salsa that cuts through the richness of the beef. Let the meat rest for about 5 minutes before slicing. Make sure you slice against the grain. I filmed a video to show you the right way.

Click here to print recipe for Skirt Steak with Pomegranate Tomato Salsa.

8 Steps to Grilled Steak Perfection

steak and wine 2One of my very first restaurant jobs was working on an outdoor charcoal BBQ, as patio grill chef. I learned how to build two-zone fires (hot side and cool side of the grill), how to tell the doneness of the meat by poking it, (not so easy!) and what cuts of beef were best for grilling. Since it was my job to schlep the 50 pound sacs of hardwood charcoal down from the patio’s rooftop, my arms were beautifully toned that summer. The only downside was the black soot that stubbornly remained under my nails, even after scrubbing with bleach and a nail brush. The kitchen staff nicknamed me Cinderella. The smell of musquite in my hair became my signature scent and excited my husband. It was a fun summer!

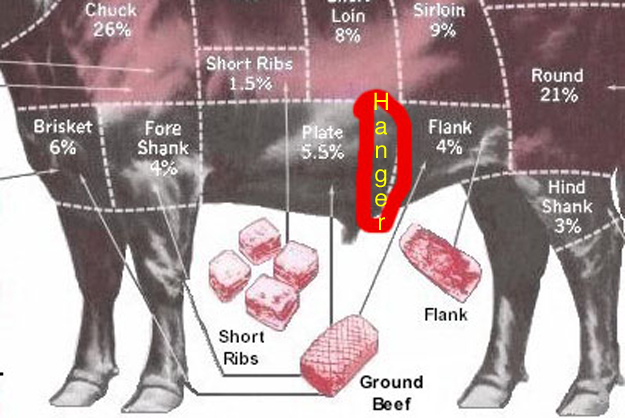
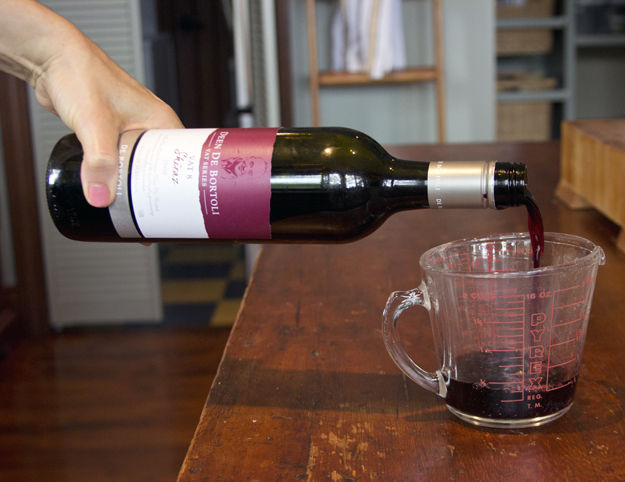
It was around this time that my husband revealed something to me that made me rexamine our relationship. He told me that when he was in University, he and his friend Joel would get together in his dorm room on Friday night and cook dinner. The night before he’d marinate rib steaks in red wine. Then Friday night, he dumped the steaks and wine it into an electric frying pan, added some dried spices and a tin of sliced mushrooms. He covered the frying pan and  basically braised the rib steaks! They thought they were quite the gourmet men about town! Braising rib steaks is a crime. A tender, well marbled piece of beef should never be braised. Luckily I have schooled him in meat cookery and he is now quite skilled in grilling.

I thought I would share with you some of the wisdom I picked up from my Cinderella summer. Here are the Eight Steps to Grilling the Perfect Rib Steak (my personal favourite).

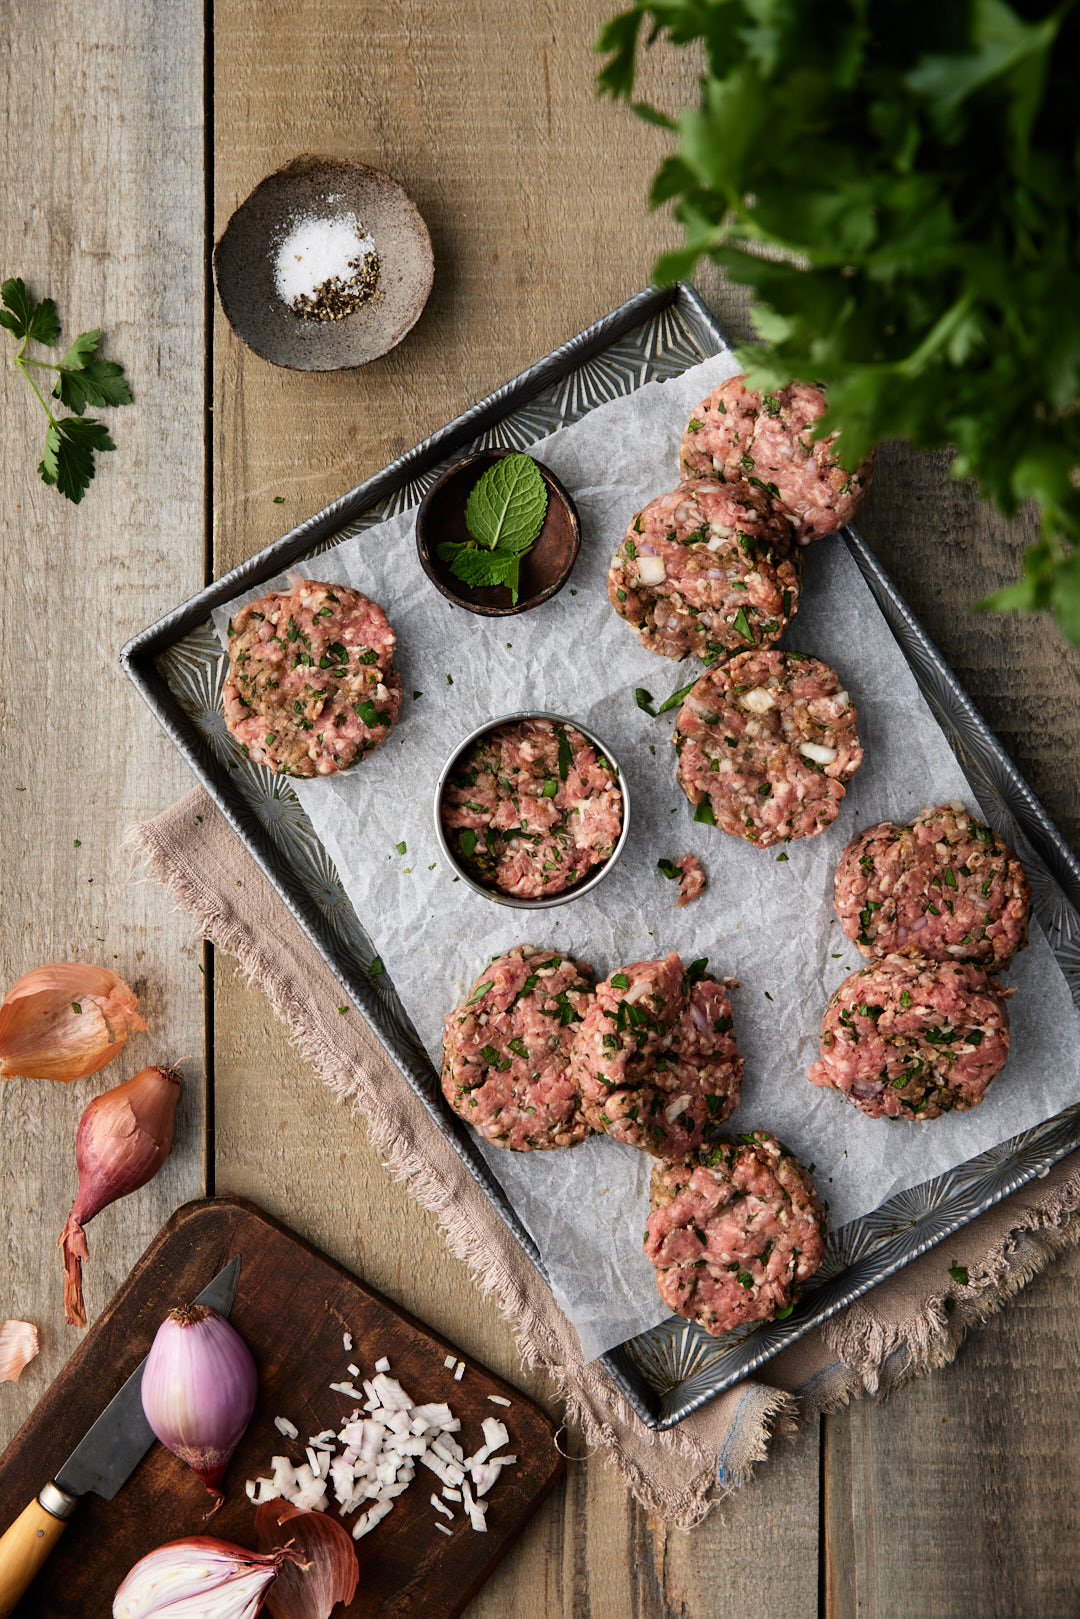
1. Make friends with your butcher. Don’t buy those skinny steaks lined up in the display case. Ask the butcher, very nicely, to please cut you some well marbled steaks between 1 1/2 and 2 inches thick. Yes, that is a big hunk of meat, over a pound, but one of these behemoths will feed 2-3 people,. The only issue might be the fight over who gets to gnaw on the bone. Most butchers won’t mind doing this for you. Some of my favourite people are butchers (Hi Joel and Gabe!)measuring steak
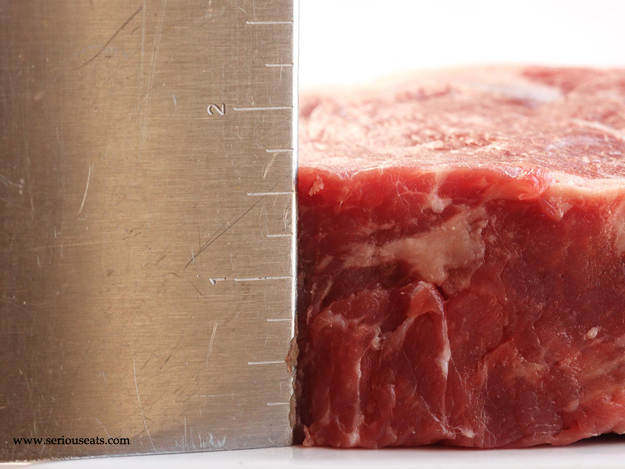
2. Salt early and heavily with Kosher salt. It used to be thought that you should never salt meat ahead of time because it was thought that would cause the juices to leak out and make the meat dry. Turns out that isn’t true. When you first salt the steak, the salt dissolves and sits in a little puddle on top of the meat, but within about an hour, the salt begins to break down the meat’s muscle fibres and the juices will be reabsorbed, along with the salt. The salt contributes to a juicer steak since it helps the cells hold on to water. By salting ahead of time you get meat that is seasoned all the way through and very tender and moist when cooked. The steak does not taste salty, it tastes properly seasoned.salted 3
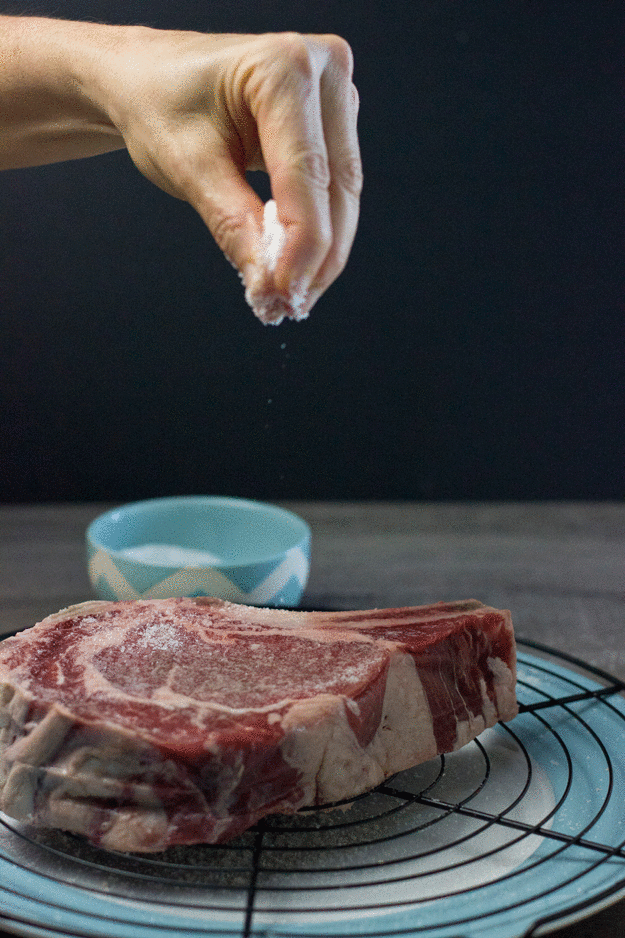
3. A Chilling Nap: Once salted, the steak should be set on a wire rack over a baking sheet and refrigerated for at least 4 hours and up to 2-3 days. (I usually do it for overnight). The wire rack allows the air to circulate around the meat and lets the surface get nice and dry. A dry steak will brown much better than a wet one.

And while we’re here, let’s address the “Let meat rest on the counter for 30 minutes, so it can come to room temperature before grilling” myth. Yes, I said myth. First of all, this is a honking’ big piece of meat. After 30 minutes, it may have warmed up by maybe 3°. What really helps with even browning is having a dry piece of meat. And salting it and letting it sit on a wire rack in the fridge overnight is going to do that work for you. So go ahead and cook fridge cold meat. Tell them I said it’s ok.

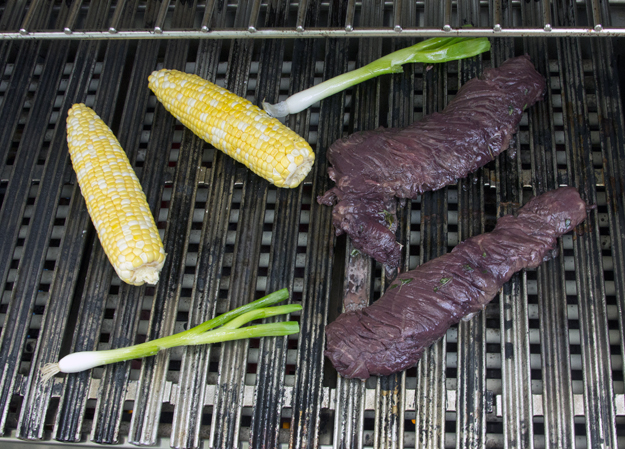
4. Make it hot! I am only going to address gas grills here. The debate about gas vs. charcoal continues to rage on with the same ferocity as Montreal vs. New York style of bagels. I have cooked on charcoal and I will admit that, if you know what you are doing, you will end up with a stellar steak. There are plenty of tutorials online for how to grill with charcoal, but, “been there, done that”. These days I am all about the ease of a gas grill.

Turn both burners on the gas grill to high. Close lid and give it 15 minutes to it get rip roaringly hot. After 15 minutes, turn the other burner to low.

5. Start High and Finish Low. Start the steaks on the hot side of the grill and cook each side for about 3 minutes, until it is well charred. Then, move it over to the cool side of the grill, close the lid and let it go for another 5 minutes, before checking the temperature.

There is a school of thought out there that advocates for the reverse sear, starting low and finishing high. Meathead Goldwyn of amazing ribs.com has me almost convinced to give it a try.

When you start with high heat, you load up the exterior, and by the time you are done you have a thick band of overcooked meat. If you reverse the order, start the food in the indirect zone at a lower temp, warm everything until it is close to uniform on the inside, and then hit it with Warp 10, you get both a better interior and exterior. That’s reverse sear, and this is another technique you should master. It is the best approach for many foods.

I will report back to you as soon as I try it.

6. Don’t Poke! If you take anything away from this post today, let it be this. Buy yourself an instant read thermometer. This is a great one, and I see that they have just come out with a little sister. Poking the meat to see if it is done is a fool’s game. A thermometer takes all the guesswork out if it, and makes you look like a rock star.

Blue (very, very rare) or, as we call it around here, “Steak for Ed” 105°F
Rare 115°F
Medium Rare 120-130°F
Medium 140°F

Stick the thermometer in the steak from the side into the center, not from the top.IMG_0659
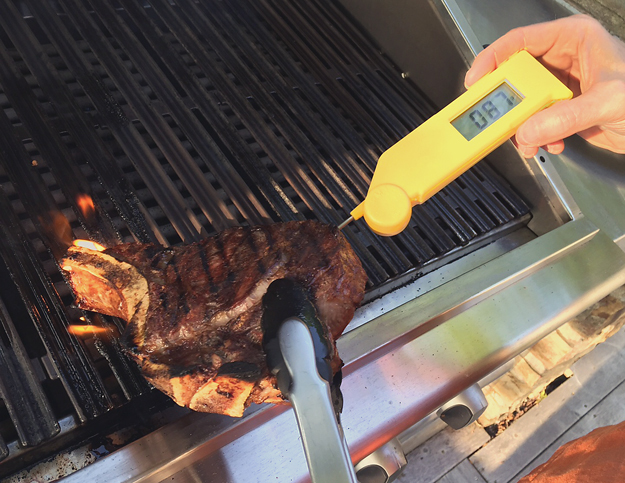
7. Let it rest. Put the steak on a plate and cover with foil to let it rest for 5-10 minutes. According to Nathan Myhrvold, James Beard Award winning author of Modernist Cuisine, the resting time down not really allow the the juices to redistribute themselves and get sucked back from the edges to the center. What is really going on here is that as the meat cools, the juices  thicken up, so that they stay in the meat, rather than flooding out into your plate.

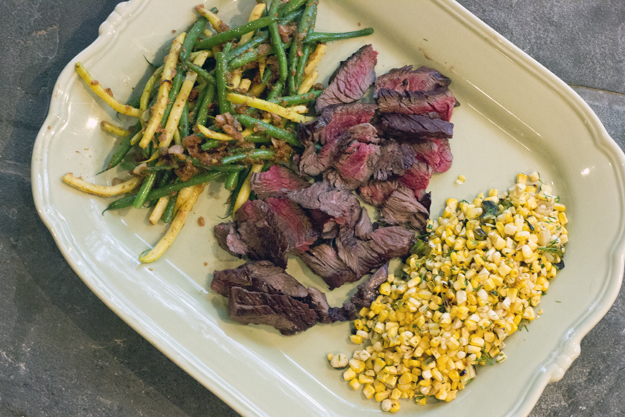
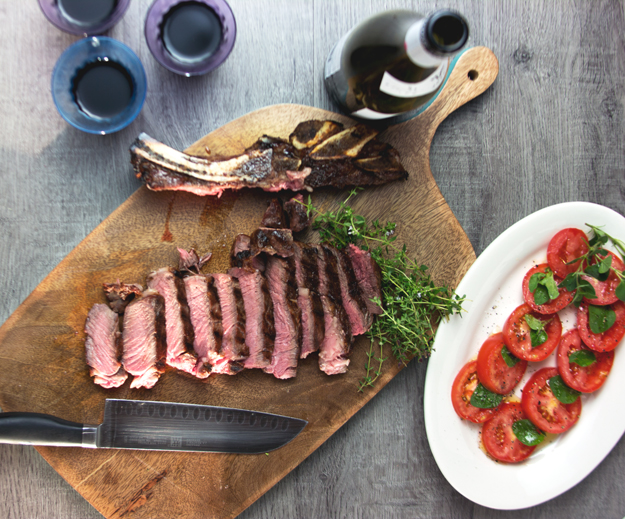
8. Slice steak, and arm wrestle your partner for the bone.

Click here to print recipe for Perfect Grilled Rib Steak.

sliced 625 2 sq

Grilled Chicken Skewers with Ginger Coconut Sauce and Mild Annoyances

on white 625 sq I am the grill master of our house. However, if the weather is particularly nasty, I will try to send my husband out to cook, but inevitably I will be beckoned to see if the food is done. It seems that I have the magic touch. Well, total disclosure here; I spent the summer between my first and second year of cooking school working in a restaurant as the grill chef. 

The restaurant had a huge stone barbecue on their patio. They stored the charcoal for the barbecue in 50-pound bags on the roof of a shed at the back of the patio.  I had to climb a ladder at the side of the shed and toss down the sacs of charcoal. My nickname that summer was Cinderella as my face was always covered with charcoal streaks. In addition to cooking the proteins, I also had to prepare pan sauces on the grill. That required a deft hand in moving the charcoal around to create hot and cool spots on the grill. I burned more than my fair share of pans the first few weeks, but eventually I got the hang of it. By the end of that summer I was fairly proficient in determining when a burger was done, when a strip steak was cooked to medium rare and when halibut was just cooked through to perfection.

These days I cook on a gas grill, and rely more often than not, on an instant read thermometer. They are basically idiot proof and they guarantee perfect results almost every time. This one is expensive but works very well.

This recipe for Grilled Chicken Skewers with Ginger Coconut, sauce hails from Chris Schlesinger and John Willoughby’s brilliant book, “License to Grill.” Although this book was written over 17 years ago, it still feels fresh and relevant. I have been making this recipe for many years and never tire of it. The original recipe calls for boneless skinless chicken breasts, but I recommend using boneless skinless thighs.

I must admit that I get mildly annoyed when people tell me they only use boneless skinless chicken breasts. Not quite as annoyed as when people tell me they never use salt in their cooking, but I won’t get started on that one right now. I always use boneless skinless thighs and serve it to guests who say they don’t like dark meat. They don’t even realize they are eating thighs and they always ask me how I keep my chicken so moist. Thighs are a no-brainer. They are next to impossible to overcook because of their higher fat (and therefore flavour) content.

The velvety coconut-ginger sauce enrobes the chicken and the ginger, jalapeño and lime add a seductive little flavour zing. The “shake” topping, crafted from peanuts, sesame seeds, cumin and red pepper flakes adds crunch and packs a welcome buzz of heat.mise en place 2If you are using wooden bamboo skewers, be sure to soak them for about an hour before skewering the meat, so that they do not burn. This recipe is also quite delicious when you substitute tofu for the chicken (or so I have been told by my vegetarian daughter!)

Click here to print recipe for Grilled Chicken Skewers with Coconut-Ginger Sauce.

on black


Hanger Steak with Corn Relish

with corn relish 3About 10 years ago I noticed a new, well new for me, cut of steak appearing on restaurant menus. Suddenly it seemed that “hanger” steak was on every trendy bistro restaurant menu. Curious,  I ordered it and discovered for myself how delicious it was. It had a full beefy flavour and richness that reminded me of skirt steak, but it was a bit more tender.

I began to do a little research and I discovered that until recently, butchers were hogging this cut all for themselves, hence the steak’s nickname, “Butcher’s Steak.” Now I have nothing against butchers, as a matter of fact, some of my favourite people happen to be butchers, but that seems kind of selfish to me, not sharing this amazing cut with the rest of us!

Upon further investigation, I discovered the geographical location of this cut on the cow. I found this great diagram on the the meat loving website chomposaurus. For all you carnivores out there, you must check it out!location of hanger steak It comes from the plate section of the steer and it “hangs” off of the cow’s diaphragm, hence the name “Hanger” steak. It is a vaguely V-shaped pair of muscles with a long, inedible membrane down the middle. If you have a good butcher (and luckily I do!) who knows how to break this down properly, he or she will remove the connective tissue and silverskin surrounding it and break this down into two separate, well-trimmed steaks. Each one will be about 12 inches long and weigh in at about 8-12 ounces. That’s only 1 – 1 1/2  pounds of hanger steak from each cow! No wonder the butchers were hoarding it. There was hardly enough to share with the whole class.

whole hanger steak 2trimmed hanger steaks 2

It is a tough piece of meat that needs to be marinated and must be cut across the grain. This shortens the long grainy muscled fibers and preventing chewiness. It should be cooked to medium or medium rare (125-130°F). Using an instant read thermometer, guarantees you get it right every time! Anything above medium will result in a rubbery steak and anything less than medium rare, you will be eating a very mushy steak.slicingI marinated mine in a mixture of red wine, olive oil, red wine vinegar, garlic, bay leaves and thyme. At least 6 hours or up to an overnight soak in the marinade is ideal. Cook it on a medium-high heat. Let rest for about 5 minutes before carving.red wine

seasoningsI served it with a yummy grilled corn salad. I was very excited when I saw the first local corn of the season at the market. However, last night, reading the newspaper, I discovered that agency responsible for governing food labelling in Canada, The Canadian Food Inspection Agency has greatly expanded its definition of local food. The old definition defined local as food that is produced within 50 kilometres of where it’s sold.local cornHowever, under a new interim policy, they are expanding the definition to mean food produced in the same province in which it’s sold. What that means is that in Ottawa, I could be eating corn that has travelled over 700 kilometers (435 miles) from Lambton Ontario, and it could still be labelled local in Ottawa. Certainly gives new definition to the term local. grillingThe contrast between the rich tender steak and the crunchy, slightly spicy corn relish makes for a perfect bite! I made Mark Bittman’s spicy-sweet green beans to go along with the steak and corn.

Click here to print recipe for Hanger Steak with Corn Relish.with corn relish 2

Avocado Toasts

I’m about to confess something that may get me drummed out of the tribe. I’m sick of eating humus! Truthfully, I have only myself to blame for this unfortunate state of events. I have been eating humus with carrot and celery sticks  for lunch everyday for the past year. Seriously, everyday! I know, you must be wondering, how is that possible? She’s a food blogger, she must create all kinds of wonderful lunches, each day more imaginative and fantastic than the last. But the sad truth is that I get into a rut, it’s just easy, plus it’s healthy and fairly low cal and so then I feel justified later in the day to indulge in my daily aperitivo!

I confess my boring lunch habit not so you will feel sorry for me, but as a way of sharing with you the discovery of a fantastic and simple appetizer to serve with drinks when company comes to visit.

Every summer for the past 26 years we have been gathering at our cottage with my husband’s University housemates and their spouses. Over the years our numbers have swelled as everyone started having kids. We had our annual get together this past weekend. It was just a small group of 15 this year as several members had other commitments. Each family is responsible for one meal over the weekend. It’s fantastic because it means that I am not in the kitchen the entire weekend cooking for everyone and I can enjoy my company instead of resent them!

As I began to plan what to serve my guests with drinks before dinner, I ruled out the usual suspects: humus and pita (sick of humus, see above!), tortilla chips and salsa (too predictable), a big bowl of pistachios or peanuts (nut allergies). As I was reading my July issue of Bon Appetit magazine, the photo on the editor’s letter page stopped me cold. It was just simply grilled bread topped with ripe avocado, sea salt, olive oil and red pepper flakes. I have to say that since Editor-in-Chief  Adam Rapoport took over at the helm of Bon Appetit, I have really started to enjoy reading this magazine once again. He has injected it with a fresh modern vibe and it just inspires me to cook everything on the pages. I still miss Gourmet (a moment of silence please!), but Bon Appetit is really doing a great job to partially fill the void.

The beauty of these avocado toasts is in their simplicity. The key is to gather together the very best ingredients for this dish. There is no real cooking or recipe involved here. Think of yourself as an orchestra leader, bringing together some gifted musicians. Each on their own, sounds quite nice. Together, they create a beautiful harmony. Look for good Artisan bread that has an “open crumb structure” (that’s baker speak for bread with lots of holes – more holes means more crusty spots to give added crunch and crevices for the olive oil to drip into).

A big fat clove of fresh garlic gets rubbed onto just grilled bread.

The avocados should be perfectly ripe, so buy them a few days ahead so they have time to ripen to perfection.

Table salt need not apply for the job of topping these crostini. Pull out the Maldon Sea Salt or some Fleur de Sel. The large crystals of salt will give added crunch and provide a perfect counterpoint to the bland creamy avocado. Pull out that expensive bottle of fruity, slightly bitter olive oil that you have been saving for a special occasion. The nooks and crannies of the grilled Artisan bread will soak it up. Finally, a very light sprinkling of red pepper flakes to wake up the taste buds.

These Avocado Toasts will have your friends and family toasting you!!