Tag Archives: Serious Eats

Strawberry Shortcake Ice Cream Bars

If you’re of a certain age, you may remember a time when ice cream treats were sold from a truck that travelled around to different neighbourhoods. That ringing bell would set off an avalanche of kids, running from their houses.

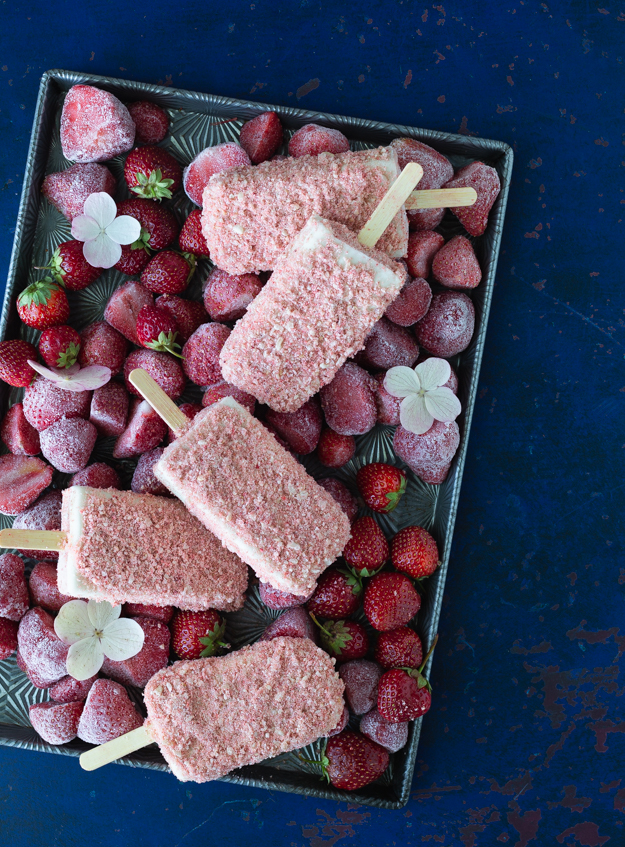
My favourite was the Strawberry Shortcake Ice Cream Bar. I loved how the crunch of the outside coating gave way to the soft fluffy ice cream middle. I recently had a craving for them and bought a box at the supermarket. It was so disappointing. It tasted nothing like my memory. It was too sweet and really artificial tasting. Nostalgia is often like that.

Luckily for us, Stella Parks over at seriouseats has made it her mission to turn our childhood memories into a reality that never disappoints.

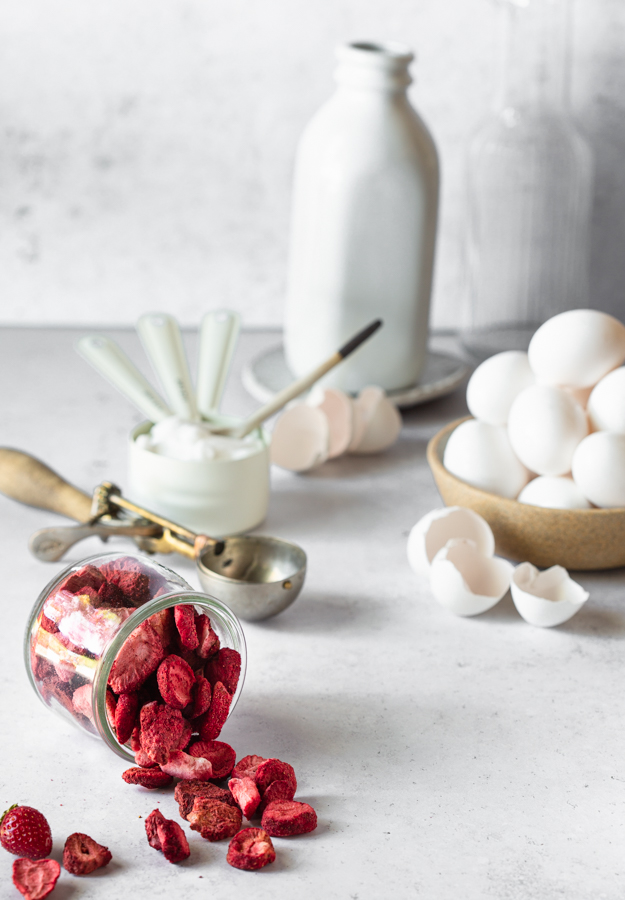
In order to get an intense strawberry flavour, start with freeze-dried strawberries instead of fresh ones. Fresh strawberries have too much water, and when you freeze them into an ice cream base, it becomes icy, not creamy and smooth.

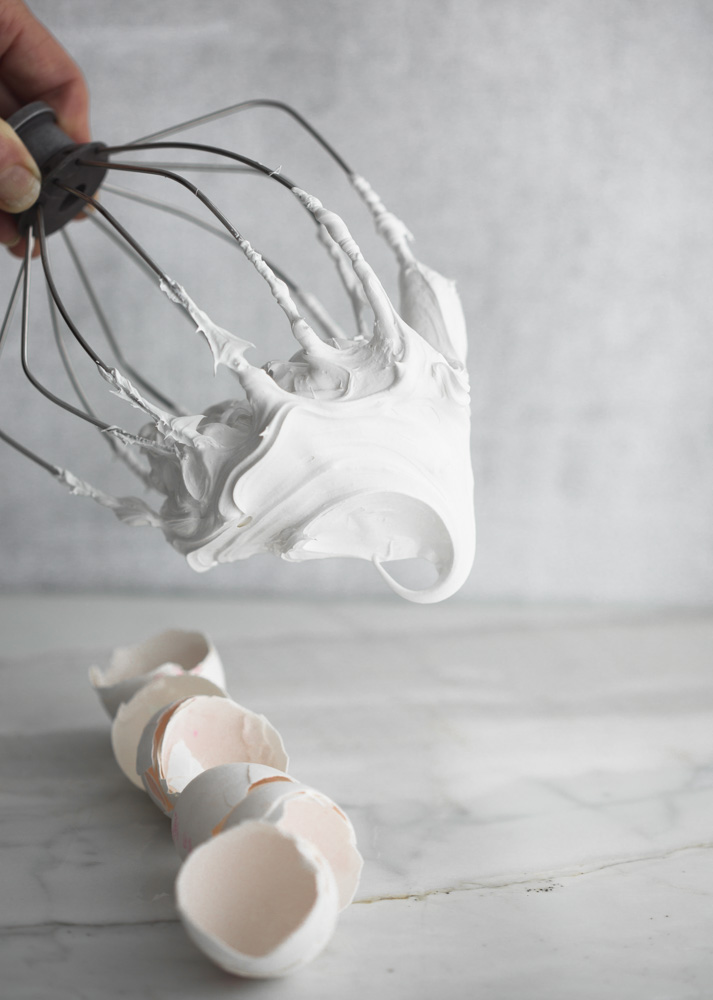
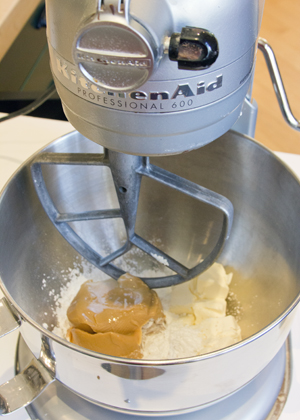
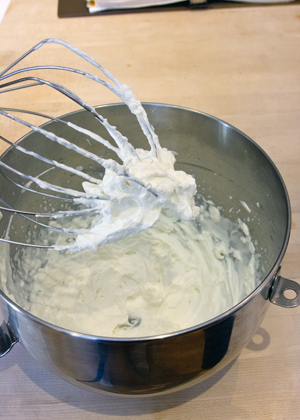
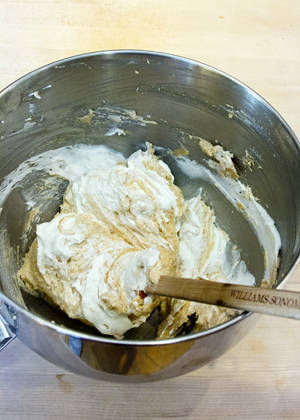
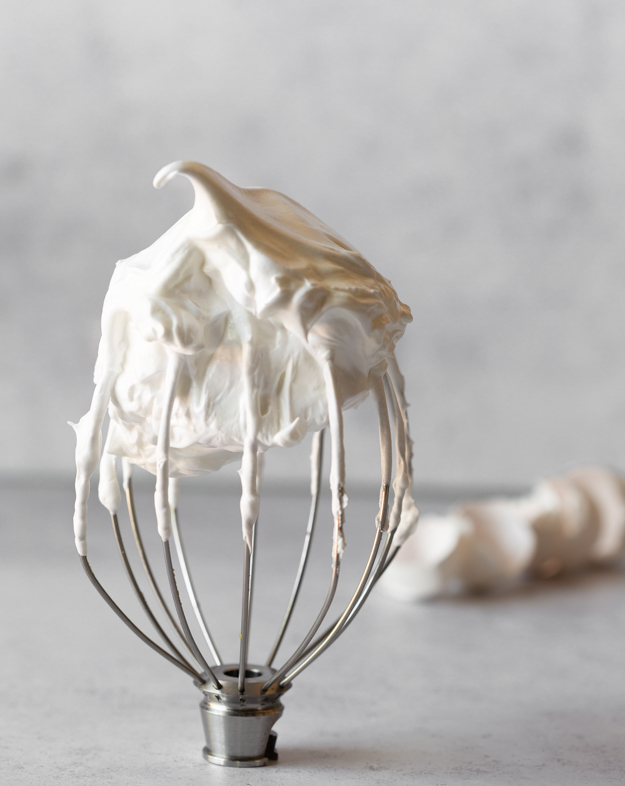
This is a no churn ice cream (meaning no ice cream machine needed). Start with egg whites and sugar, heat them to 165°F and then whip them into a, stiiff meringue.

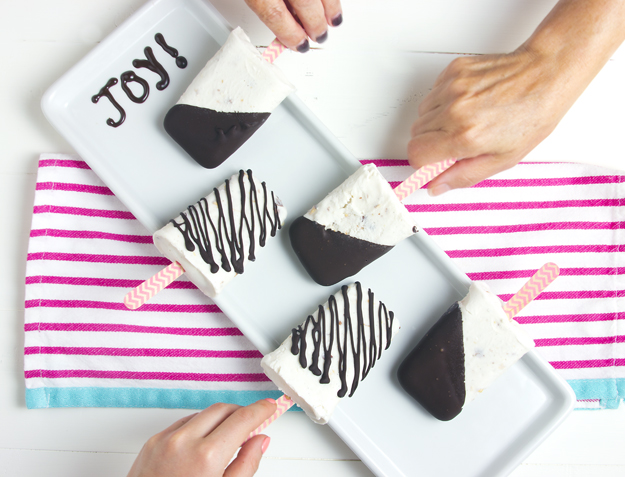
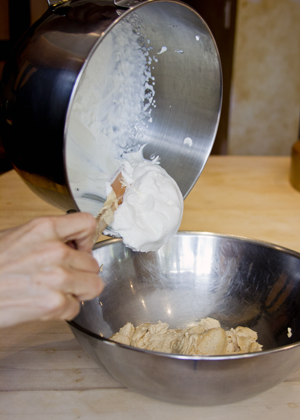
Whip some heavy cream with ground up freeze dried strawberries and then fold it into the meringue. Then pipe this mixture into popsicle molds. After years of buying and losing plastic popsicle molds, I finally invested in these. But any popsicle molds will work.

Pop them into the freezer for at least 24 hours.

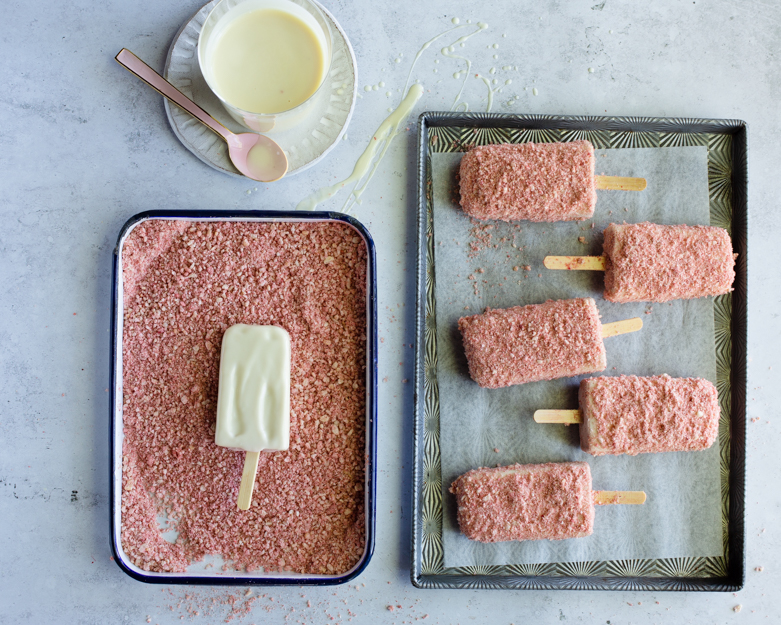
For dipping, mix melted white chocolate with a bit of coconut oil. That will give you a thin outer shell for the ice cream. Grind up some more freeze dried strawberries with Rice Krispies and then roll the chocolate coated bars in this. Crunch!!

Take a bite and relive your childhood!

Emergency Brownies

These brownies are the creation of Stella Parks. If you are a baker and don’t know who Stella is, make it your business to learn all about her. She will make you life so much sweeter. She is the resident pastry wizard over at seriouseats.com. She is also the author of the charming cookbook Bravetart; Iconic American Desserts.

Stella wanted to create a homemade boxed brownie mix, for those times when crisis strikes, and you need a brownie immediately, but don’t have time to make them from scratch. You know, like when you scrape your car on the wall of your parking garage, or when you find out that The Chew was cancelled, or you need something to snack on while binge-watching something this weekend.

All the dry ingredients are mixed together in the food processor. Then you stash the mix in an airtight jar for emergencies. When crisis strikes, preheat oven to 350°F (if only most solutions to life problems could be solved by preheating to 350!), add coffee, 2 eggs, and some vanilla extract and the batter is ready.

A jar of this mix would be the perfect hostess gift to bring with you the next time you are invited to a cottage for the weekend. If you are feeling extra generous, bring along a new baking pan and some parchment paper and impress your friends with your ability to perfectly line the baking pan.


My favourite baking pan is made from light coloured aluminum. Pyrex or glass pans are poor heat conductors, which means that they are slow to heat up and to cool down. This can cause brownies to overbake, because the pan is stays so hot for so long after you take it out of the oven that it continues to bake the brownies.

Stella is insistent on top quality ingredients. Spring for the good dark chocolate, 70% bittersweet. Make sure your cocoa powder is Dutch process. It is darker and higher in fat. She recommends Cacao Barry Extra Brute, and I concur. The secret ingredient is malted milk powder. It is a flavour bomb. Ovaltine is available at most supermarkets, or you can buy Hoosier Hills Farms online. Stella suggests boosting the chocolate flavour with a little instant espresso powder in the dry mix. I used that the first time I made them. The second time, I didn’t have any left, so I substituted some strong coffee for the water she calls for in the wet ingredients. Score! The coffee really bumped up the chocolate notes.
The second change I made to the recipe was to add some chopped up Skor bars, because toffee can soothe like no other flavour.


Click here to print recipe for Emergency Brownies.

Rhubarb Raspberry Meringue Tart

If you were at the McCrae Avenue Farm Boy store in Ottawa last Saturday afternoon, and heard a high pitched squeal, that was me. For the past month I have been watching my instagram feed blow up with images of rhubarb creations. I wanted in on the fun, but there no rhubarb anywhere in my neck of the woods.

To be clear, this was not local rhubarb. It’s still too early for that here. It was that pretty pink “forced” rhubarb, which I love way more, because of that gorgeous hue. If you follow me on instagram you may have caught my teaser video.

Cooked rhubarb can be a bit mushy in texture, so I like to combine it with another fruit. Strawberries are the classic pairing, but I went rogue and opted for raspberries.

The rhubarb needs to be cooked before it can go into the tart. Roasting helps retain that pretty shade of pink. It needs sugar to tame the its astringency and some orange zest to enhance the flavour and aroma.
I drained the roasted rhubarb to get rid of any excess liquid, so that my tart bottom would not get soggy. Mary Berry does not like soggy bottoms. The raspberries get mixed in after the rhubarb is roasted.

I used a deep dish 8 inch tart pan, with a removable bottom, for a dramatic presentation. You could also use a springform pan. For fun, because that’s what my life has come to, I doubled the recipe and also made 6 mini tarts.As has been the case lately, this recipe took more than one attempt to get it just right. But I am happy to report that I nailed it on the second try!

In my first attempt I pre-baked the crust for 20 minutes, added the filling, topped it with a simple French meringue and baked it for a further 30 minutes. The delicate raspberries turned to mush, the bottom crust was soggy and the meringue turned brown and was really tough and chewy. 

On the second attempt I pre-baked the crust for almost 35 minutes, so that it was totally golden brown and gorgeously flaky and crispy. To solve the meringue dilemma, I turned to pastry wizard “Bravetart ” (aka Stella Parks) and she pointed me in the direction of a Swiss meringue.  The main difference between the two types of meringue is that in a Swiss meringue, you heat the egg whites and sugar first, before whipping them. In a French meringue, there is no pre-heating before whipping. A Swiss meringue whips up fluffier and more stable than its French cousin and it is safe to eat without additional cooking time. If you are curious and want to learn more, Stella wrote a great piece on Serious Eats about it.
I topped the pre-baked tart shells with the rhubarb-raspberry filling, topped them with the Swiss meringue, and baked them for a brief 10 minutes just to give the meringue a golden kiss. The raspberries maintained their integrity and the meringue was pillowy soft, fluffy and SOOOOO delicious, like the very best homemade marshmallows.
Perfect with a cup of tea!

Click here to print recipe for Rhubarb-Raspberry Meringue Tart.


Apple Cheddar Hand Pies

Happy Pi Day (3.14/March 14). Pie making is not my strong suit. I have always struggled with uneven and cracking dough while rolling, and shrinking dough while baking. I’m much more comfortable whipping up a swiss meringue buttercream for a cake or a dozen salted caramel macarons.

It seems like every day is National Something or Other Day. There is actually a calendar to keep us informed. Did you know that April 14 is National Ex-Spouse Day? Maybe people celebrate it with a smash cake? Some food bloggers are super organized and maintain an editorial calendar to track and feature all these days. Sadly, I don’t fall into that category. But, Pi day is something I feel like I can get behind. Last year we celebrated with Spiced Lamb Hand Pies.

I have a thing for hand pies. They’re just so adorable and I feel no guilt about eating a tiny pie.

The pie dough for this recipe comes from pastry wizzard Stella Parks, over at Serious Eats. She calls for a 1:1 ratio of flour:butter, by weight. Most typical pastry dough recipes use more flour than butter. The extra butter in her dough creates a dough that’s pliable but strong, making cracks and tears a thing of the past.
It gets folded once, to create extra flaky layers.

The apple filling is classic and simple. Apples, brown sugar, cinnamon and a pinch of salt.
Sharp white cheddar makes a fine companion for apples, but use orange cheddar if that’s all you have.
I decided to get fancy and make a decorative braided border on my pies. Ever since I saw this Apricot Pie I wanted to try my hand at dough braiding. I still need a bit of practice, but it was fun to do. You can simply leave them plain and they’ll be equally delicious

Click here to get recipe for Cheddar Apple Hand Pies.

If you plan to make these, I highly recommend watching Stella’s video demonstrating how to make the dough.

Malted Milk Cookies with Milk Chocolate and Pecans

Malted Milk Cookies on chocolateI have a big jar of Hoosier Hill Farm malted milk powder in my pantry. Pastry wizard Stella Parks, told me to buy it. She promised me I’d find all kinds of uses for it.Malted Milk Cookies stackedI adore the flavour of malted milk. I made malted milk drumstick ice cream cones a few years ago. For the uninitiated, a little primer on malted milk powder. All malt products come from barley. The grain is sprouted, then dried and ground. During this procedure, starches are converted to sugar and the end result is a sweet, dried grain powder. This is the base for much of the beer that is produced today.

The ground powder is  also combined with wheat flour, milk powder, salt and sometimes sugar to create malted milk powder. Some brands, like Ovaltine also add cocoa powder to the mix. Malted milk powder has caramel, toasty, roasted notes. The addition of milk powder to the blend adds a creamy rich dairy note. It enhances most baked goods, complementing both vanilla and chocolate flavoured goods.hoosier and ovaltineI decided to add some to cookies. I started with a recipe for Chewy Malted Milk Chocolate Cookies from Yvonne Ruperti over at Serious Eats.mise en placeI added some toasted pecans and switched out the honey for Barley Malt Syrup, to really boost the malt flavour. Honey or malt syrup help keep these cookies chewy. I also added a tiny sprinkle of flaked sea salt on top before baking. I’m considering mixing in some chopped Malteasers next time I bake these.

Instead of milk chocolate chips, I chopped up some Lindt milk chocolate bars. I really like the big chunks of milk chocolate studded throughout these cookies. A mix of milk and white chocolate would also be good. I think dark chocolate might be too overpowering. adding milk chocolateUsing a portion scoop ensures that you get uniform cookies that are all baked at the same rate. I used a 1.5 ounce (3 tablespoons) sized scoop.scoopingGently flatten the cookies with the palm of your hand. I added a tiny sprinkle of flaked sea salt to the top of each cookie. It balances all the sweetness perfectly.

These are a hefty, chewy, delicious cookie. Hints of caramel and a unique toasty roasted flavour keep them from being too cloyingly sweet. They are quite fantastic frozen, as my family can attest to. broken cookies

Click here to print recipe for Malted Milk Cookies with Milk Chocolate and Pecans.

milk and cookies


Spicy Orecchiette with Tuna, Lemons, Peas and Crunchy Breadcrumb Topping

big bowl of pastaWhen I was growing up, my mom was at the culinary forefront of our neighbourhood. While other moms were making Jello, she was creating whipped jello molds, a raspberry jello and frozen raspberry concoction that had sour cream or whipped cream folded into it. Kind of looked like this. While other moms were making KD, my mom was making macaroni salad. Elbow macaroni, coated in mayonnaise, chopped celery, a squeeze of lemon juice, and, if she was feeling extra fancy, she’d toss in some diced red peppers.

Then, when I went to camp, I had my mind blown by what else you could do with boxed mac and cheese. On overnight camping trips, dinner was a delicacy known as  “Tripper’s Stew.” We’d be sent out into the woods to collect firewood. Some of the campers would actually use that time to hide and smoke cigarettes! With the campfire blazing we’d boil up a few boxes of Kraft Dinner. Once the noodles were cooked, in went the powdered cheese, and a few cans of tuna, peas and corn. It was my favourite camp meal.

When I saw Serious Eats contributor Lauren Rothman’s recipe for Spicy Orecchiette With Tuna, Peas, and Lemon, I was instantly transported back to my summer camp days. This is a more grownup version of Tripper’s Stew. It uses tuna packed in olive oil, (Italian if you can find it), rather than the dry water-packed tuna of my childhood. Red pepper flakes and garlic give it some zip and lemon zest wakes up all the flavours. I adapted Lauren’s recipe by adding a toasted lemon breadcrumb topping to give the dish a welcome crunch. My final adaptation was to add some coarsely grated Parmesan cheese. Please don’t yell at me and tell me that pasta dishes containing fish are not topped with cheese. I already know the Italian rules, I just don’t care. It’s delicious with cheese.3 stacked bowlsgather everything from the pantryThe breadcrumbs take a bit of extra time, but I think that the textural contrast they make to the chewy pasta, makes them worth the additional effort. making bread crumbs 1making bread crumbs 2crispy golden crumbsI made this last week when I was alone, so I ate it for dinner, 3 nights in a row. It tasted better each night. I just warmed it in the microwave and then tossed in grated cheese to melt.

Click here to print recipe for Spicy Orichiette with Tuna, Lemons, Peas and Crunchy Breadcrumb Topping.

close up of pasta

Almond Joysicles…If this is vegan, sign me up!

hands 1 I intended to blog about peach raspberry sorbet this week but somehow, here I am telling you all about Almond Joysicles. It all started with a little culinary challenge. We were having 12 friends up to the cottage for the weekend and I was in charge of Friday night dinner and dessert. (Everyone is assigned a different meal). Most of these friends keep strictly kosher and since I was making Miami Ribs, dessert had to be dairy free.

I must confess that I am always thrown off balance when challenged to bake dairy free desserts.  I don’t like to use butter or milk substitutes so I took the fresh fruit sorbet route. I settled on a tangy lemon sorbet and a peach-raspberry combo. While surfing for inspiration, I came across an article on seriouseats.com titled, “How to make Great Vegan Ice Cream”. Vegan Ice cream?? Isn’t that an oxymoron? Ordinarily, my visceral reaction to the word vegan causes me to recoil.

But, as I read through the article and recipe, I discovered that it did not contain any ersatz dairy products, but utilized instead, the dynamic duo of coconut milk and coconut cream.  With this double coconut whammy, this ice cream would be high in fat, which means lots of flavour.

I whipped up a batch of this along with the peach raspberry and the lemon. Most requested flavour and winner by a long shot was the coconut sorbet.  If this is vegan, sign me up!in cone 2I was telling my daughter about these and she suggested I freeze them in Popsicle molds. As I whipped up second batch, I upped the fun factor, and mixed in some chopped salted almonds, toasted coconut and bittersweet chocolate chunks. Outstanding! Then, my girlfriend Marla, who is one of the most intelligent people I know, suggested, dipping them in melted bittersweet chocolate. I know… brilliant, right?3 blue 625b sq

Click here to print recipe for Almond Joysicles.


Three Pea Coconut Rice and Chicken

in pan 625 sq 1Just did a quick check and discovered that coconut has been featured 15 times on my blog.  To  the coconut haters out there, “I’m sorry”, and to the rest of you lovely folks I say, “you’re welcome”.

When I saw this dish on serious eats last month I bookmarked it immediately. This recipe checked all the boxes for me; one pot complete dinner, flavourful moist chicken thighs, coconut milk and jasmine rice. Since we are trying to limit our intake of white carbs, white rice has been scarce around here lately. But every so often, I get a craving for Basmati or Jasmine rice. The nutty, popcorny aroma that envelopes my kitchen makes me believe that all is right with the world and that I am very loved.

Yasmin Fahr, creator of this recipe asked “Why I don’t cook everything in coconut milk is beyond me.” Well Yasmin, in answer to your question, I would bathe in coconut milk if I could, but if I cooked everything in it, I would surely weigh 200 pounds. The sweet luxurious coconut milk in this recipe  is saved from a cloying fate by the addition of cumin and a strong hint of cayenne. The finishing touches of lime and cilantro produces a dinner that packs a wallop of flavour.

You must exercise great patience when browning the chicken thighs. Put the pan on high, add the thighs, skin down and leave them alone for a good 8-10 minutes. The brown caramelized bits and pieces of chicken that get stuck to the pan, known in French as “fond” should not be thrown out.  The chicken stock and coconut milk  will help you to to scrape up all those flavourful dark bits. They will dissolve and become the foundation for the luxurious sauce that the chicken and rice are cooked in.browning chicken

zesting limesdicing onionsThe original recipe called for adding snow peas during the last few minutes of cooking for some crunch and gorgeous colour. I went with a triple pea crunch and added snow peas, sugar snaps and some frozen green peas, because that’s how I was raised. I come from a home where more is better. When my mom made banana bread, if the recipe called for 3 bananas, my mom added 5.  It produced a loaf with the heft of a brick, but heck, that’s just  how mom rolled. sugar snaps

Click here to print recipe for Three Pea Coconut Rice and Chicken.

Challah Monkey Bread and Goldilocks

Shabbat dinner at our house just got a whole bunch more fun this week. piece removed 2If you have never heard of monkey bread, let me enlighten you. Essentially it is a yeast dough that is rolled into small balls, dipped in melted butter, then rolled in sugar and cinnamon and layered in a Bundt pan to rise. As it spends time in the oven, the little balls fuse together like  pieces of an interlocking puzzle-cake. Once it is baked, everyone pulls off the little balls of delicious dough with their hands and pops them in their mouth. As much fun to make as it is to eat. More fun than a barrel of monkeys!

How it got the name, “monkey bread” is up for debate. Some say that since monkeys are known for pulling at everything, when humans pull the warm butter drenched, cinnamon and sugar coated balls of baked dough off the finished loaf, we resemble a bunch of monkeys. Others have suggested that the way it is eaten, torn, piece by piece off the loaf resembles how monkeys pick at their food. Whatever the explanation, monkey bread is irresistible.

When I opened my inbox earlier this month and saw that Alexandra Penfold at Serious Eats was struck by the genius idea to create monkey bread from challah dough, I knew I had to try it. I make challah every week. My favourite challah dough is made with 2/3 all-purpose white flour and 1/3 whole wheat flour. Alexandra said that bread flour is best for making this version, so I followed her recipe. My mom was visiting me this week, so we made it together. I made the dough on Thursday and stuck it in the fridge for a slow overnight rise. You can make this all in one day if you like, but I find it easier to make the dough a day or two ahead of time and let it sit in the fridge until the day I want to serve it.

The dough gets divided into 64 pieces and then each piece is rolled into a ball. My mom has lots of patience for these kinds of projects. It would also be a perfect thing to do with kids! My daughter wants to make it with me when she comes to visit later this month.dividing dough

rolling into ballsThen each little dough ball is plunged into a bath of warm melted butter, followed by a dip into a tub of brown sugar and cinnamon.dipping in butter and sugar-cinnamonThe challah dough balls are then layered in a greased bundt pan. ready for oven 2After a 90 minute rise, the bread is ready for the oven. Once baked, it needs to cool for a bit before you can turn it out of the pan and cover it in cinnamon bun type of icing.icing

close up of insideThe monkey bread elicited lots of oohs and aaahs as I brought it to the table. We made the blessing on the challah monkey bread and then everyone tore into it. If you envision the best part of a cinnamon bun, that gooey center bit of dough, then you will understand the genius behind monkey bread. Each piece of monkey bread that you rip off is coated in that perfect sticky goo! After dinner, I left the remainder of the bread on the counter. It was gone by morning. I suspect we may have been visited by a barrel of monkeys in the middle of the night.all icedThrilled as I was by the results, I was a little disappointed that the finished bread was a bit squat, not tall and majestic as I had hoped. I suspected that Alexandra used a smaller sized Bundt pan. I used a standard 12 cup Bundt pan.  So, I did a little research and discovered that there is a smaller size Bundt pan, a 6 cup size. I ordered the smaller one and made a second challah monkey bread.

I used my challah dough in this version. The smaller pan filled up quite nicely.small pan ready for ovenAs the bread was baking, and filling the house with the insanely delicious aroma of cinnamon and brown sugar, I decided to take a peek into the oven. Ooops!pan too smallI failed to take into account that the dough would continue to rise. I felt like Goldilocks in the Three bears story. The first pan was too big for the dough. The second pan was too small. Then I emailed Alexandra to find out what size pan she used. Apparently there is a 9 inch silicone Bundt pan that holds 10 cups… just right!

The overflowing disaster monkey bread disapppeared just as quickly as the first one. The feedback I got was that everyone preferred the softer texture of the dough made from the all purpose flour and whole wheat flour combo dough, over the chewier texture from the bread flour dough. I did briefly consider ordering the 9 inch pan and remaking it a third time so my photo would be perfect for this post. My family told me that as much as they loved the Challah Monkey Bread, a third one in the span of one week was just too much fun for them to handle.

Click here to print recipe for Challah Monkey Bread.

If you are curious and would like to try Alexandra’s bread flour Challah Monkey Dough, click here.

Happy Birthday with Chocolate and Peanut Butter Mousse Cake

square 625My baby recently turned 20! Kind of scary and yet also awesome at the same time to realize that I am no longer the parent of teenage children. I have made the exact same Chocolate Cake for him for the past 19 years. To say that he is a child that does not handle change well is putting it mildly. For the first 3 years of his life he cried every year on his birthday when we sang happy birthday to him. The more he cried, the louder his older brother and sister would sing. Whether it was to drown out his crying or antagonize him even further, I am not quite sure, but I have my suspicions!

Thankfully, for the next several years, the crying stopped but he would still get sad on his birthday. We just learned to keep things low key. Finally, on his 9th birthday he said he wanted to have a party with friends, balloons and streamers. I was thrilled and we went all out with the decorations. I even suggested that perhaps we make a special cake, maybe a train cake, or a swimming pool cake or even a rocket ship cake, like I had made for his brother and sister in past years.Train cake

swimming pool cake

rocketship cakeThose suggestions were met with a stony stare and then he informed me that he would like his regular chocolate cake with chocolate icing please. Hey, at least he said please! So as the saying goes, “If it ain’t broke, don’t fix it.” So, I continued to make his favourite cake every year. However, as a food blogger, I have found this to be quite frustrating. I needed new material to blog about! 

When I saw this photo of Chocolate Cake with Peanut Butter Mousse Filling on Serious Eats, I became transfixed. I could not stop thinking about it and began having serious cravings. This looked like the consummate birthday cake for my son. He loves the combo of chocolate and peanut butter. I showed him a picture of the cake and asked if this could be his birthday cake this year. He shocked me by saying, sure!Serious Eats-peanut-butter-mousse-chocolate-cakeI adapted the original recipe in several ways. The first thing I did was double the cake recipe. This chocolate cake recipe uses both bittersweet chocolate and unsweetened cocoa powder. Buttermilk and coffee round out the flavours to produce a fantastic moist, rich and fudgy cake. I wanted more cake in relation to the peanut butter mousse filling.pouring coffee on chocolatebuttermilk3 bowls 2 The peanut butter mousse filling gets a bit of tang from cream cheese and then the whole thing is lightened with some whipped cream.

mousse 1whipped creamadding whipped creamfolding cream into peanut butter mixturespreading pb mousseThe original recipe called for a ganache frosting, but I swapped in my favourite Chocolate Coffee Buttercream instead. The slight bitterness of the coffee was a great counterpoint for the sweet cake.spreading buttercream The final change I made was adding a dusting of peanut praline to the outside of the cake. I liked the textural crunch it added to the final bite. Without the praline I found it was just too many smooth textures in your mouth from the mousse and the buttercream.peanut praline large

piping buttercream

putting on reeses pieces

Click here to print recipe for Chocolate and Peanut Butter Mousse Cake

whole cake

slice on plate

Brown Sugar Roasted Tomato Soup

snow 2

This is a photo of my backyard. Last week 40 centimeters of snow fell on our city and yesterday, to add insult to injury, an additional 25 centimeters piled up! That’s over 2 feet of snow for those of you not familiar with the metric system. In any language, it’s a sh#@load of snow!

Just In case there is any doubt about  where I fall on the love-hate spectrum of winter, I reside on the far right. I despise winter!  However, my oldest son recently became certified to teach skiing, so in the generous spirit of the season, I am thrilled for him and all the skiers out there.

Last week, I promised no more cookie postings in December. However, I did not promise no more sugar. I couldn’t go cold turkey without sugar, so there is just a little bit of brown sugar in the following recipe. I felt that I needed to offer you a warm buffer against the nastiness that is winter.

A big bowl of steaming hot tomato soup and a grilled cheese sandwich are the consummate comfort lunchtime meal for many a school age child. That being said, my childhood lunchtime never included this classic tummy warmer.

When I was growing up, my sisters and I came home from school everyday for lunch. Our public school was a short 8-minute walk from our house. The walk could be done in 7 minutes if we took the shortcut, but I seem to recall that we had to pass by a scary house if we took it, so we toughed out the extra minute.  We always watched the Flintstones at lunchtime and usually ate Kraft Dinner or a Swanson’s Chicken Pot Pie or a T.V. Dinner. Hey, it was the 70’s and we were a modern family!

I never really developed a taste for tomato soup until recently. I tried Campbell’s tomato soup in university and didn’t particularly care for it. If I needed comfort, my go-to soup was my mom’s chicken soup or, in a pinch, Campbell’s Chicken Noodle.

Lately, I have been noticing tomato soup popping up on restaurant menus and on all the food web sites and magazines. The world is a darker and scarier place now and I suppose tomato soup is the quintessential reminder of those simpler, gentler times.

I discovered this Brown Sugar Roasted Tomato Soup on www.seriouseats.com. I get an e-mail everyday from them. Serious Eats is a website focused on celebrating and sharing food enthusiasm through blogs, video and online community. They are passionate about food, informative, inclusive and, most importantly, they make me laugh.

Instead of serving this soup with the traditional grilled cheese sandwich, it gets a topping of cheddar cheese croutons. Brilliant, and quite delicious, this may become your new favourite go to comfort food when your world seems a little too treacherous and uncertain to handle.

ready to eat 1

Canned tomatoes are drained and then topped with a little brown sugar to enhance their natural sweetness. A quick roasting in the oven and the tomatoes and brown sugar caramelize into sweet deliciousness.

tomatoes ready for roasting

Finely grated cheddar cheese and olive oil get massaged into some whole grain bread cubes and then the whole lot gets tossed into a hot oven.

grating cheddar

croutons ready for toasting 2

toasted croutons

Click here to print recipe for Brown Sugar Roasted Tomato Soup.

ready to eat 4