Tag Archives: Stella Parks

No Churn Malted Chocolate Swirl Ice Cream

No churn ice cream means that no ice cream machine is required. You just mix all the ingredients together, freeze, and voila, creamy, smooth, luscious ice cream. How is that possible you ask?

When you make ice cream the traditional way, in an ice cream machine, the action of the paddle, churning the mixture, is actually incorporating air into the ice cream, so you end up with a light and fluffy finished product.

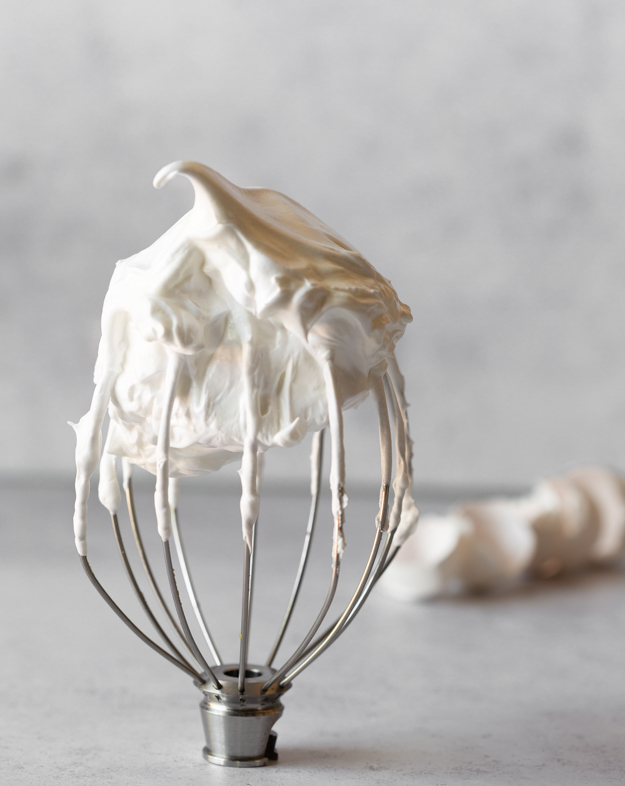
The secret to no churn ice cream is two key ingredients. The first is whipped cream. You whip the cream before mixing it into the other ingredients. The act of whipping causes the volume to increase and incorporates air into the cream. Whipping the cream replaces the work of the ice cream machine.

The second key ingredient is sweetened condensed milk which has a very high sugar content. Sugar lowers the freezing point and prevents the ice cream from becoming rock hard. The “condensed” in sweetened condensed milk, means that the milk has been cooked down to reduce the water content. Less water means that you will not form ice crystals. So you end up with a smooth and velvety ice cream.

But sweetened condensed milk is a mixed blessing. While the high sugar content keeps it creamy, it can also produce some very queasily sweet ice cream. The solution, I have discovered, it to be strategic about the flavours that you incorporate into it. I would not add crushed Oreos to make Cookies and Cream, or fudge and marshmallows to make Rocky Road ice cream.

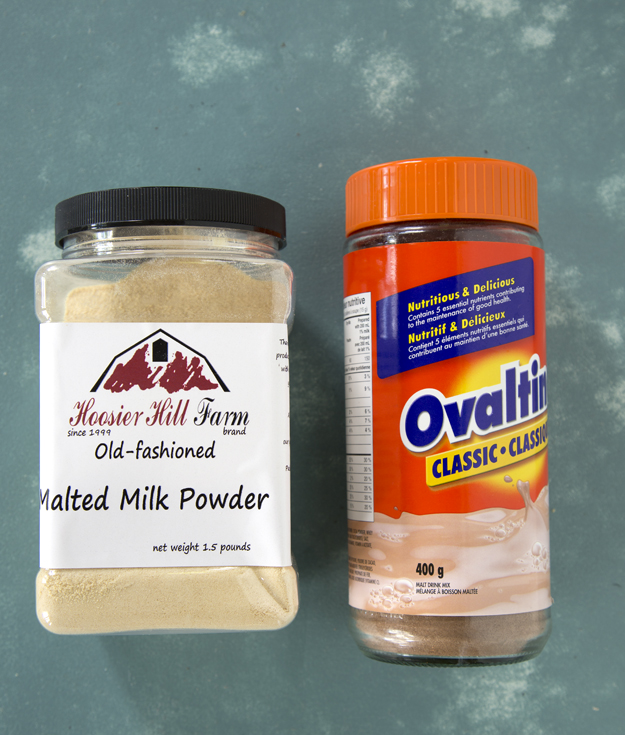
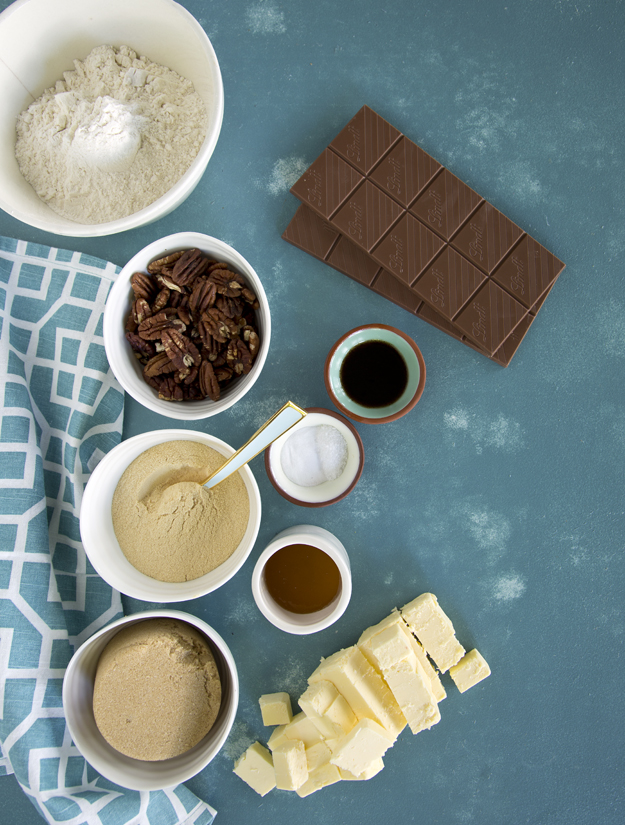
I added malted milk powder to my no churn ice cream. Stella Parks calls malted milk powder the umami bomb of desserts. Malted milk powder contains barley malt, wheat flour, milk powder, and salt. The barley malt gives malted milk powder a roasted, toasty earthy flavour. The salt aids in tempering the sweetness, and enhancing all the other flavours in whatever it is combined with.

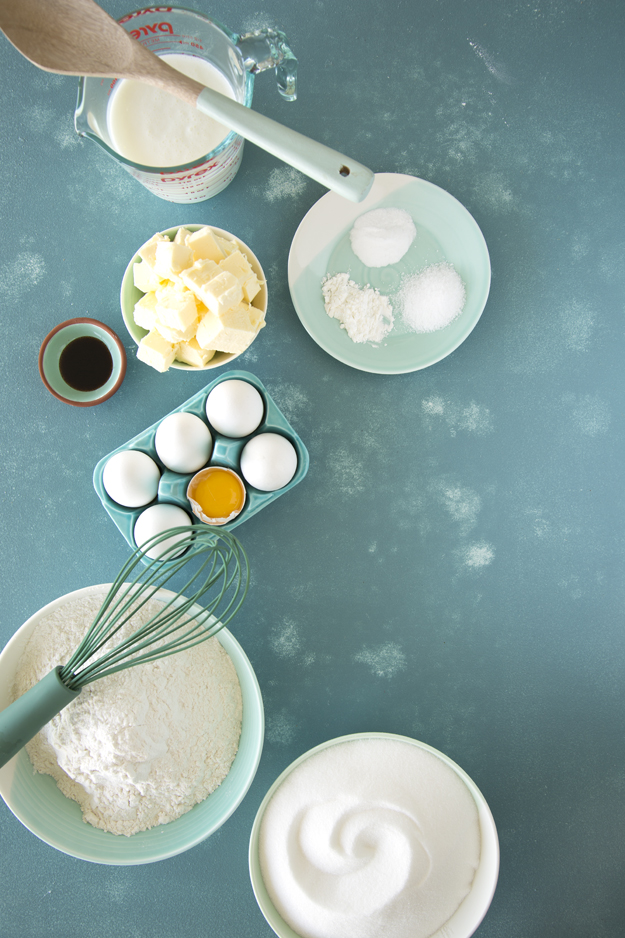
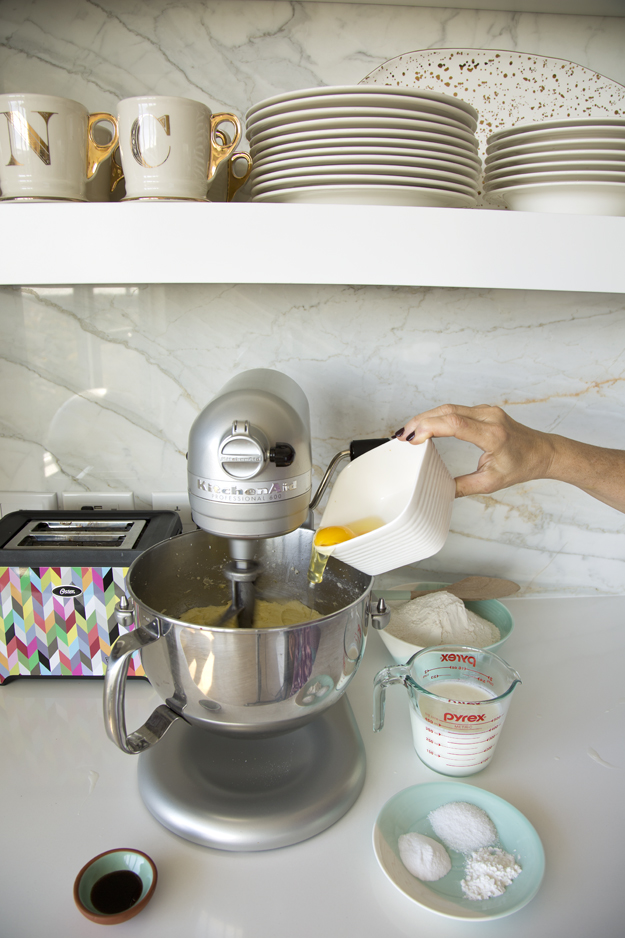
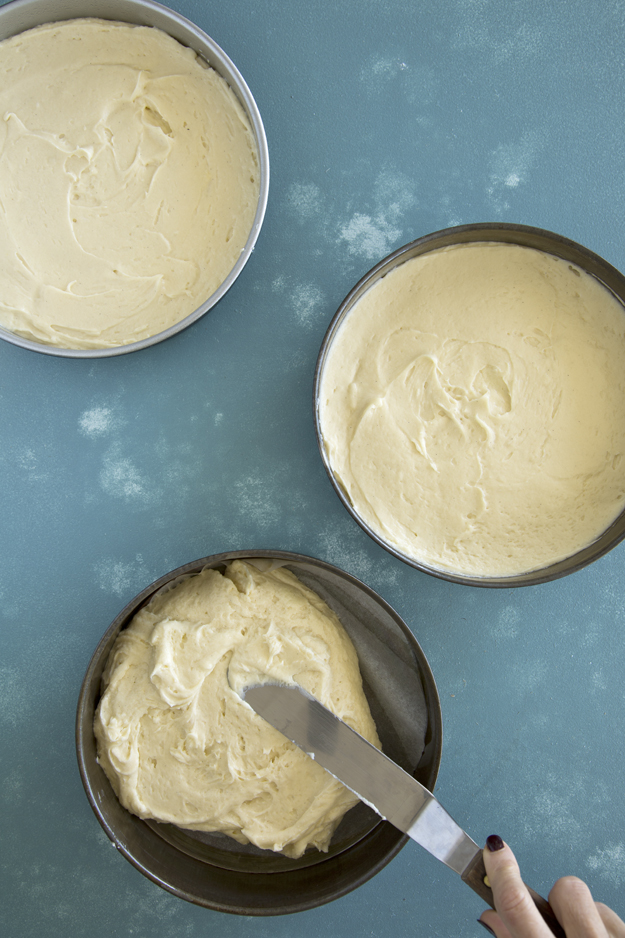
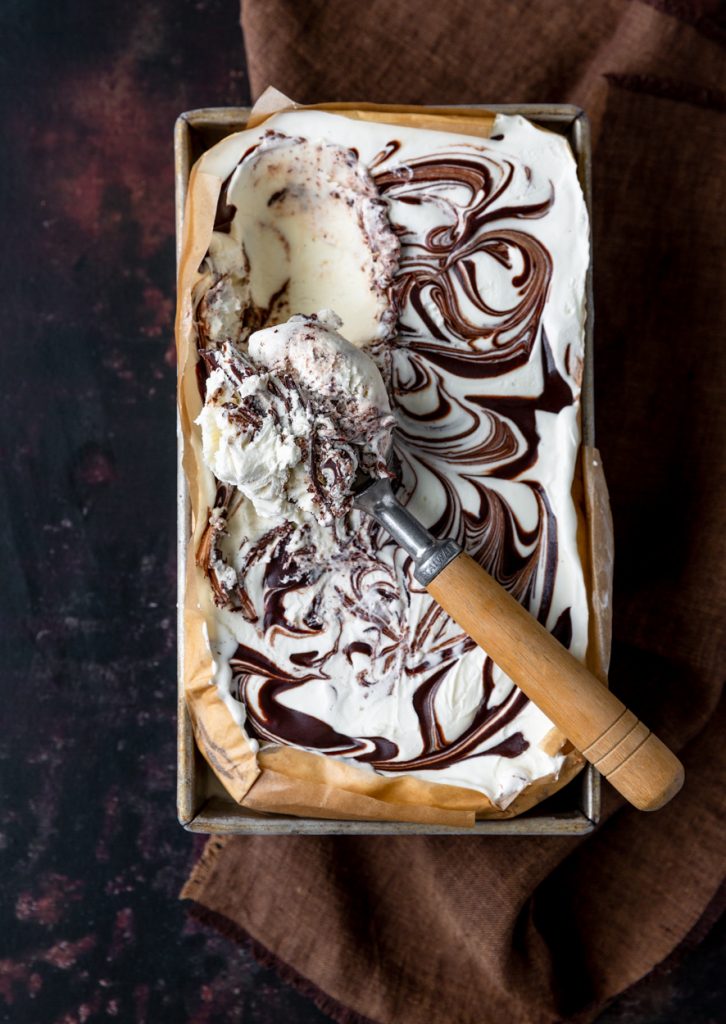
Malted milk powder is mixed with some heated 1% milk to dissolve it. That gets cooled down while you whip the cream. Mix the sweetened condensed milk with the malted milk mixture and fold in the whipped cream, some vanilla bean paste and a pinch of salt. Pour that into a 9x 5 inch loaf pan.

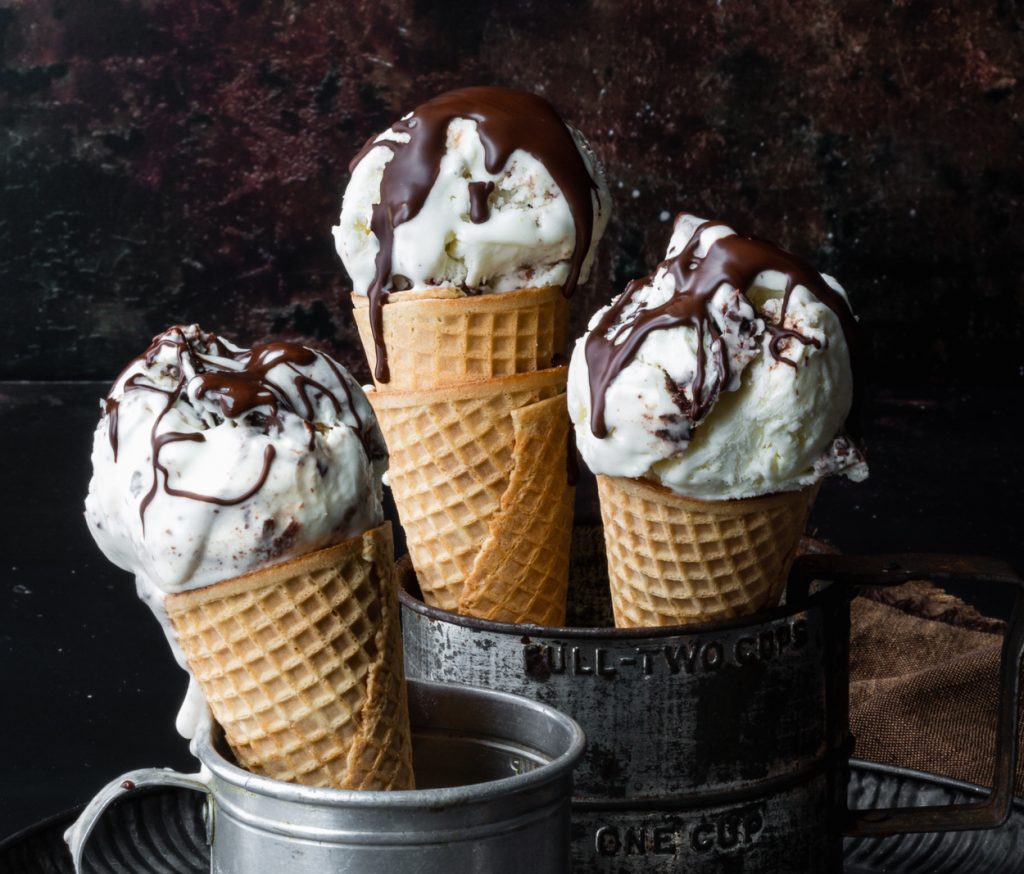
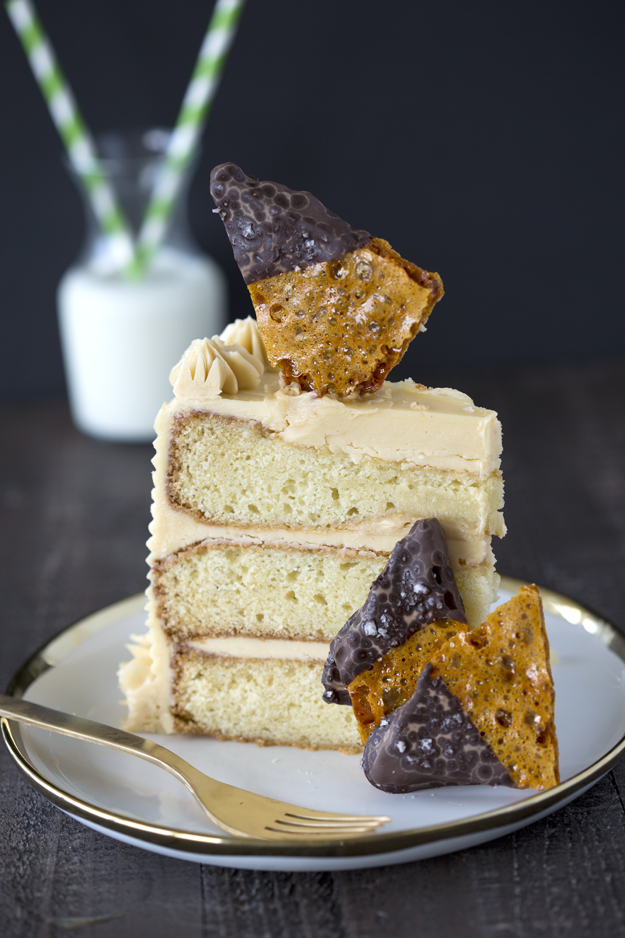
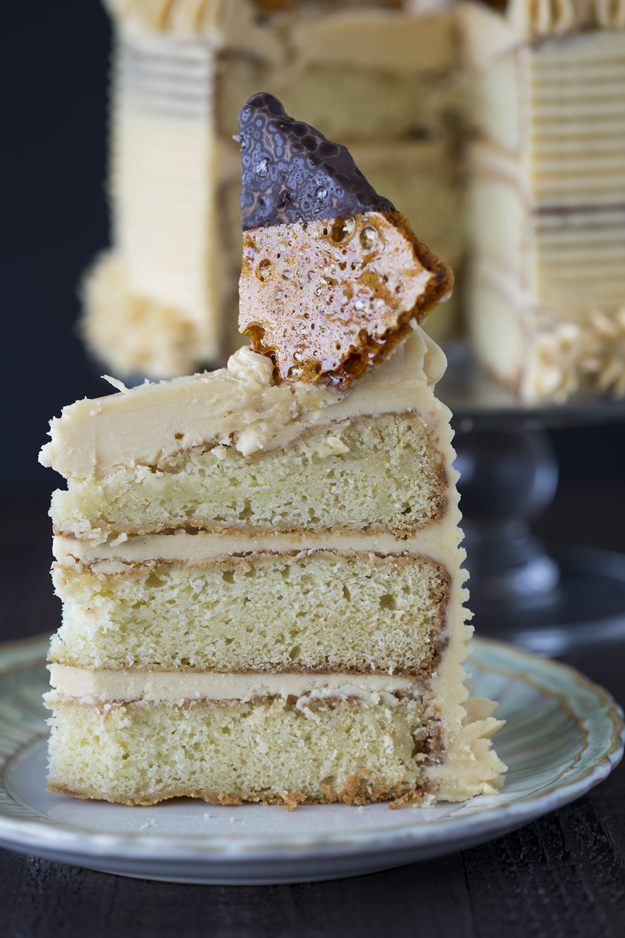
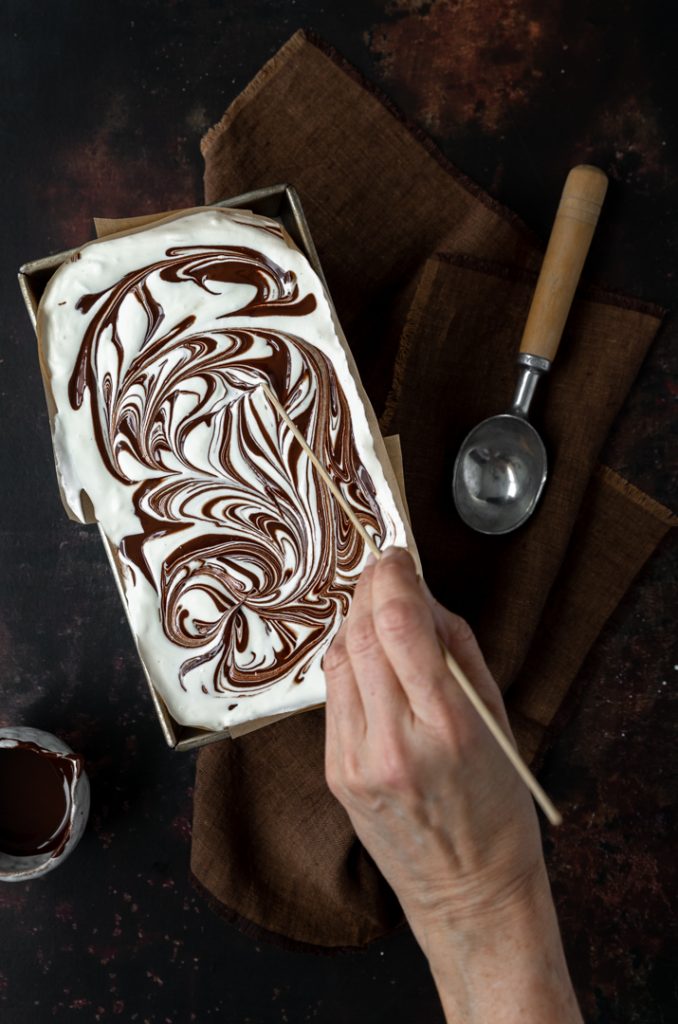
I decided to add a chocolate swirl to my ice cream. A touch of coconut oil added to the melted chocolate keeps it from becoming too brittle when it freezes. Put the ice cream in the freezer for at least 5 hours before scooping.

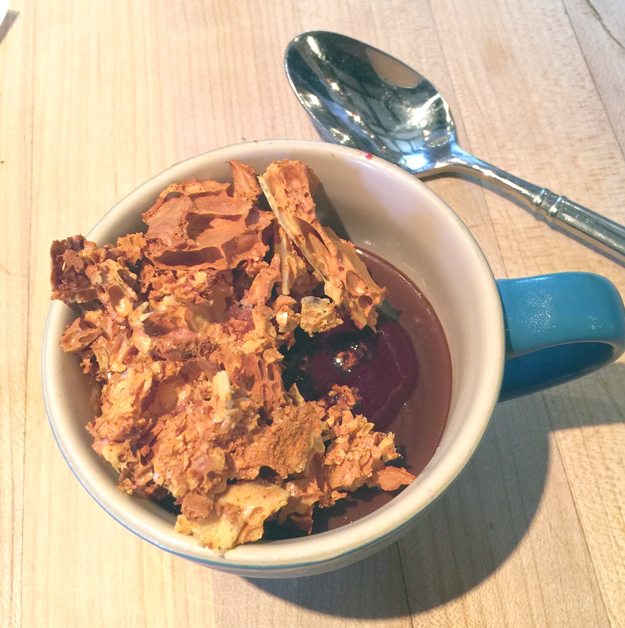
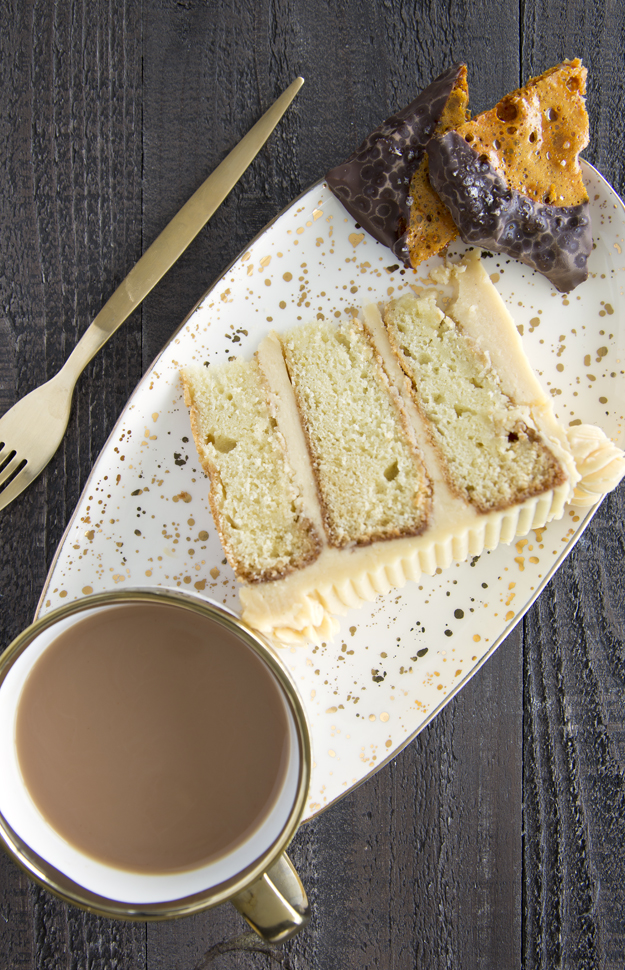
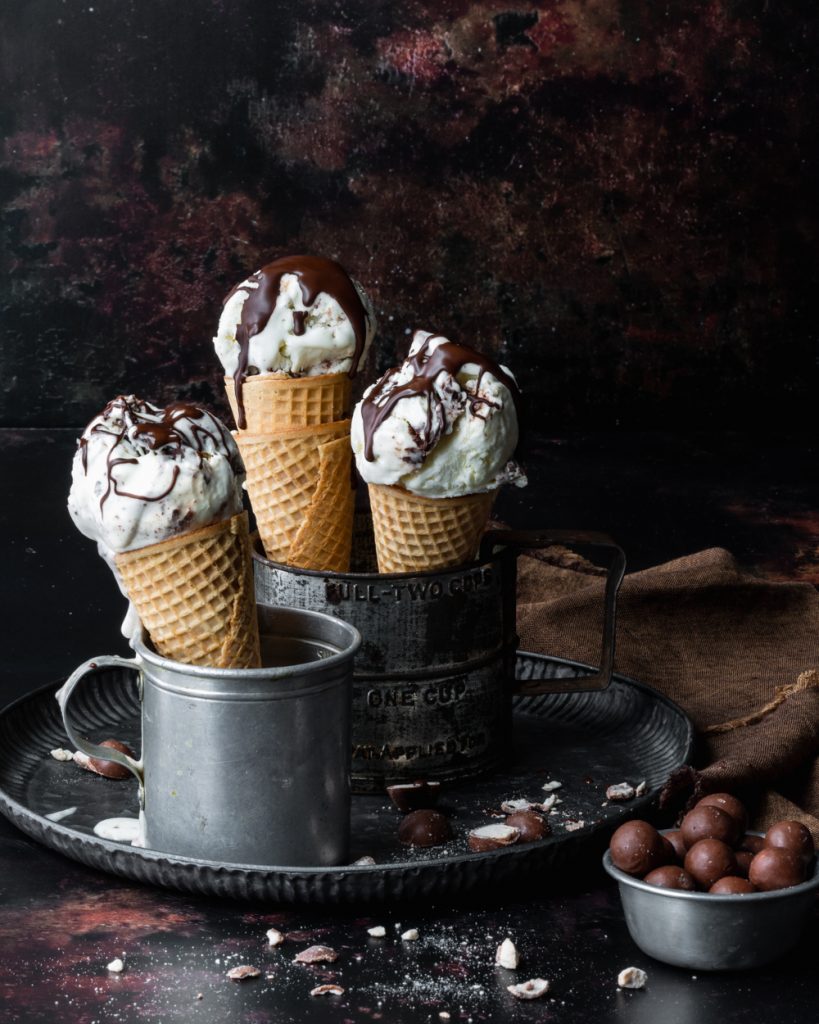
Creamy, rich and smooth, with a real toasty depth of flavour, this is ice cream for grownups. If I weren’t socially distancing this summer, I would invite my friend Mrs Grizzly over for a few scoops. She is a malted milk aficionado.

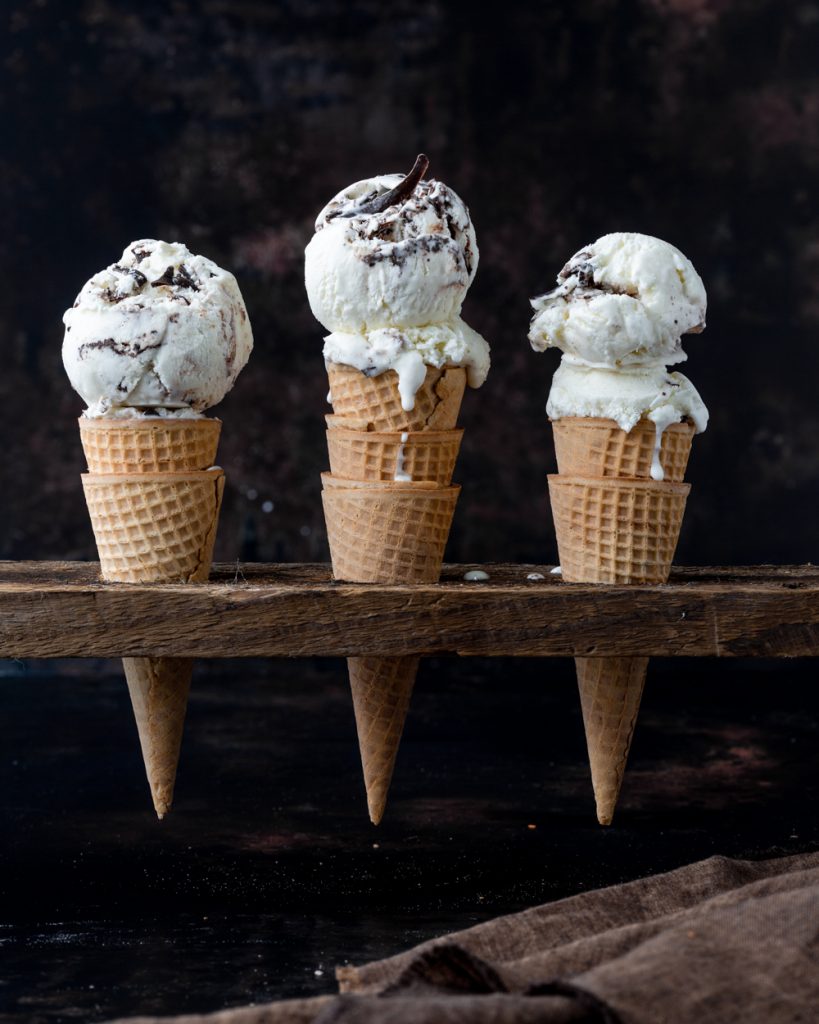
Feel free to drizzle a little extra melted chocolate on top. I don’t think anyone will complain.

Baked Apple Cider Doughnuts

My relationship with doughnuts is a complicated one. I have memories of painful childhood dentist visits followed by a trip to Mr. Donut for a chocolate glazed, as a reward. As a young adult, doughnuts filled an emotional void for me. I was a new mom, pregnant with my second child, and we had just moved to a new city. I missed my family and friends, and felt very lonely. After a visit to the doctor, to check on the progress of my pregnancy (and weight gain), I’d stop by Lady Jane Donuts for a chocolate coconut cake doughnut, to drown my sorrows.

Eventually I replaced doughnuts with friends and it was many years before I indulged again. Doughnuts are really best eaten within a few hours of making them which is why I like making them myself. There are two main types of doughnuts, cake and yeast. Yeast style doughnuts, obviously rely on yeast to do the leavening work. They have a more open crumb structure and a chewier texture. Cake donuts, on the other hand, rely on baking powder and/or baking soda to do the heavy lifting. They result in a donut with a tighter crumb structure, and are denser and more crumbly than yeast donuts. Cake doughnuts are my favourite.

Most Apple Cider Doughnuts suffer from a weak apple flavour. They’re heavily flavoured with cinnamon and nutmeg and light on the apple. I wanted to recreate that juicy apple flavour that you get with the first bite of a crisp apple. I learned how to accomplish this from Stella Park at serious eats.com. The secret, it seems, is freeze dried apples pulverized with sugar into a sweet-tart powder for dredging the doughnuts with.

Freeze dried fruit is not the same as dried fruit. Dried fruit is dehydrated and only about 75% of the water is removed. With freeze-dried, the fruit is placed into a vacuum chamber where the temperature is well-below freezing and 99% of the moisture can be removed from the fruit.

A few years ago, I discovered that not all doughnuts need to be fried. There is such a thing as baked doughnuts. They make special doughnut pans, but I decided to use my mini Bundt pans, because they’re a little bit fancy, and that’s how we roll around here at saltandserenity!

The doughnut batter can be made in one bowl and you don’t even need a stand mixer. These are so fast and easy to make.

You’ll have leftover apple cinnamon sugar which keeps forever, in an airtight jar. I have been mixing in a spoonful with my oatmeal every morning and sprinkling it on buttered toast. YUM.

Strawberry Shortcake Ice Cream Bars

If you’re of a certain age, you may remember a time when ice cream treats were sold from a truck that travelled around to different neighbourhoods. That ringing bell would set off an avalanche of kids, running from their houses.

My favourite was the Strawberry Shortcake Ice Cream Bar. I loved how the crunch of the outside coating gave way to the soft fluffy ice cream middle. I recently had a craving for them and bought a box at the supermarket. It was so disappointing. It tasted nothing like my memory. It was too sweet and really artificial tasting. Nostalgia is often like that.

Luckily for us, Stella Parks over at seriouseats has made it her mission to turn our childhood memories into a reality that never disappoints.

In order to get an intense strawberry flavour, start with freeze-dried strawberries instead of fresh ones. Fresh strawberries have too much water, and when you freeze them into an ice cream base, it becomes icy, not creamy and smooth.

This is a no churn ice cream (meaning no ice cream machine needed). Start with egg whites and sugar, heat them to 165°F and then whip them into a, stiiff meringue.

Whip some heavy cream with ground up freeze dried strawberries and then fold it into the meringue. Then pipe this mixture into popsicle molds. After years of buying and losing plastic popsicle molds, I finally invested in these. But any popsicle molds will work.

Pop them into the freezer for at least 24 hours.

For dipping, mix melted white chocolate with a bit of coconut oil. That will give you a thin outer shell for the ice cream. Grind up some more freeze dried strawberries with Rice Krispies and then roll the chocolate coated bars in this. Crunch!!

Take a bite and relive your childhood!

Blood Orange Meringue Tart

One of the most beautiful ways to showcase the glorious blood orange, is to make a curd. You can use the curd to fill a pie or tart, spread it between two cookies, sandwich it between cake layers, swirl it into ice cream, stuff it into donuts or cupcakes…. you get the idea. Curd is glorious and versatile.

The juice and zest of about a dozen blood oranges are packed into this dessert. Start by reducing 2 cups of juice in half. You want the tart to pack an orange punch! The curd can chill while you make the crust. For the meringue topping I looked to Stella Parks for advice. Her swiss meringue is foolproof. It whips up into a perfectly light, yet stable topping.
You could, of course, blanket the entire top with meringue, but I didn’t want to cover all that gorgeous orange curd, so I left some spots bare.

Leave the meringue snowy white or torch it for toasted goodness.

Click here to print recipe for Blood Orange Meringue Tart.

Maple Crunch Birthday Cake

What I love best about my birthday is making my own cake. I spend weeks before the actual day pondering flavours and textures. Buttercream is not optional, it is a requirement. While some people might think it’s a little sad to have to bake your own birthday cake, I disagree. I get exactly what I want, and get so much joy creating it.

If you’re looking for a one bowl “dump and stir” cake, this is not the post for you. My birthday cake  has many elements and usually takes the better part of a day.

This year’s cake is a “virtual collaboration” between Anna Olson, Rose Levy Beranbaum and me! I started with Anna’s Classic Vanilla Birthday Cake, which is a perfect canvas for everything. I had my heart set on a maple cake. I thought it would be a good idea to substitute maple sugar for the granulated sugar in the recipe to really intensify the maple flavour. I was wrong. I have never baked with maple sugar before, but the texture is different from that of traditional granulated sugar, and it resulted in a crumbly cake that tasted really strange. When I remade it with granulated sugar, it turned out perfectly. Moist and light with a beautiful tender crumb.

Next I moved onto the buttercream. I decided to make Rose Levy Beranbaum’s Neoclassic Buttercream, which is basically a French buttercream that uses egg yolks and butter. This is not a buttercream for the faint of heart. We’re not fooling around here . This is straight-up rich and luxurious. Rose suggests that you can replace the corn syrup for maple syrup and that’s what I did. Rich and silky , practically exploding with intense maple flavour.
 
The final component of my cake is the addition of a layer of crunch. I love a cake that combines texture. I crumbled up some Dad’s Oatmeal Cookies (because maple and oatmeal!!!!) and mixed them with malted milk powder (the umami bomb of the baking world, as Stella Parks is fond of saying), a bit of sugar, some melted butter and a pinch of salt.
Mix the crumb mixture until clumps form. Bake and cool. The finished crumble is crunchy and very addictive. It reminds me of the clumps in granola. The recipe makes more than you will need, so there is some leftover for snacking!

Click here to print recipe for Maple Crunch Birthday Cake.

Celebrating Blog Post #500 – Apple Cinnamon Ginger Crunch Cake


On May 19 2009, I wrote my first blog post . Today marks my 500th! I never set out to write a blog. It happened accidentally. I joined an online group who were baking their way through Peter Reinhart’s tome, “The Bread Baker’s Apprentice”. I was hoping to increase my bread baking skills beyond the simple challah I baked each Friday.

The premise of the group was that we would work our way through the book, alphabetically, from Anadama Bread to Whole Wheat , one loaf each week, for 43 weeks. Group members would share their experiences in a Google group. I noticed that some members were chronicling their journey via blogging. It seemed like a cool idea, so I stayed up all night and figured out, with the help of wordpress.com, how to do it.

Here is a shot from that first post. My bread turned out perfectly, but clearly my photography skills needed work.
There were 212 of us, from all over the world, who started the challenge together. Only 12 of us actually finished! I loved the whole process! At heart, I think I am a born storyteller, so blogging really spoke to my soul. I love to create, so baking, taking photos of the process and telling stories about it really fed my creative needs.

After I finished my final loaf, I just kept on blogging. Along the way, I bought a better camera, took some online classes in food writing, and photography and attended several workshops on food styling and photography. One of the best investments I ever made was purchasing this online course from Rachel Korinek, of Two Loves Studio. She is an amazing teacher and extremely generous with her time. I have also been inspired by the effervescent Bea Lubas. Her ability to tell stories is unparalleled.

Another outstanding teacher is Joanie Simon of The Bite Shop. Her youtube videos on food photography, released every Thursday, are the highlight of my week. I have learned so many tips and techniques from her. All of these mentors have helped me along my journey, but the most important tip I have learned is practice and perseverance. Nothing replaces these.

With 500 blog posts under my belt, I am excited to see where the next 500 take me. I have a loyal group of followers who encourage me by leaving me questions and comments. Thanks from the bottom of my heart. It’s so nice to know someone is out there reading what I’m writing!

I am so grateful for the community of food bloggers and photographers. For the most part, they are people who are generous of spirit. I adore the trait of generosity. My fellow food bloggers and photographers share knowledge and offer gentle and constructive criticism as well as heaps of praise. I feel like I have found my tribe.

To celebrate this milestone I decided that a special cake was in order. This cake is quite spectacular. It starts with three layers of moist apple spice cake. Each layer is covered in silky cinnamon Swiss meringue buttercream. To finish this gorgeous cake, I added a drizzle of apple cider caramel.
The cake batter is crammed full of diced apples. I used three huge Honeycrisp for mine. When you mix the batter together you will think you made a mistake because it is so thick. It basically looks like bits of diced apples, barely held together by batter. Don’t worry. As the cake bakes, the apples release their moisture and your cake will be perfect.

This cake recipe is barely adapted from John’s recipe on The Preppy Kitchen. His knowledge of  cake baking is mind-boggling. He taught me about cake strips. They help prevent domed and cracked tops and over-cooked edges.

 I went with a silky Swiss meringue buttercream, accented with cinnamon. While admittedly a bit more work than a simple American buttercream, I just adore the light and velvety texture of a Swiss meringue buttercream. If you are curious, here is everything you ever wanted to know about buttercream from the über-talented Stella Parks.

For the shiny caramel drizzle recipe, I went straight to Tessa Huff’s gorgeous book, Layered, for inspiration. In a traditional caramel sauce, you use water and white sugar. Tessa suggests reduced apple cider and brown sugar instead. The tang of apple cider is perfectly balanced by the toasty notes of brown sugar in the cooked caramel. It really helps to offset the sweetness of the buttercream.

I added a little surprise of crunch between each layer with a ginger-pecan crumble, because texture is important in everything.

Truthfully, we didn’t drink the Prosecco (in the first photo of this post) with this cake. My first slice I had with some ice cold milk, and the second (and third, if we’re being honest), I had with tea. My fourth slice I just ate standing in front of the fridge. I ended up making this cake three times, before I got it exactly where I wanted it, so we had lots of cake. Even the mistakes were delicious. The first cake was served at our Rosh Hashanah dinner, with a birthday candle for my cousin Barbara. The second and third cakes were sliced, photographed and then wrapped and sent off to my husband’s office, where most of my baked goods go to have a happy ending.

Click here to print recipe for Apple-Cinnamon Crunch Cake with Caramel Drizzle.

Emergency Brownies

These brownies are the creation of Stella Parks. If you are a baker and don’t know who Stella is, make it your business to learn all about her. She will make you life so much sweeter. She is the resident pastry wizard over at seriouseats.com. She is also the author of the charming cookbook Bravetart; Iconic American Desserts.

Stella wanted to create a homemade boxed brownie mix, for those times when crisis strikes, and you need a brownie immediately, but don’t have time to make them from scratch. You know, like when you scrape your car on the wall of your parking garage, or when you find out that The Chew was cancelled, or you need something to snack on while binge-watching something this weekend.

All the dry ingredients are mixed together in the food processor. Then you stash the mix in an airtight jar for emergencies. When crisis strikes, preheat oven to 350°F (if only most solutions to life problems could be solved by preheating to 350!), add coffee, 2 eggs, and some vanilla extract and the batter is ready.

A jar of this mix would be the perfect hostess gift to bring with you the next time you are invited to a cottage for the weekend. If you are feeling extra generous, bring along a new baking pan and some parchment paper and impress your friends with your ability to perfectly line the baking pan.


My favourite baking pan is made from light coloured aluminum. Pyrex or glass pans are poor heat conductors, which means that they are slow to heat up and to cool down. This can cause brownies to overbake, because the pan is stays so hot for so long after you take it out of the oven that it continues to bake the brownies.

Stella is insistent on top quality ingredients. Spring for the good dark chocolate, 70% bittersweet. Make sure your cocoa powder is Dutch process. It is darker and higher in fat. She recommends Cacao Barry Extra Brute, and I concur. The secret ingredient is malted milk powder. It is a flavour bomb. Ovaltine is available at most supermarkets, or you can buy Hoosier Hills Farms online. Stella suggests boosting the chocolate flavour with a little instant espresso powder in the dry mix. I used that the first time I made them. The second time, I didn’t have any left, so I substituted some strong coffee for the water she calls for in the wet ingredients. Score! The coffee really bumped up the chocolate notes.
The second change I made to the recipe was to add some chopped up Skor bars, because toffee can soothe like no other flavour.


Click here to print recipe for Emergency Brownies.

Rhubarb Raspberry Meringue Tart

If you were at the McCrae Avenue Farm Boy store in Ottawa last Saturday afternoon, and heard a high pitched squeal, that was me. For the past month I have been watching my instagram feed blow up with images of rhubarb creations. I wanted in on the fun, but there no rhubarb anywhere in my neck of the woods.

To be clear, this was not local rhubarb. It’s still too early for that here. It was that pretty pink “forced” rhubarb, which I love way more, because of that gorgeous hue. If you follow me on instagram you may have caught my teaser video.

Cooked rhubarb can be a bit mushy in texture, so I like to combine it with another fruit. Strawberries are the classic pairing, but I went rogue and opted for raspberries.

The rhubarb needs to be cooked before it can go into the tart. Roasting helps retain that pretty shade of pink. It needs sugar to tame the its astringency and some orange zest to enhance the flavour and aroma.
I drained the roasted rhubarb to get rid of any excess liquid, so that my tart bottom would not get soggy. Mary Berry does not like soggy bottoms. The raspberries get mixed in after the rhubarb is roasted.

I used a deep dish 8 inch tart pan, with a removable bottom, for a dramatic presentation. You could also use a springform pan. For fun, because that’s what my life has come to, I doubled the recipe and also made 6 mini tarts.As has been the case lately, this recipe took more than one attempt to get it just right. But I am happy to report that I nailed it on the second try!

In my first attempt I pre-baked the crust for 20 minutes, added the filling, topped it with a simple French meringue and baked it for a further 30 minutes. The delicate raspberries turned to mush, the bottom crust was soggy and the meringue turned brown and was really tough and chewy. 

On the second attempt I pre-baked the crust for almost 35 minutes, so that it was totally golden brown and gorgeously flaky and crispy. To solve the meringue dilemma, I turned to pastry wizard “Bravetart ” (aka Stella Parks) and she pointed me in the direction of a Swiss meringue.  The main difference between the two types of meringue is that in a Swiss meringue, you heat the egg whites and sugar first, before whipping them. In a French meringue, there is no pre-heating before whipping. A Swiss meringue whips up fluffier and more stable than its French cousin and it is safe to eat without additional cooking time. If you are curious and want to learn more, Stella wrote a great piece on Serious Eats about it.
I topped the pre-baked tart shells with the rhubarb-raspberry filling, topped them with the Swiss meringue, and baked them for a brief 10 minutes just to give the meringue a golden kiss. The raspberries maintained their integrity and the meringue was pillowy soft, fluffy and SOOOOO delicious, like the very best homemade marshmallows.
Perfect with a cup of tea!

Click here to print recipe for Rhubarb-Raspberry Meringue Tart.


Apple Cheddar Hand Pies

Happy Pi Day (3.14/March 14). Pie making is not my strong suit. I have always struggled with uneven and cracking dough while rolling, and shrinking dough while baking. I’m much more comfortable whipping up a swiss meringue buttercream for a cake or a dozen salted caramel macarons.

It seems like every day is National Something or Other Day. There is actually a calendar to keep us informed. Did you know that April 14 is National Ex-Spouse Day? Maybe people celebrate it with a smash cake? Some food bloggers are super organized and maintain an editorial calendar to track and feature all these days. Sadly, I don’t fall into that category. But, Pi day is something I feel like I can get behind. Last year we celebrated with Spiced Lamb Hand Pies.

I have a thing for hand pies. They’re just so adorable and I feel no guilt about eating a tiny pie.

The pie dough for this recipe comes from pastry wizzard Stella Parks, over at Serious Eats. She calls for a 1:1 ratio of flour:butter, by weight. Most typical pastry dough recipes use more flour than butter. The extra butter in her dough creates a dough that’s pliable but strong, making cracks and tears a thing of the past.
It gets folded once, to create extra flaky layers.

The apple filling is classic and simple. Apples, brown sugar, cinnamon and a pinch of salt.
Sharp white cheddar makes a fine companion for apples, but use orange cheddar if that’s all you have.
I decided to get fancy and make a decorative braided border on my pies. Ever since I saw this Apricot Pie I wanted to try my hand at dough braiding. I still need a bit of practice, but it was fun to do. You can simply leave them plain and they’ll be equally delicious

Click here to get recipe for Cheddar Apple Hand Pies.

If you plan to make these, I highly recommend watching Stella’s video demonstrating how to make the dough.

Caramel Honeycomb Birthday Cake

make a wishRegular readers of this blog know that I bake my own birthday cake every year. My girlfriend Paula learned this the hard way. I am still apologizing to her for my rudeness!

My birthday cakes are usually multi-recipe, all day baking extravaganzas. It’s my birthday present to myself. I get exactly what I want and I get to spend time alone, baking in my kitchen, my happy place3 slices of cakeThis year’s cake was inspired by a trip to Charleston South Carolina we took with our friends The Grizzlies. One of the highlights of our weekend was a cooking class with Chef Vinson Petrillo at The Zero George Hotel, a charming 16 room boutique hotel. Chef Vinson is a recent transplant to the Charleston area. Originally from New Jersey, he honed his craft in New York. When I asked him what brought him to Charleston, he replied simply, “My wife wanted kids.” Chef PetrilloThey are now the proud and very busy parents of two little ones, aged 1 and 2. As I observed Chef Vincent during our 3-hour class it became obvious to me that he must be an excellent dad. He handled all our questions and comments with great patience and equanimity!

For the first course, he cooked butternut squash by the sous vide technique. He followed that up by sauteeing it in brown butter and finally topped it with torched marshmallow. Sort of a glorified sweet potato casserole but so much better.

For the main course, he prepared sauteed snapper. Watching him cook and plate the food was just a joy. His passion for and knowledge of the ingredients were obvious.

The dessert course was a Chocolate Cremeux, essentially a chocolate pudding, topped with big shards of honeycomb. My iPhone photo does not do it justice.chocolate cremeaux with honeycombIf you’ve ever had a Crunchie chocolate bar or sponge toffee, you know what Honeycomb is. Essentially, you make caramel and add baking soda at the end to produce a bubbly toffee confection. This honeycomb topping was the inspiration for my birthday cake.honeycombBefore he began cooking, Chef Vinson emphasized the importance of “mise en place”. Read through the recipe, measure and chop all your ingredients and set out all pans and tools you need before you start cooking. Nowhere is this more important than in the preparation of honeycomb.

You will need a candy thermometer and a baking sheet lined with parchment paper or a silpat sheet. The process goes quickly, so don’t walk away from the stove. Chef Patrillo left his honeycomb unadorned, but I dipped the corners of mine in bittersweet chocolate and sprinkled them with a bit of flaky sea salt because that’s the way we roll around here!


For the cake, I turned to Brian Hart Hoffman’s book “Bake From Scratch.” I thought his classic golden cake with buttermilk would be a perfect base for honeycomb.cake ingredientsadding eggsbatter in cake pansI filled and covered the cake with a salted caramel buttercream.piping icingWith a cup of tea or a glass of milk, this indulgent cake is the perfect way to celebrate a birthday.with a cup of teawith a glass of milk

Click here to print the recipe for Caramel Honeycomb Birthday Cake

a slice taken out of the cake


Malted Milk Cookies with Milk Chocolate and Pecans

Malted Milk Cookies on chocolateI have a big jar of Hoosier Hill Farm malted milk powder in my pantry. Pastry wizard Stella Parks, told me to buy it. She promised me I’d find all kinds of uses for it.Malted Milk Cookies stackedI adore the flavour of malted milk. I made malted milk drumstick ice cream cones a few years ago. For the uninitiated, a little primer on malted milk powder. All malt products come from barley. The grain is sprouted, then dried and ground. During this procedure, starches are converted to sugar and the end result is a sweet, dried grain powder. This is the base for much of the beer that is produced today.

The ground powder is  also combined with wheat flour, milk powder, salt and sometimes sugar to create malted milk powder. Some brands, like Ovaltine also add cocoa powder to the mix. Malted milk powder has caramel, toasty, roasted notes. The addition of milk powder to the blend adds a creamy rich dairy note. It enhances most baked goods, complementing both vanilla and chocolate flavoured goods.hoosier and ovaltineI decided to add some to cookies. I started with a recipe for Chewy Malted Milk Chocolate Cookies from Yvonne Ruperti over at Serious Eats.mise en placeI added some toasted pecans and switched out the honey for Barley Malt Syrup, to really boost the malt flavour. Honey or malt syrup help keep these cookies chewy. I also added a tiny sprinkle of flaked sea salt on top before baking. I’m considering mixing in some chopped Malteasers next time I bake these.

Instead of milk chocolate chips, I chopped up some Lindt milk chocolate bars. I really like the big chunks of milk chocolate studded throughout these cookies. A mix of milk and white chocolate would also be good. I think dark chocolate might be too overpowering. adding milk chocolateUsing a portion scoop ensures that you get uniform cookies that are all baked at the same rate. I used a 1.5 ounce (3 tablespoons) sized scoop.scoopingGently flatten the cookies with the palm of your hand. I added a tiny sprinkle of flaked sea salt to the top of each cookie. It balances all the sweetness perfectly.

These are a hefty, chewy, delicious cookie. Hints of caramel and a unique toasty roasted flavour keep them from being too cloyingly sweet. They are quite fantastic frozen, as my family can attest to. broken cookies

Click here to print recipe for Malted Milk Cookies with Milk Chocolate and Pecans.

milk and cookies


Apple Custard Cake

sliced-cakeI have a recipe for an apple caramel cake that is outstanding. But some occasions (maybe breakfast if you’re my husband) call for a simpler cake. This cake is perfect for those times. This is a dense cake. Not that there’s anything wrong with that! I mean dense in the best possible sense. This is yellow cake at it’s finest. Owing to butter, eggs, whole milk and sour cream it has a compact velvety texture.

My dad would have described this cake as plain. And he would have meant it as a great compliment. He liked subtle flavours, nothing too sweet, ornate or fancy. The inspiration for this cake comes from Sarabeth’s Good Morning Cookbook. Sarabeth knows good breakfast!

The first tweak I made to the original recipe was to toast the sugar. Stella Parks over at Serious Eats convinced me to give it a try. The bottom line is that toasting sugar in the oven tames sugar’s sweetness and the longer you toast it, the more intense the caramel flavour will be. Check out her article if food science is your jam.

I toasted my sugar for about 2 1/2 hours. The toasted sugar is on the right. I tasted both, side by side and did find that the toasted sugar tasted less sweet. You can toast 4 pounds at one time and it will keep forever, just like white sugar. toasted-sugarStart with a 9 inch tube pan (also called an angel food cake pan). Butter and flour the pan very well.brushing-panI made this cake twice last week. The first time I made it, I found it too plain. (Sorry dad!). On the second go-round I added an additional layer of apples and coated the apple slices in cinnamon-sugar.

Half the batter goes into the pan. Smooth it out.smoothing-batterI used the first Honeycrisp apples of the fall season! Pink Lady or Granny Smith would also be great choices.slicing-applesTop batter with cinnamon apples.arranging-applesRepeat with a second layer of batter and cinnamon apples. Then drizzle with custard mixture.drizzling-custardResist the urge to turn the cake out of the pan until it has completely cooled. Your patience will be handsomely rewarded. 3-slicesThe ribbon of cinnamon coated apples that runs through the center of this cake is quite beautiful.one-slice-1

Click here to print recipe for Apple-Custard-Cake.

sliced-cake-2