Tag Archives: Butter

Salted Butter Skor Shortbread


Alison Roman’s Salted Butter and Chocolate Chunk Shortbread has been popping up all over social media during the past two months. These cookies have been monopolizing my instagram and twitter feeds. My favourite tweet was from @hyphenpfeifer, “Fake news that the Salted Butter and Chocolate Chunk Shortbread recipe makes 24 cookies bc you’ll eat a log-worth of dough.” I needed to see what all the fuss was about.
The first time I made them was New Year’s Eve. We had friends visiting and I baked them that afternoon to serve for dessert. They didn’t quite make it to the dessert table. We snacked on them all afternoon. I tucked the few leftover ones into the freezer and we had them for breakfast the next day. We all loved them even more, frozen.

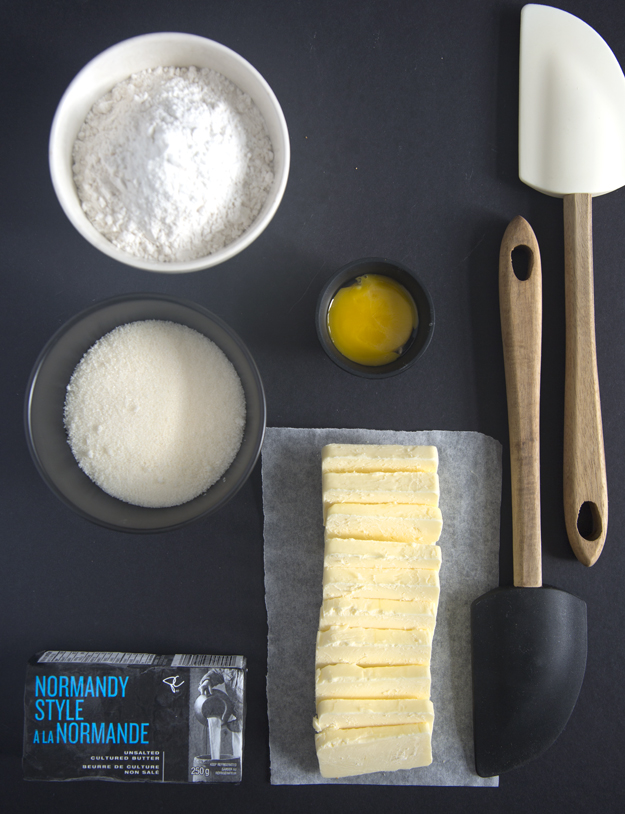
These cookies are made with salted butter. It has long been thought that unsalted butter was the preferred butter for baking. The reasoning behind this had to do with the fact that salt is a preservative, and so unsalted butter was often fresher. This is not the case anymore and blind taste tests have shown that salted butter tastes more buttery, and has a riper, more full-blown flavour than unsalted butter. When butter is a key ingredient, as it is in shortbread, we want to really enhance its flavour, and salted butter does that. You can’t get the same effect from using unsalted butter and adding more salt to the recipe.

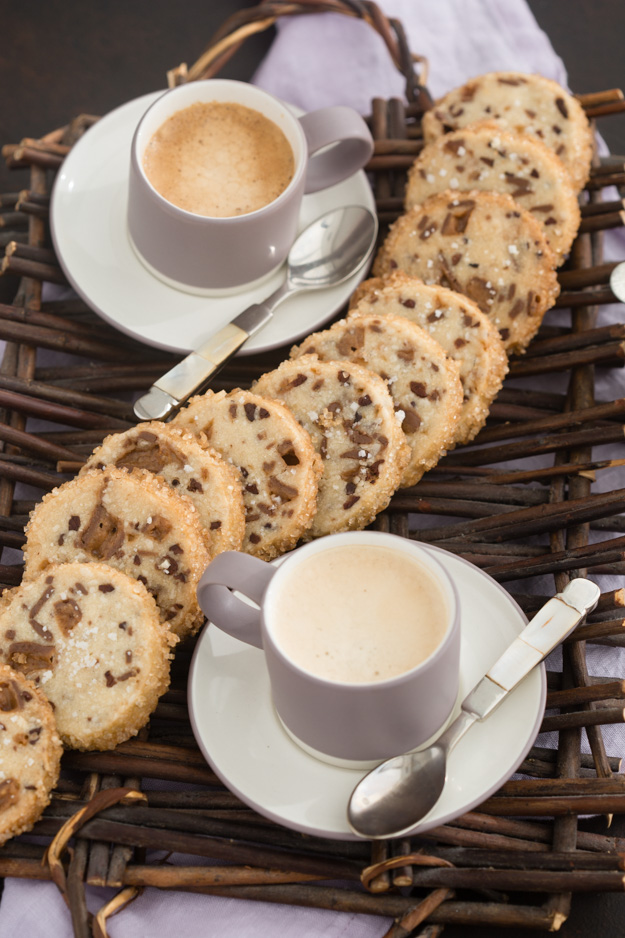
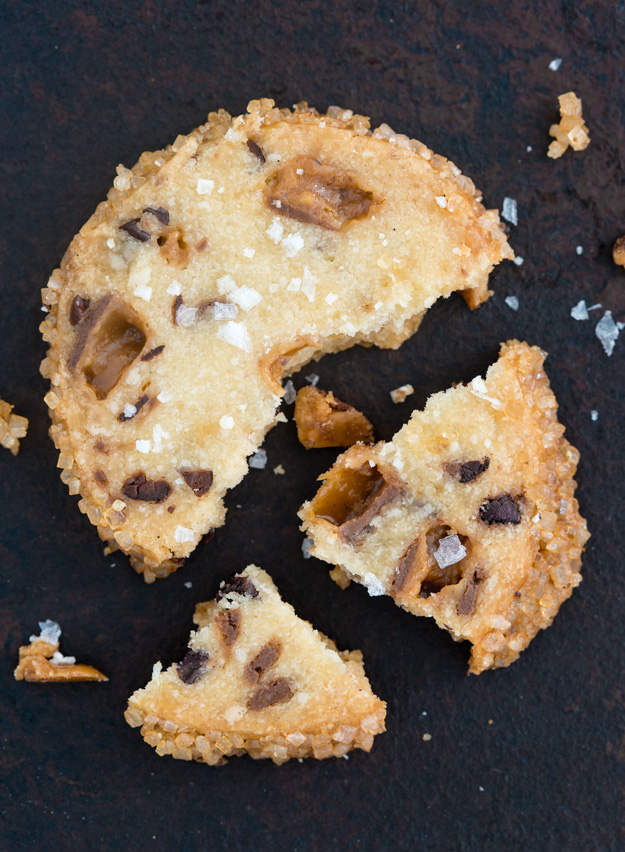
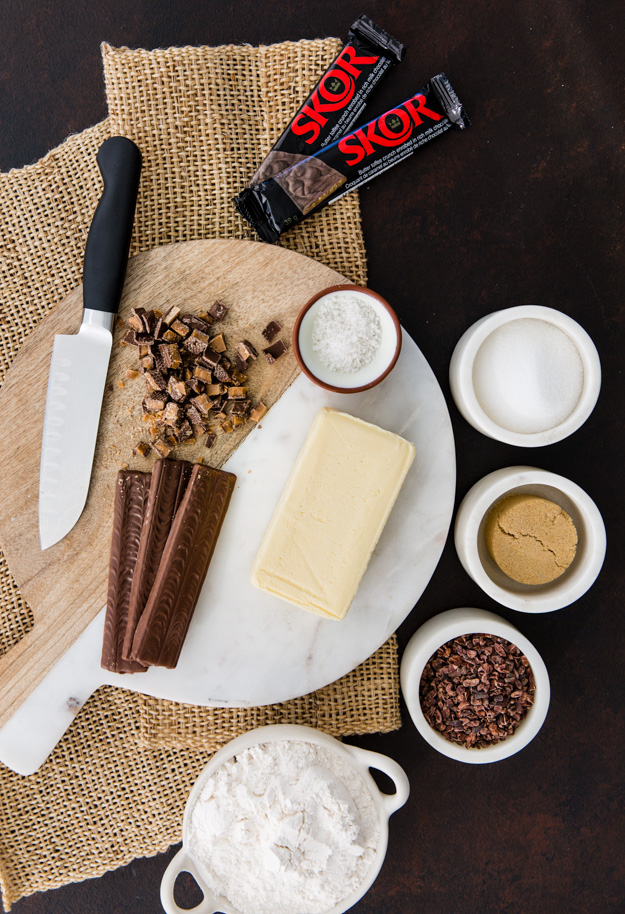
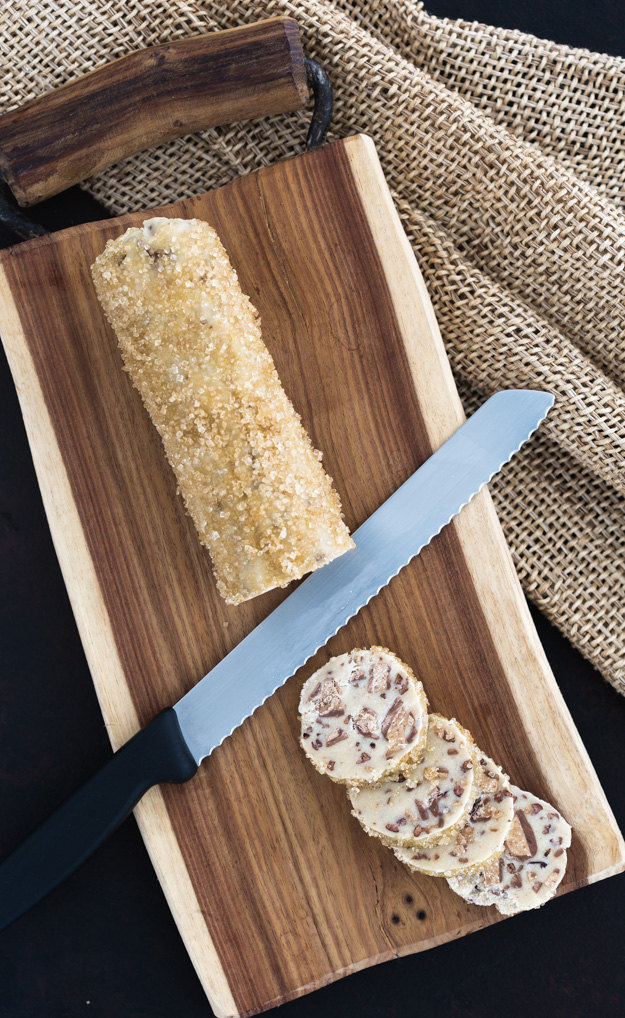
This is my twist on Alison’s cookie. I decided to swap out the chocolate chunks for chopped up Skor bars (Heath bars is you’re American). I thought the addition of toffee would take these cookies to a different place, for me, a very happy place! Because Skor Bars are covered in milk chocolate, I also added a handful of cocoa nibs to the dough. Their bitter note would work as a perfect counterbalance to the sweet Skor bars.
Both the toffee and the cocoa nibs added a fantastic little crunch to these cookies. I was thrilled with the results.

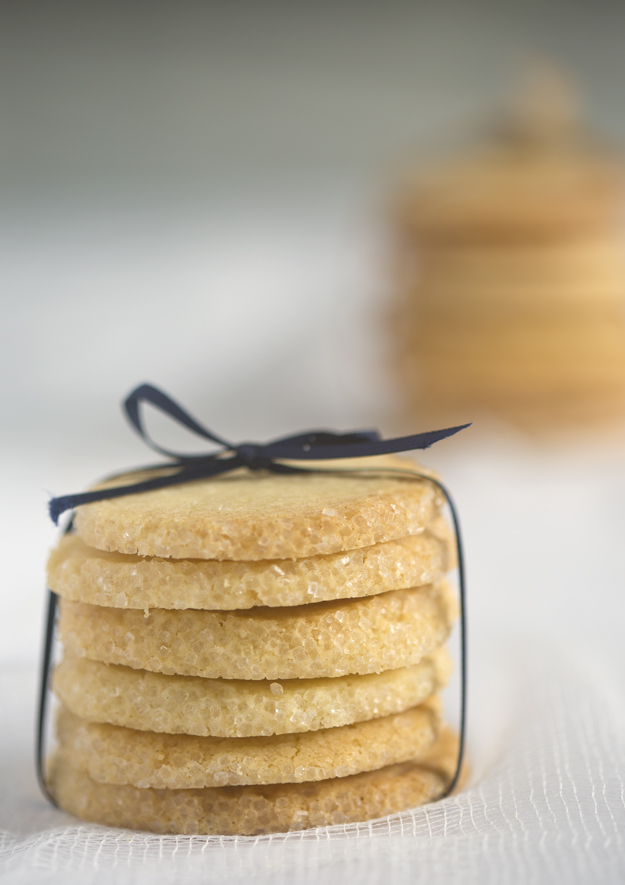
These are an extremely versatile cookie, perfect for all occasions. I am a firm believer that what you put out into the universe will come back to you. If you share these cookies you will reap all sorts of unexpected rewards.

Gift a bag to the staff at your hairdressing salon and sit back and luxuriate in the most amazing head massage during your shampoo.

Gift a bag to your noisy neighbour and listen as this,

is soon followed by blissful silence once they go into a sugar/carb coma from ingesting the cookies.

Mail off a package of these to your adult children and sit back and wait for the phone call, or at least a text telling you that they love you and that you’re the best mom ever. (I’m mailing these tomorrow morning so I’ll let you know if it works).

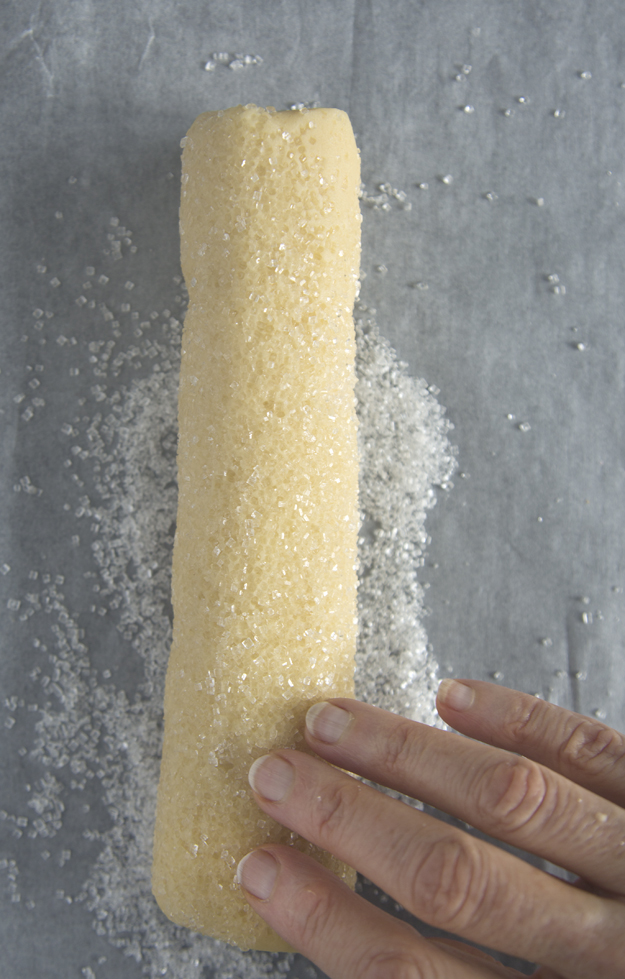
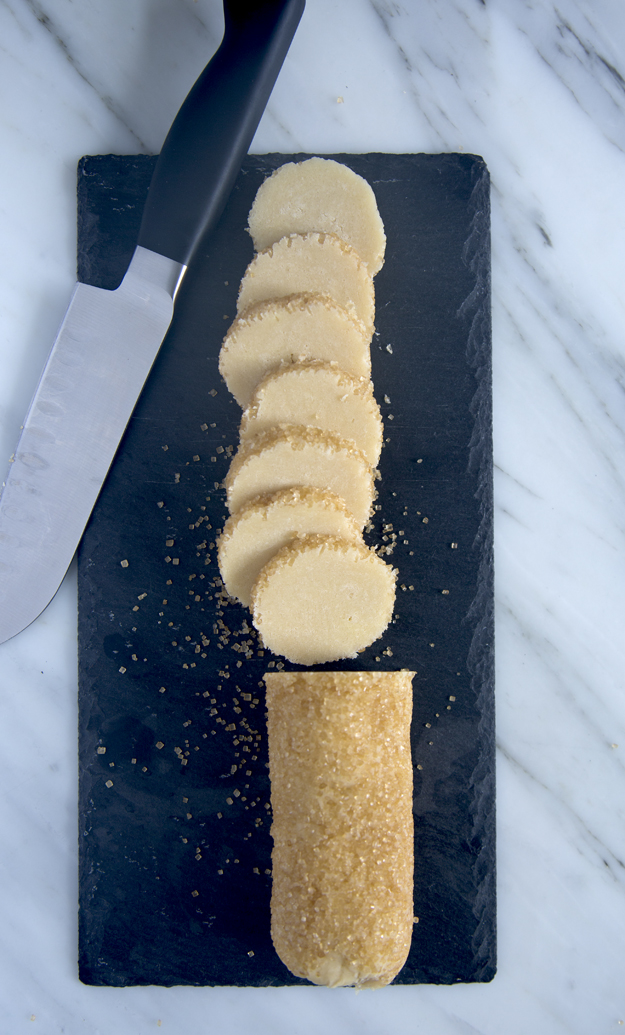
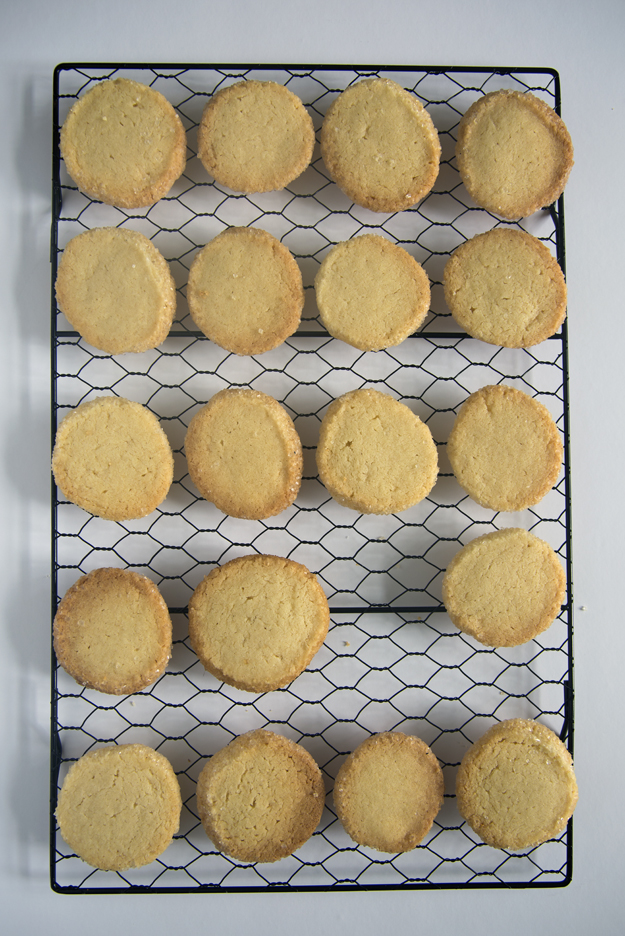
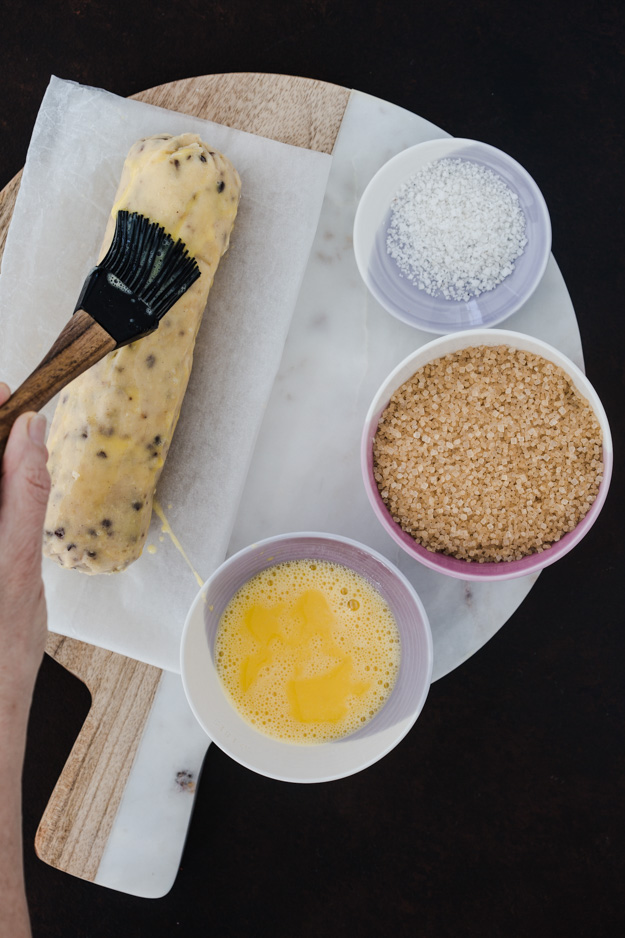
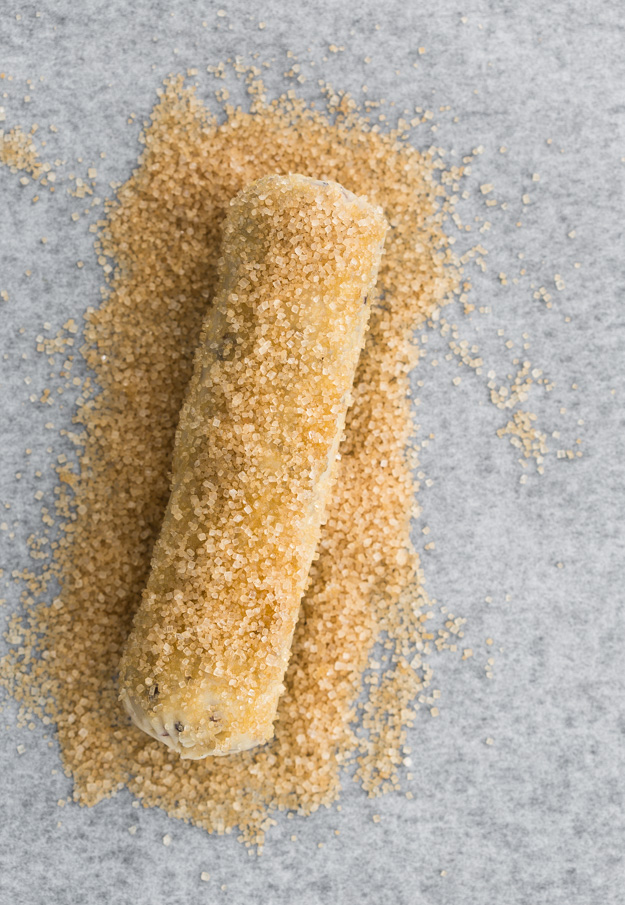
The hardest part about making these cookies is getting the dough to compact into a tight roll. I had to hand knead it, on the counter, for a few minutes before it came together. Divide the dough into 2 and roll each piece into a 2 inch diameter log. Wrap well in waxed paper and chill for several hours or even a few days. 
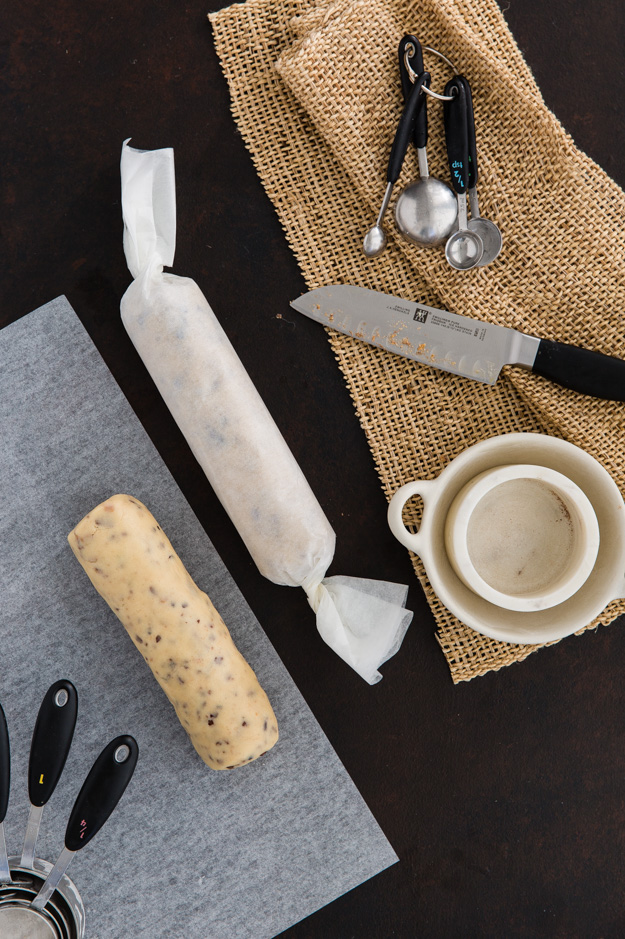
Brush logs with beaten egg and coat the logs in turbinado or demerara sugar. Then slice them into cookies.
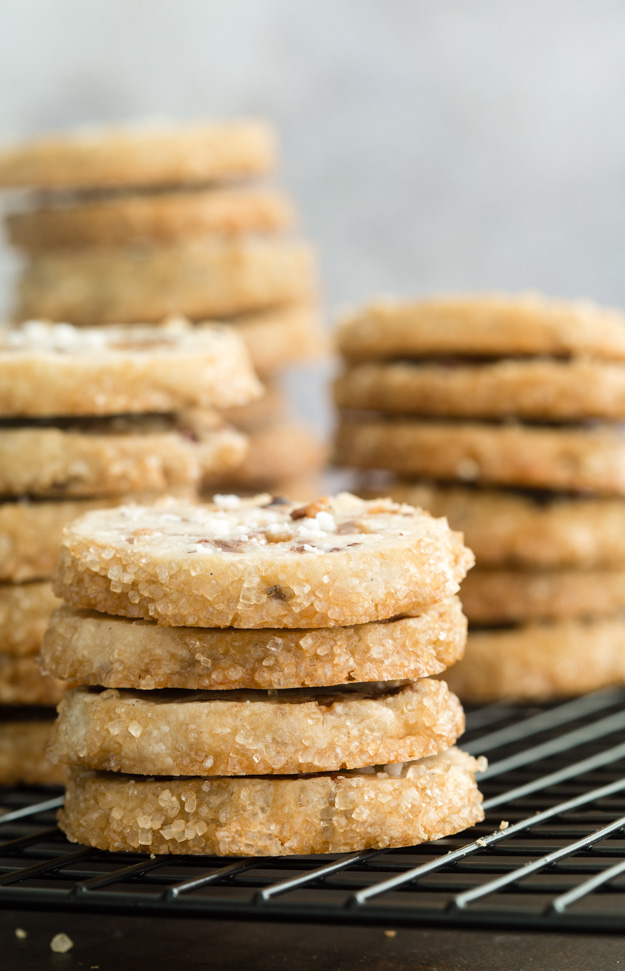
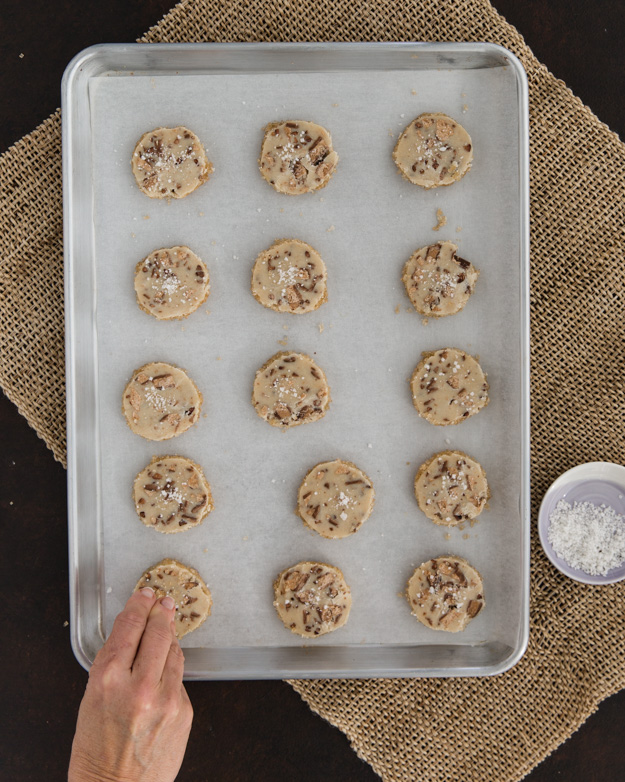
A final tiny sprinkle of some coarse sea salt. Yes, more salt. Don’t be afraid.

Click here to print recipe for Salted Butter Skor Shortbread.


Cultured Butter Cookies

with-latte-and-sugar-cubesIf there were a “little black dress” of the cookie world, this cookie would be it. Simple and elegant, much like I imagine Melissa Clark, creator of this cookie, to be. Cultured Butter Cookies, perfect for any occasion, need to become a staple in your cookie wardrobe.

A rather unassuming little cookie, but appearances can be deceiving. When a cookie lists flour, butter and sugar (along with a little salt, baking powder and an egg yolk), as the only ingredients, then quality matters. That’s where the cultured butter comes in.

For the uninitiated, here’s a little butter making history. (I always consider it a great day when I learn something new!) Many years ago all butter was made with “cultured” cream. After the evening milking the farmers left the cream to sit out overnight so that the milk would settle and the cream would rise to the top of the bucket. Without refrigeration, the naturally occuring bacteria in the milk caused it to sour slightly, giving it a tangy nuttiness. This cultured cream, once churned into butter, retained that delicious flavour.

Once dairy farmers began pasteurizing their milk, all the active cultures were killed and the cream no longer soured on its own. If they wanted cultured cream they would have to add an additional step in the butter making process and add live cultures back into the pasteurized milk. In an effort to save time and money, North American farmers skipped this step and made butter from sweet cream.

We grew accustomed to the mellow flavour of butter churned from sweet cream. But over in Europe, they never stopped adding live cultures back into the pasteurized cream. When we began importing these European cultured butters into North America people were surprised at how different this butter tasted. Cultured butter is a higher-fat product (86% butterfat vs 80% for regular butter), which in turns makes the butter more silky and gives it a richer taste. The complex tanginess is very pronounced.

When the flavour of butter is front and center, it’s worth the extra money to buy cultured  butter. simple-ingredientsThe dough comes together quickly and then it’s essentially a slice and bake cookie. The dough gets rolled in coarse sanding sugar for a little glitter, because even cookies need a bit of bling!rolling-log-in-sanding-sugarslicingcooling-on-rackThese cookies are crumblier, crisper and more buttery in flavour than a traditional butter cookie. Sometimes simple is best.tied-up

Click here to print recipe for Cultured-Butter-Cookies.

with-latte-and-sugar-stick


Peach Praline Coffee Cake

When peach season rolls around, there is almost nothing better than biting into the perfect peach. It gives just slightly to pressure when prodded gently with your finger. It has a full sweet lingering aroma, that you will notice as soon as you approach the bin of peaches at the market. That first bite, when your teeth break the skin, gives way to a juicy interior, sweet but with a bit of tang, and the juice drips freely down your chin. The fuzz on the peach just slightly irritates your lower lip. (Or maybe that’s just me. My husband says that I am easily irritated!)

I almost never buy the early peaches. They are the “cling” variety and the flesh does not separate easily from the pit. I wait patiently each year, until late August/early September for the “freestone variety” to arrive at the markets. The flesh just falls off the pit. Of course, I buy way too many peaches and there is no way I can eat them all, so I end up with a small bowl of somewhat bruised peaches that need to be used fast.

When I saw this cake on Serious Eats, I knew I had to make it. The indubitable star of this cake is praline topping. Measuring a whopping 3 inches tall, it makes up over half the total height of this cake. You will wonder, as you pile the praline topping over the cake batter, if there is a mistake in the recipe. No error here! This is as it is intended. Everyone knows that the topping is the best part of most coffee cakes. The actual cake, while certainly playing a supporting role, is no shrinking violet either. Moist, dense and slightly tangy, from the peaches and buttermilk in the batter, this cake is the perfect counterpoint to the crunchy sweet praline topping.

The peaches need to be peeled for this cake and while it is a bit of a process, it is important as bits of peach peel in the cake would not be great. Using a sharp knife, make an “X” in the bottom of each peach. Place in a pot of boiling water. When you see the skin start to peel away from the flesh, after about 1-2 minutes, they are ready to be removed. Let cool a bit, then peel and cut in half to remove it.

I gave the praline topping a bit of a makeover, by adding some whole wheat flour and quick cooking oats. Not that I delude myself by thinking that these additions make this a “healthy” cake, but I love the nuttiness that whole wheat flour adds and I love the texture that oatmeal contributes. I also reduced the amount of butter in the original topping recipe, as when I made this the first time, there was a melted pool of butter sitting on top of the cake. The original recipe called for 10 ounces of butter. I cut it back to 6 ounces and still ended up with a very buttery praline topping.

The cake batter comes together quickly. Buttermilk is the choice of liquid for this coffee cake as it really complements the tangy peaches.

You must be patient and give the cake a few hours to cool before removing from the pan. A big slice with a cold glass of milk disappears in almost no time at all. Magic how that happens!

Click here to print the recipe for Peach Praline Coffee Cake.

Ambivalent Birthday Cupcakes

You always remember your first. No, I’m not talking about THAT first. This is a not that kind of blog!

I have the good fortune of being blessed with 14 nephews and 9 nieces. I have a special place in my heart for each and every one of them, but there is something quite special about becoming an aunt for the first time. My oldest nephew was an adorable, sweet-natured baby and has turned into a wonderful, responsible, very funny young man with a strong sense of family. His 29th birthday coincided with a visit to our cottage last week. I wanted to make a family dinner for him. I know he has been following the Paleo diet for some time now, and birthday cake is not really on the approved Paleo list. However, a birthday without cake is just too sad for me to contemplate, so last week I sent him the following e-mail:

Would you eat cake on your birthday? If so, what would your preference be? Chocolate, Berry Shortcake, Carrot, or anything else.

I got the following response:

Well, I would have some cake if there was one in front of me, but I’d rather not.  I know I’d enjoy it in the moment, but I’d probably regret the sugar and gluten the next day.  But if I had to choose?  Chocolate or Berry Shortcake sounds great.

As far as what I eat…pretty much meat and veg these days – still on the Paleo diet.  I basically stay away from gluten/grains, dairy, and most processed food.  That being said, however, given your penchant for baking (I don’t remember the last time I was at your cottage and didn’t see something delicious cooling down on those huge racks you’ve got) I’d imagine I’ll be doing a bit of cheating those few days.
Anything I can bring?
WHAT???? Talk about an ambivalent response! How was I to interpret that?
This party was beginning to look like no fun at all. I fired off a quick e-mail:
Do you still drink alcohol?
He responded:
Yes, just wine and tequilla. 
Whew, he hadn’t completely lost his mind.
Now I had to decide if I would be the Evil Aunt and tempt him with something anti-Paleo, or should I be considerate and respectful of his diet and make him a Paleo Chocolate Birthday Cake with Coconut Honey Frosting?
I decided that to go with a full-on, loaded with gluten, dairy and sugar cake would be cruel, but it really seemed to me that he was asking me to help him cheat. So. I decided to make cupcakes, because they’re small and not really a true cake. Sort of an ambivalent cake for his ambivalent response.
For the base of the cupcakes, I knew chocolate was the right road to follow. I have tried many different chocolate cake recipes over the years, and have come to the conclusion that butter is not always better when it comes to the moistest cake. Vegetable oil really does make a better cake. Our family’s go-to chocolate cake comes from Noreen Gilletz’s “Pleasures of Your Food Processor.”  Rich, moist and very deeply chocolate, but not too sweet, it makes a perfect cake or cupcakes every time.

I am thrilled with the Cocoa Barry brand of cocoa powderI just bought. (Cocoa Barry is the French division of Callebaut)

I wanted to try a different buttercream this time. A few years ago I had dinner at a wonderful restaurant in Ottawa called Beckta. Before the meal they brought bread and some type of butter spread to the table. I was smitten from the first bite! I begged the waiter for the recipe for this spread. He told me that they melt butter until it turns a medium nutty brown colour. Then they chill it ao that it becomes a solid again and whip it with a little regular butter. This was my first foray into the land of browned butter (the French call it beurre noisette) and I must say that it has haunted my dreams ever since.
Given my success with browned butter berry tarts, I suspected that browned butter in a buttercream would be fantastic. Something magical happens when you brown butter. It enhances the flavour of just about anything you add it to, and the aroma will drive you wild. Making brown butter is quite simple. Use a saucepan with a light coloured bottom, so that you will be able to judge when the butter is browned to perfection. A dark bottom pan can lead to burned butter and trust me, that aroma and taste will not leave you craving more!

As the butter melts, it will begin to foam. Swirl the pan to ensure even melting. The color will progress from pale yellow to golden-tan to, finally, a burnt sienna (remember that crayola crayon colour?). Once you smell that nutty aroma, take the pan off the heat and transfer the browned butter into a heat-proof bowl to cool.

The milk solids will cook faster and you’ll see them settle on the bottom of the pan. You can strain the brown butter through cheesecloth to leave those milk solid particles behind, or you can incorporate them into the buttercream. I really like the almost burnt taste of them as well as seeing the specks of browned butter in the icing, so I did not strain mine.

The brown butter is chilled for about an hour until it becomes solid again. The ideal temperature of the brown butter for making the buttercream is room temperature. If it becomes too hard in the fridge, leave it on the counter to soften a bit. Beat the brown butter with icing sugar, a pinch of salt and a little vanilla extract.

Fit a disposable piping bag with a large star tip and frost the cupcakes.

The cupcakes were a huge hit. My nephew inhaled two of them and asked for two more to be wrapped up to go. I have a feeling he may have had a bit of a gluten-sugar hangover the next morning, but I think he will agree that they were worth it.

Click here to print the recipe for Chocolate Cupcakes with Browned Butter Icing.

P.S. Just read about browned butter on field fresh tomatoes. Check it out!

Holiday Baking Day 1: Dark Chocolate and Pecan Biscotti Slabs

My youngest sister once told me that the sight of 24 pounds of unsalted butter in her freezer makes her very happy. I have to admit, the same is true for me. Although in my case, the butter would all be neatly stacked in orderly rows. In my sister’s freezer, more like haphazardly thrown in wherever they would fit. Now, that’s not a dig at my sister. It’s just part of her unique charm.

Why, you may be asking, would these sisters need 24 pounds of unsalted butter in their freezer at any given time? Do we operate a bootleg bakery out of our homes? No. Were we children who came from poverty? No, as a matter of fact, we grew up in a middle-class suburb of Toronto. I guess you could say we come by our hording honestly. Our mother stockpiled our freezer with Swanson’s T.V. dinners and chicken pot pies, Sara Lee Banana Cakes and Highliner fish sticks. We hoard butter because you never know when the urge to bake will hit, and you must never be caught unprepared. We both love to bake. We both find baking an extremely creative outlet and a way of showing our love to those around us.

Rather than shop for gifts for all the people in my life for whom I am grateful, I decided many years ago to bake. And somehow, over the years my gratitude has grown to include a circle of about 40 people! I usually bake about 7 or 8 different kinds of treats and package them all up in a beautiful unique container.  There are a core 4 items I bake that must be included each year. If I leave any of them out, there may be a mutiny. These treats include Peanut Butter Bark, Chocolate Peppermint Cookies, Lemon Coconut Cookies and Gingerbread Snowflakes.

This year I added a few new items to the mix. The first are Biscotti Slabs. These are a creation of Montreal baker Marcy Goldman. Essentially, you take a typical biscotti batter, bake it in a loaf pan, chill, slice, re-bake and voilà: a new product. Slabs of crisp cookie-like biscotti with a delicious middle layer of chocolate and pecans and a glittering topping of cinnamon sugar. These are serious biscotti. Perfect for breakfast with a cafe latte. Anyone I have ever offered them to looks at them and says, “Oh, these are huge, I’ll just have a small piece.” They break off about a third, nibble on it quietly and then come back and finish the rest off. Sweet, but not too sweet, crunchy and quite addictive.

These biscotti begin with melted rather than softened butter. Marcy uses melted butter in many of her recipes. Not quite sure why this is. If you are melting the butter in the microwave, save yourself a lot of grief and a huge butter explosion and cover butter with a sheet of waxed paper first!

Butter and sugar are creamed together. Be sure to take the time to do this properly. It takes at least 4-5 minutes of creaming. It should look like this when it is done.

Eggs, vanilla, flour, baking powder and salt are added to complete the batter.

Here is my foolproof technique for lining the baking pan. No greasing required and the biscotti slab will lift out very easily without any sticking.

Toasted pecans and bittersweet chocolate are chopped up to make the biscotti middle layer.

Mix together some cinnamon and sugar.

Then it’s time for assembly. Spread half the batter into the prepared loaf pan. Use wet fingers to spread it evenly. Spread the chocolate and pecan topping evenly over the batter. Sprinkle on half the cinnamon sugar mixture. Top with remaining batter and finish with a dusting of remaining sugar-cinnamon mixture.

Bake for about 50 minutes. Let cool completely and remove loaf from pan. Wrap well in foil and freeze for about an hour. Then slice into slabs and bake a second time.

Arrange slabs on baking sheet and bake for an additional 10-15 minutes until crisp and slightly browned. They will continue to firm up as they cool.

Click here to print recipe for Dark Chocolate and Pecan Biscotti Slabs