Tag Archives: Fall Desserts

Apple Maple Rose Tarts

I would describe myself as having perseverant tendencies. Perseverance refers to the drive and determination to complete a project or task, regardless of how long it takes or how many setbacks you experience along the way. Perseverance is not giving up.

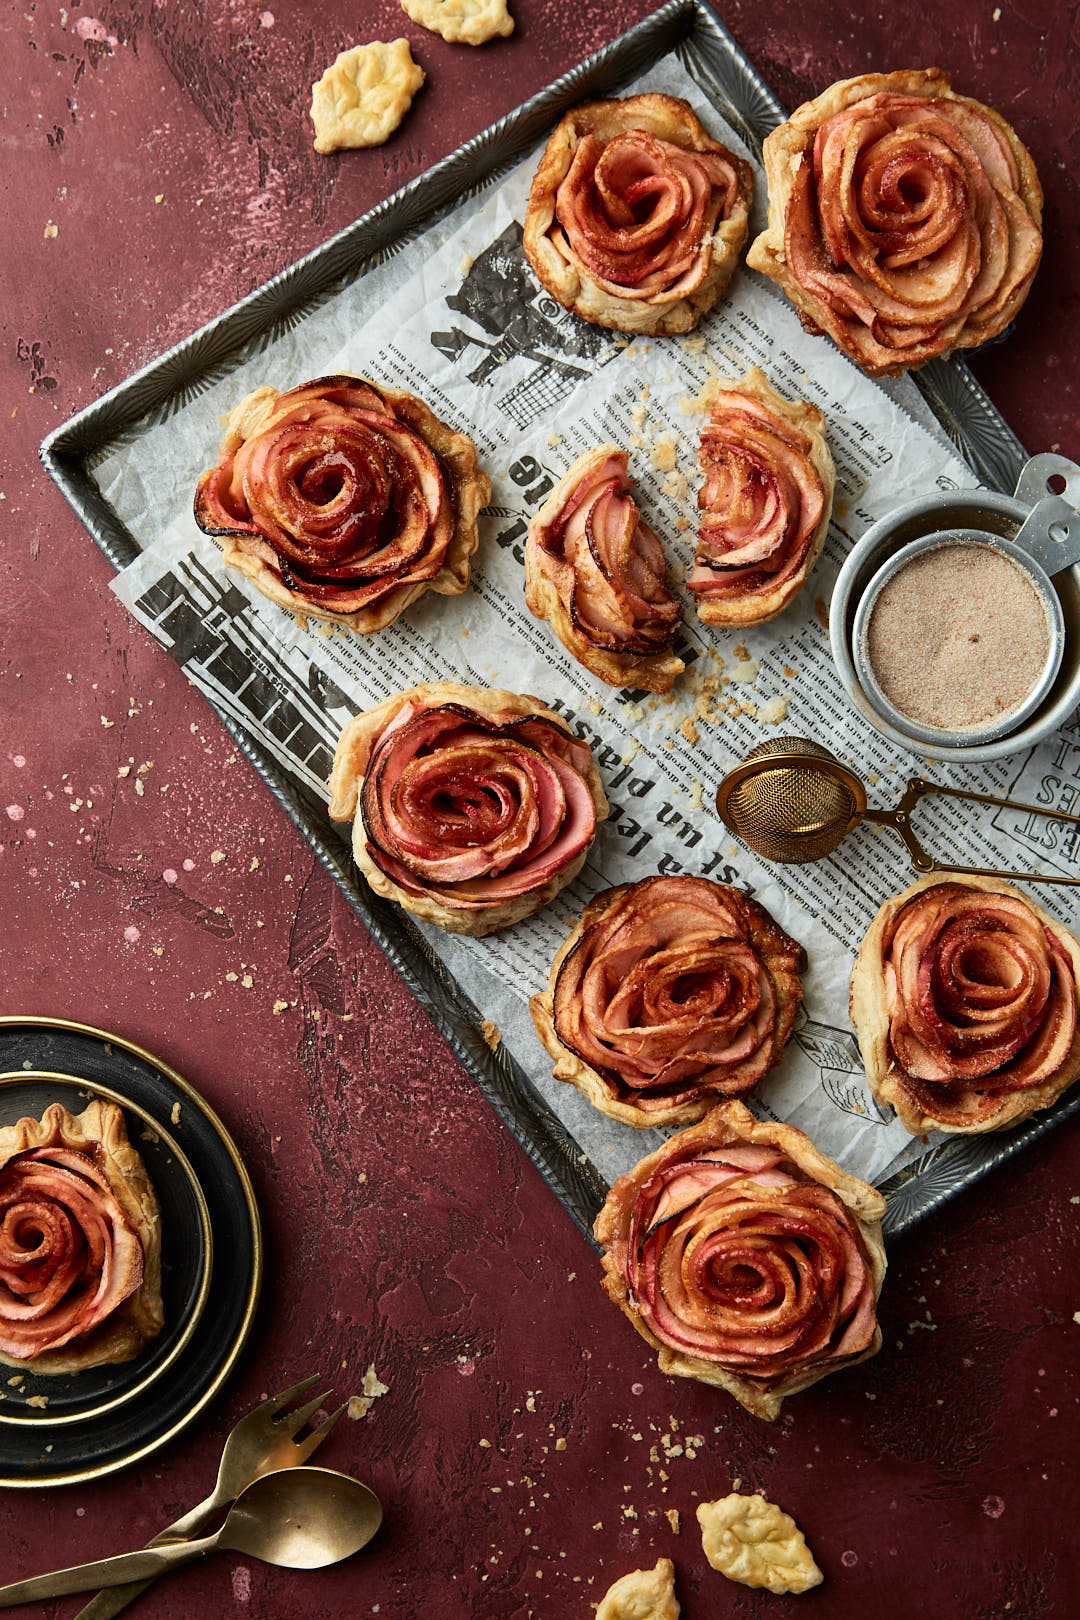
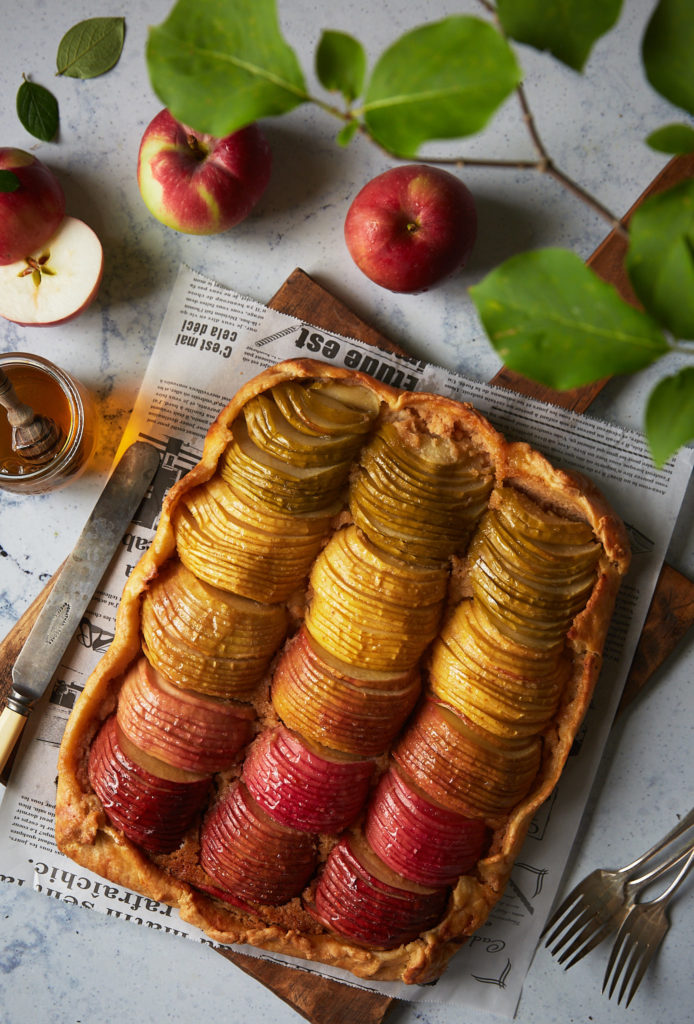
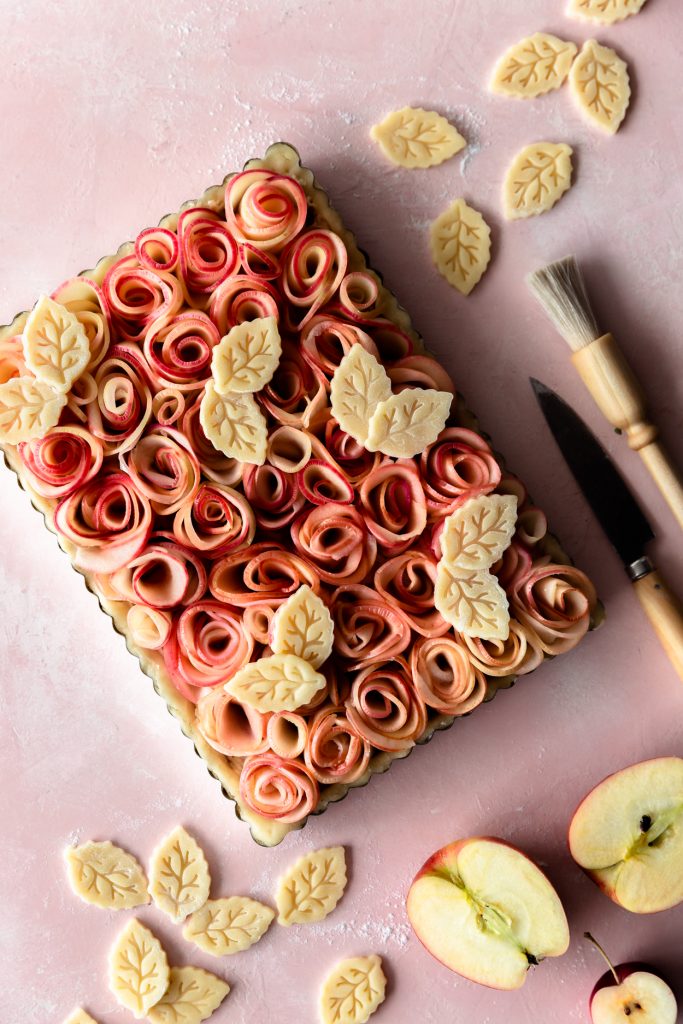
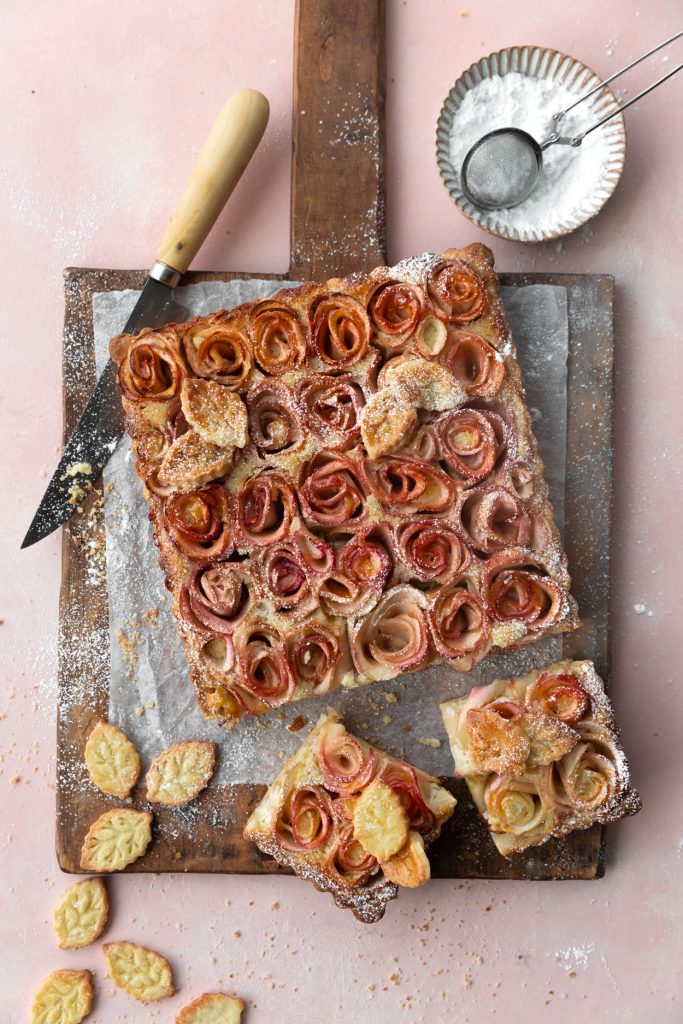
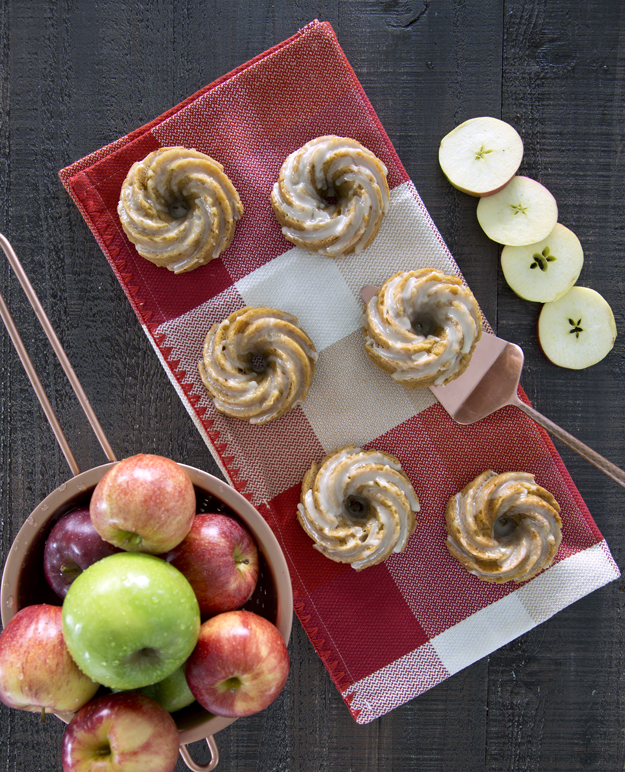
I had seen these apple rose tarts all over Instagram for a while now. They have been on my must-make list for several months. I finally got around to trying them a few weeks ago. There are many versions on this theme, but they all boil down to this basic process: thinly slice apples and cook them until slightly pliable, but not mushy. Cut strips of store bought puff pastry, spread with jam and roll the thinly sliced apples up in the pastry, to form a “rose”. Bake until done.

I believe the original recipe was created by Manuela Mazzocco. Check out her reel on Instagram to see how she makes them.

Armed with several pounds of all-butter frozen puff pastry, and about 20 pounds of apples I got to work. I ran into two main roadblocks. The first problem was that the pastry in the centre of the rose never got fully cooked. Raw puff pastry is disgusting not pleasant to eat. If I baked the roses longer, the outside of the pastry burned. The second issue I had was that the thinly sliced apples burned at the edges because puff pastry needs a hot oven and at least 30-40 minutes to bake.

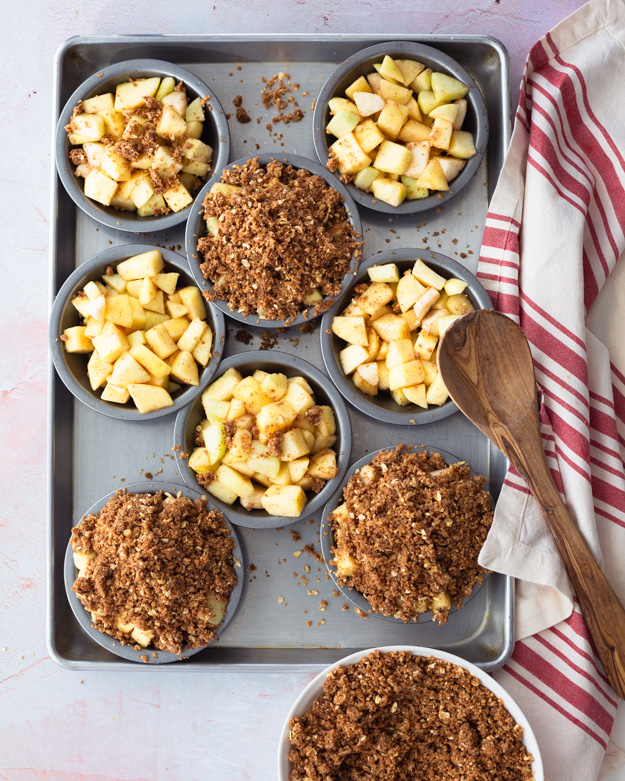
I tried rolling the strips tighter, then looser, baked them in muffin tins and individual ceramic ramekins and even tried baking them upside down. While my husband happily ate all the mistakes, I continued to persevere. I had to figure this out.

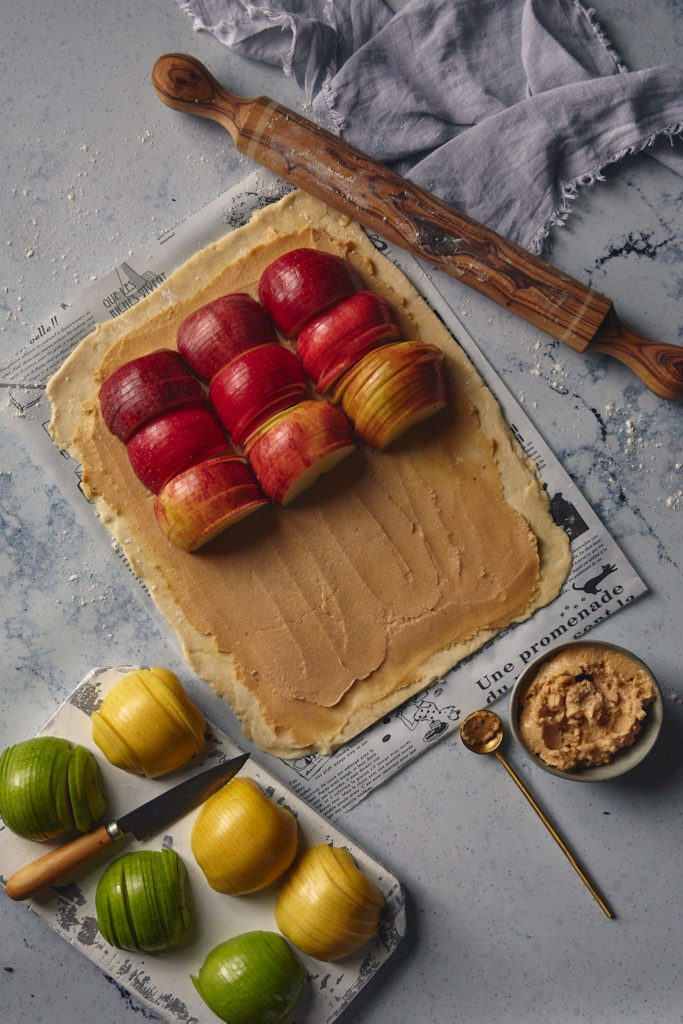
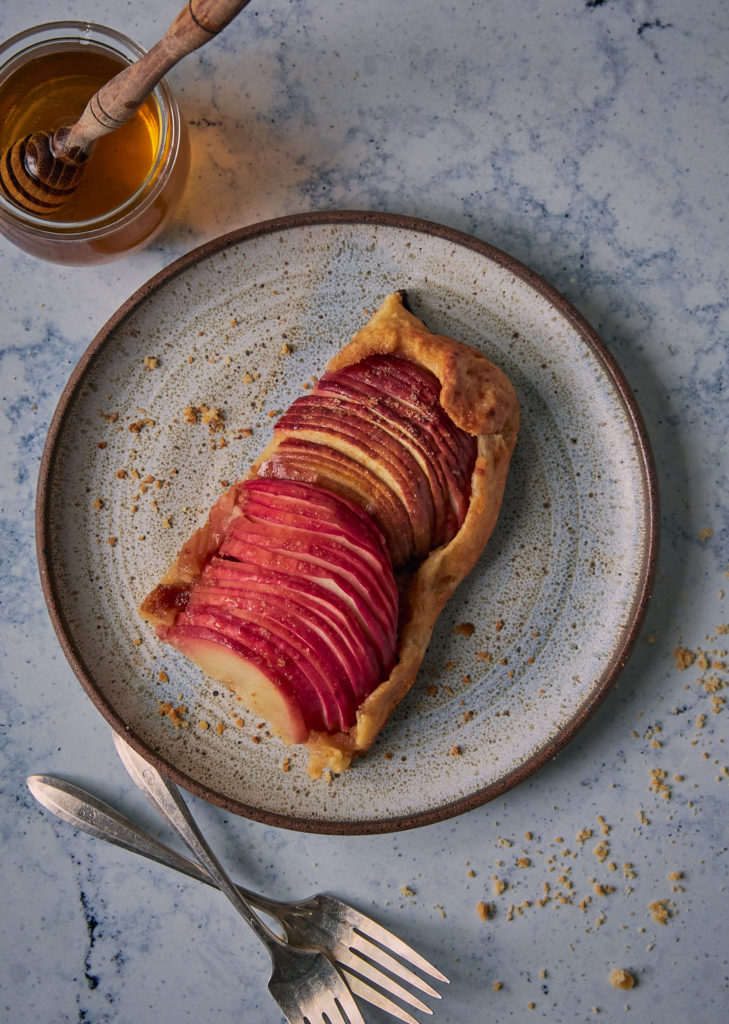
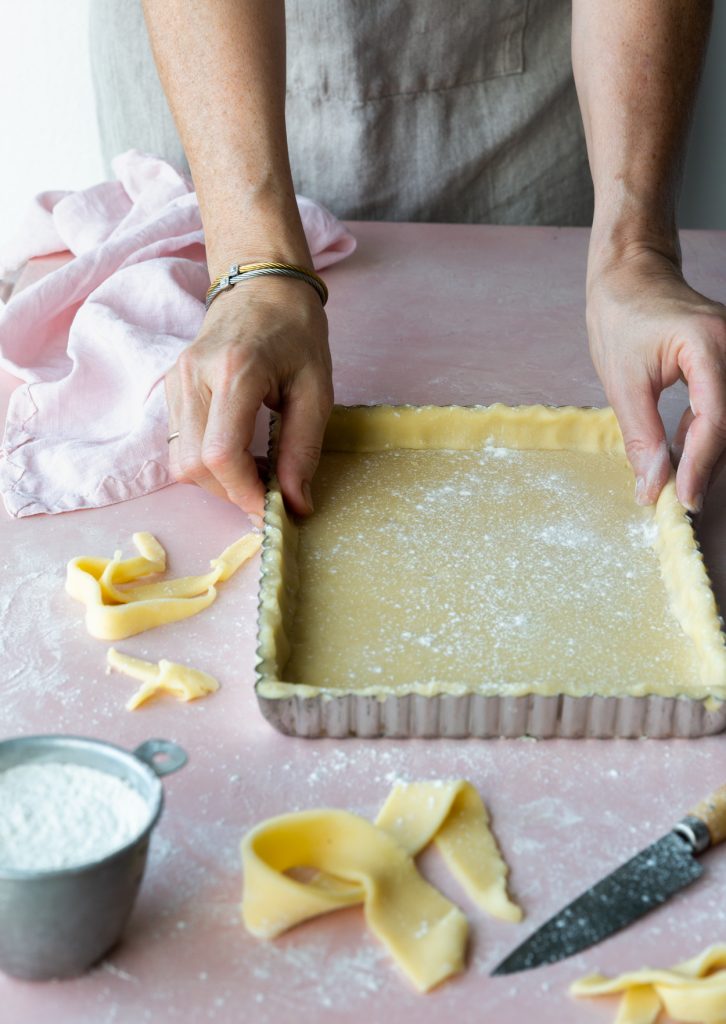
Eventually I wondered if I could just form the apple rose without rolling it up in pastry. Once the rose was formed, I just wrapped the exterior in a circle of puff pastry. Success. Check out my video to see how I did it.

Here is what I discovered in my journey:

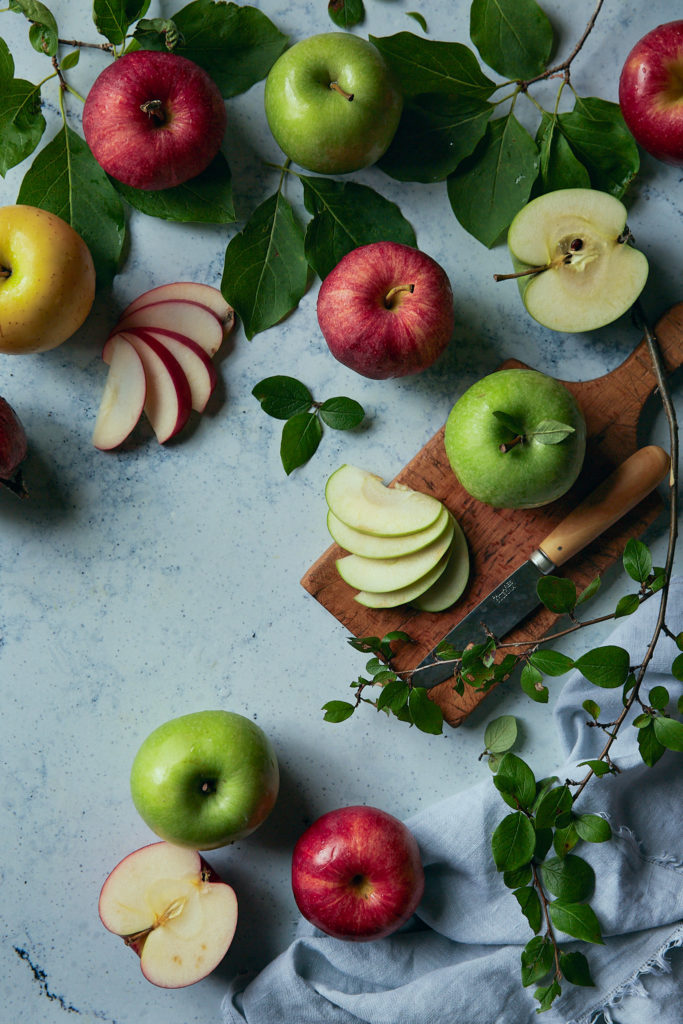
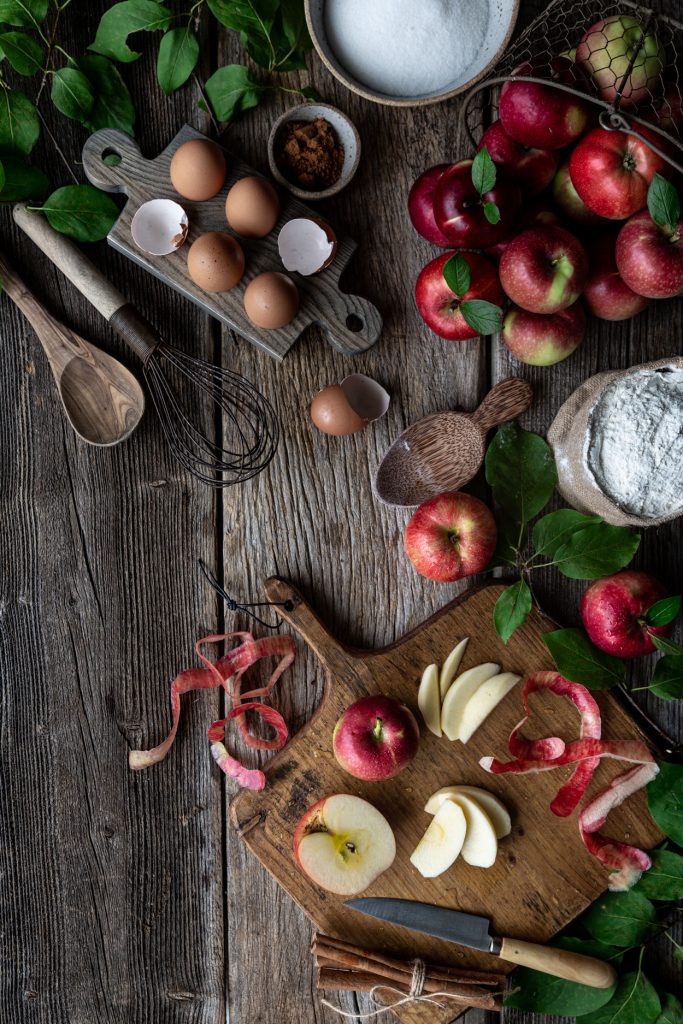
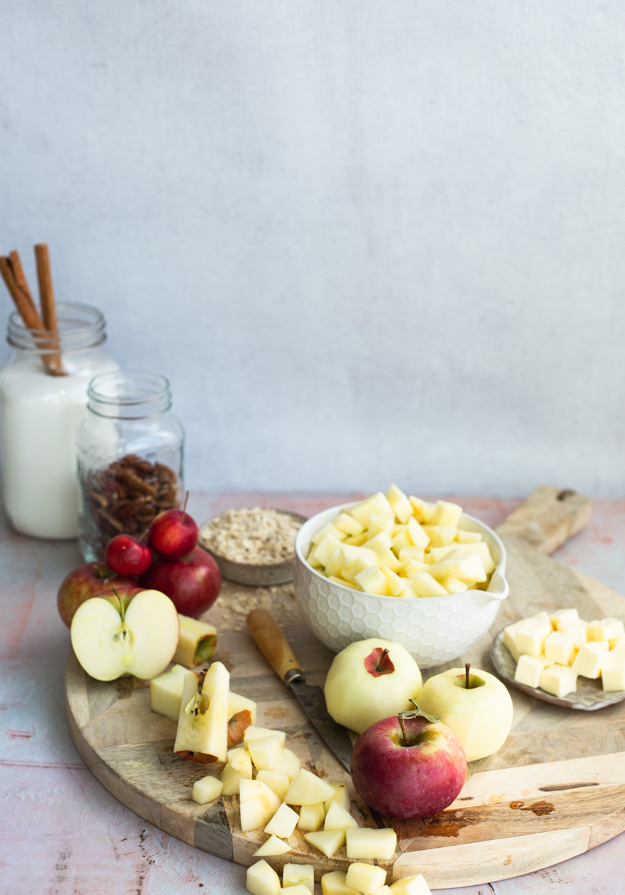
You can thinly slice the apples by hand with a very sharp knife and some good knife skills, but it is much easier and you will get much more consistent results with a mandoline.

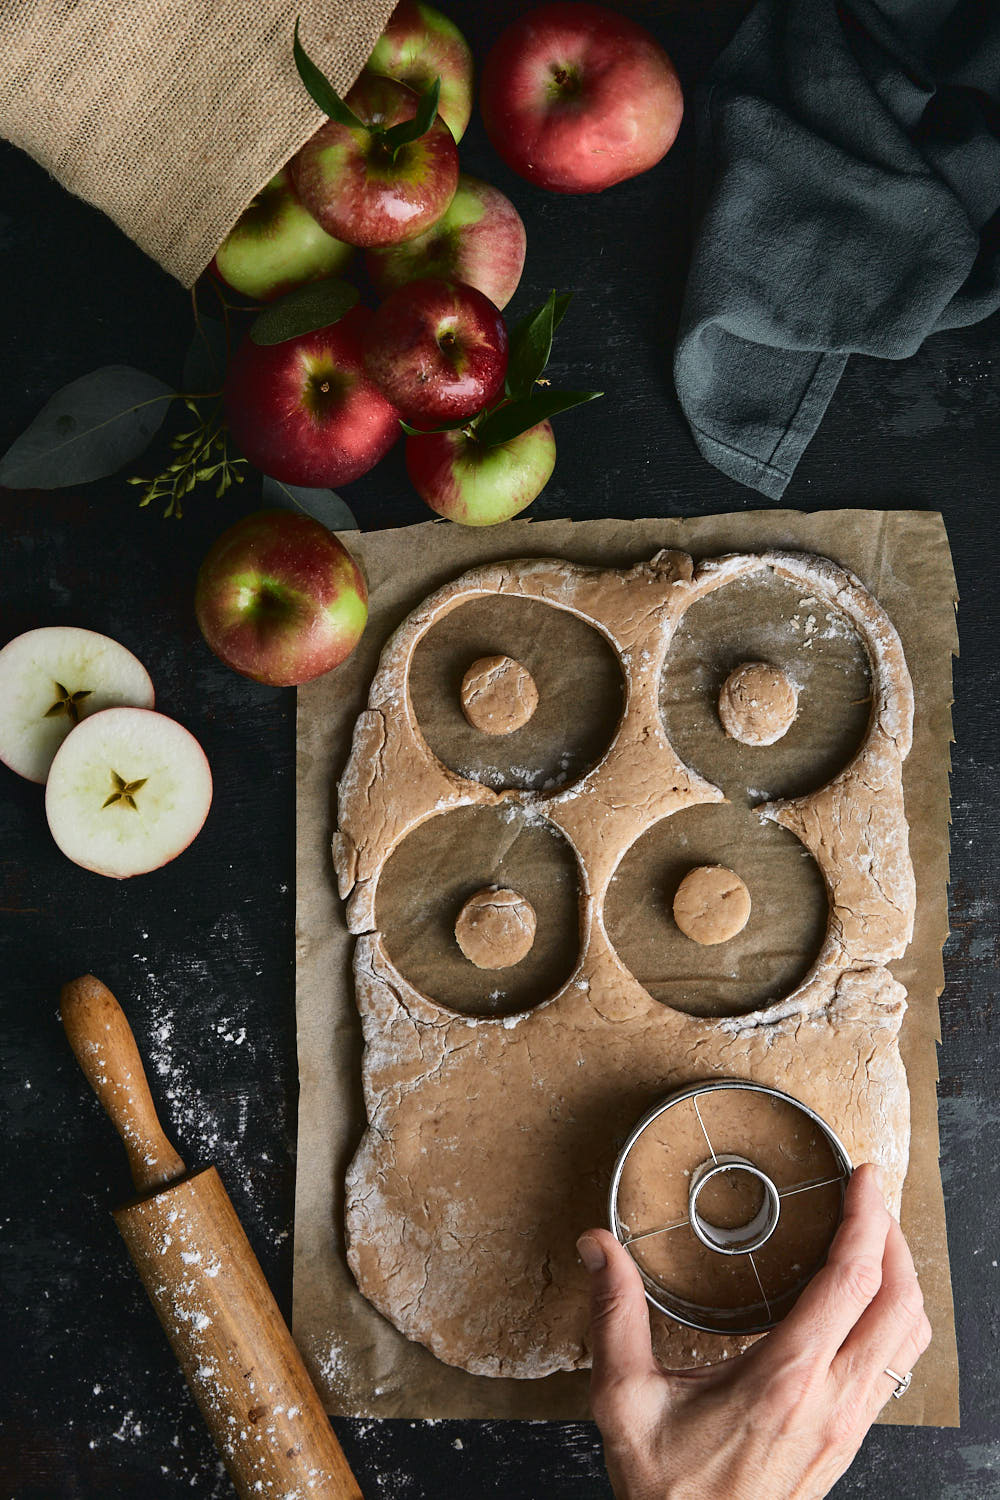
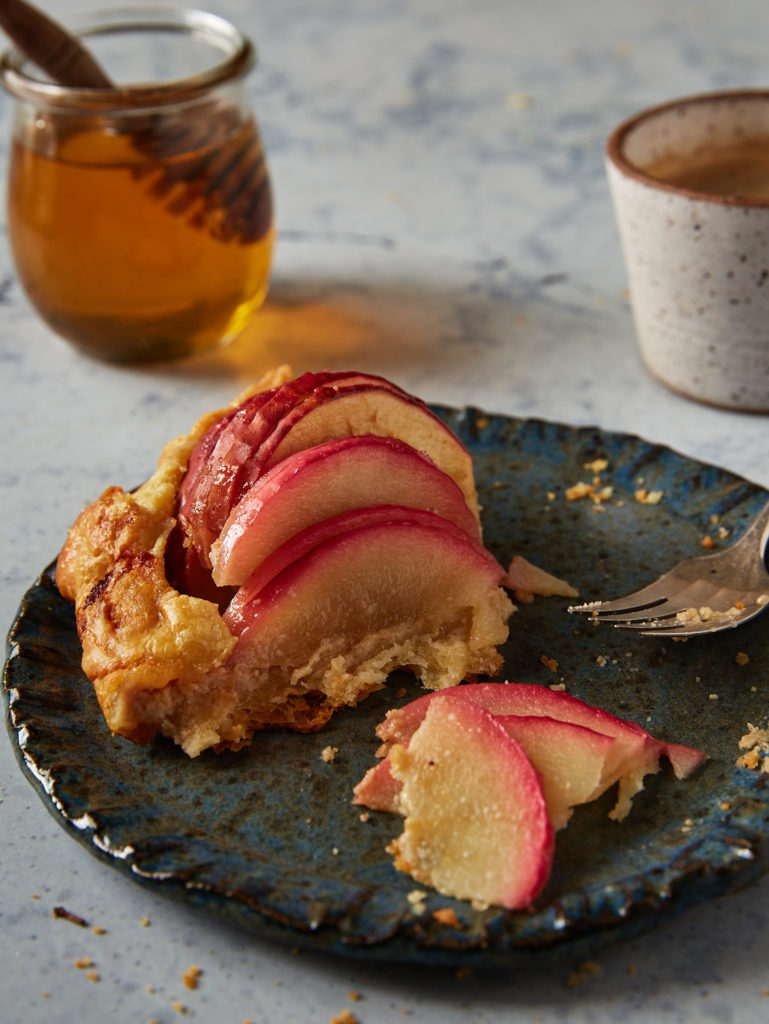
Firm white fleshed apples, such as Cortland or Empire apples, produce the prettiest roses. Honeycrisp apples are also good, although their flesh is a bit more yellow than the snowy white interior of the Cortland or Empire. I added a few drops of pink gel food colouring to the cooking water. It gave the white fleshed apples a beautiful pale pink tint.

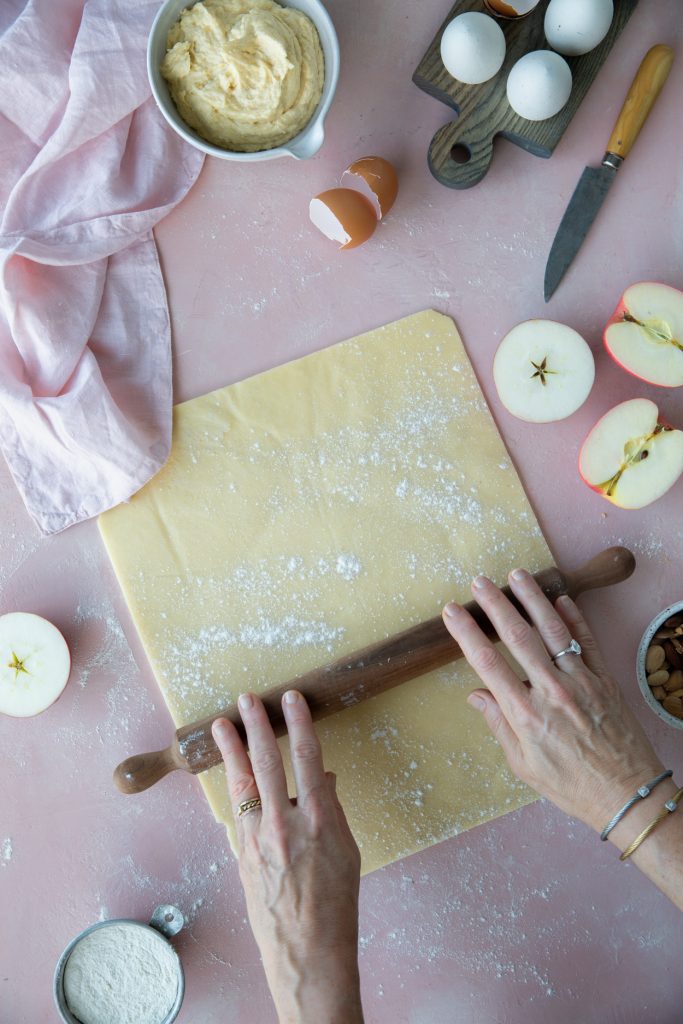
Defrost puff pastry overnight in the refrigerator. Chill your softened apples before forming the roses and wrapping them in the puff pastry. Hot or warm apples on cold puff pastry are a poor combination.

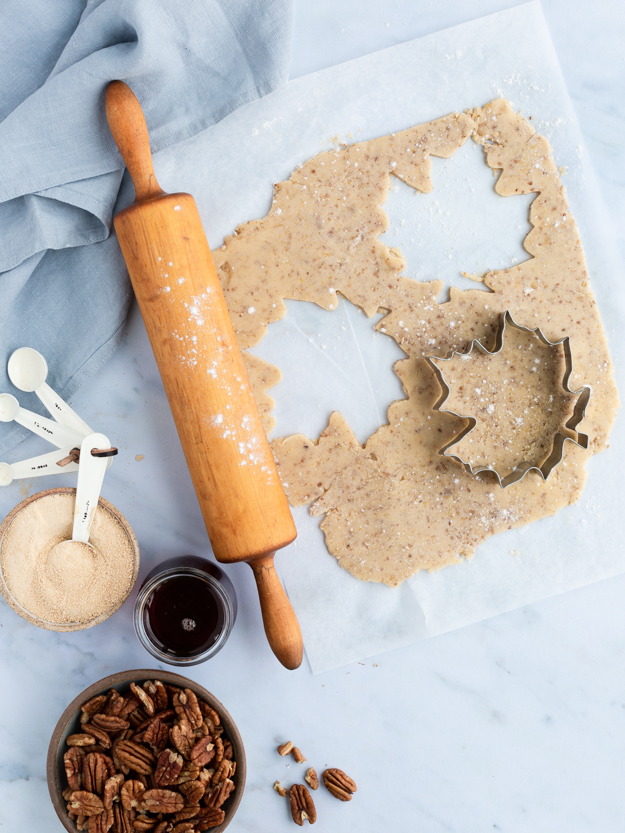
When rolling out the thawed puff pastry, flour your work surface and rolling pin and roll gently.

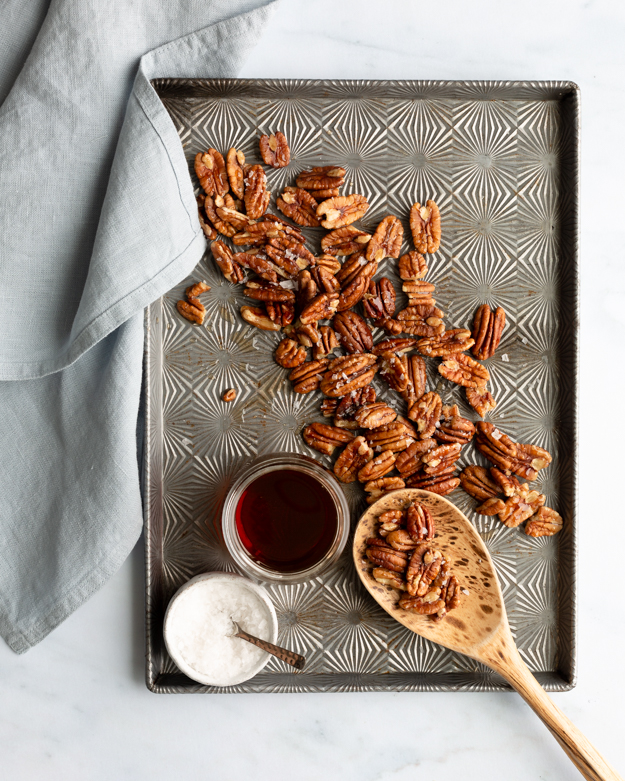
Try brushing the puff pastry with maple butter instead of jam. Maples and apple are a yummy combo.

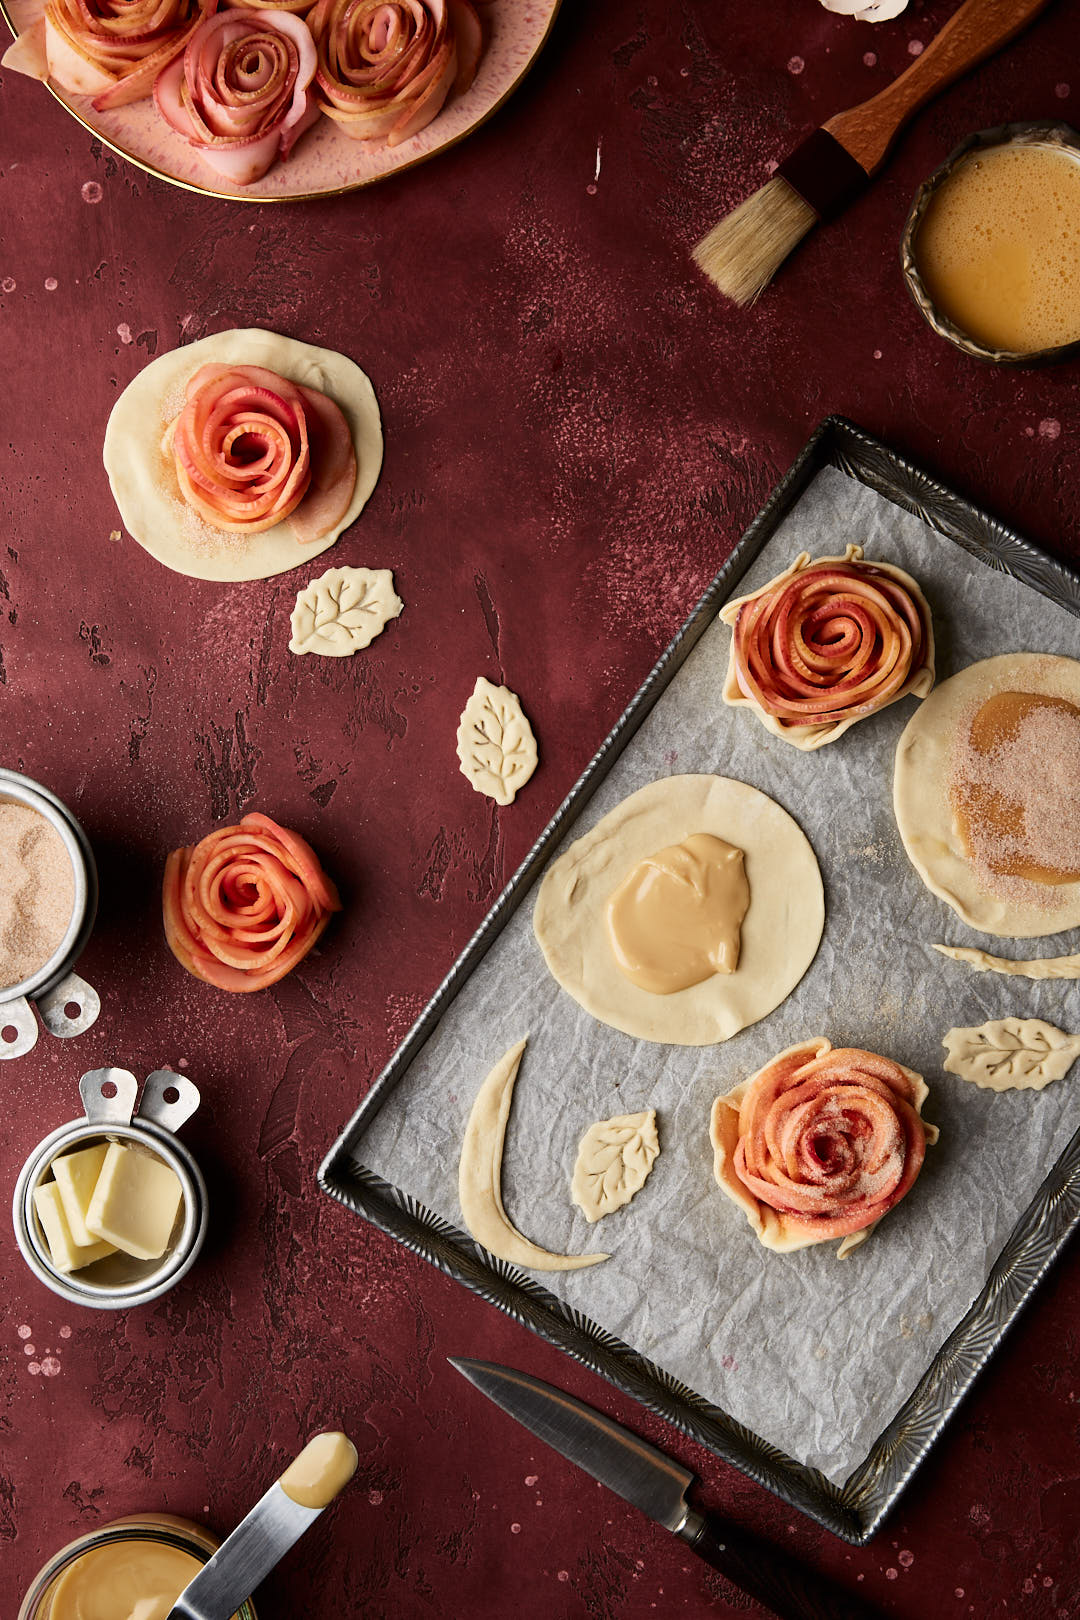
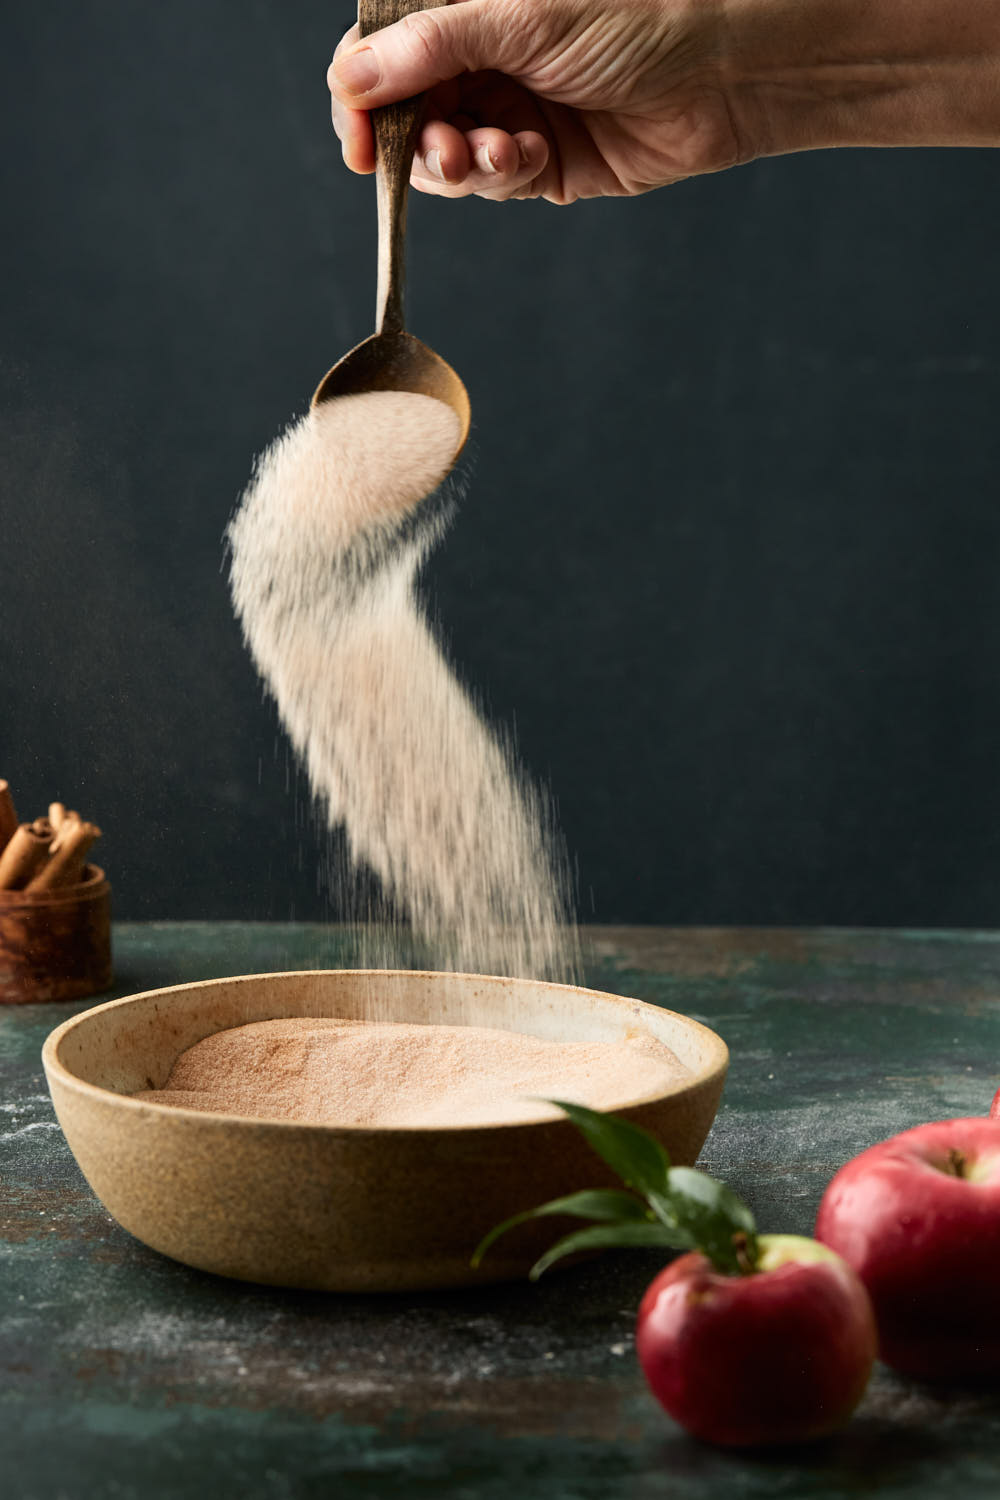
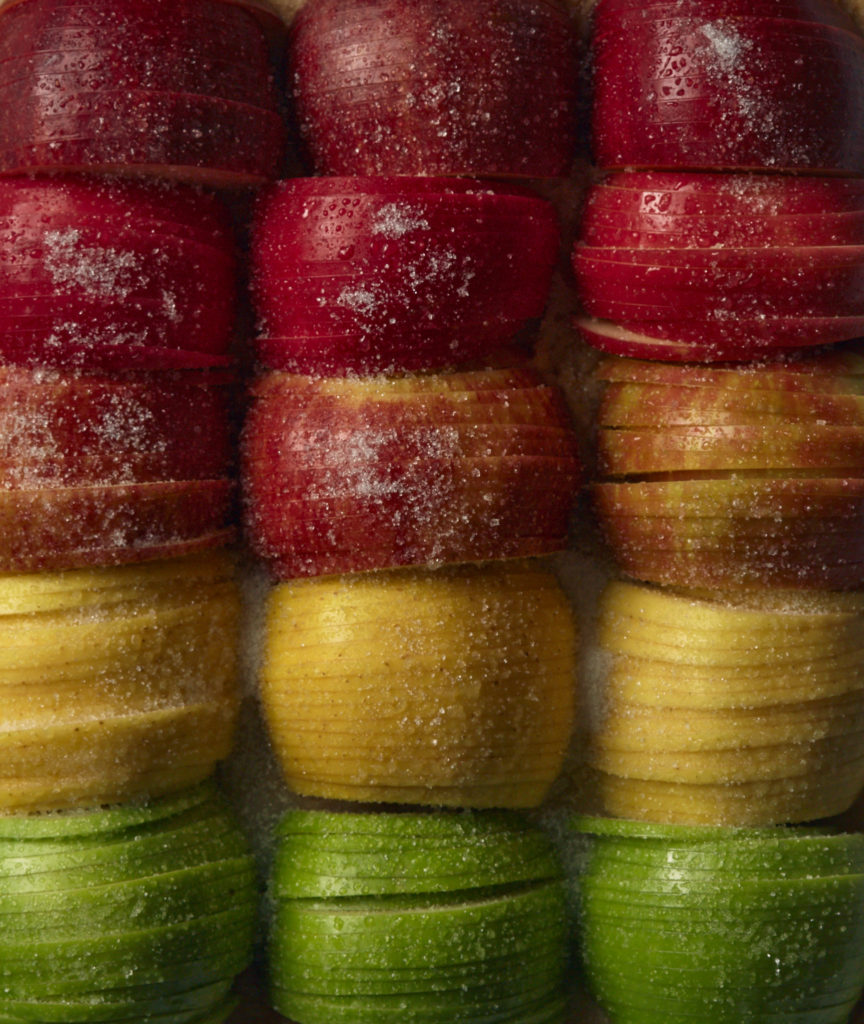
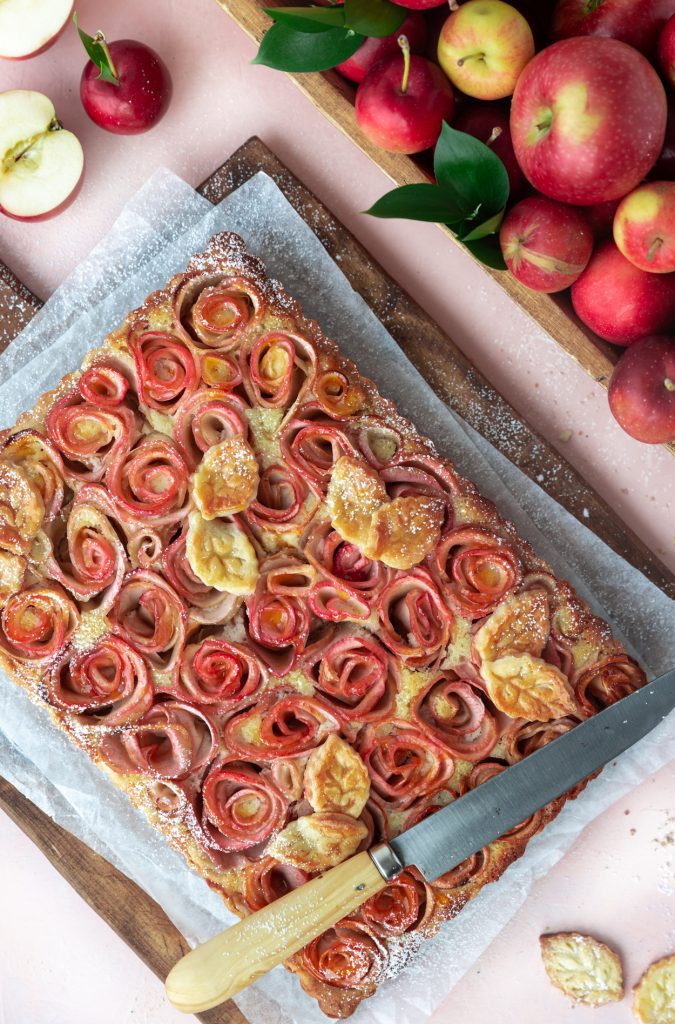
Just as you would dot the top of an apple pie with butter, brush the tops of the roses with some melted butter and a good sprinkling of cinnamon-sugar before they hit the oven.

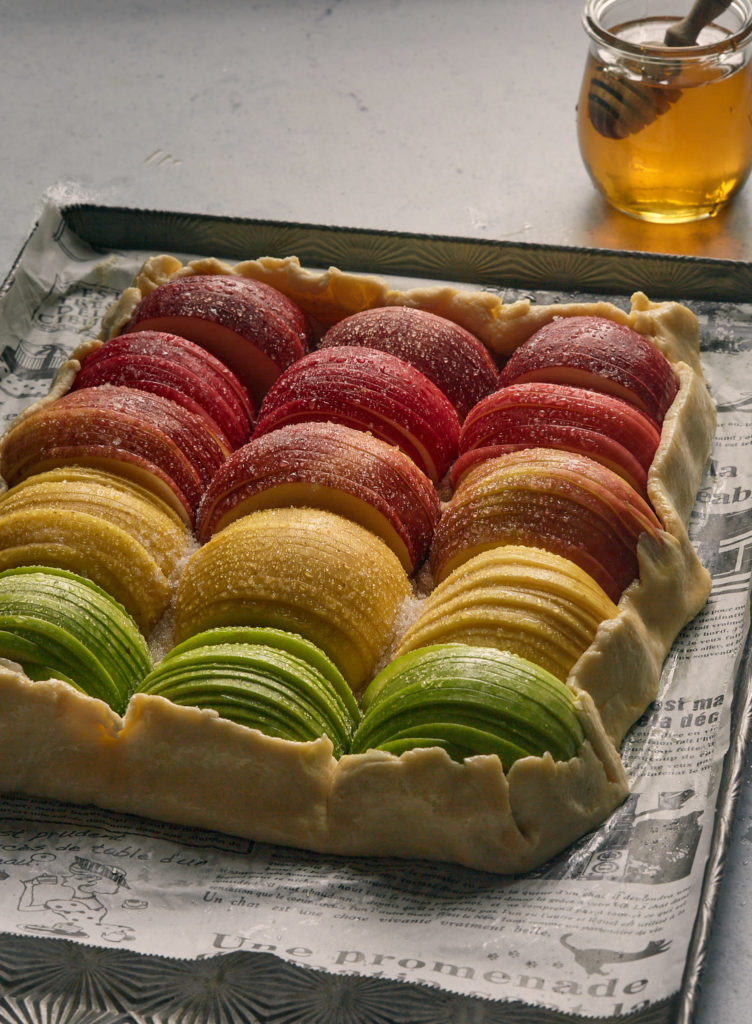
Pop the assembled tarts into the freezer for 10 minutes before baking. That will firm up the butter in the puff pastry and giving you extra flaky layers.

Start the tarts in a 425°F oven for 10 minutes, then reduce the heat to 375°F. The intense heat will jumpstart the baking.

Make little foil hats for all the apples. Those thinly sliced apples are delicate and you want to protect them.

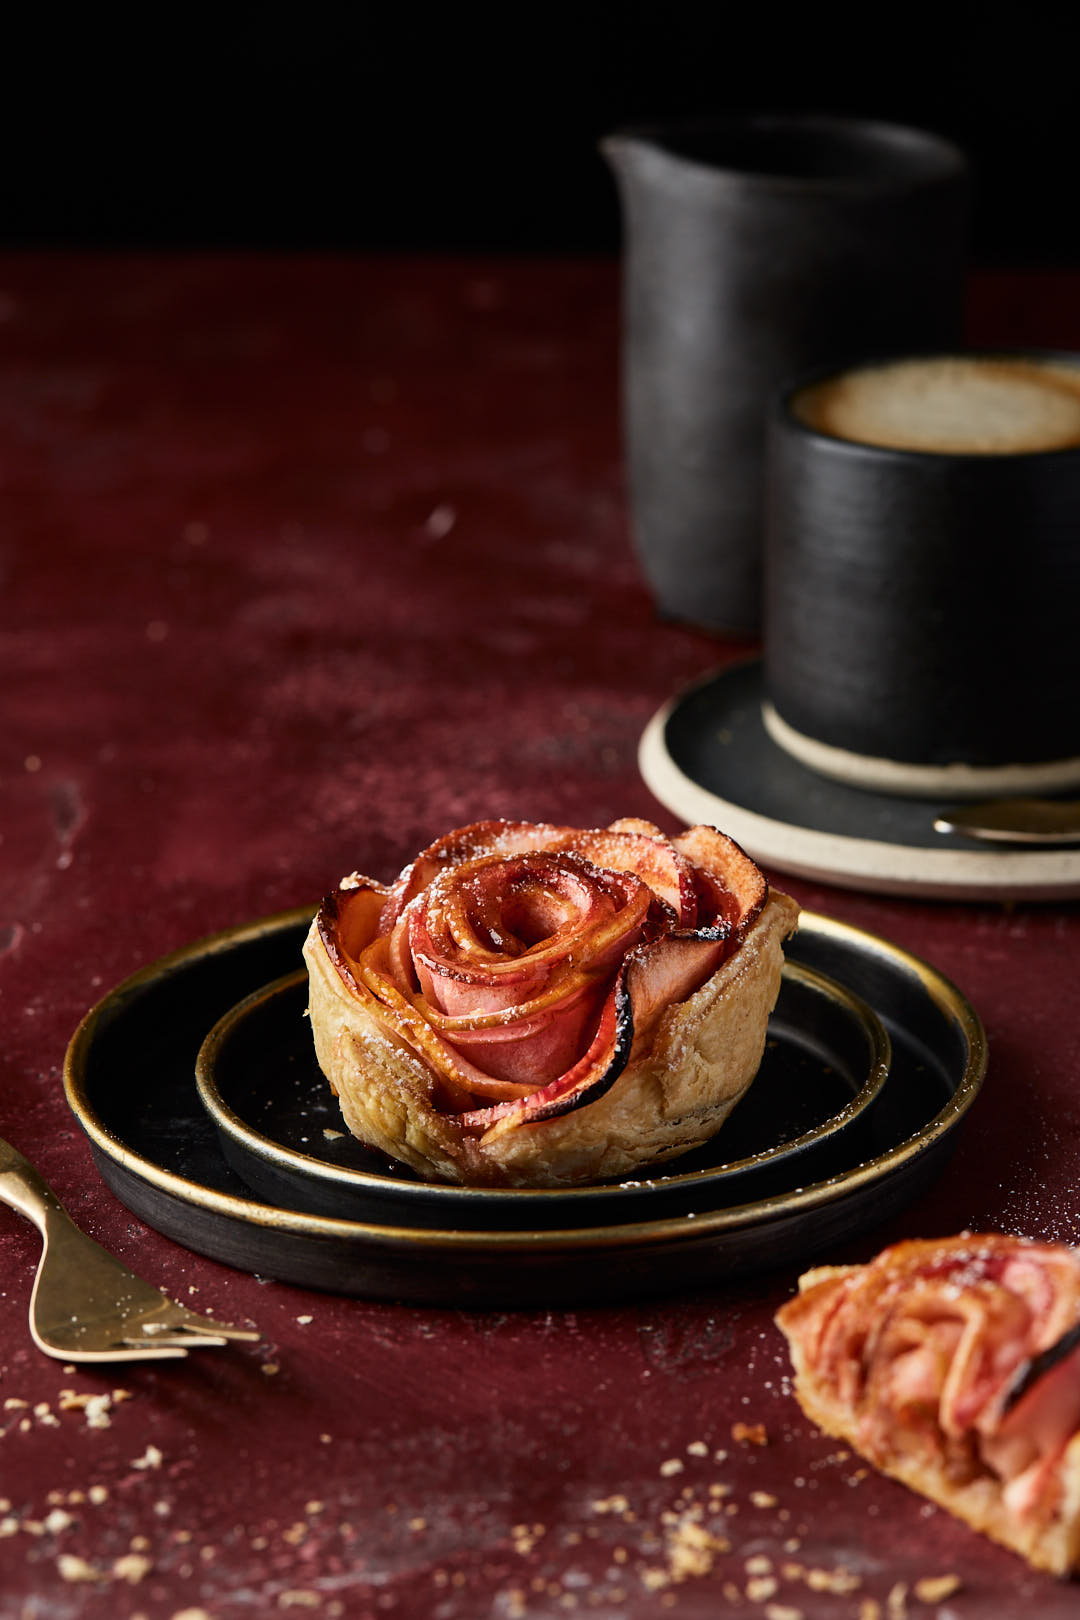
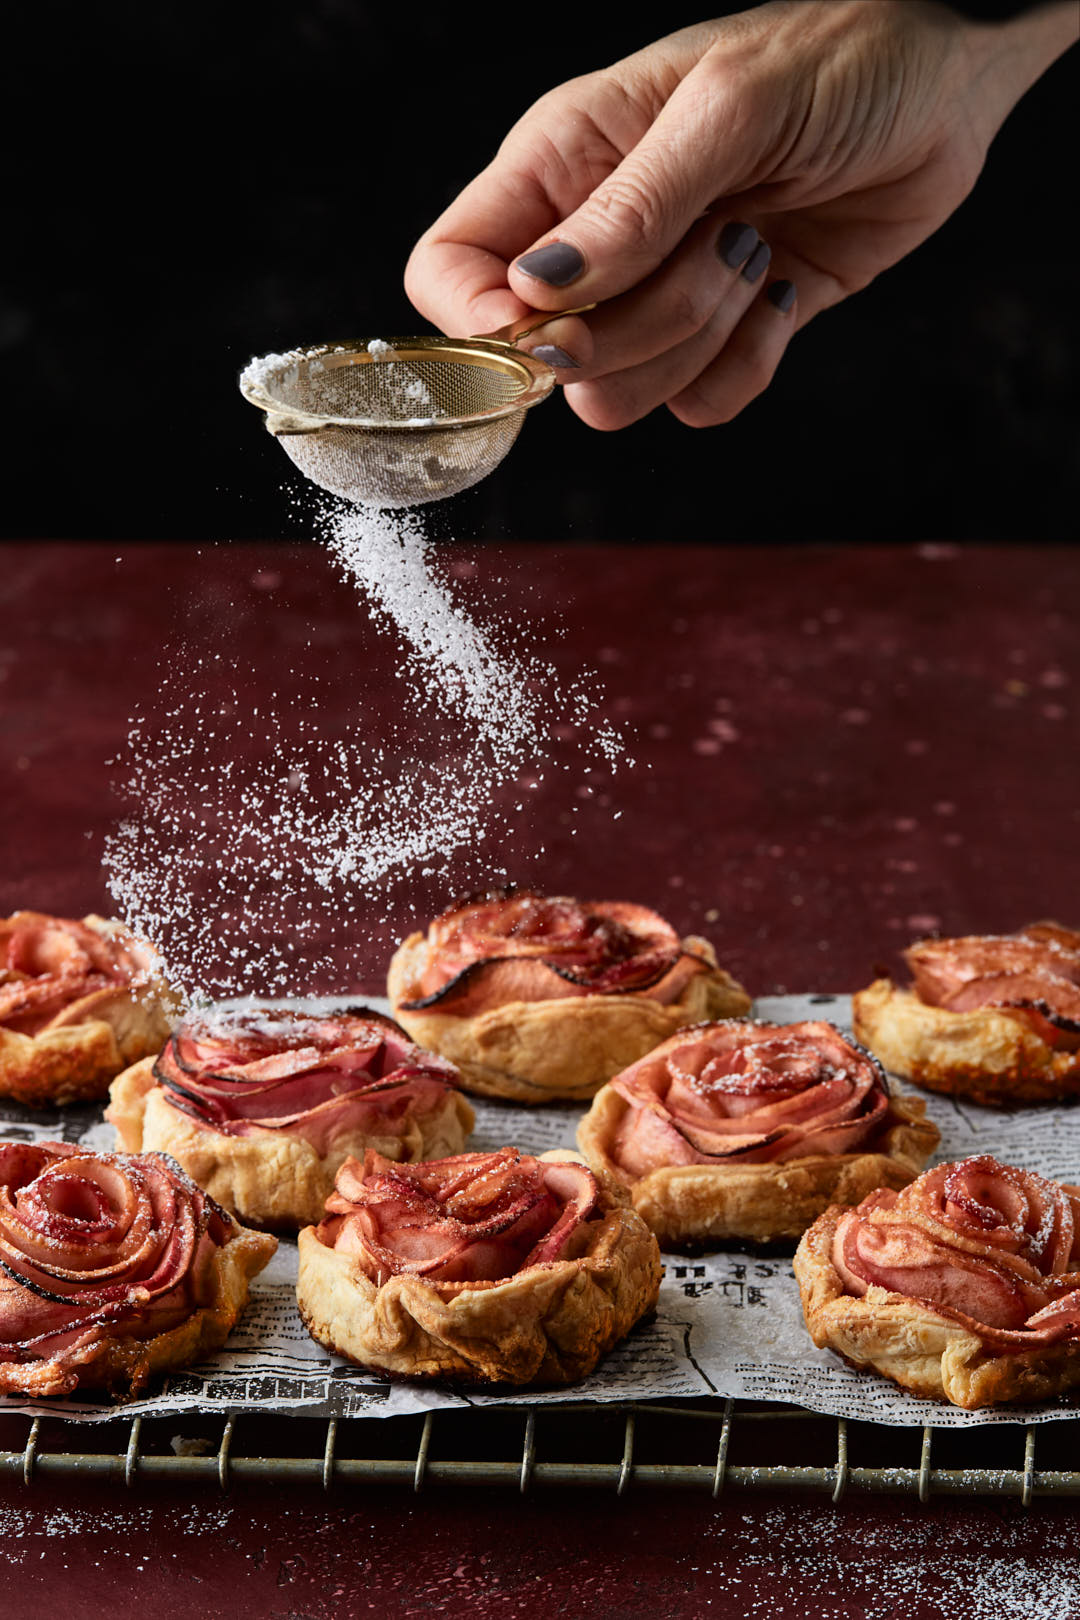
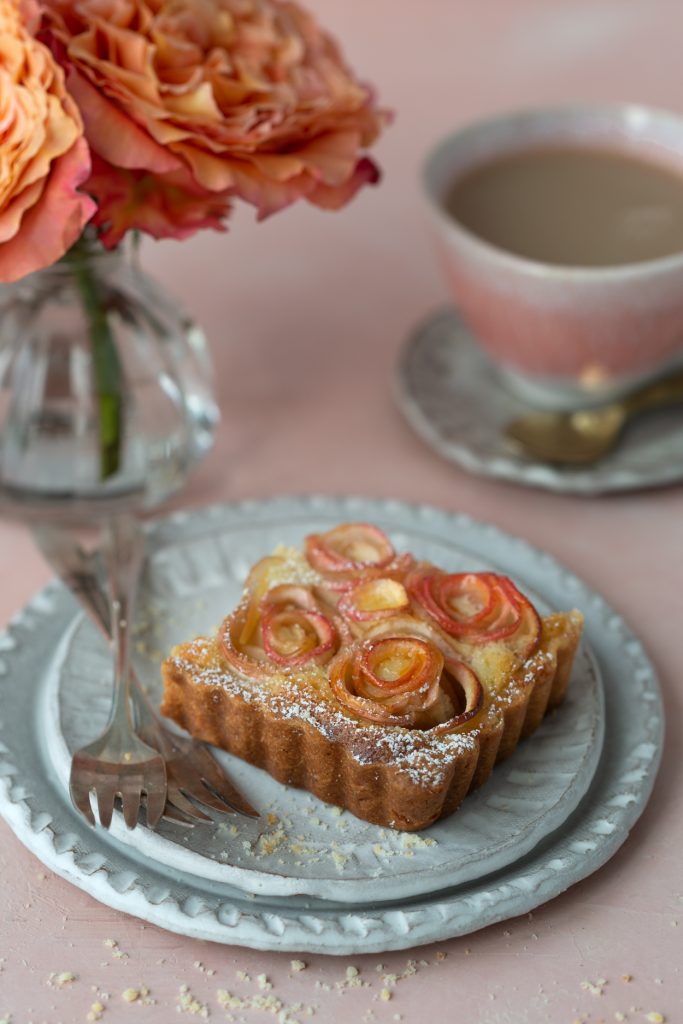
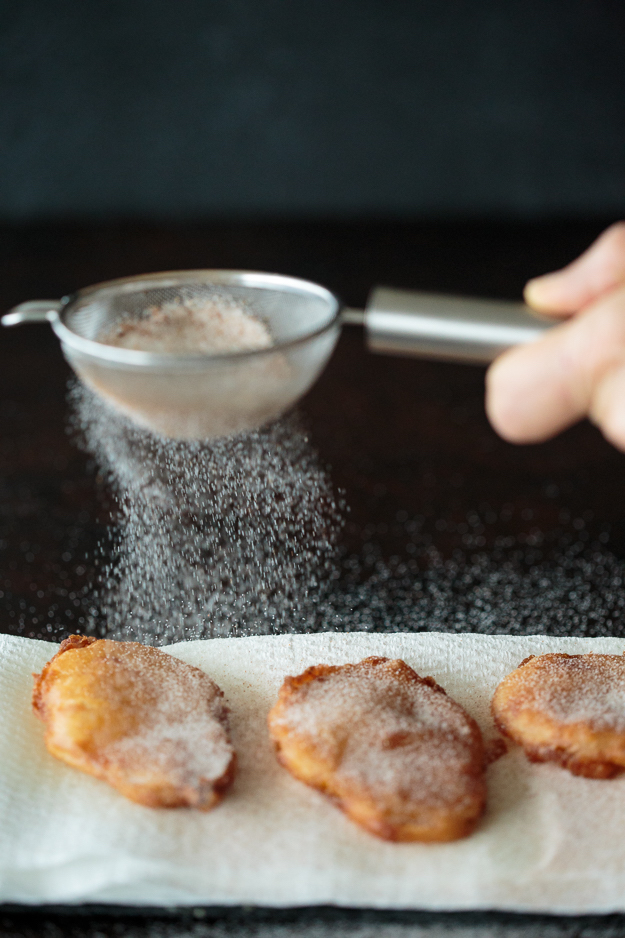
A light dusting with icing sugar once they are cool, makes them extra pretty and sweet.

Leftovers keep for 1-2 days, on the counter, uncovered. If you wrap them, they will sweat and the pastry will get soggy.

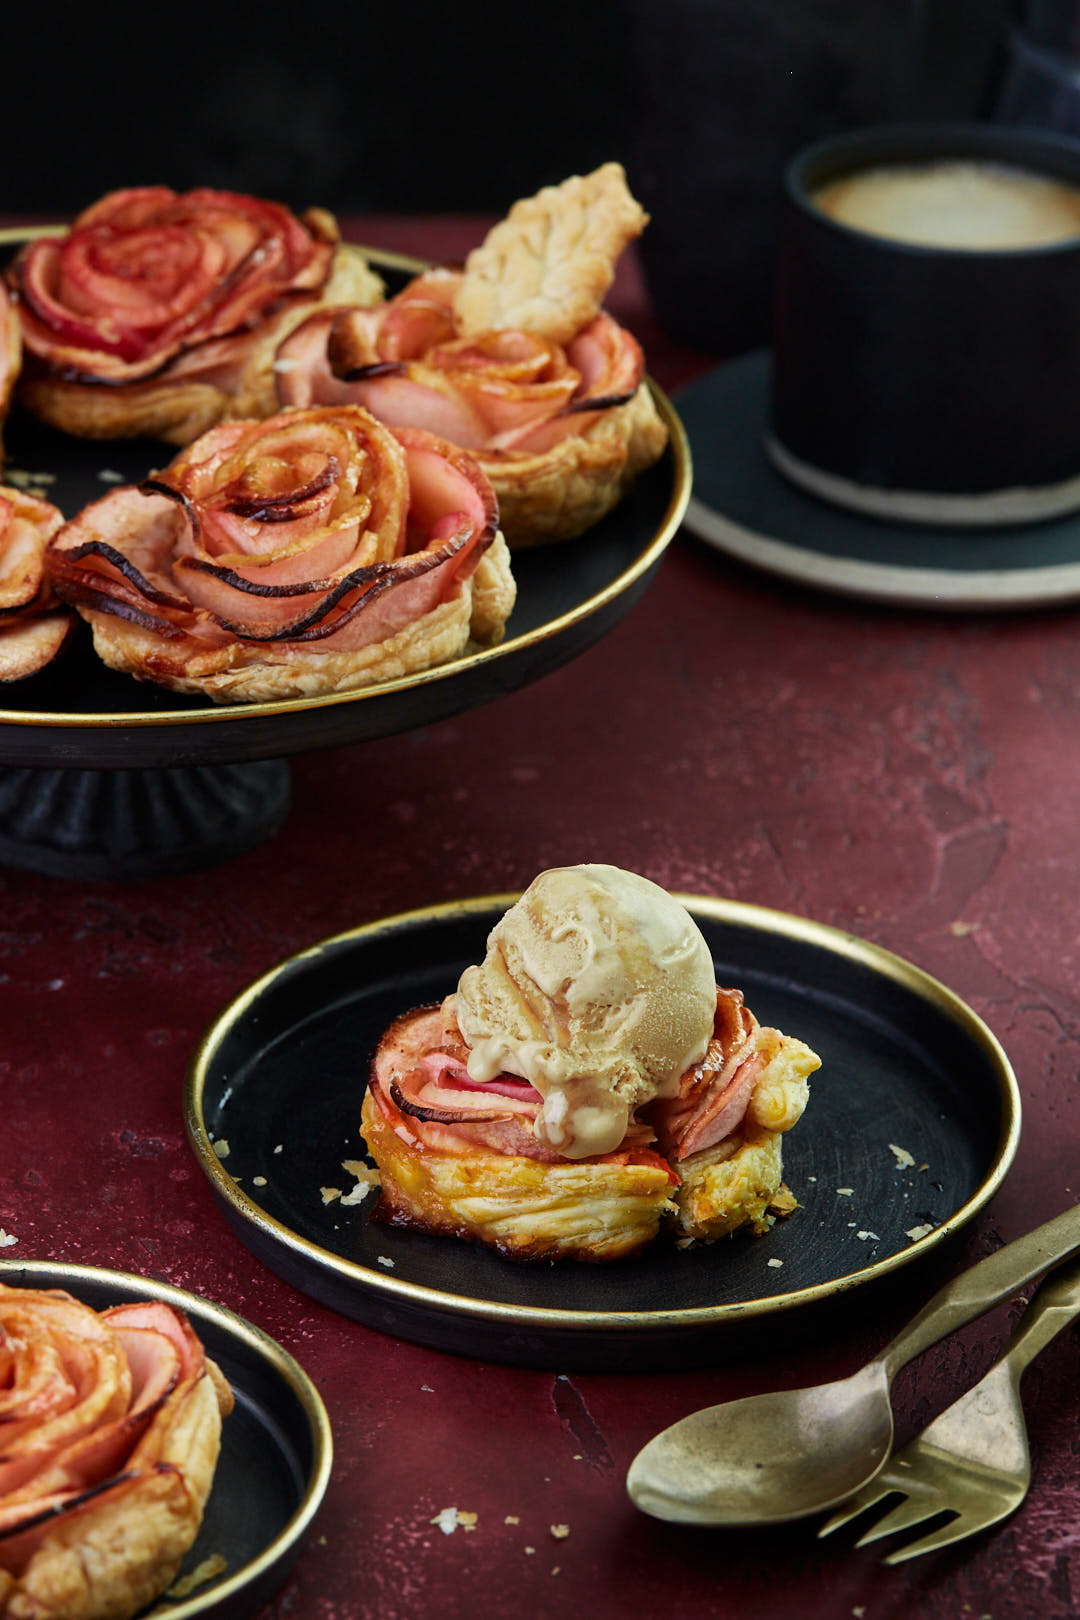
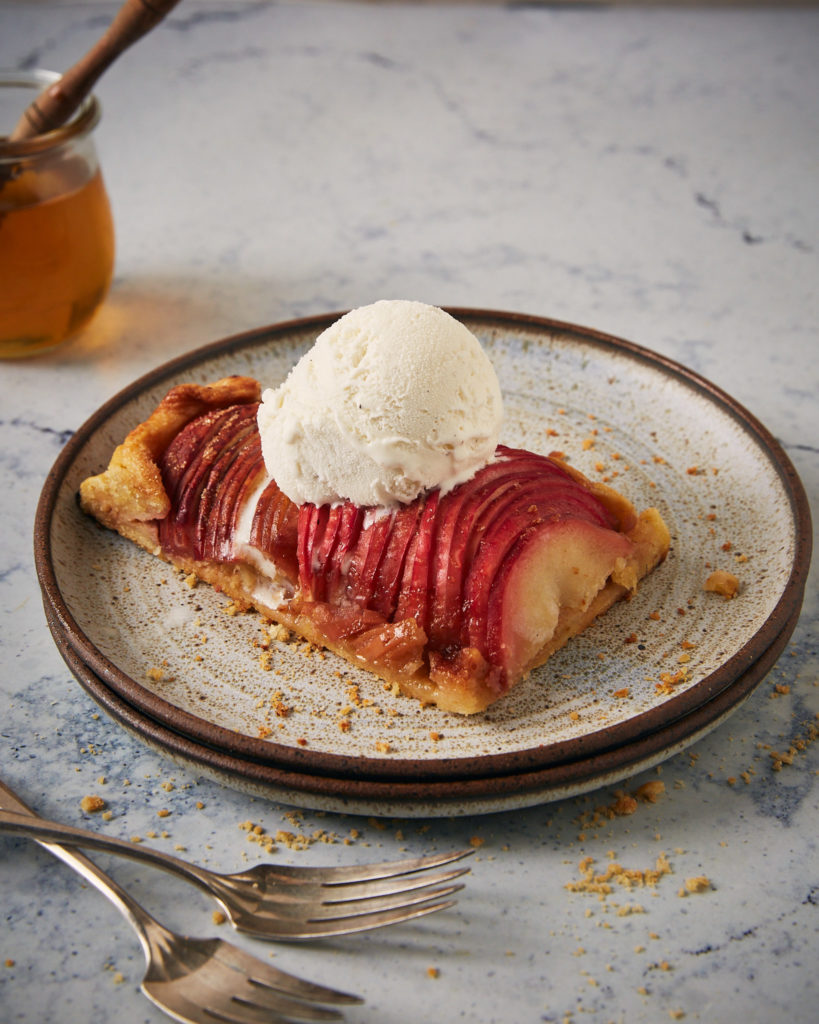
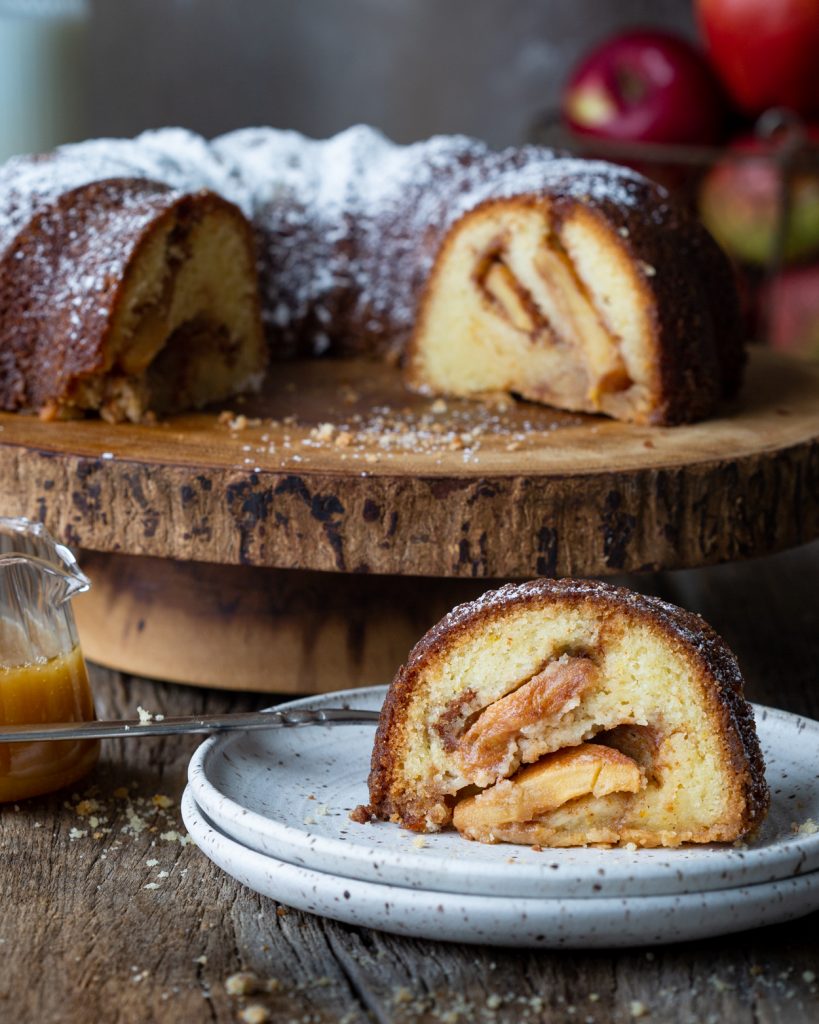
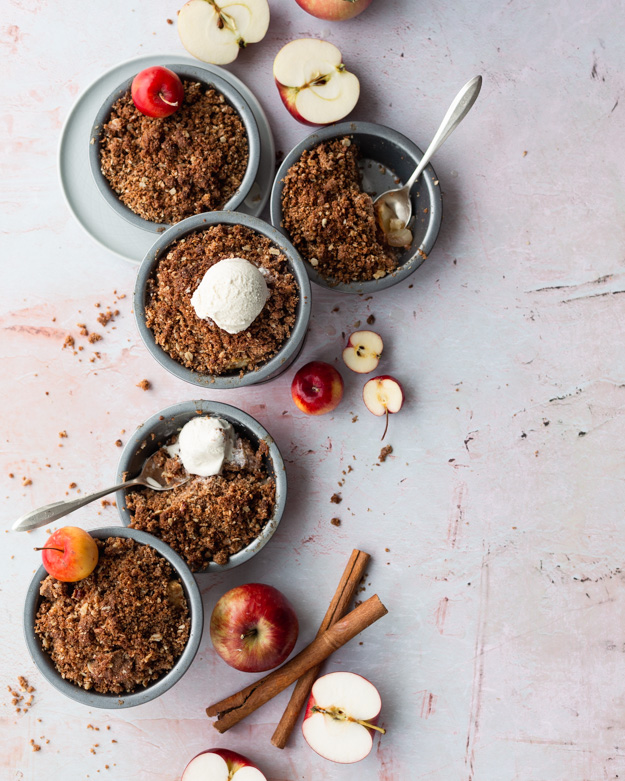
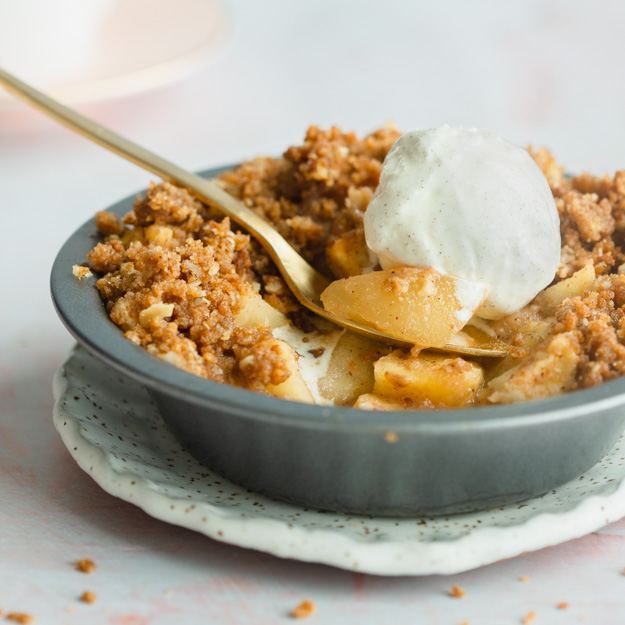
A scoop of salted caramel ice cream is a welcome accompaniment.

Click here to print recipe for Maple Apple Rose Tarts.

Apple Cider Donuts

Are you #teampumpkin or #teamapple when it comes to fall baking? I have both feet firmly planted in the apple camp. It’s not officially fall for me until I make Apple Cider Donuts. I have always made a baked version, but this year, Claire Saffitz convinced me to try frying them.

I was not disappointed. Frying results in a craggy crunchy exterior that can’t be replicated by baking. Donuts are best eaten within hours of being made. The dough can be made a day ahead and stored in the fridge. Then all you have to do is fry them when you’re ready.

Because I never met a kitchen gadget I didn’t like, I have a dedicated donut cutter. No need to buy one though. You can just use a 3-1/4 inch round cutter and a second 1-1/4 inch round cutter to cut out the centre. Don’t throw away those donut holes. They are the baker’s treat!

The donuts are intensely apple flavoured thanks to a dough that incorporates both apple butter and reduced apple cider. The interior is pleasantly dense. These are a cake style donut (as opposed to an airy yeast donut). The dough is very sticky, so it needs a rest in the fridge before cutting and frying. It’s critical to flour your cutter very well. You’ll see in the video that I place each donut on a little square of parchment paper. They are much easier to transfer into the fryer this way. Once they start frying, you can remove the paper from the oil with a pair of tongs.

Don’t skip the cinnamon-sugar coating.

Click here to print recipe for Apple Cider Donuts.

Ombre Apple-Honey Galette

If you were at the Smiths Falls YIG (Your Independent Grocer) last week, and saw a masked woman pawing through every apple bin, looking for perfect specimens in every colour of the rainbow, that was me. I apologize for getting my germs over every apple!

I realize that August is a bit early to start posting about fall apples, but Rosh Hashanah is in two weeks and we’ve got to get our ass in gear. I’m not a fan of traditional honey cake. I find it too cloyingly sweet. I wanted to find a way of incorporating both apples and honey into a dessert.

Apples and honey go together on Rosh Hashanah (the Jewish New Year), like cookies and milk, every other day of the year! We dip apples in honey to symbolizes our wishes for a sweet year for family, friends and all the Jewish people. While this explanation makes sense, I have often wondered why specifically apples and honey?  Why not figs dipped into date syrup?

In researching this question, the interpretation I discovered on the website torah.org, resonated quite strongly with me.Their insight regarding the apple part of the equation, is explained this way:
“On most fruit trees the leaves appear before the fruit, thus providing a protective cover for the young fruit. The apple, however, makes a preemptive move by appearing before the leaves. The Jewish people are compared to an apple because we are willing to live out our Jewish lives even if this seems to leave us unprotected. “

The choice of honey was brilliantly explained with this insight:
“A bee can inflict pain by its sting, yet it also produces delicious honey.  Life has this same duality of potential. We pray that our choices will result in a sweet year.”

And so apples and honey it is again, this year on my holiday table.

You’ll need 5 different varieties of apples if you want to make the Rainbow/Ombre effect I produced here. You’ll need two of each kind of apple. Look for dark red apples, pink apples, red-orange apples, yellow apples and green apples. A very sharp paring knife and about 20 minutes of concentration and you will be ready to assemble.

I used my favourite galette dough as the base. Impossibly flaky and delicious it is a versatile dough. I mixed some ground almonds, honey, egg and flour to make a honey paste (frangipane) as the base for the apples. The dough is folded up around the apples in a very casual way. Nothing precious here. Sprinkle it all with some cinnamon sugar and then into a hot oven.

The colours do fade a bit when baked, but the taste is so delicious. I brushed it with a honey glaze when it was still warm, for extra shine.

A scoop of vanilla ice cream would be very welcome.

Or just plain with a cup of coffee or tea.

Apple Rose Tart

Sometimes when I post things, I think, “who is actually going to make this?” This Apple Rose Tart is one of those things. It took a few hours to create this beauty. It is my take on Julie Jones’ incredible Apple Rose Tart. I have been obsessed with baking it for a while now. I finally decided to tackle it last week.

I was listening to Sprout podcast last week, on the subject of Creating a Space for Judaism in the Lifestyle World. Rebekah Lowin was being interviewed and something she said resonated strongly with me. “Things don’t have to be fast and easy. They can be a little bit challenging. Sometimes giving yourself a challenge is beautiful and a more interesting way to live your life.”

My girlfriend Sandy and I were chatting last week, about how we want to spend our time, at this point in our lives. We are both empty nesters. She said she is looking to pare down her time in the kitchen. She only wants fast, easy recipes. I had to laugh, because at this point in my life, I only want to create and photograph beautiful food. If it takes a bit longer, I’m ok with that. I have always had a very strong sense of aesthetics. It drives my husband crazy that I insist on labelling jars with my label maker, in a specific font and not just masking tape and a marker.

So, even f you don’t plan to create this tart, I hope that you can enjoy my journey and still appreciate the beauty. If you do plan to make it, I have included a very detailed recipe and a video showing how to create these beautiful apple roses.

Julie’s version of the tart uses a basic shortcrust pie dough. I decided to use a pâté sucrée instead, which uses more sugar and some eggs. It has the crumbly melt in the mouth texture of a shortbread cookie and I thought it would pair perfectly with tart apples.

I used a rectangular tart pan (11×7 inches) but a 9 inch round pan would work perfectly. The pan should have a removable bottom. The tart is first filled with an almond frangipane (ground almonds, eggs, butter and sugar).

The apples need to be sliced quite thin (1mm or 1/16 inch). A mandolin is best for this job. Core apples and cut in half, vertically. Once sliced, they go into a bowl of cool water with lemon juice to help prevent browning. Then, they are microwaved until pliable and don’t crack when you bend them. This takes about 5-8 minutes, depending on your microwave. Then the fun part begins. It’s not actually difficult, it just takes time. I found the process quite meditative.

Apple Caramel Cake

I’m passionate about apple cake, so when my Instagram friend Dee, boasted that her apple cake was the BEST ever, you can bet that got my attention. Of course, I had to go over to her blog and check it out. I had a sneaky feeling I knew exactly which recipe she used, and I was right. The recipe came from her mother-in-law, who got it from the Second Helpings Please! Cookbook. Every Jewish mother, worth her salt, cooked from this book in the 1970’s. I don’t recall my mom using this book though. We ate mostly frozen foods in the 70’s.

I first learned about this apple cake at one of my very first professional cooking jobs. I was working in an upscale take-out food shop in Toronto’s Yorkville area called Dinah’s Cupboard. I learned so much from Dinah Koo, the shop’s owner. She demanded perfection and precision. She cooked with big flavours and was a master at presentation. I am forever grateful to her for teaching me so much. It was my job to make 4 of these cakes every day. We baked them in 9×13 inch rectangular cake pans and cut the cakes into large squares to sell in the shop.

Dinah’s twist on the Second Helpings classic was to soak the just baked cake in a caramel sauce. How bad could that be? As soon as it comes out of the oven, poke holes all over the cake and pour on caramel sauce so it has an opportunity to soak in. This is a moist, dense, intensely flavourful cake. Because I’m fancy, I baked mine in a Bundt pan with 2 layers of apples sandwiched between 3 layers of batter. Watch how it all comes together.

Maple Pecan Shortbread

There are times that call for a simple, one-bowl, 10 minute drop cookie, and then, there are times that call for something a bit fancier, when you want to pull out all the stops. like, when you’re going to meet the parents of your son’s fiancé and want to bring something that says thanks for the hospitality. We travelled to Owen Sound, Ontario for Canadian Thanksgiving this past weekend, to meet the folks.

On the way to Owen Sound , my husband and I discussed the logistics of the initial meeting. Would we just shake their hand, or hug? What if we go in for the hug, both arms open wide and they stick put their hand for a shake. Awkward! We took a chance and went for the hug and so did they. We arrived as strangers and left as friends.

Saturday night was Thanksgiving dinner. Mom and daughter cooked us an unbelievable feast, complete with turkey, dressing, gravy, cranberry sauce, roasted squash, mashed potatoes, beets and cabbage salad! For dessert there was an early birthday cake for me (Mark Bittman’s coconut cake), baked by my son and THREE PIES (apple, pumpkin and pecan). Sunday we were treated to lunch at the charming Cobble Beach Inn. Both of her parents were charming and really made us feel welcome. Our son is a very lucky man.

These cookies were inspired by Emma’s Pecan Maple Shortbread Cookies. If you’re not familiar with Emma, you need to check out her blog and Instagram accound (@emmaduckworthbakes). She’s a brilliantly talented baker with clever ideas and her photos are off-the-charts gorgeous.

Emma dipped her cookies in a maple glaze and scattered maple glazed bacon bits over her cookies. I opted for a milk chocolate dip and a generous coating of maple glazed chopped pecans. These cookies are buttery, sweet, a tiny bit salty, crunchy and packed with maple flavour. If you can get your hands on maple sugar use it instead of regular granulated sugar.

After makling the dough, roll it out right away, while it is still soft, between 2 sheets of partchment paper. It’s so much easier than trying to roll out firm chilled dough. After rolling, chill the dough before cutting out your maple leaves. While the dough is chilling make the candied maple pecans. Mix together the pecans. maple surup and a pinch of salt.

I’m a bit of a perfectionist and I wanted an impeccable straight, clean line of chocolate and pecans. Just dipping the cookie into the melted chocolate wasn’t going to give me the edge I wanted, so check out my method for achieving perfectly decorated cookies.

Speculoos Apple Crisp

Here’s what date night looks like after 34 years of marriage. Gone are the days of candlelit dinners in the dining room at home. We stand at the kitchen island. He is peeling 12 pounds of apples and I am dicing them up to convert them into mini apple crisps for the freezer. We used to cook together all the time when we first started dating. But then I became a professional cook and took over kitchen duties. I had forgotten how nice it is to cook together. Granted, the CFL weekly highlights were on TV in the background, but still, it was quality time.

I had a big bag of my go-to crisp topping in the freezer so making these went really quickly. We still had about 5 mini crisps left to cover with the crumble, but we ran out of topping. I found a bag of oat crumble in the freezer, leftover from my Maple Crunch Birthday cake. My husband suggested we top the remaining apples with this topping so we tried it. We baked the tray of crisps and had a taste test. The oat crumble topping was fantastic.I played around with the recipe a bit and had the brilliant idea of using Speculoos cookies instead of oatmeal cookies. Gingersnap cookies would make an excellent substitute if you can’t find Speculoos (also called Biscoff). I added some chopped pecans and rolled oats for a bit more texture. This crisp topping is sweet but with a spicy ginger bite. A perfect complement to the apples.

With a scoop of vanilla ice cream, they were the perfect end to date night.

Click here to print recipe for Speculoos Apple Crisp.


Celebrating Blog Post #500 – Apple Cinnamon Ginger Crunch Cake


On May 19 2009, I wrote my first blog post . Today marks my 500th! I never set out to write a blog. It happened accidentally. I joined an online group who were baking their way through Peter Reinhart’s tome, “The Bread Baker’s Apprentice”. I was hoping to increase my bread baking skills beyond the simple challah I baked each Friday.

The premise of the group was that we would work our way through the book, alphabetically, from Anadama Bread to Whole Wheat , one loaf each week, for 43 weeks. Group members would share their experiences in a Google group. I noticed that some members were chronicling their journey via blogging. It seemed like a cool idea, so I stayed up all night and figured out, with the help of wordpress.com, how to do it.

Here is a shot from that first post. My bread turned out perfectly, but clearly my photography skills needed work.
There were 212 of us, from all over the world, who started the challenge together. Only 12 of us actually finished! I loved the whole process! At heart, I think I am a born storyteller, so blogging really spoke to my soul. I love to create, so baking, taking photos of the process and telling stories about it really fed my creative needs.

After I finished my final loaf, I just kept on blogging. Along the way, I bought a better camera, took some online classes in food writing, and photography and attended several workshops on food styling and photography. One of the best investments I ever made was purchasing this online course from Rachel Korinek, of Two Loves Studio. She is an amazing teacher and extremely generous with her time. I have also been inspired by the effervescent Bea Lubas. Her ability to tell stories is unparalleled.

Another outstanding teacher is Joanie Simon of The Bite Shop. Her youtube videos on food photography, released every Thursday, are the highlight of my week. I have learned so many tips and techniques from her. All of these mentors have helped me along my journey, but the most important tip I have learned is practice and perseverance. Nothing replaces these.

With 500 blog posts under my belt, I am excited to see where the next 500 take me. I have a loyal group of followers who encourage me by leaving me questions and comments. Thanks from the bottom of my heart. It’s so nice to know someone is out there reading what I’m writing!

I am so grateful for the community of food bloggers and photographers. For the most part, they are people who are generous of spirit. I adore the trait of generosity. My fellow food bloggers and photographers share knowledge and offer gentle and constructive criticism as well as heaps of praise. I feel like I have found my tribe.

To celebrate this milestone I decided that a special cake was in order. This cake is quite spectacular. It starts with three layers of moist apple spice cake. Each layer is covered in silky cinnamon Swiss meringue buttercream. To finish this gorgeous cake, I added a drizzle of apple cider caramel.
The cake batter is crammed full of diced apples. I used three huge Honeycrisp for mine. When you mix the batter together you will think you made a mistake because it is so thick. It basically looks like bits of diced apples, barely held together by batter. Don’t worry. As the cake bakes, the apples release their moisture and your cake will be perfect.

This cake recipe is barely adapted from John’s recipe on The Preppy Kitchen. His knowledge of  cake baking is mind-boggling. He taught me about cake strips. They help prevent domed and cracked tops and over-cooked edges.

 I went with a silky Swiss meringue buttercream, accented with cinnamon. While admittedly a bit more work than a simple American buttercream, I just adore the light and velvety texture of a Swiss meringue buttercream. If you are curious, here is everything you ever wanted to know about buttercream from the über-talented Stella Parks.

For the shiny caramel drizzle recipe, I went straight to Tessa Huff’s gorgeous book, Layered, for inspiration. In a traditional caramel sauce, you use water and white sugar. Tessa suggests reduced apple cider and brown sugar instead. The tang of apple cider is perfectly balanced by the toasty notes of brown sugar in the cooked caramel. It really helps to offset the sweetness of the buttercream.

I added a little surprise of crunch between each layer with a ginger-pecan crumble, because texture is important in everything.

Truthfully, we didn’t drink the Prosecco (in the first photo of this post) with this cake. My first slice I had with some ice cold milk, and the second (and third, if we’re being honest), I had with tea. My fourth slice I just ate standing in front of the fridge. I ended up making this cake three times, before I got it exactly where I wanted it, so we had lots of cake. Even the mistakes were delicious. The first cake was served at our Rosh Hashanah dinner, with a birthday candle for my cousin Barbara. The second and third cakes were sliced, photographed and then wrapped and sent off to my husband’s office, where most of my baked goods go to have a happy ending.

Click here to print recipe for Apple-Cinnamon Crunch Cake with Caramel Drizzle.

Pear Fritters

on gold platter 1As if I really needed another reason to be grateful that I am a Canadian and not an American citizen, I found one. The mighty tonka bean!  Turns out they are illegal in America, but perfectly safe to purchase here in Canada.

Tonka beans are a major source of coumarin, a highly aromatic organic chemical compound naturally occurring in many plants, including cassia cinnamon, lavender, and bison grass. The fear and confusion stem from the fact that coumarin is used in the production of Coumadin®, a blood thinner. But the chemical structure of coumarin is changed when it is used in the production of Coumadin®. Coumarin, naturally occurring in tonka beans and other plants will not act as a blood thinner. Yet, the FDA has banned tonka beans. Interestingly enough, they have not put a ban on any other plant naturally containing coumarin. tonka beansI discovered tonka beans while I was in Charleston South Carolina last month. I attended a cooking class and the chef whipped out a vial of contraband tonka bean. When we asked him how he got his hands on them he just smiled and said, “I have a guy.”

They grow in South America. While tiny in size, only 1-inch long, they are huge in aroma and flavour. They are reminiscent of vanilla, cloves, and cinnamon with a hint of nuttiness reminding me of almonds. To use them, they must be grated, much like whole nutmeg. A microplane grater does a great job of this.

I like Bosc or red or green Anjou pears for this dessert. They have a denser flesh than other pear varieties. They become more tender when fried, but they don’t turn to mush. horizontal pearsI left the peel on and just sliced them vertically so that each slice retained its pear shape. A basic fritter batter contains flour, baking powder, sugar, salt, egg, butter or oil and usually water or milk. To bump up the pear flavour I used pear cider for my liquid. I added half a grated tonka bean to the batter. If you can’t get tonka beans, add a bit of vanilla and almond extract to the batter. The second half of the grated tonka bean gets mixed into the sugar-cinnamon for topping the fried fritters.

Heat the oil to about 375°F for optimal frying. You want a crispy golden crust and a tender interior. They only take 2-3 minutes per side to fry.

Have a baking sheet lined with paper towels as well as your grated tonka bean-cinnamon sugar mixture ready before you start frying. Make sure to sprinkle with the topping while the fritters are still hot. Even if you omit the tonka bean, these fritters are freaking delicious. A burnished golden brown outer crust gives way to the sweet and creamy pear encased in the center.Sifting cinnamon and sugar 1They would be delicious with a cold glass of pear cider.on gold platter bite takenCould be a fun substitute for sufganiyah this year at Chanukah!fritters for 2

Click here for the recipe for Pear fritters.

Cider Glazed Apple Bundt Cake

with whole and sliced applesI happen to have a surplus of apples, so we’re baking apple cake around here this week. I have my go-to my favourite apple cake recipe, but I was intrigued by this recipe from the September issue of Cook’s Illustrated magazine. In addition to the apples in the batter, they added apple cider to the batter and glaze. A full litre of apple cider is reduced down to one cup to really concentrate the flavour.

The recipe fills a large 12 cup bundt pan, but because I can’t resist anything mini, I used my bundlette pan. I also made a small loaf with the leftover batter. loaf and minissingle miniThe batter comes together quickly. You don’t even have to bust out the mixer.

The baked cake gets brushed with some of that reduced cider and the remaining cider is mixed with icing sugar to create a yummy glaze.drizzling glaze 1

Click here to print the recipe for Cider Glazed Apple Bundt Cake.

with tea


Best Apples for Baking

headerOn the weekend we went apple picking. To clarify, we didn’t actually pick the apples off the trees, but we did pick them off the shelf at Farm Boy, so that sort of counts as apple picking, doesn’t it?

I have been wanting to write a post about the best type of apples to use in baking for some time now. With so many varieties of apples to choose from, it can be a little overwhelming to know which kind to use for which recipe. Although I don’t find choosing apples nearly as confusing as buying a pair of pantyhose. The breadth of choice there is mind boggling.

The perfect apple for pie, crisp or crumble (or any of those other baked apple desserts, such as grunts, slumps and pan dowdies) must be capable of holding its shape after cooking but still melt in your mouth. Equally important is that elusive perfect balance of tart and sweet.

We bought 7 varieties of apples.apple varieties 5
I took a scientific approach to testing, just like they do over at Cook’s Illustrated, which, by the way, just might be my dream job. I got out my scale and measuring spoons and peeled, cored and cut into wedges, exactly 9.5 ounces of each apple variety. I didn’t want to overwhelm the apples with too many flavours so I kept it basic. Each variety was mixed with 1 tablespoon sugar, 1 teaspoon lemon juice, 1/8 teaspoon cinnamon and a tiny pinch of salt. Initially I planned to bake the apples naked.sugar lemon and cinnamon3 varieties4 varietiesWhen I explained my methodology to my husband he said, “You mean you’re just going to bake plain apples, with nothing covering them??” I explained that I didn’t want to have too many other flavours muddying up my experiment. I took one look at his crestfallen face and abandoned my “pure” approach and agreed to cover the apples with crisp topping. It doesn’t take much to make that man happy.crisp toppingInto the oven they went, dressed with their almond-oat crisp topping. baked 1baked 2Here are the findings of our very scientific testing!

Highly Recommended :

Honeycrisp: Undeniably, these are my favourite apple for eating out of hand. They are shatteringly crisp, juicy and slightly sweet.

When we baked them they held their shape, but just barely. They literally melted in the mouth. The apple flavour was complex. My husband declared the crisp baked with honeycrisp apples to be his favourite. I liked it but found the flavour to be a bit too sweet.

Russet Apples: I just learned that these are not actually a single variety of apple. “Russetting” naturally happens to some varieties of apples. The skin becomes discoloured and somewhat leathery. As an eating apple, I find the skin to be tough, but the flesh, while not as juicy as honeycrisp, can best be described as powerfully “apple-y”. Russetts are an under appreciated apple. 

When baked, the russet apples were not as meltingly tender as the honeycrisp, but I really enjoyed their more gently yielding texture. The flavour of the russet was the most complex and balanced of all the apples I tasted. Slightly sweet but with a bit of tartness. Russets were my number one pick.

Recommended:

Granny Smith: Eaten out of hand, Granny Smiths are crunchy and quite tart, with a bright tangy apple flavour.

Once baked, they held their shape but the texture was quite soft. The flavour of these was more tart, not as “apple-y” as our 2 winners, but still, I wouldn’t object if someone served me a pie made with Granny Smiths.

Don’t Bother:

Pink Lady: Secretly I was hoping this varietal would be the winner. I mean, Pink Lady is an awesome name for an apple. As the name suggest, these have a lovely pink blush which turns into a deeper red with sun exposure. They are delicious to eat out of hand. They have great crunch and start off tasting slightly tart but end with a sweet finish. These apples have a surprisingly concentrated burst of flavour. 

My Pink Lady crush was over once we baked these. They were the firmest of the bunch, almost to the point of chewy. The apples barely gave off any juice, making for a dry apple crisp, never a good thing. The flavour was more sweet than tart and seemed to have lost it’s apple-y nuances once baked.

Empire: This varietal is a cross between McIntosh and Red Delicious apples. Eaten out of hand, this varietal shows off the best of both its parents- crunch from the Red Delicious and tartness from the Macintosh.

Once baked, the Empire apple failed miserably. They became quite mushy, almost to the point of apple sauce. The heat of the oven caused the sugar level to soar and any signs of tartness were gone.

Lobo: Lobos are an Eastern Ontario apples. I had never heard of them until I net my husband and moved to Ottawa. These are the apples of his childhood. An offspring of Macintosh, early Lobos are crisp and tart, but they sweeten considerably as they are stored.

When my husband tasted the baked crisp, he immediately identified it as the one made with Lobo apples. The texture was quite soft, almost mushy. The flavour was pleasant but far too sweet.

Gala: A New Zealand creation, Gala apples are known for their mild sweet flavor and crunch. They are thin skinned and the flesh has a grainy texture.

Once baked, gala apples go quite mushy. They lose their distinct apple taste and the grainy texture is quite unpleasant.tasting 1Tasting all these crisps was hard work, but we were happy to do it for you. The dynamic combo of Russett and Honeycrisp apples are about to become my go to pair for all baked apple desserts.

Click here for my favourite Apple Crisp recipe.

lobo baked


Apple Beehive

buzzing with anticipation 4I’m not sure what Elisabeth Prueitt had in mind when she created the Apple Beehive, but my mind immediately went to Rosh Hashanah. For the Jewish New Year, it is customary to dip apples in honey to symbolize our wishes for a sweet year for family, friends and all the Jewish people. There are quite a few sweet options available for us to choose from. Why specifically apples and honey?look at those layers

In researching this question, the interpretation I discovered on the website torah.org, resonated quite strongly with me. Their insight regarding the apple part of the equation, is explained this way:
“On most fruit trees the leaves appear before the fruit, thus providing a protective cover for the young fruit. The apple, however, makes a preemptive move by appearing before the leaves. The Jewish people are compared to an apple because we are willing to live out our Jewish lives even if this seems to leave us unprotected. “

The choice of honey was brilliantly explained with this insight:
“A bee can inflict pain by its sting, yet it also produces delicious honey. Life has this same duality of potential. We pray that our choices will result in a sweet year.”

This dessert is gorgeous in its purity. Gossamer thin slices of apples are shingled with butter, cinnamon and sugar. That’s it. Nothing else. When baked, the apple slices fuse together into a sweet-tart conglomeration that belie its simplicity. This is one of those cases where the whole is greater than the sum of its parts. The flavours are surprisingly complex for so few ingredients.

A mandoline makes slicing the apples easy. If you have stellar knife skills, you can just use a sharp knife. Granny Smith apples are the perfect choice for this as they are tart and hold their shape when baked.slicing applesBrushing with melted butterIt really looks like a beehive before it goes into the oven.before bakingDuring baking, the apples shrink and caramelize, losing the lofty height it once had. It doesn’t quite resemble a beehive as much after baking, but this is so delicious, no one will complain. Just remember to take a before picture to show everyone!after bakingOnce the beehive comes out of the oven, brush it with some melted apricot jam to give it a glossy coat. glossy from apricot jamDelicious warm or at room temperature, it can be served plain.a naked sliceOr gild the lily and add some vanilla ice cream or whipped cream.with some whipped creamOr do as I did and drizzle it with salted caramel sauce.everything's better with salted caramelWishing you all a happy, healthy and very sweet new year.

Click here to print recipe for Apple Beehive.