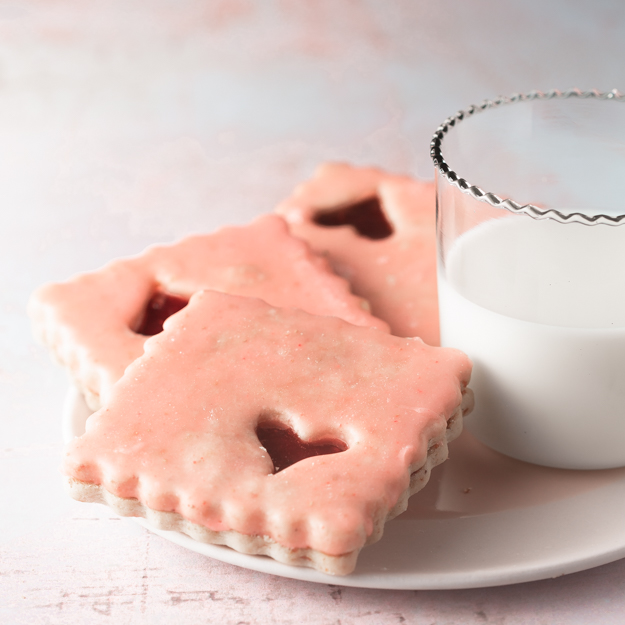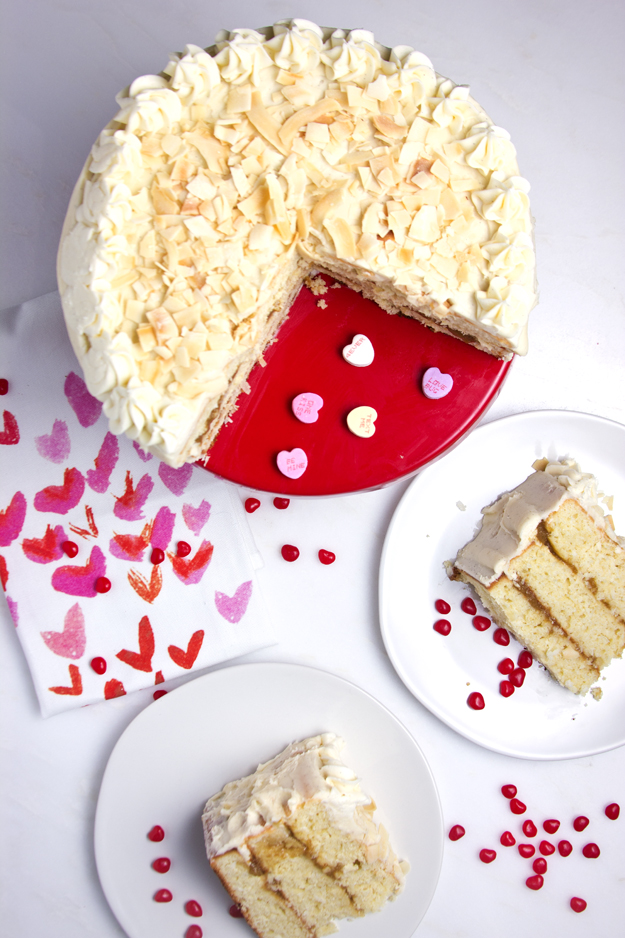
I can’t help it—I have a deep love for all things beautiful. Some might call it a blessing; other times, it feels like a curse (hello, endless tweaking and reworking). And when it comes to cookies? They need to be just as delicious as they are stunning. These Pretzel Shortbread Cookies meet all the criteria.
Most decorated cookies look amazing but taste like… well, just sugar. Royal icing, while pretty, can be overly sweet and one-note. I wanted to create a cookie that actually delivers on flavour and looks
The Cookie
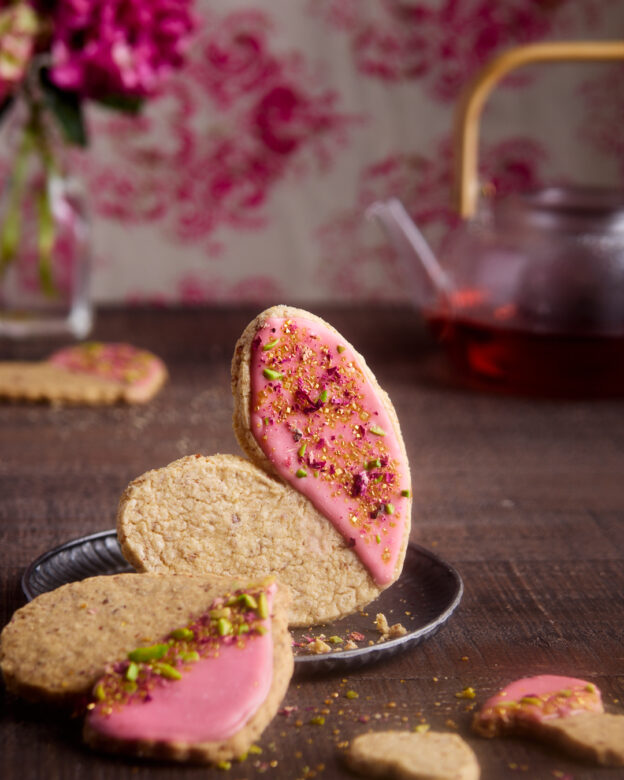
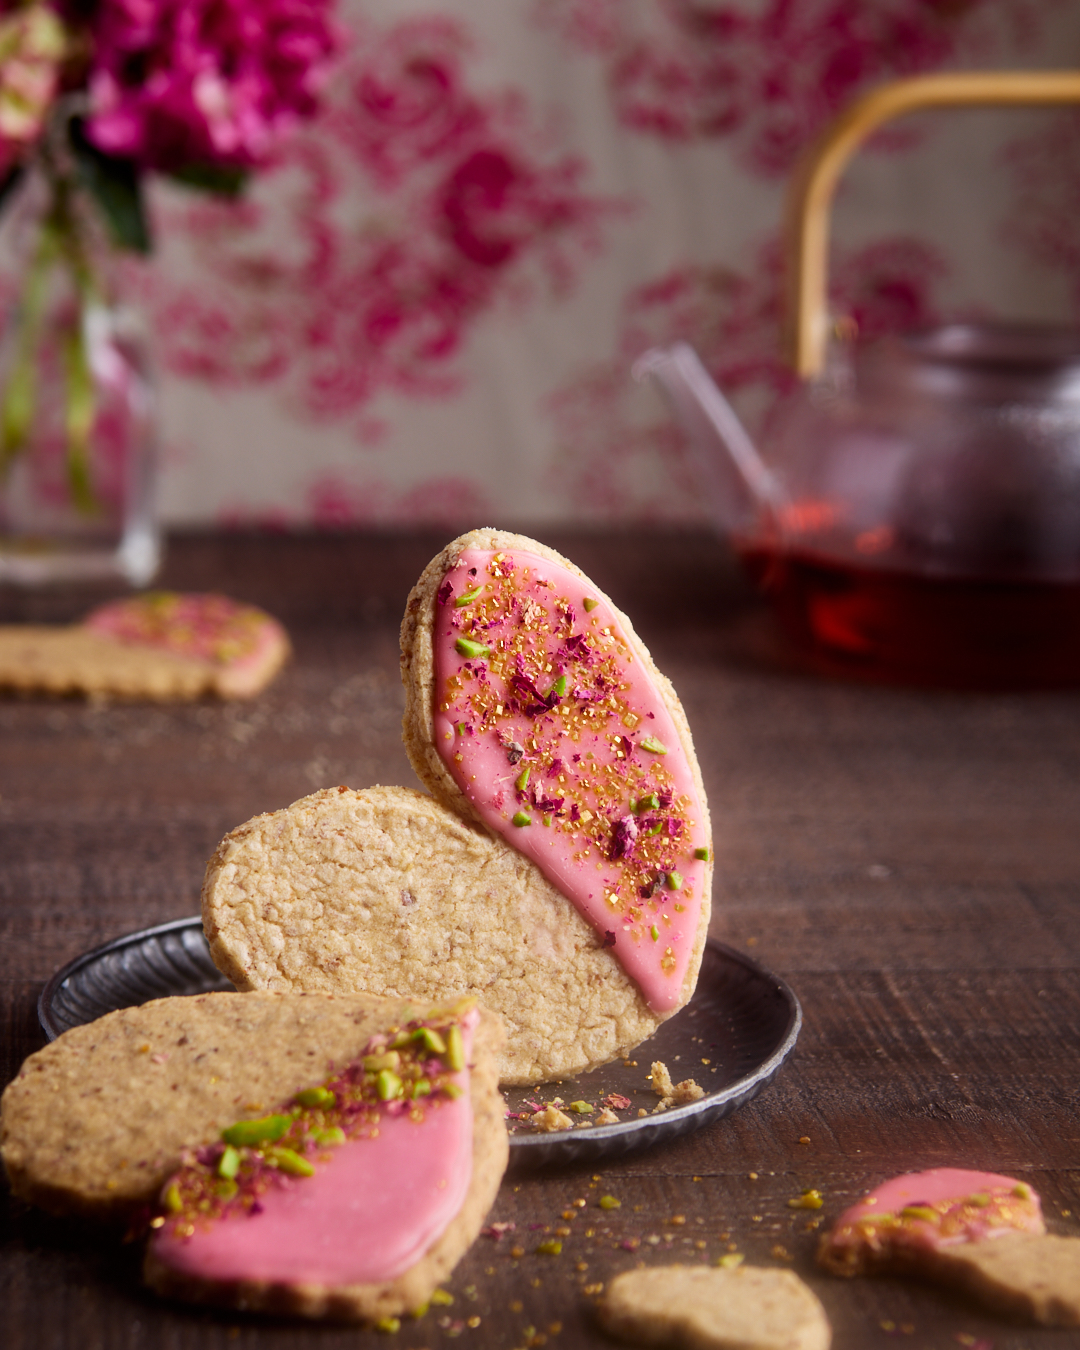
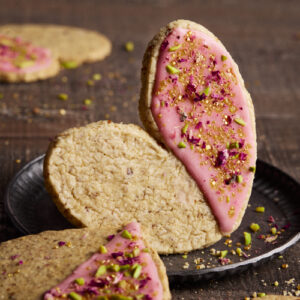
This pretzel shortbread recipe comes from Amy at @constellationinspiration, and it’s perfection. Buttery, crisp-edged, melt-in-your-mouth goodness with a salty crunch from finely ground pretzels. That little hit of salt balances the sweetness beautifully and makes these cookies completely addictive.
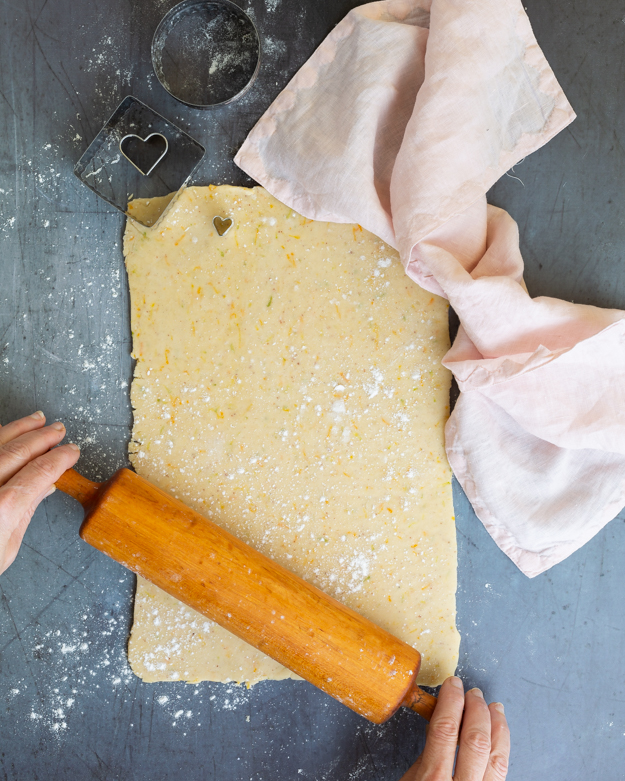
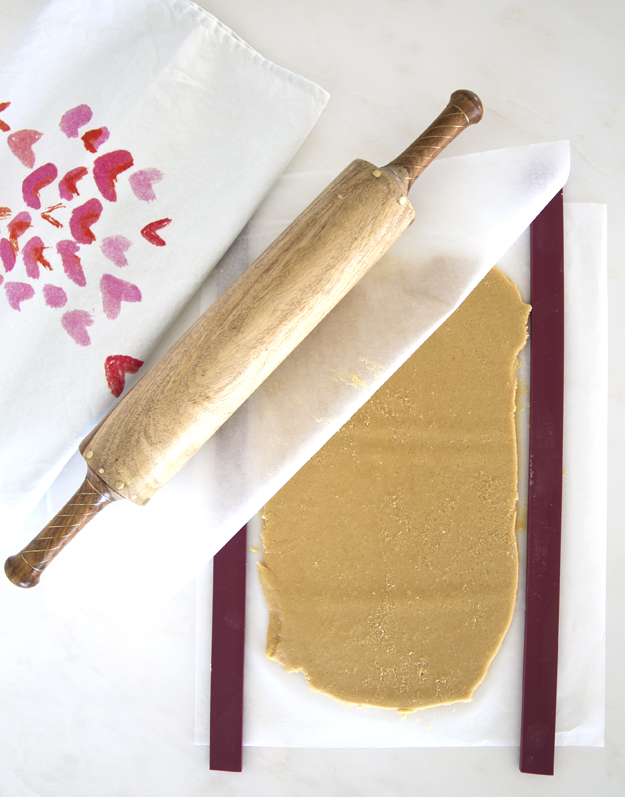
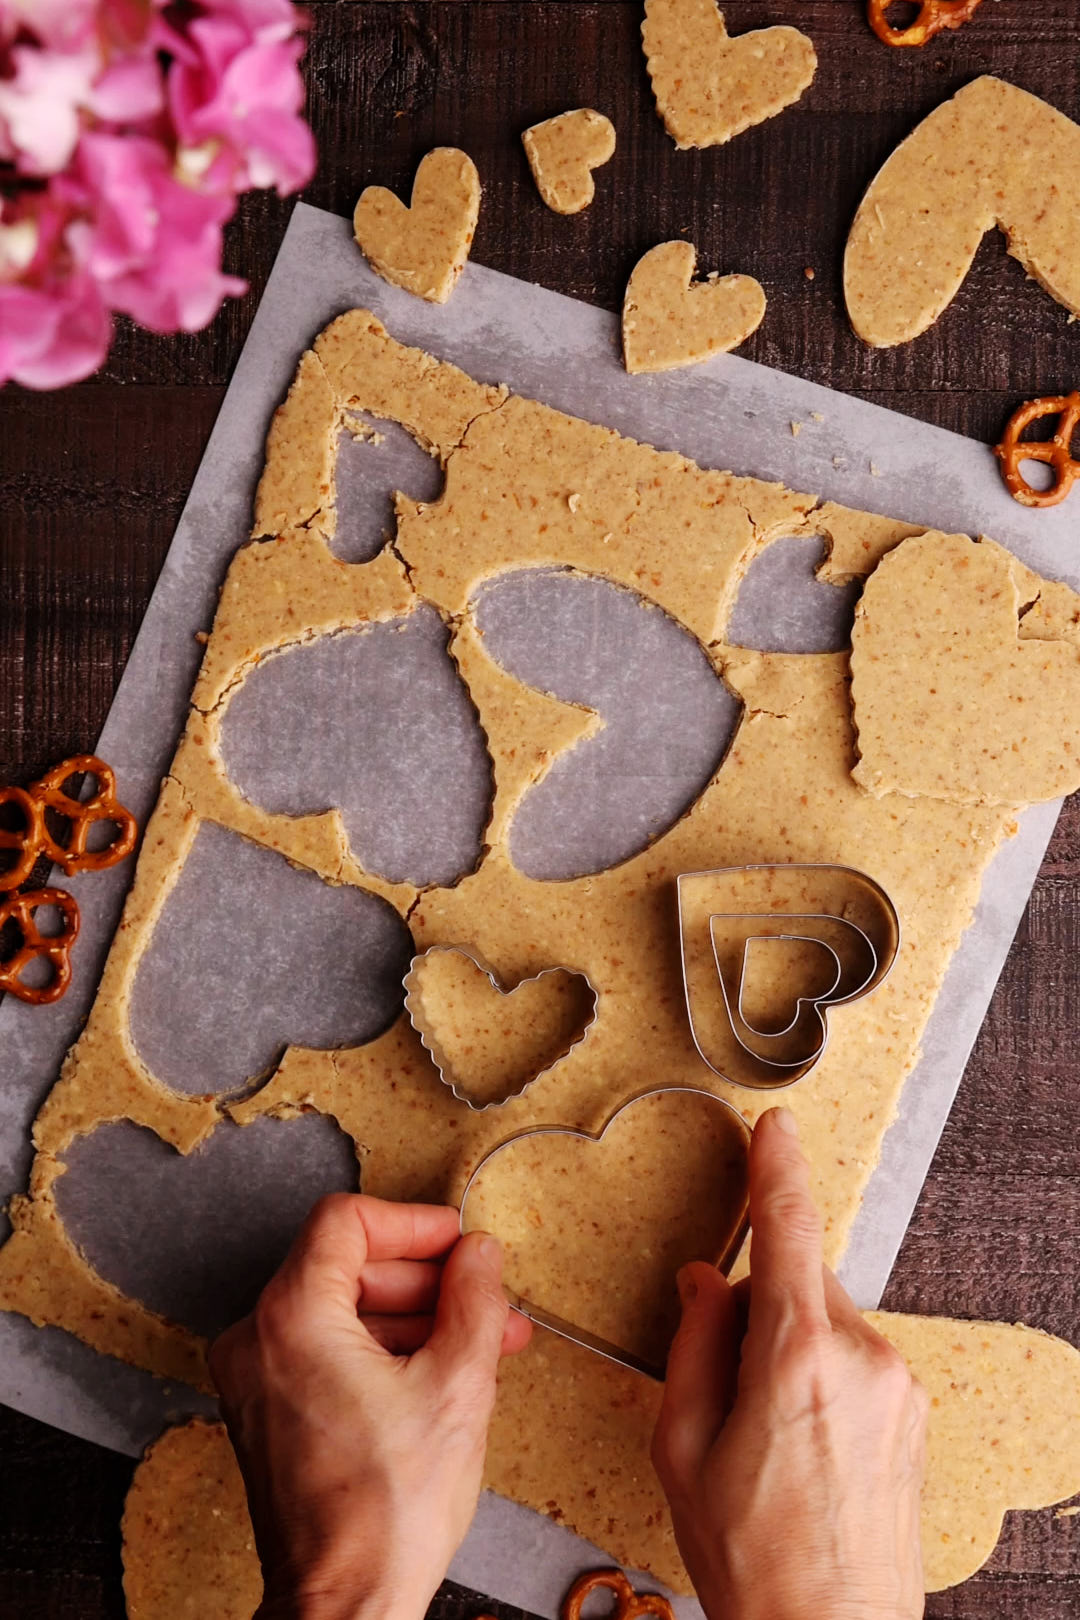
For the best results, I roll the dough between two sheets of parchment before chilling, then chill the cut shapes again before baking. This helps keep the edges nice and sharp—no wonky cookies here!
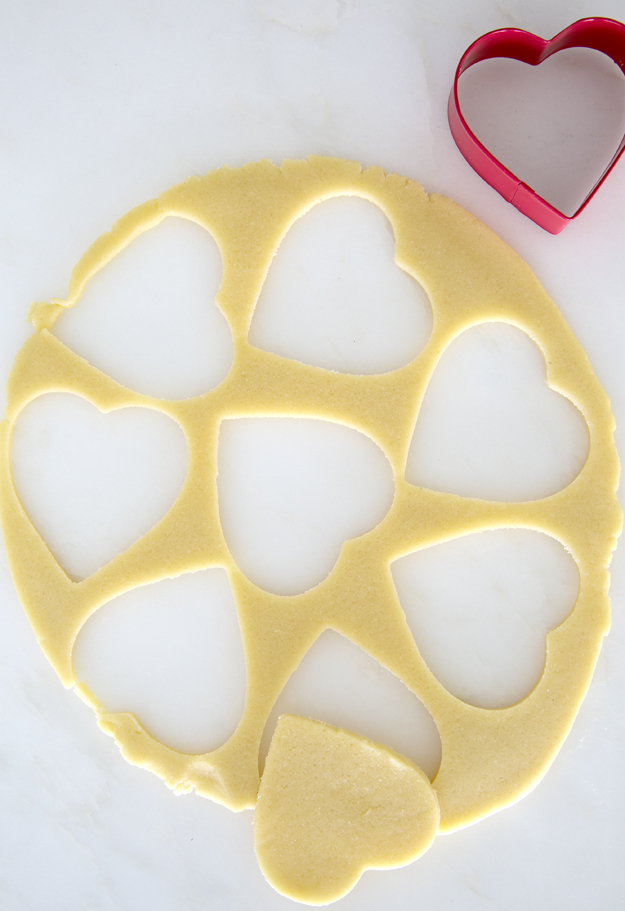
I bought a few sets of new heart cutters that I really love. Check out these deep v heart cookie cutters and these charming scalloped ones.
The Glaze
I’ve been obsessed with using freeze-dried fruit in icings for a while now. It adds such a vibrant, natural colour and brings real fruit flavour to the party.
Freeze dried strawberry powder packed a berry delicious punch to these Strawberry Glazed Chewy Brown Sugar Cookies . Freeze dried raspberry powder flavoured the buttercream in these stunning Raspberry Sandwich Cookies.
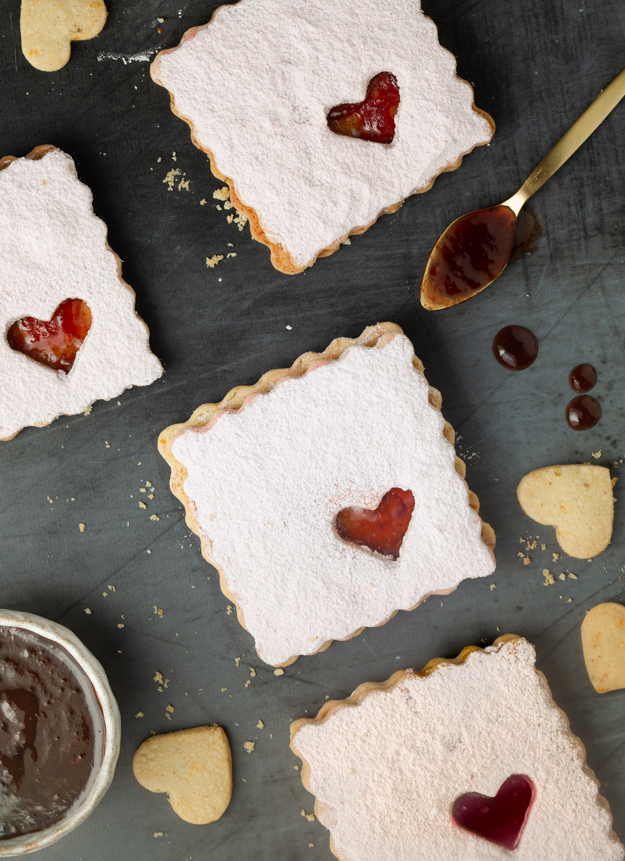
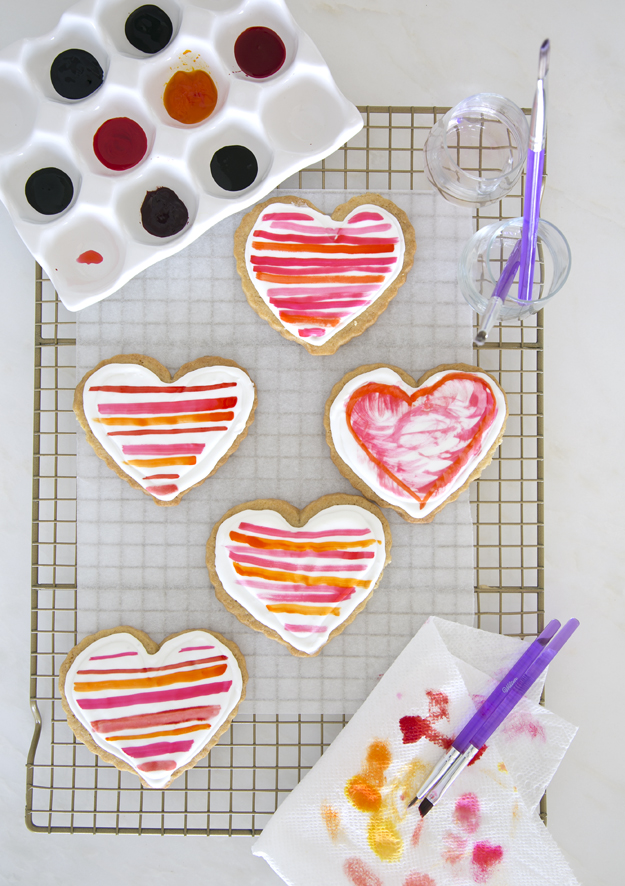
When I found freeze-dried pomegranate powder, I knew it had to become a glaze. This glaze is tangy, punchy, and perfectly balanced—made with icing sugar, freeze-dried pomegranate powder, a little pomegranate juice, and lemon juice to brighten everything up.
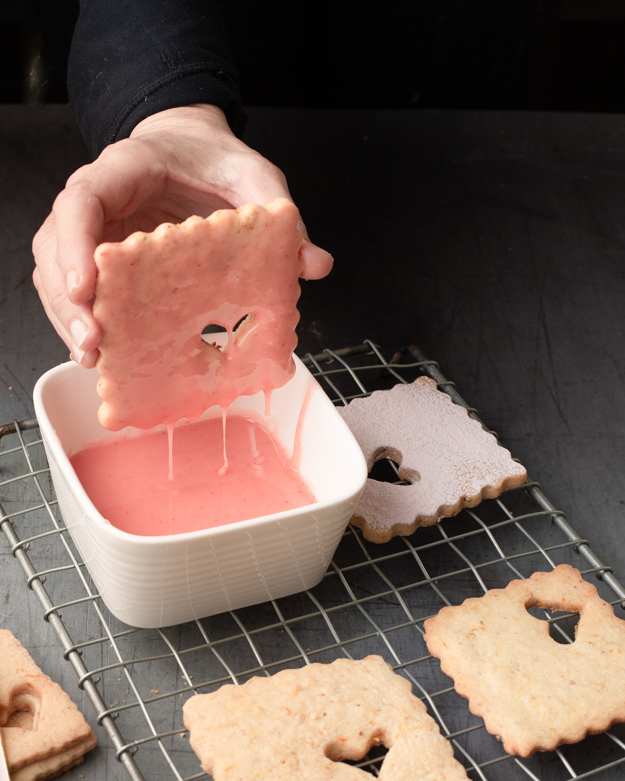
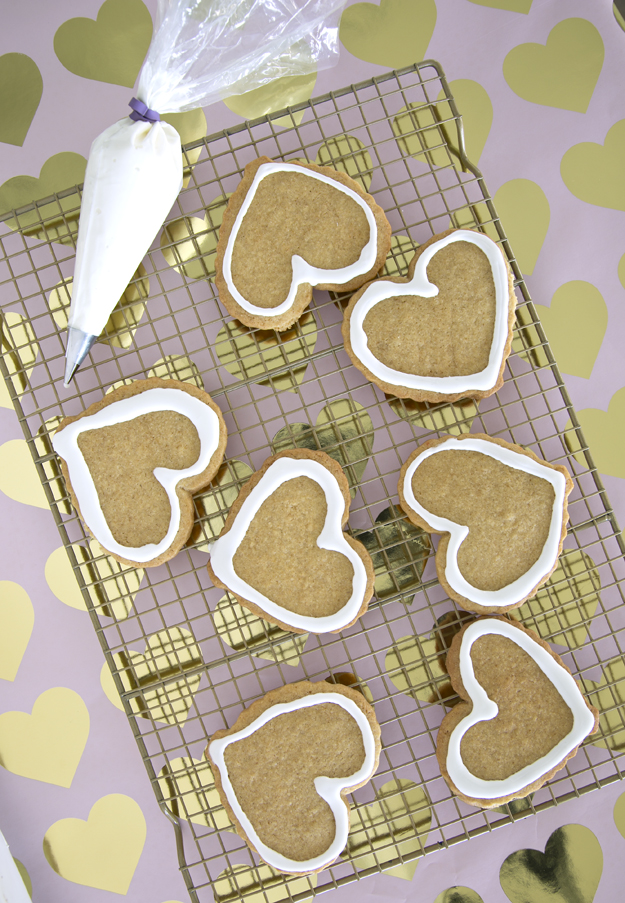
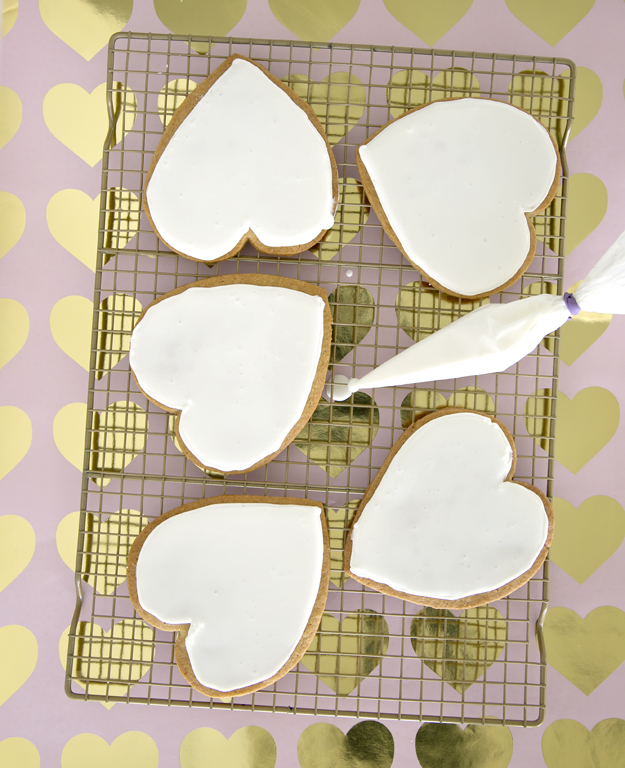
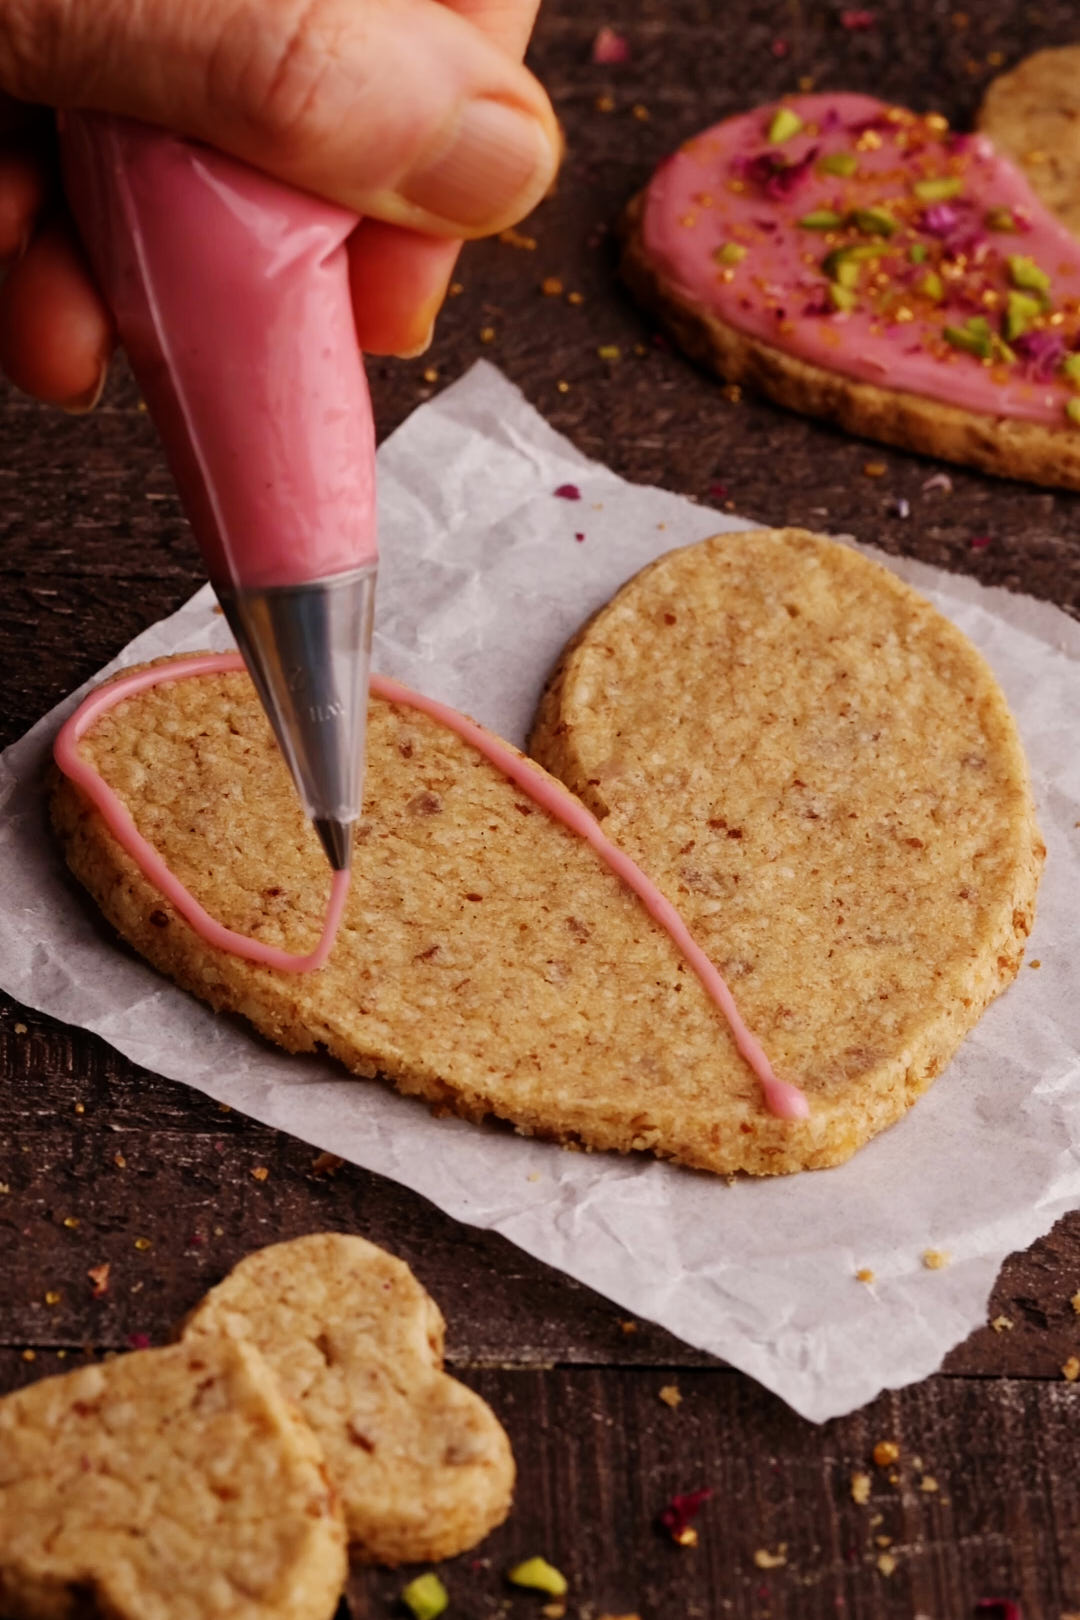
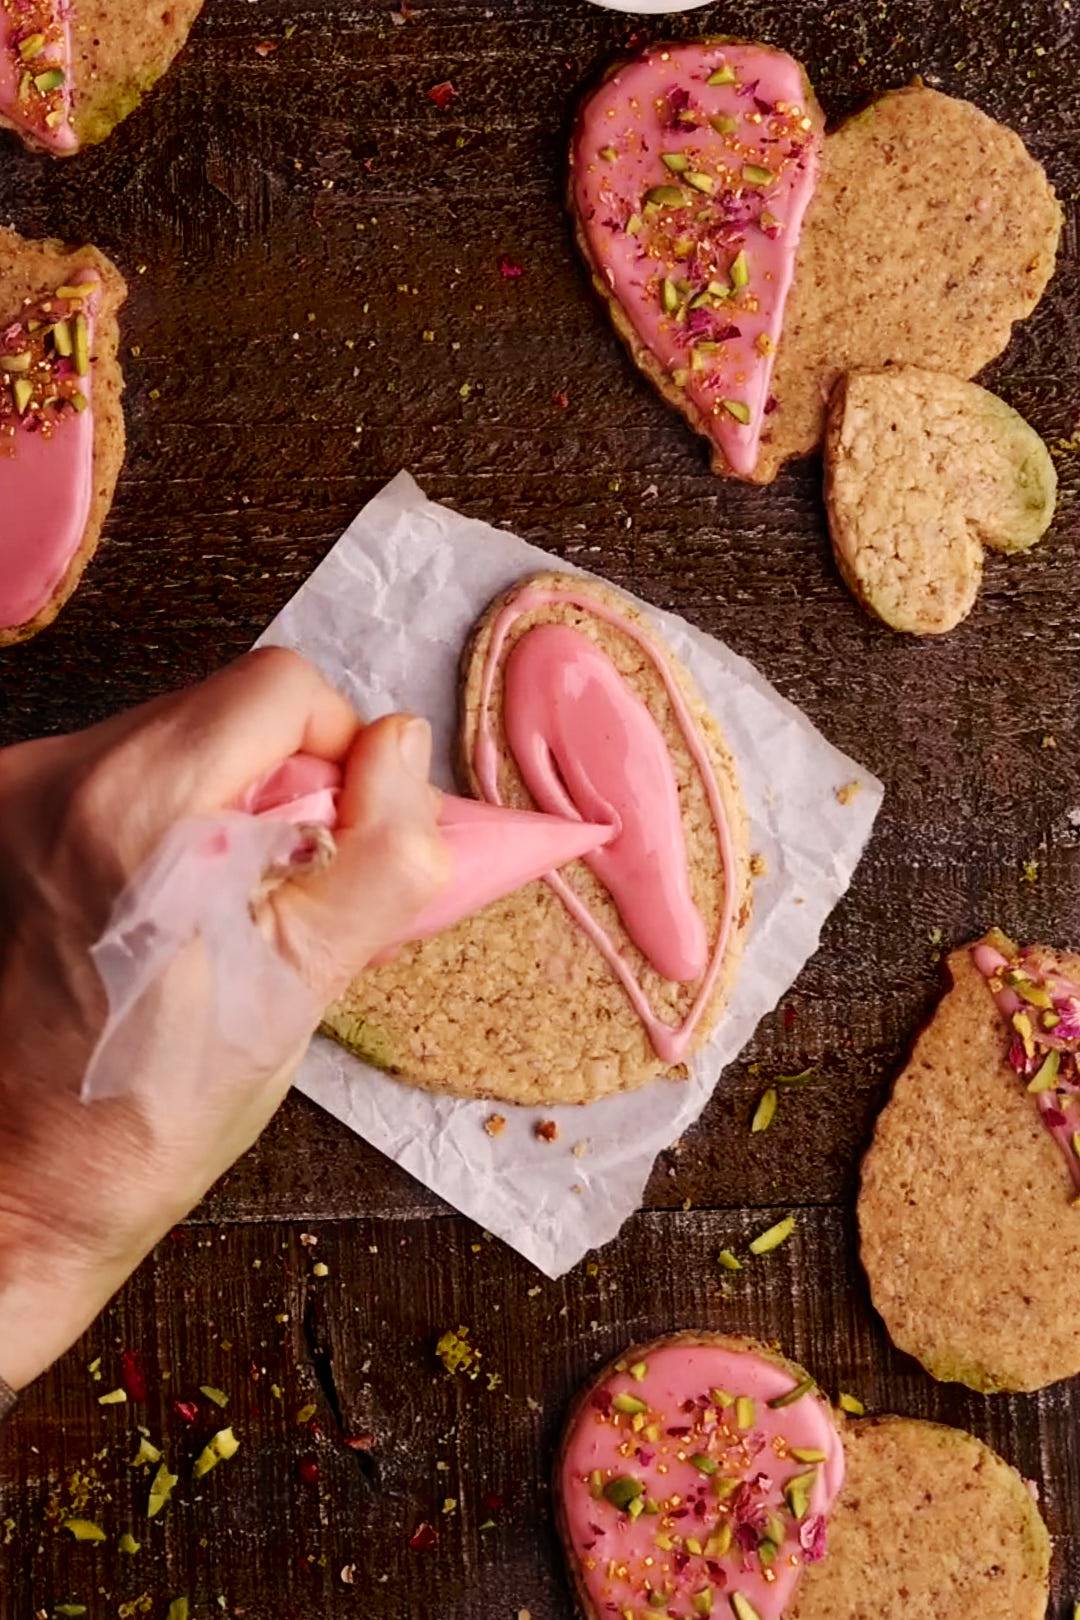
At first, I tried dipping the cookies, but the glaze dried unevenly, and the edges weren’t crisp. So I switched things up—piping a border with a thicker glaze and then flooding the inside with a thinner one, decorating just half of each heart. The result? A smooth, glossy finish that lets the natural pink colour shine.
For outlining, the glaze should be thick like toothpaste, holding its shape without running. For flooding, thin it to a honey-like consistency so it flows smoothly but doesn’t drip off the edges. Adjust with tiny amounts of liquid or powdered sugar until just right.
The Toppings
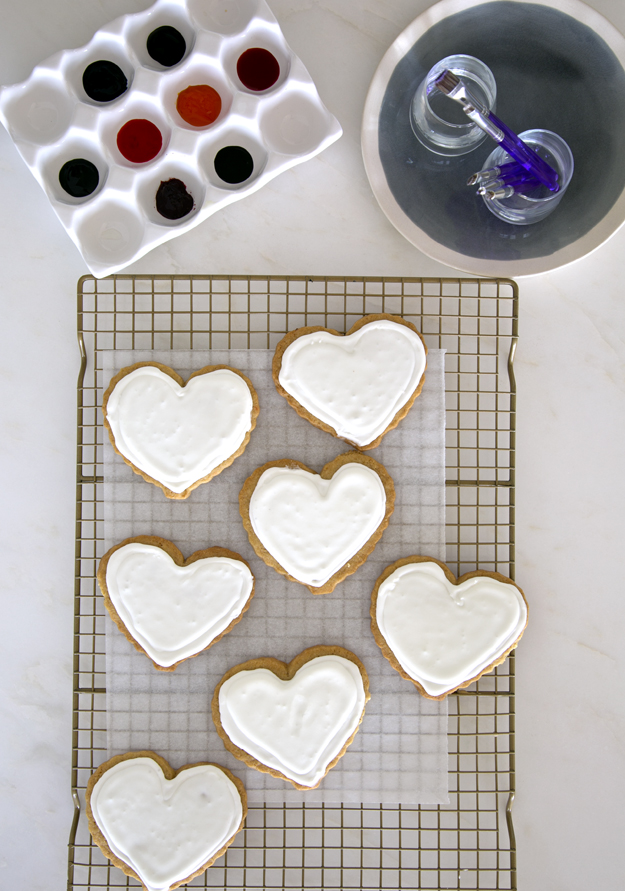
Since these were for Valentine’s Day, I went all in on the toppings. I wanted a mix of texture, colour, and a little sparkle:
• Chopped pistachios – for crunch, flavour and that gorgeous pop of green.
• Crushed rose petals – because they’re just so pretty.
• Gold sprinkles – because, let’s be honest, gold makes everything better.
Pomegranate Glazed Pretzel Shortbread
Equipment
- 1 #2 piping tip
- 4 disposable piping bags
Ingredients
Cookies
- 150 grams pretzels
- 132 grams all purpose flour
- 227 grams unsalted butter, removed from fridge 30 minutes before making dough
- 120 grams icing sugar, sifted
- 1 teaspoon vanilla bean paste or vanilla extract
Pomegranate Glaze
- 500 grams icing sugar, sifted
- 1/4 cup freshly squeezed lemon juice
- 1/4 cup Pomegranate juice
- 1/4 cup Freeze Dried Pomegranate Powder
- 1/2 teaspoon vanilla bean paste or vanilla extract
- 1/2 teaspoon Diamond Crystal Kosher salt, or 1/4 teaspoon Morton's Kosher salt
Decorations
- 2 Tablespoons edible dried rose petals, finely chopped in a spice grinder or by hand with sharp knife
- 40 grams shelled pistachios, toasted and finely chopped
- 2 Tablespoons gold sprinkles
Instructions
Cookies
- In food processor or blender, pulse pretzels until the texture resembles flour. Transfer pretzel flour to a medium sized bowl, add all purpose flour to bowl and set aside.
- In the bowl of a stand mixer fitted with the paddle attachment, beat the butter on medium speed until smooth, 1-2 minutes. Add powdered sugar and vanilla and mix until fully combined. Scrape down the sides of the bowl and mix on medium speed for another 2 – 3 minutes, until the colour lightens and the texture becomes fluffy and smooth.
- Add pretzel flour mixture to the bowl and mix on low speed until just combined. Gather the dough into a ball. Using your palms, press dough into a rough rectangular shape and place between 2 sheets of parchment paper.
- Using a rolling pin, roll out dough to a rough rectangle, about 9×12 inches. The dough should be 1/4 inch thick. I use these rolling pin guides to help me get an even thickness. Place dough, still between 2 sheets of parchment paper, on a baking sheet and chill in fridge for about 45 minutes.
- Line 2 baking sheets with parchment paper. Remove dough sheet from the fridge and place on work surface. Peel off top parchment sheet and gently lay it back in place. Flip the dough over; peel off and discard second parchment layer.
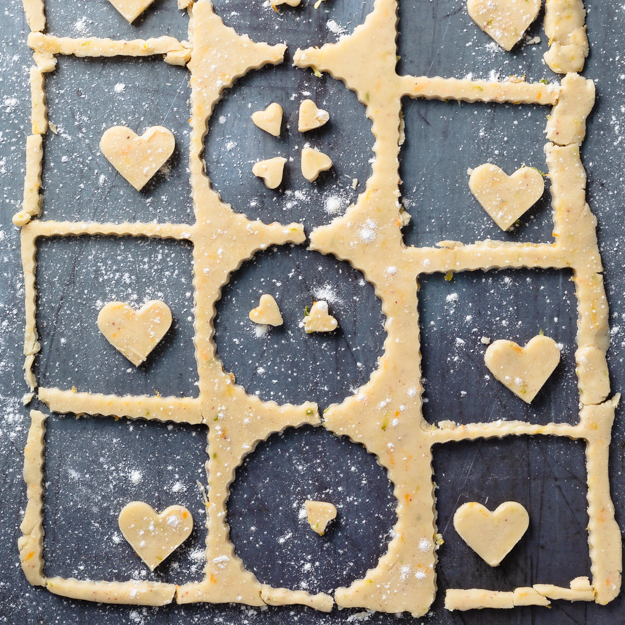
- Cut the dough, using cookie cutters of your choice. I used a variety of heart sizes and shapes. Transfer shapes to prepared baking sheets, using a wide metal spatula, spacing them 2 inches apart. Chill cookies in freezer for about 15 minutes before baking. This will help prevent spreading and help cookies retain their shape.
- Adjust the oven racks to the upper and lower middle positions and heat the oven to 350°F.
- Bake cookies for 5 minutes. Rotate baking sheets from front to back and switch positions from top to bottom. Bake for a further 5 minutes until golden brown. Set cookie sheets on a wire rack and allow to fully cool.
- Gently re-roll dough scraps between 2 sheets of parchment, chill and cut out more cookies. Transfer to cookie sheets and bake as above.
Glaze and Decorate
- Place sifted icing sugar into large bowl. Add lemon juice, pomegranate juice, pomegranate powder, vanilla and salt whisk vigorously until smooth and no lumps remain.
- In a small bowl, mix together finely ground rose petals, chopped pistachios and gold sprinkles.
- Prepare border icing. Place about 1/4 cup of glaze into a small bowl. Fit one disposable piping bag with a #2 tip. This will be used for piping a border/outline of the cookie shape. Place about 1/2 a cup of glaze into a small bowl. For outlining, the glaze should be thick but pipeable, similar to toothpaste or soft frosting. It should hold its shape without spreading but still flow smoothly from a piping bag. When you lift a spoonful, it should ribbon off slowly and settle back into itself after several seconds. If it’s too thick, add a few drops of liquid (pomegranate juice or lemon juice) until it reaches the right consistency. If too thin, mix in a bit more powdered sugar to thicken.Transfer border icing to bag with piping tip. Cut a small hole in bottom of bag to allow tip to come halfway through. Twist top of bag and close with twist tie. Set aside.
- Prepare flooding icing: Pour about 1 cup of glaze into a small bowl. For flooding, the glaze should be thin enough to flow smoothly but thick enough to hold a slight shape before settling—similar to honey or maple syrup. When you lift a spoonful, it should ribbon off easily and disappear back into the bowl within 10-15 seconds. It should spread evenly when piped but not be so runny that it drips off the edges. If it’s too thick, add tiny amounts of pomegranate or lemon juice; if too thin, mix in more powdered sugar until you reach the perfect balance.Transfer flooding icing to bag without piping tip. Twist top of bag and close with twist tie. Do not cut hole in bag until ready to flood icing.
- Glaze cookies: Arrange about 4 cookies on baking sheet and outline cookies with border icing. I just outlined half the heart. Cut a small hole in flooding icing bag and flood the center of each cookie with the thinner glaze. Use a toothpick or wooden skewer to gently coax the icing to the edges of the border.
- While the glaze is still wet, sprinkle with pistachio mixture. Repeat decorating the rest of the cookies. Let set for several hours until glaze has hardened.
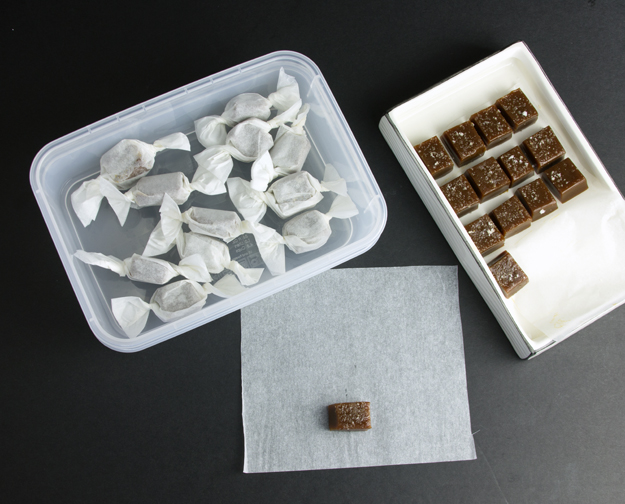
- Store cookies in airtight container, separating layers with parchment or waxed paper so they do not stick to each other. They will be fine at room temperature for a few days. For longer storage, freeze.
Notes
Nutrition
These cookies are proof that decorated cookies can be both stunning and packed with flavour.