No Knead Bread


After reading the title of this post you may have either one of two reactions. If you are a fellow bread freak you may be saying to yourself, “What?? Who is she kidding?  That is so last decade. Mark Bittman wrote about Jim Layhey’s revolutionary no-knead bread in 2006! Every food blogger worth her salt has reported on this bread.” If you are not a bread freak, you may be saying, “What?? No knead bread. She’s been inhaling too much bleached bread flour.  How could that be possible?” So, to the bread freaks reading this, I apologize for reporting on something you have already heard about ad nauseam. To the rest of you, I say, yes, this is possible and it’s spectacular. (sorry, couldn’t resist that link!)

Although I first heard about this no-knead bread over two years ago, I only just tried it for the first time last week. I then made it a second time, 4 days later because I just couldn’t get over how simple it was to produce such amazing bread. There are 2 major factors at play here that help create this wonderful bread. The first is mixing up a very wet dough and letting it sit, at room temperature for 18 hours. Food scientist, Harold McGee, explained it like this, to Bittman,

“It makes sense. The long, slow rise does over hours what intensive kneading does in minutes: it brings the gluten molecules into side-by-side alignment to maximize their opportunity to bind to each other and produce a strong, elastic network. The wetness of the dough is an important piece of this because the gluten molecules are more mobile in a high proportion of water, and so can move into alignment easier and faster than if the dough were stiff.”

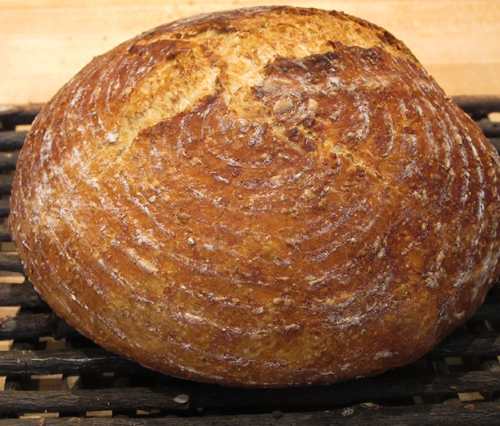
The second major factor involved in making this bread is where Jim Lahey’s real genius comes into play. He discovered that by baking the bread in a covered preheated cast iron or enamel pot (like a Le Creuset), you mimic the steam ovens that professional bakers use to develop that crisp crackling crust so desirable on artisan breads. During my 18 month journey through the Bread Baker’s Apprentice Challenge, I tried all sorts of methods to produce steam in my home oven. I put a pan of hot water at the bottom of the oven, I sprayed the sides of my oven wall with a plant mister during baking, I added ice cubes to the oven during the baking process and I even tried adding lava rocks to the pan of hot water, to mimic a sauna. I never did achieve that holy grail of crackling crust.

I discovered a version of the original recipe with some wheat bran added to the dough. (Chatelaine Magazine Feb. 2011 issue)  I really loved the addition of the wheat bran. Truly, the only thing difficult about making this bread is remembering to start the night before you want to serve it. It had been awhile since I last baked bread so I was excited to get back to it again.

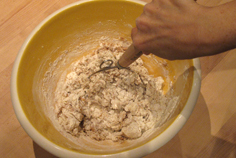
Over the past two years I have accumulated quite a bit bread making paraphernalia, so it was great to use some of it again. In Jim Lahey’s video he says to just use your hands to mix up the dough but I was excited to use my special King Arthur bread whisk again. If you plan to make lots of bread, get one of these. If not, your hands work just fine.

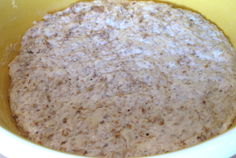
Once mixed, the dough will appear quite shaggy and rough-looking. That’s ok, it’s supposed to look that way. Just cover the bowl with plastic wrap and leave it on the counter for 18 hours. It is a big leap of faith to take, I know, but trust me, it works. After 18 hours, it will have all smoothed out and the surface will have fine bubbles on it.
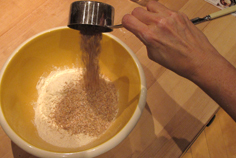
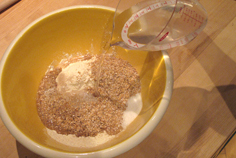
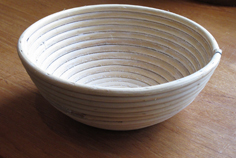
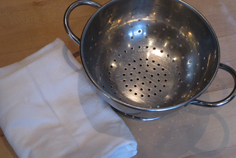
In the original recipe, Jim says to just form a ball and place it on a cotton towel, cover it and let rise. Since I had a special bread rising basket in my cupboard (a banneton) I decided to use that. A banneton is woven bread mold, usually made of made of cane and is used to form and shape artisan loaves during the proofing/raising stage. The basket imprints its shape and ribbed design on the finished loaf. They can be ordered online from Brotform (U.S.) or Goldas Kitchen (Canada). You can also just line a colander with a clean cotton towel, although you won’t get the cool design on your bread.
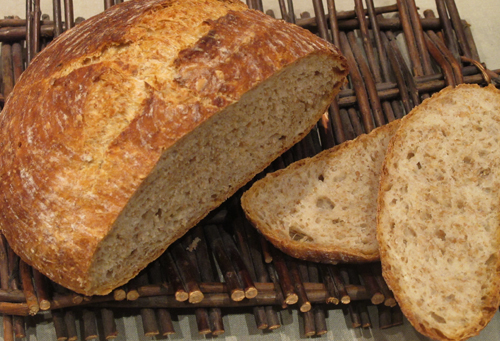
I found it best to lightly flour the counter and then wet my hands to scrape the dough out of the bowl. I did not want to add too much more flour as the high hydration level of the dough is what gives you the big open crumb structure (ie: big holes) of the finished bread. Bread freaks aim for big holes in their finished bread. If you are at all interested in reading more about this subject and finding our why big holes are desirable, visit The Fresh Loaf’s website. A very animated discussion on this very topic has been raging for the past week. Yes, bread freaks are a strange and wonderful breed!

Once the dough is dumped out onto the counter, just fold it over itself, sort of like a business letter. Then, cover with plastic wrap and let rest for 15 minutes.
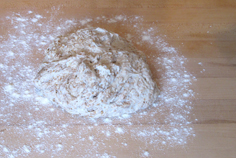
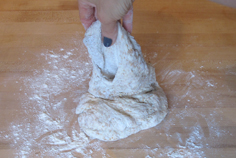
Then you want to shape the dough into a ball.

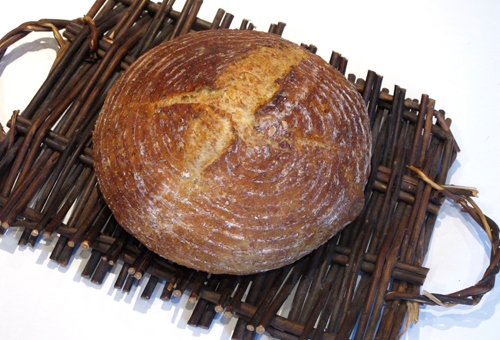
After dough is shaped you can just place it on a floured towel and cover it with a second towel, or you can put it in a basket or colander to let it rise for about 2 hours. I heavily floured my banneton with rice flour and then dumped out the excess, and set my dough in there to rise. You will notice I put the dough in seam side up. That is because after it has risen, I will dump it into the hot pot for baking and the top (with the pinched seam) will hit the pot first and become the bottom and then my pretty ribbed design, from the basket, will become the top.
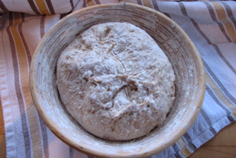
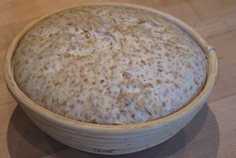
A few words about the pot to cook the dough in. Just about any covered 6-8 quart covered pot will work here. Cast iron or enameled cast iron (like Le Creuset) work very well for this job. I have also read that ceramic and Pyrex would work also, but have not tried them. These are the kind of pots I am talking about.
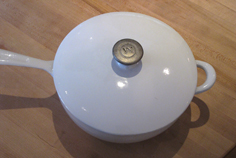
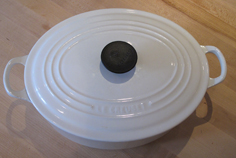
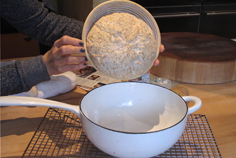
The pot with lid must be preheated in a 450º F oven for at least 30 minutes before baking the bread. It is a bit scary dumping the bread into the hot pot, but just wear oven mitts and dump quickly. If it goes in a bit uneven, just wiggle the pot back and forth a bit to straighten it out. It will all turn out fine.
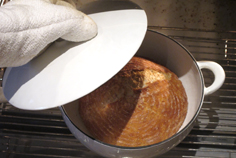
Resist all temptation to slice the bread as soon as it comes out of the oven. It continues to cook a bit more as it cools. It will be gummy in the centre if you slice right away.
To print recipe for No-Knead Bread, click here.

Mushroom Barley Soup


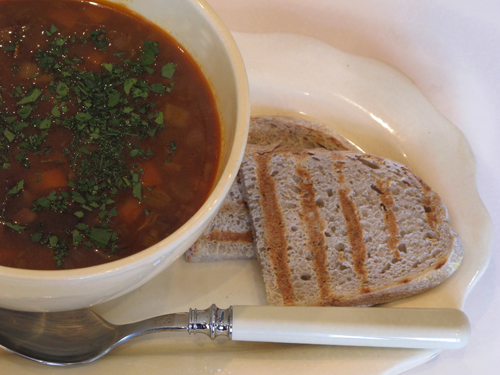
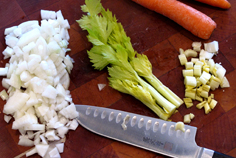
Let me begin by saying, very unapologetically, this is not a vegetarian soup!  I have made this soup, for many years, with vegetable stock, and it was quite delicious.  But this time I made it with homemade beef stock. This soup was savory and meaty, with a richness, fullness and complexity of flavour that I had not tasted in a very long time. I had forgotten how good soup made with homemade beef stock could taste.  About 9 years ago my daughter announced she was going vegetarian.  I thought it was a phase, but by year 3 I finally wised up to the fact that she meant business. As a result, I vegetarianized all my soup recipes. And I just got used to them that way. It’s amazing how you can get stuck in a culinary rut this way and not even realize it.

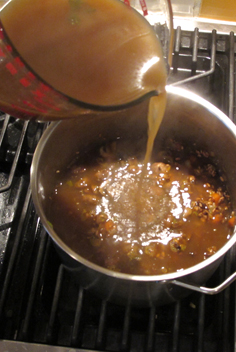
It was only after volunteering at a Soup Sisters event last week that I was reminded of how much I loved soup made with beef and chicken stock. I used to make chicken stock weekly and beef and veal stock once in a while. With my daughter is away at university and I decided to embrace the beef. I got some beef bones at the butcher and roasted them with aromatic vegetables until they were all golden brown. I have to admit, I sort of felt like I was cheating and as the aroma of roasting beef bones was wafting out of my oven, I worried she would come in at any moment and catch me in the act of infidelity. I simmered everything for about 5 hours, strained the broth and chilled it overnight. The next day I spooned off the hardened fat, and heated up the stock. It was gorgeous.

I found this recipe for mushroom barley soup in Gourmet magazine (a moment of silence please)   many years ago (September 1998 issue).  The original recipe comes from Zingerman’s Deli in Ann Arbor Michigan. I have adapted it slightly. If you plan to make it with homemade beef stock (and I implore you to try it, just once, you’ll be hooked!) start a day ahead of time.

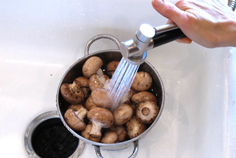
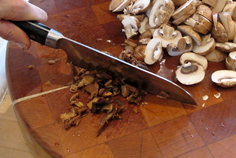
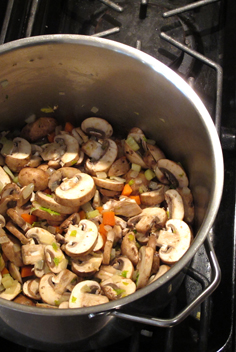
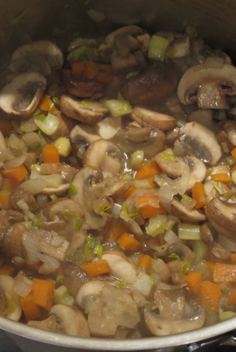
Just a few words about mushrooms. I had always been taught that mushrooms should never be washed under running water as they act as a sponge and will become waterlogged. I was instructed to just wipe them with a damp cloth or paper towel. What a tedious task. Well, Cook’s Illustrated has dispelled the washing myth. They did a test (of course they did, you gotta love Cook’s!) where they soaked 6 ounces of mushrooms in a bowl of water for 5 minutes.  Then they drained the mushrooms and weighted them again. They only absorbed 1 1/2 teaspoons of water. So go ahead and rinse your mushrooms under cold water. I used regular brown button mushrooms (called crimini) in my soup.

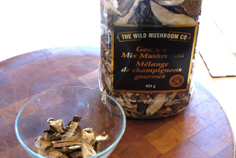
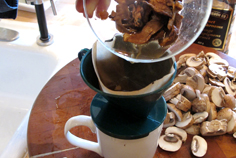
Regarding dried mushrooms, they should be soaked in boiling water for about 10 minutes. Sometimes there is grit in dried mushrooms. If you want to use the flavourful soaking liquid in the soup, strain the liquid through a paper coffee filter if you don’t have any cheesecloth.


I added about a tablespoon of tomato paste to the original recipe. Tomato paste is one of the several foods that contribute to umami. Umami (pronounced oo-mommy) is known as the 5th taste. We all learned about sweet, sour, salty and bitter when we were in school. Turns out the Japanese discovered a 5th taste our tongues could recognize. They maned it umami. It is best described as a savoriness. Simply put, it just makes food taste more delicious. Other foods that contribute to umami include Parmesan Cheese, anchovies, mushrooms, soy sauce and, brace yourself, breast milk. No wonder humans crave this 5th taste!

I finished the soup off with some freshly chopped dill and parsley as well as a spoonful of sherry vinegar. I remembered making beef consommé in culinary school. It was an all day affair involving ground beef and egg whites. Really gross but kind of cool to watch it being made. We finished the consommé off with some dry sherry. I had none in the house so I tried a splash of sherry vinegar and really liked the brightness it added to the soup.

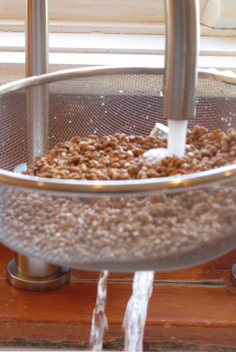
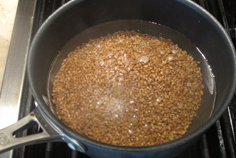
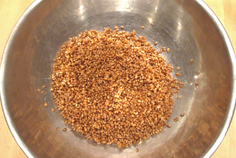
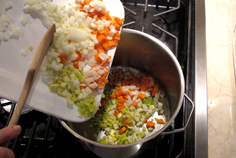
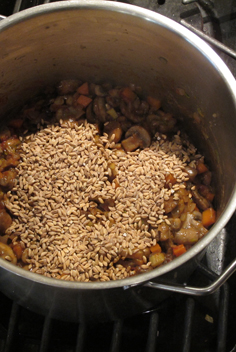
The day I decided to make this, I had no barley so I substituted farro. I really loved the chewy texture of this grain in the soup.

Click here to print recipe for Mushroom Barley Soup.

Click here to print the recipe for Beef Stock.

Betrayal on Big Rideau Lake


So this is a story about betrayal, deception and denial. But it’s not all dark and horrible. It takes place in a very bucolic setting. Take a look.

We decided to go up to our cottage last weekend. All this cold weather and snow has been starting to get to me and I figured if you can’t beat it, join it. We were joined by one of my oldest and dearest friends, and her husband. We have been friends since we were 13 years old and now that we live in different cities, we just don’t get to see each other enough.  Leading up to the weekend were a flurry of phone calls and e-mails to discuss, what else, the food! She offered to bring Friday night dinner and I graciously accepted. (YAY!!)

As we were discussing menus we slipped into the obligatory January discussion about overindulgence in December. We agreed that we would not do appetizers before dinner. We always eat too much of them and then by the time dinner is over we both feel stuffed. We would, however, allow drinks before dinner.  Clearly we have our priorities in order. Feeling virtuous we said goodbye and hung up. The next day, she inquired in an e-mail, “If we’re not doing hors d’oeuvre, does that mean we aren’t doing dessert either? I have a banana recipe that I really want to try out.” I shot back a reply, “Bananas are fruit. That’s allowed. I’ll do apples for Saturday night dessert .”

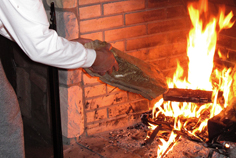
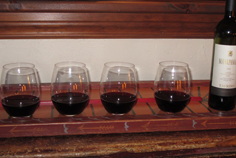
About an hour after we arrived at the cottage on Friday afternoon, it began to snow. Big fat fluffy snowflakes, with no wind at all. My friend said it was as if someone had turned on a tap up above and let these snowflakes fall. And they continued to fall, in their lazy steady way all weekend long. It looked like something out of a Disney movie set. We built a fire and poured out some red wine to let it breathe.

We were vigilant in our no hors d’oeuvre pledge and proceeded to dinner after a glass of wine. I sat back and relaxed as my friends served a beautiful dinner. We all cleaned up together after dinner and reminisced about when we used to rent a cottage together in the mid 80’s. It was a beautiful cottage on Lake Simcoe. The house was set high on a hill, and you had to walk down stone steps through a forest to get to the sandy beach. We spent many happy hours there sunning and listening to the Blue Jays on the radio (Those were the good old days!!).

After doing the dishes we collapsed on the couch and dessert was served. My friend brought out a banana cake. Cake??? I thought we were having fruit for dessert. So either I had been deceived or my friend was in complete denial. Either way, my brain was way too happy humming on a sugar high to care. This banana cake was better than Sarah Lee! You have to understand that this is very high praise as I grew up on Sarah Lee Banana Cake and consider it the gold standard. I feel compelled to disclose that  I also grew up on TV dinners and Swanson’s Chicken pot pies. It was an idyllic childhood.

The next day, those big fat flakes of snow continued to fall. We decided to take a walk on the frozen lake. My friends strapped their snowshoes on (yes, they’re those kind of people), and I got to try out my brand new winterproof boots. We almost fell into an ice fishing hole, but aside from that, the 90 minute hike was beautiful. And I am happy to report that my feet stayed warm and dry.

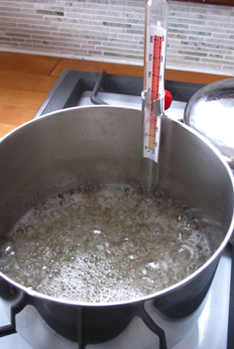
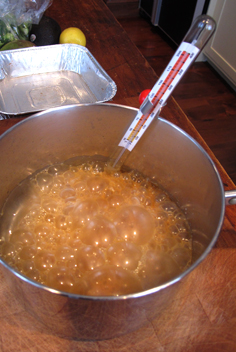
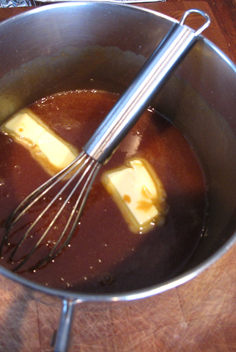
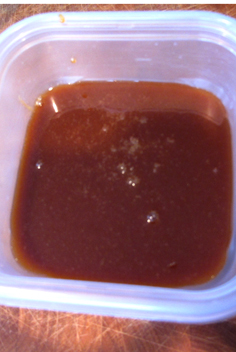
When we got back, I took a shower and upon entering the living room discovered an empty bowl with a few orange crumbs clinging to the bottom of it. I licked the crumbs from the bottom of the bowl. Aaargh…Honey Barbecue Chips. Betrayal!! In her defense, my girlfriend swore they were the  baked variety. After that, it was a slippery slide into Prosecco and  red wine. I tried to stem the tide by bringing out edamame pods and carrot and celery sticks but it was clear at this point we were into full-scale deception and denial. I did what any self-respecting woman would do and trooped off to the kitchen to make salted caramel sauce.


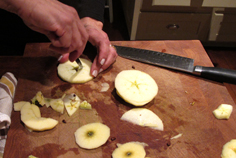
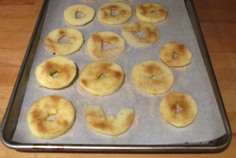
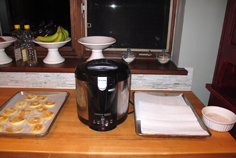
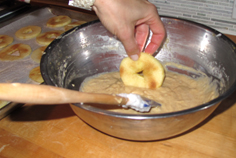
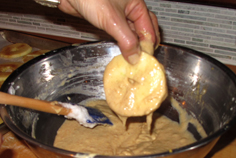
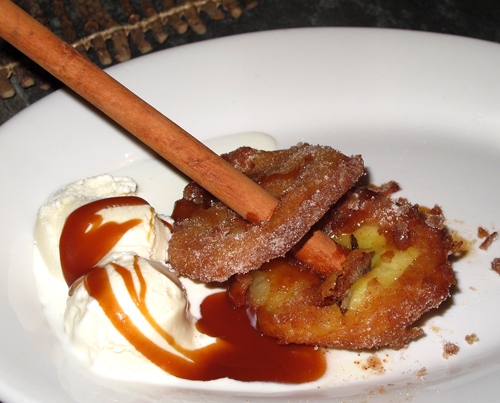
To serve with the caramel sauce…Apple Fritters, from Karen DeMasco’s new book, “The Craft of Baking.”

We dipped the fritters into a cinnamon-sugar mixture and skewered them with a cinnamon stick. Salted Caramel Sauce was drizzled onto vanilla ice cream. Deception never tasted so good!


To print recipe for Salted Caramel Sauce, click here.

To print recipe for Apple Fritters, click here.
Salt and Serenity is Stylish!

On the very same day that the nominations for the Academy Awards were announced, I was awarded “The Stylish Blogger Award”.  Coincidence?  I think not!  Thanks so much to The Little Yellow Kitchen for honoring me.  The two women behind this blog are just adorable.  Lauren and Chrissy are recent college grads, “adding a little zest to what they do best.”  They chronicle their cooking adventures from their tiny yellow kitchen.  It make me happy to see young adults passionate about food.  Check out their blog.


Apparently this award comes with some strings attached.  Sort of reminds me of those old chain letters you used to get as a kid.  In order to fulfill the duties of this prestigious award I must:

1.  Make a post & link back to the person who awarded me this award.
2.  Share 7 things about myself.
3.  Award 10 recently discovered great bloggers.
4.  Contact these bloggers and tell them they’ve won!

That’s why I love the world of blogging.  It’s filled with people who are generous of spirit and want to pay it forward.  It reaffirms my belief that people are good.

So, 7 things you may not already know about me:

1.  I am the second of 6 children, 5 girls and 1 boy (he is the baby).  My mother named me after my older sister’s favourite doll because she wanted to make sure my sister would like me when they brought me home from the hospital.  (Imagine the hours in therapy I spent over that one!)

2.  My sense of direction is pathetic.  I am a slave to my GPS, so much so that once, when in Florida, the GPS told me to keep going straight, and even though I saw the ocean right in front of me, I was tempted to obey.

3.  I once poured an entire package of Jell-O right into the electric kettle because my mother said, when the water comes to a boil, add the Jell-O.  I was 12 at the time.

4.  I used to hate cilantro. Now I love it.

5.  I practice Iyengar yoga and can stand on my head for about 5 minutes.

6.  I speak to the woman at the King Arthur order desk more often than I talk to my own mother.  (Mom, call me!!)

7.  I would like the words “Serenity Now”engraved on my tombstone.

Recently Discovered (well recently discovered by me) Blogs

Dash and Bella

Baking Across Country

Not Without Salt

Soup Addict

Sweet Amandine

The Grub Daily

The Jewish Hostess

Yummy Supper

The Year in Food

You can do it… at home

Take a few minutes to check out their blogs.  You’ll be glad you did.

Sour Cherry Scones

I have a bit of a thing for online shopping.  I think it harkens back to my childhood when my grandmother would send us cookies in the mail, packaged in a shoe box.  There is something so exciting about a package arriving in the mail for you (even if you did send it to yourself, but then I never spring for the express shipping, so by the time it comes, I have forgotten all about it).

A few weeks ago I was ordering a book on Amazon (Chewy Gooey Crispy Crunchy Melt-in-your-mouth Cookies by Alice Medrich.).  I was about to check out when those lovely folks over at Amazon wanted me to know that customers who bought” Chewy Gooey”, also bought Tartine Bread by Chad Robertson, Baked, New Frontiers in Baking by Matt Lewis and The Craft of Baking by Karen DeMasco.  Of course I had to look at all these books too.  I could have easily clicked “add to cart” for all three of their recommendations but I exercised some restraint and just added The Craft of Baking.

I had never heard of Karen DeMasco, but when I read the little blurb, I discovered that she used to work as the pastry chef at Tom Colicchio’s Craft, Craftbar and ‘wichcraft restaurants.  I still dream about the lemon tart and pistachio and coconut sorbet I ate at Craft over 3 years ago. That, and their roasted carrots still make me weak at the knees.  Plus I am a huge Top Chef and Tom Colicchio fan.

I loved the premise of this cookbook.  It is designed to let the reader be creative.  After many of the recipes, Karen gives you ideas and tips on “varying your craft.”  Great suggestions on how to make the recipe your own.  Baking as a craft, not just a science.  Plus, If I added this book to my order, then I would qualify for free shipping, so really I was saving money, not spending more money.

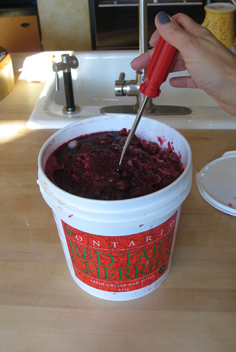
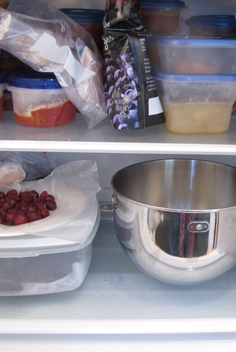
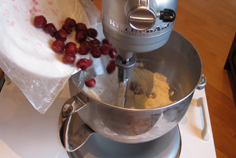
When I began reading the book I wanted to bake everything from it.  The photography is gorgeous and her instructions are so detailed.  I decided to start with the Sour Cherry scones.  It has been a long time since I have baked scones but I love tea time. Karen had me at “sour cherry”.   I order American Spoon Sour Cherry Preserves by the caseful.  When I went to the supermarket to find frozen sour cherries I discovered they were sold in a 4.5 kilogram tub.  I lugged the tub home and opened it up to discover that they were not individually quick frozen like blueberries.  I had a solid mass of sour cherries.  I used a screwdriver and hammer to chisel out a half a cup.  It barely made a dent.  I rinsed off the cherries to separate them, then dried them and put them on a plate and stuck them back in the freezer so they would not defrost.  (Karen says if you are using frozen, don’t defrost).  I hauled the tub down to my basement freezer.

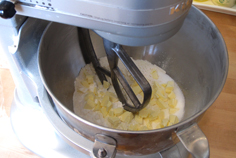
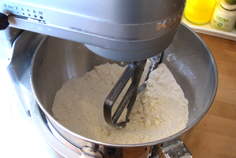
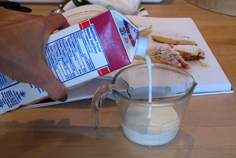
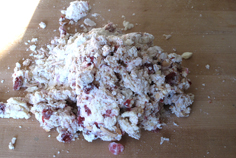
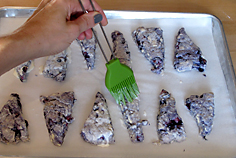
After measuring out the flour, sugar, baking powder, salt and butter, she instructs you to pop the whole mixing bowl into the freezer for 5 minutes.  Then mix on low-speed to break up the butter into pebble sized pieces.

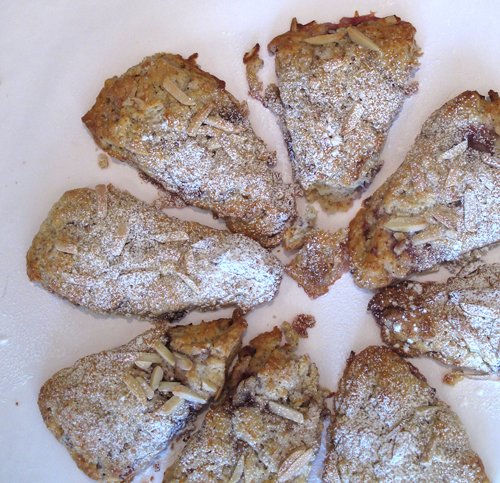
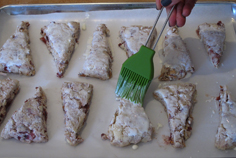
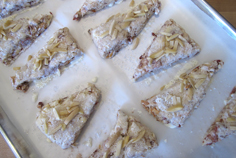
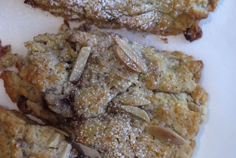
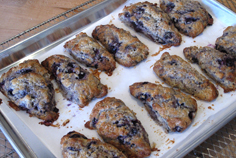
Hot out of the oven we tore into them.  The top was all crunchy from the Demerara sugar and silvered almonds we sprinkled on top. However, inside they were kind of wet, not underdone but just too moist from the sour cherries.  Plus, I was a little disappointed with the sour cherry flavour.  They were kind of bland.

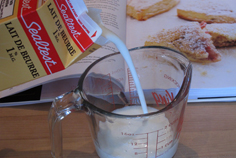
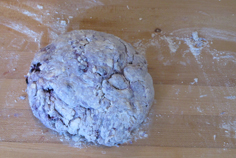
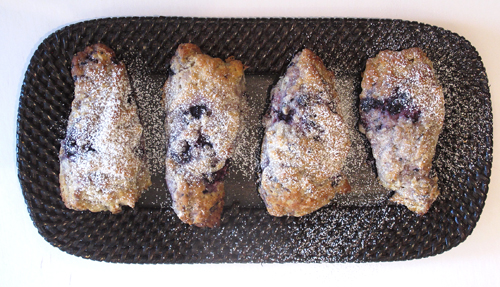
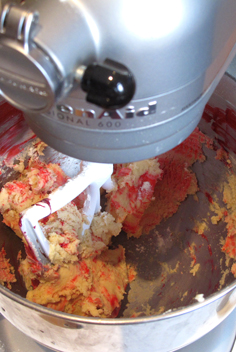
To “vary my craft”, I decided to do a second batch, using frozen wild blueberries and buttermilk instead of cream as the liquid.  I also added about a 1/4 teaspoon of cinnamon to the dry ingredients.  Do not adjust the colour on your monitor.  The blueberry dough will turn purple.  It’s kind of pretty.  I have to say, I prefered the tang of the buttermilk over the cream on the cherry scones.  I also found that the blueberry ones were not as wet inside, which I liked better.  I am excited to try my hand at some savory scones with cheddar and jalapeno.

To print the recipe for Sour Cherry Almond Scones, click here.
To print the recipe for Blueberry scones, click here.


Light and Lazy Lasagna

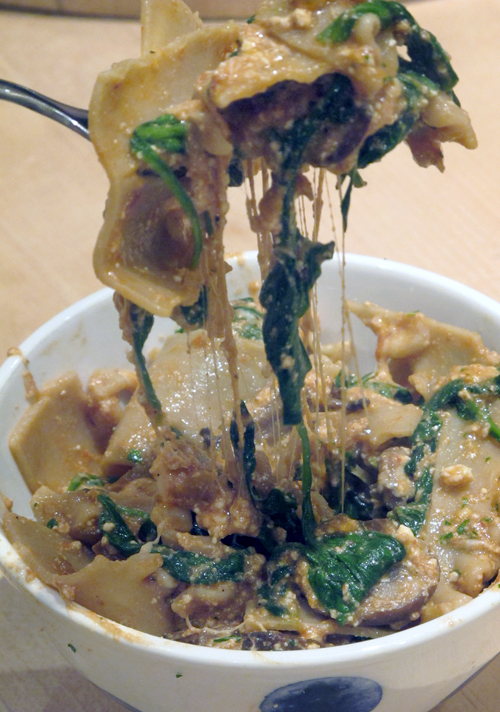
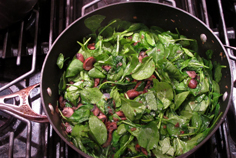
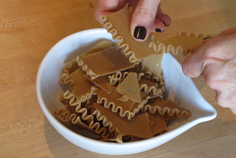
Snow, more snow, freezing rain, ice, slush.   Have I mentioned that I hate winter?   It’s only the middle of January and already I am sick of winter.   I am also sick of yogurt, halibut, carrot and celery sticks and cantaloupe and all those other January foods I have been filling myself with.  I am feeling cranky.  I want pasta.  I watched Rachael Ray make “Lazy Florentine Lasagna” last week and it just looked so cheesy and good. (Pet peeve here, why is her audience instructed to applaud every time she adds garlic or cheese or wine?  It makes me crazy! See I told you I was cranky.)  She broke up the lasagna noodles and just mixed everything together instead of layering it.  I wondered if I could lighten it up just a bit so I wouldn’t undo all the good I have done so far this month in the healthy eating department.  I had kamut lasagna noodles, mushrooms and spinach.

I took some of The Quickest Tomato Sauce out of the freezer and went to work.  This recipe is from his Jamie at Home cookbook and I love it.  Well, I just love anything about Jamie Oliver.  Just ask my husband.  Last summer we were in London for a wedding.   One night we went to The River Cafe for dinner.  When we first arrived and got out of the taxi, I noticed a group of people outside the restaurant.  I watched as they were ushered to a table on the outdoor patio.  As I looked more closely, I was positive I recognized one of the members of that group. Apparently my eyes grew wide, my face got a bit flushed and I was rendered speechless. I just grabbed my husband’s arm and ushered him into the restaurant.

When we got inside, I stammered to the Maitre d’, “Was that who I thought it was?”  She smiled and said, “Yes, it was Jennifer Anniston.”  I replied, “What … no not her, was that Jamie Oliver?”  “Oh, yes, she replied, he was with her group.”  Of course most normal people would have recognized Jennifer Anniston and been excited about seeing her.  I didn’t even notice her.  I only had eyes for Jamie.  My husband said he hasn’t seen a glow like that on my face since our wedding day.  Yes, I have a bit of a crush.  He is such a brilliant chef.  I just love his style of cooking; unpretentious with bold flavours shining through.   We ate inside and they were outside on the patio. I never did manage to get the courage to go over for a photo or autograph.  It was just enough for me to see him.  I had forgotten that he trained at River Café as a young chef.

This dish, inspired by Rachael and Jamie, managed to satisfy my craving for cheese and pasta and my crankiness disappeared, if only temporarily!

To print this recipe, click here.
To print Quickest Tomato Sauce recipe, click here.
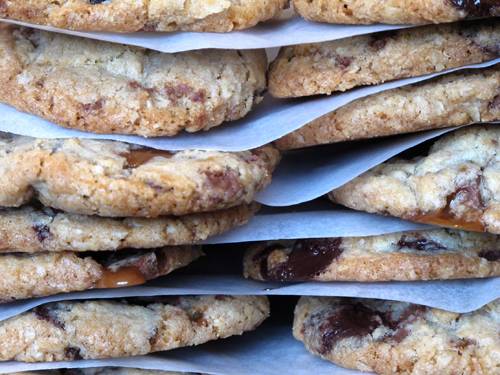
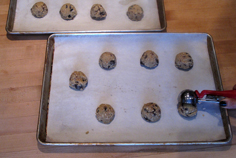
Torie Cookies (Oatmeal Toffee Cookies)


If you have been following along for the last few days you will know that I am struggling to come up with dried fruit desserts for my cooking class on Tu B’Shvat desserts.  Dried fruit desserts are not something I am well versed in.  I think I met the challenge quite well with Tu B’Shvat cake and Meneinas, but the well was running pretty dry and I really wanted to give my students a third dessert.  Of course, there is always fruit compote, but come on now, that’s a cop-out.

I tried focusing on the glut of dried fruit I had purchased, in preparation for this project, but all I kept thinking was, “I want chocolate!”.  And then I remembered one of my favourite cookies combined chocolate and dried cherries (and oatmeal and chopped up skor bars too).  So I figured, as long as the cookie contained some dried fruit, we were ok on the Tu B’Shvat front.

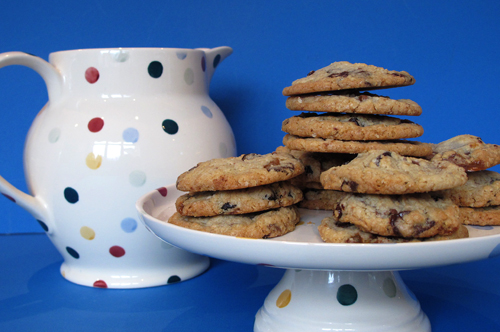
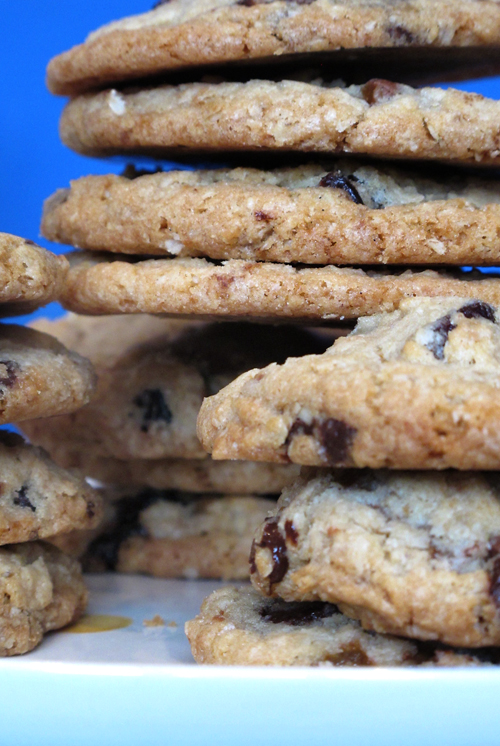
This cookie is an old Martha Stewart recipe, that she got from her friend Torie.  She originally called them “Torie’s Cherry Chocolate Chunk Cookies” and then somewhere along the line changed the name to “Oatmeal Toffee Cookies”.  In our house, we just call them Torie Cookies.  I did a little research and discovered that Torie is Torie Hallock, a real estate broker on Mount Desert island, Maine, where Martha has her famous “Skylands” house.  I’m betting that Torie is a very successful broker as all she would have to do to sell a house is throw in a dozen of these cookies to seal the deal.

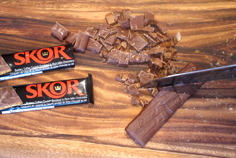
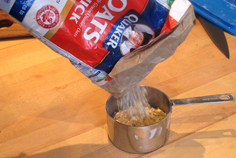
The original recipe called for toffee bits.  They are usually sold here in Canada under the name Skor bits.  I decided to chop up whole Skor bars instead so my cookies are a bit more chocolatey.  I think in the US they are sold under the name Heath Bar.  Whatever you call them, they are delicious.  Just a few notes about ingredients.  Use quick cooking or large flake oats, not instant oats. Instant oats are precooked and dried and are too fine in texture to make a good oatmeal cookie.   Also, the original recipe calls for chocolate chips, but I substitute chocolate callets, which are bittersweet couverture chocolate, shaped into discs.  Feel free to just use any good quality chocolate, chopped up.


To print recipe, click here.
Meneinas (yummy little nuggets)


In my continuing quest to uncover dried fruit and nut desserts for my Tu B’Shvat cooking class, I uncovered this little gem.  These adorable little cookies are called “Meneinas” (pronounced Meh-NAY-nas) and they may be singly responsible for making me reverse my former position on not liking dried fruit desserts.  I feel like Sam in “Green Eggs and Ham.”  Say,…. I do like dried fruit and nut desserts.

I discovered this cookie recipe in my new book, “Chewy, Gooey, Crispy, Crunchy Melt in Your Mouth Cookies.” by Alice Medrich.  I am just a little obsessed with this book and am tempted to bake my way through this one too.  When I bought this book in late December, I promised myself that I would not bake from it in January.  I swore I would only use it for bedtime reading.   Come on now, who am I kidding?  I am so weak!  My New Year’s resolution broken in only 2 weeks.  But to be fair, I was giving a cooking class on dried fruit desserts and this little cookie was just perfect.

Alice says that this is a cherished family recipe from Alexandria, Egypt, given to her by artist Jeannette Nemon-Fischman.  The traditional filling is made with date and walnut, but in typical Alice Medrich fashion, always one to gild the lily, she offers us 4 alternate fillings: Spiced Fig, Apricot Vanilla with Cinnamon and Almonds, Pear Almond and Sour Cherry with Black Pepper.  Of course, being the keener I am, I had to make all 5 fillings.  Just for research purposes of course.  My favourites were the Pear Almond and the Sour Cherry with Black Pepper.  The cooking class students loved them all but their favourites were the date walnut and the spiced fig.

These cookies were so much fun to make.  Actually, I had the best time making the fillings.  Alice suggested that a potato masher would be the best tool for making the dried fruit fillings.  I somehow lost my potato masher so I had to get a new one.  Look what I found!  It is a pogo stick potato masher.  It is spring-loaded and so much fun to use.  No wonder I made 5 fillings.

Once the filling cooled, I added some chopped almonds.  The dough comes together quite easily in a mixer.  It’s enriched with butter, milk and orange blossom water.  I’m just warning you, when you open the orange blossom water be prepared.  It smells like a cheap hooker, but once incorporated into the dough, the flavour and aroma are very subtle.  You can find the orange flower water at middle eastern stores.  Just use some orange zest if you can’t find it.  The dough has the consistency of play-doh and the little cookies are so easy to form.  It’s best to set up an assembly line process.  First, scoop out the filling.  A heaping teaspoon is a good size.  Then scoop out tablespoon sized nuggets of dough.  Then form little cups and fill and seal.

Once the cookies have cooled, I rolled them in icing sugar.  Alice recommends coating them when they are warm and then coating them a second time once they have cooked.  I found they got a bit gummy, so I just coated them once, when cool. I think you could freeze them, uncoated and then thaw and coat them before serving.


To print recipe, click here.
To print filling recipes, click here.
Tu B’Shvat Cake

I  have been very busy the past few days testing dessert recipes with dried fruits and nuts.  This has been challenging on several fronts.  In the first place these are not exactly my type of desserts.   I typically answer to the calls of chocolate, mint, coconut or caramel.  Secondly, we are trying to eat a bit lighter this month in order to make up for our December cookie gluttony.  Why, you may be asking, is she doing this?  Well, it’s all for a good cause.

There is an organization here in Ottawa known as the Friendship Circle.  They pair volunteer teens and children with special needs for hours of fun and friendship.   This organization envisions a world in which children with special needs and their families experience acceptance, inclusion and friendship.  My youngest son, who has Cerebral Palsy and Autism, has been a benefactor of this program for almost 4 years now.  Every Sunday, his friend comes over for a visit.  Sometimes they go bowling, sometimes to a movie, but mostly they just hang out at home playing Nintendo Wii or watching a DVD. This has been a life enriching experience for both my son and his friend.

A secondary goal of the organization is to provide some respite for the moms of these special needs children.  They started a “Mom’s Night Out” program last year.  When they asked me to give a cooking class for the moms last year, I happily accepted.  I was in the middle of my Bread Baker’s Apprentice Challenge, so I wowed them with challah, bagels and cinnamon buns.  In the fall, they asked me if I would do it again this January.  Of course I accepted.  When the organizer called me last week to discuss the evening I suggested we do a class on how to incorporate more whole grains into your life.  I thought this would be  perfect for January.  She said that the moms really wanted a class on Tu B’Shvat desserts.  There was a momentary pause and then I said, “Sure, no problem.”  After I hung up the phone I ran to my computer and Googled  “Tu B’Shvat.”

Although I am Jewish, and have heard of Tu B’Shvat, it is not one of the major Jewish holidays.  (The big 4 being Rosh Hashanah, Yom Kippur, Chanukah and Passover).  A little research was in order here.  Tu b’Shvat, which begins sundown on January 19 this year,  celebrates the New Year for Trees.  In essence, it is a celebration of nature and the fruits of the land of Israel.  Jewish tradition marks this date as the day when the sap in the trees begins to rise, signaling the earth’s awakening from its winter slumber and heralding the beginning of spring.  Say what??  Beginning of Spring?  Anyone looked out the window today?
Yes. I realize most of us are still digging out from the last snowstorm and bracing for the next onslaught of white stuff.  But trust me, in Israel, last time I checked, it was 15º C (59º F) in Tel Aviv.  Next week, on Tu B’Shvat, Jews in Israel, and all over the world will mark this day by planting trees and eating dried fruit and nuts.  Of course it’s not all about planting trees and gorging on dried fruit.  Rabbi Naphatli Hoff, at torah.org, makes an interesting observation on how the seasons often parallel our own lives.

Of all of the yearly seasons, there is perhaps no greater disparity than the one that exists between the seasons of winter and spring. Winter represents stagnation and unrealized potential, when all signs of growth lie hidden inside of the trees. There are no external signs of development, no expressions of vitality. All we see is an empty tree trunk; the fruit and leaves of last season have long since fallen away.

Spring, on the other hand, symbolizes burgeoning vitality. Everything is new and exciting. Trees that have remained dormant for the past few months start to show new signs of life. Buds begin to sprout, flowers start to open. Nature once again reveals its true beauty.

 This contrast is true in human life as well. Circumstances sometimes force us into our own personal “winter,” when struggles and challenges strip us of our innate vitality. There are other times in which we seemingly experience only joy and excitement in our lives. Everything points towards growth and accomplishment.

We must realize, however, that there are two distinct ways for a person to approach the winter-like situations in his own life. The aforementioned contrast between winter and spring is only true if one views winter as the death-knell of summer. The beauty of the seasonal cycle, however, is that one can alternatively view winter as ushering in the upcoming spring. No matter what challenges a person faces, there are always better days awaiting him. Such a person knows no limitations, no dormancy. Life is a continuous cycle pointed in the direction of growth.

This is the message of Tu B’Shvat. In the middle of the winter, when everything around us seems so cold and bleak, think of spring. Eat fruit. Sing joyous tunes. Plant new trees. Always look for the good.Tu BShvat provides us with many essential, real-life lessons. We celebrate Tu B’Shvat knowing that we will continue to weather the storm of life, no matter what that particular “season” has in store. “
So, back to my original mission, dried fruit and nut desserts. I have come up with 3 wonderful recipes that fruit and nut lovers will be thrilled with.  I have to admit, even I thought they were delicious.

I started my research with Janna Gur’s book, “The Book of New Israeli Food.”  Janna didn’t disappoint.  In the index I found a recipe for Tu B’Shvat cake.  Perfect.  As I read through the recipe I started to think, “It’s beginning to look a lot like Christmas.”  This was a fruitcake recipe.  Almost a pound of assorted dried fruit and nuts, held together with miniscule amounts of flour, sugar and eggs.  Well, I am all for Culinary Co-existence.  No reasons Jews can’t bake fruitcake.
At this point I looked at the cake and wondered how this dense gooey mixture would transform itself into a cake.  It does not rise very much and resembles a fruit and nut brick when you turn it out of the pan.  But once I waited for it too cool and sliced it, I was in for a surprise.  Crunchy around the edges and chewy in the middle, this cake is chock full of goodness.  It is even better the next day.  In my effort to abstain from sugar this month, I had just half a slice and sent the rest off to my husband’s office.  Come back tomorrow and Friday for more dried fruit and goodness!

Click here to print recipe for Tu bi’Shvat Cake.


SaveSave

SaveSave

SaveSave

Farro Pilaf with Apples and Raisins


Let me begin by apologizing.  Usually when you open up a new post from me you are greeted with a mouth-watering photo of something delicious to eat.  We have a problem here.  This Farro Pilaf with Apples and Raisins is not the most photogenic thing I have ever made.  But do not stop reading here!  I beg of you to be patient and continue on.  Farro-Apple pilaf combines my two newest food obsessions.

First we have farro.  I have fallen hard for Farro!  No, not the Egyptian Pharaoh!  Farro is a Roman grain, cultivated originally by European farmers as far back as 5000 B.C.  Although it is ancient, it seems to be the new darling of the culinary world and is making a big time comeback.  I accidentally stumbled across it when I was doing a search for Tabbouleh on epicurious.com.  I found a recipe for Farro and Pine Nut Tabbouleh.  Intrigued, I printed it out and put it in my “to try” pile.

The next week, I was watching Giada De Laurentiis on the Food Network, and she made Cheesy Baked Farro, essentially macaroni and cheese but prepared with farro instead of macaroni. Now I just have to say, for the record, that I love Giada!  I think she has great recipes and she seems like a really fun gal to hang out with.  But I just wish she would cover up that cleavage a little.  Ok, rant over.

Two farro recipe sightings in less than a week.  Now my curiosity was definitely piqued.  I had to try this grain.  However, getting hold of farro was no simple task.  I called around to several local food stores.  Two of them said they had never heard of farro, while the other two said that in Canada, farro was sold under the name spelt.  Then, remembering that farro was Italian, I called Nicastros, Ottawa’s largest Italian food purveyor.  Yes, they told me, they sell “farro in chicchi”.

I came back from Nicastros with 2 boxes of farro.  Both were imported from Italy.  One is made by Martelli and the other is by Pantanella.  Interestingly, on the ingredient list of one box, it says, “100% Spelt”.  On the other box it says, “100% Farro, Spelt, Epautre”.  What??  No wonder people are confused.  I decided to consult Mark Bittman (or Bitty, as Gwyneth Paltrow calls him in “Spain, on the Road Again” on PBS), author of “How to Cook Everything”, and “How to Cook Everything Vegetarian”.  These books are the modern day equivalent of Joy of Cooking.”

And of course, Bitty cleared things up for me.  Farro and spelt are often confused for each other.  Both are ancient grains from the wheat family. Farro cooks in about 20 -30 minutes and retains a chewy, toothsome texture while spelt takes 60-90 minutes to cook and has the tendency to turn gummy or mushy.  Farro is extremely versatile and can be used in soups, pilafs, risottos or cold grain salads.  It has become my new comfort food.  Plus, it is low in gluten, high in protein, helps fight insomnia and regulates cholesterol levels.  How could I not fall for Farro?

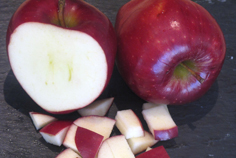
And then we have my second obsession, apples.  Honeycrisp Apples!  Who knew?  Apparently everybody but me.  These apples even have their own facebook page!  These apples hit the market in the fall of 1991.  I just discovered them a few months ago.  Where have I been?  To be fair, I was a little preoccupied in the early 90’s.  By the spring of 1993 I had a 3 year old, a 19 month old and a newborn to care for.  All three were in diapers, so cut me some slack.  But still, my kids are now 21, 19 and 17.  I pride myself on being knowledgeable about new food trends and products, (I’m hot on the trail of cacoa nibs  right now, but that’s a story for another time) but somehow, I missed the boat on this one.

In September, my daughter returned from a a farmer’s market with a big bag of Honeycrisp Apples.  She was positively gushing over them.  Gushing over apples?  This is my child whose first word was “Chocolate.”  I took one bite and suddenly I understood.  This is an explosively crisp apple. It snaps when you bite it.   It is crunchy and juicy all at the same time.  It is so refreshing to eat.  Sorry, was I gushing there?  You will too when you try one.  Oh, maybe you already know about them.  Maybe I really have been living under a rock.  If so, forgive me.

My curiosity led me to a search on where these apples came from.  It’s actually a pretty funny story.  The University of Minnesota has egg on it’s face over this one.  As is the case of most modern hybrid apples, the final product is the result of a lengthy breeding process, experimenting with cross after cross to get the optimal result.  When they finally had an apple they were pleased with, they sent it to market under the Honeycrisp name.  They believed that the parents were  “Honeygold” and  “Macoun”.  However, genetic fingerprinting revealed the shocking truth that neither of these apples were Honeycrisp’s parents.  They knew for certain that one parent was “Keepsake” but the other parent has not yet been identified.  If you know who it is, please advise the University of Minnesota.  Inquiring minds want to know.

I will admit that Honeycrisp apples are best in the fall.  They lose a bit of their “refreshing” nature as they mature.  However, that being said, I boutght a big bag at Costco this week and they were still pretty fantastic.  I decided to combine my two new loves, Honeycrisp and Farro, into one fabulous dish.

Farro can be cooked like pasta, where you boil it in a large quantity of water and then drain it and add it to all the other ingredients.  Or it can be cooked like a rice pilaf, where you saute some onions in oil or butter, then add the farro to coat it in the fat and then add stock and simmer until all the liquid is absorbed and the farro is tender.  I used the pilaf method.  I decided to add apples and raisins for their delicious sweetness and then I finished the dish with some freshly chopped Italian parsley.  It is absent from the photo as I forgot to add it!  But it really finishes the dish with a fresh note.

To print this recipe, click here.
I’d love to hear from you!