Turkish Flatbread (Lahmajoun)

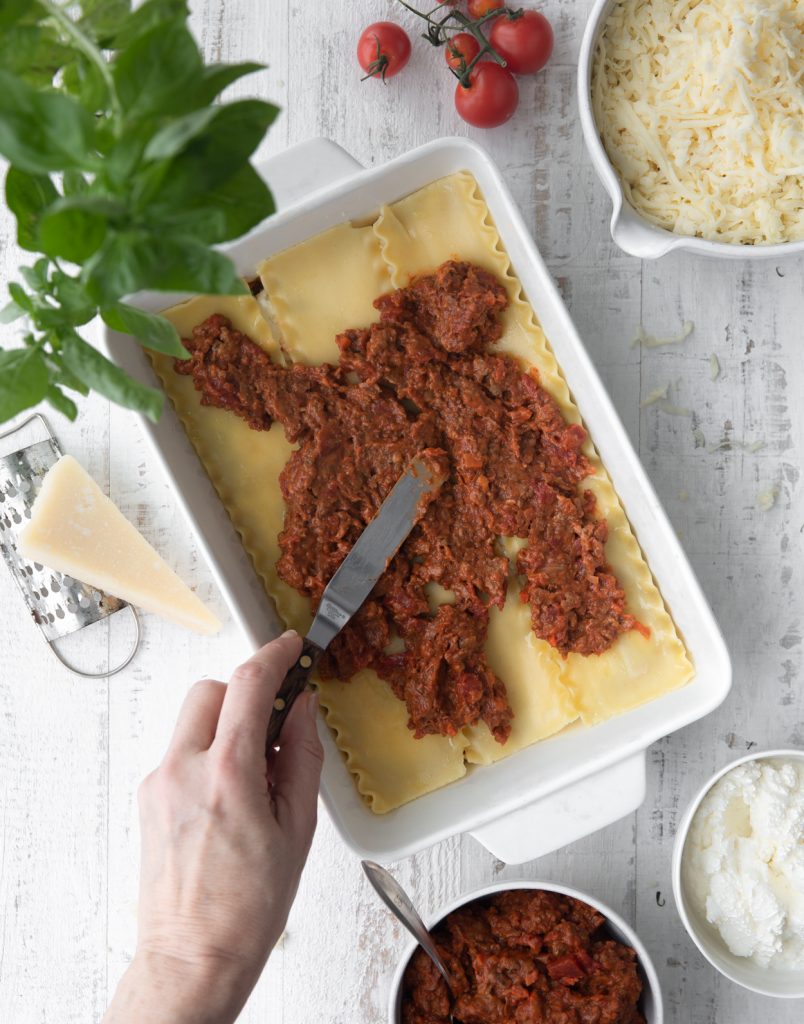
I love it when you can put salad on top of your dinner and call it a complete meal. This flatbread originated in Turkey. It is traditionally topped with ground lamb or beef, but I went for a plant based meat. I had never heard of this dish until I saw Christopher Kimble make it on Milk Street. I was intrigued and decided to make it.

The dough for the flatbread comes together in the food processor in one minute. This is a yeast raised dough, but don’t let that scare you. It uses instant yeast, which means you just dump it in with the rest of the dry ingredients.

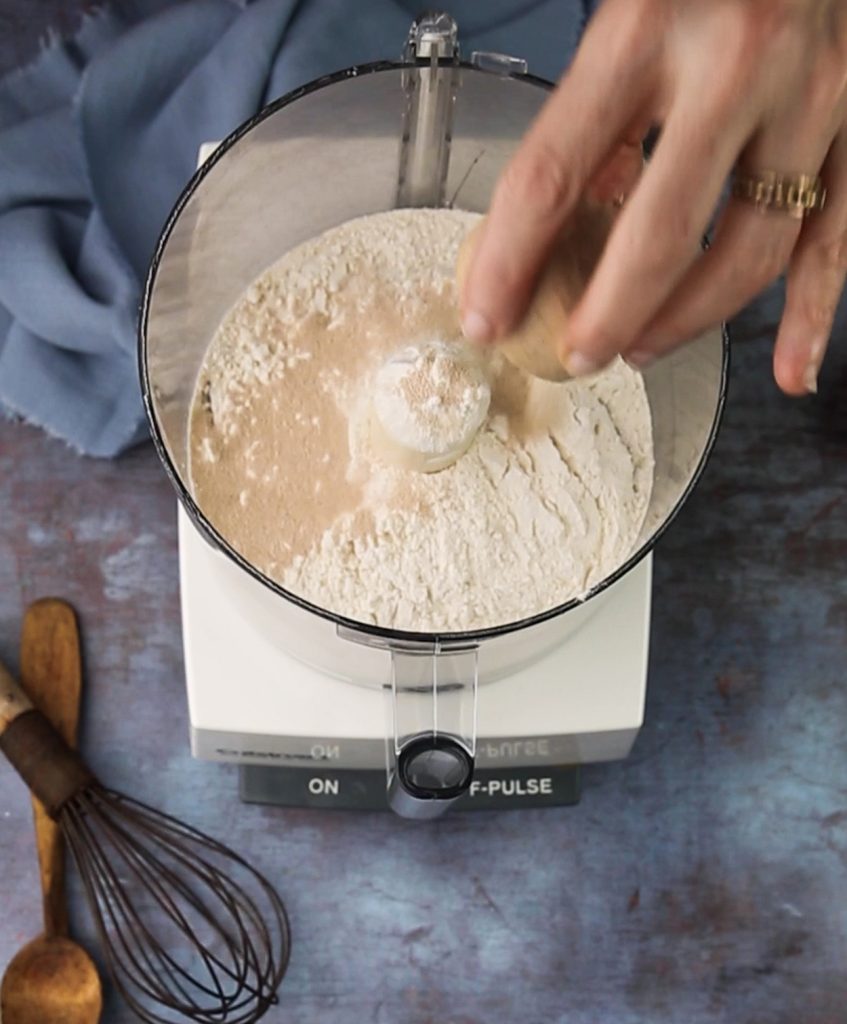
The wet ingredients for this dough are a bit unusual. In addition to water, yogurt is also added. Yogurt, because of its acidity, will relax the gluten, making the bread more tender. It also adds a subtle tang to the crust. Let the food processor do all the work, no hand kneading required. It takes between 1-2 minutes, and you will notice that the dough will get quite warm in the food processor. This is totally normal. Once the dough is smooth and satiny, remove, divide it in half, form two balls of dough and let rise until doubled, about an hour.

While the dough is rising, make the filling. Roasted red pepper and onion get chopped in the food processor until fine. Add tomato paste. I love buying tomato paste in a tube. It keeps forever in the fridge and there is no messing around with half a leftover can.

The spices include cumin, for an earthy note, paprika and red pepper flakes for some kick.

While the arugula and yogurt topping are not traditional, I really love how the peppery arugula cuts through the richness of the meat topping, The yogurt drizzle helps to tame the kick from the red pepper flakes. Plus, your entire dinner is right there on a flatbread. No side dishes are required.

Poppyseed Fig and Walnut Hamentashen

Hamentashen are the traditional treat baked for the Jewish holiday of Purim, which, this year,  falls on Thursday February 25. Essentially, they are a triangular shaped cookie stuffed with a sweet filling.

The Festival of Purim commemorates a time when the Jewish people living in ancient (4th century BCE) Persia were saved from extermination. If you’re curious to learn a bit more about the holiday, check out this post I wrote a few years ago.

We’re all about texture here in the salt and serenity kitchen, so this year I added some poppyseeds to my hamentashen dough for added crunch. I have loved poppyseeds ever since I was a little girl. My paternal grandmother baked poppyseed cookies. We called them Bubbe Cookies. She lived in Philadelphia and a few times each year she would mail us cookies. She always packed them in a shoebox. When that package arrived, my sisters and I would get so excited. I suspect that is where my love of online shopping stems from. There is something so exhilarating about getting a package and opening it.

I filled the hamentashen with fig jam. My favourite is the Dalmatia brand. Don’t be tempted to overfill the hamentashen. A heaping teaspoon if perfect. Make sure you brush the edges with beaten egg white, to glue the seams closed. Pinch the corners firmly to really seal them. I like to put them in the freezer for about 15 minutes before baking. It helps them to hold their shape during baking.

Once they are cooled, I dipped one edge in honey and then into some crushed candied maple walnuts. Double crunch!

Strawberry Rhubarb Hamentashen

Sam Sifton, food editor of the New York Times, has an interesting theory regarding pizza. The first slice of pizza a child sees and tastes becomes, for him, pizza. In effect, that becomes your standard by which you judge all other pizzas. I believe the same could be said for hamentashen. We have a predisposed love of the hamentashen we grew up with.

I grew up in Toronto, and in our family Purim was celebrated with hamantashen from Open Window Bakery. They were huge with a hard, crumbly cookie dough exterior and either a prune or poppy-seed filling. My sisters and I fought over the poppy-seed ones. (Mom, why did you even bother buying the prune ones?)

Over the years, I have experimented with different types of fillings (hello cinnamon bun hamentashen, salted caramel apple hamentashen, dried cherry and pecan hamentashen, and maple pecan hamentashen. Experimenting with fillings is fun, although there are the die-hard traditionalists, like my husband, that just want the “Aunt Carol” hamentashen they grew up with.

Where I get a bit cranky is when people start playing around with the dough that encases the filling. Many of the newer recipes include cream cheese or sour cream, in an attempt to make a flaky dough. People, we are making hamentashen here, not rugelach. Cream cheese and sour cream do not belong in hamentashen dough. The shell of a hamentashen should be cookie-like, firm and crumbly with a toothsome chew.

I did stray slightly by sprinkling a little bit of freeze-dried strawberry powder over my dough, as I was rolling it out. It added a hint of strawberry flavour to the dough, and looked so pretty. Sadly, the streaks disappeared upon baking, but the flavour was there. It’s an optional step.

I’m going to ask you to make your own strawberry rhubarb jam. Store-bought is fine, but if you have an extra 20 minutes, this jam is stellar. I discovered this recipe from Jake Cohen over at thefeedfeed. Sweet and tart with a little pop of acidity from rice wine vinegar, you will find yourself putting this s##t on everything.

Once the jam is made, the process goes fairly quickly, unless you have a mailing list of 25 to send hamentashen to!

Malt Chocolate and Marshmallow Sandwich Cookies

When I saw these cookies on nytcooking.com, created by recipe developer and food stylist Yewande Komolafe, I knew I wanted to recreate them. I love using malt powder in baking. Stella Parks calls it the umami bomb of dessert.

These are like a grown-up version of Mallomars. A pillowy marshmallow filling, sandwiched between two chocolate malt shortbread cookies and topped with a bittersweet chocolate ganache. Each cookie is garnished with a sprinkling of edible gold flakes and coarse sea salt. I love to make delicious and beautiful cookies. It satisfies my deeply strong sense of aesthetics. These cookies are fancy AF, but that’s how we roll here at saltandserenity!

Making marshmallows is not difficult, as long as you have a candy or instant read thermometer. I give very detailed instructions in the recipe. The marshmallow mixture sets up fairly quickly, so have your cookies baked and ready to fill before you make the marshmallow mixture.

Although I called these adult cookies, don’t skip the glass of milk!

Bagel Breakfast Sandwiches

Although this post is titled “Bagel Breakfast Sandwiches”, I’d never actually eat this for breakfast. I’m never hungry in the morning and usually it’s just a bowl of oatmeal or some yogurt and fruit. But, I’m a big fan of breakfast for dinner. When my kids were little, we’d have waffles and ice cream if my husband was out at a meeting. He would have never considered that dinner. We loved it.

Although I’m giving you a recipe for this sandwich, it’s really more of a guide. Feel free to use whatever you have on hand. I had leeks, kale, peppers and some leftover plant based Italian sausage.

I sautéed the veggies, shredded some cheese, then added them to some beaten eggs and poured them into a greased sheet pan. It only took about 8 minutes to bake in the oven.

Since there are just the two of us, we had leftover “egg circles”. They reheated up perfectly for breakfast with a piece of toast the next few morning, and lunch the day after that.

I toasted up some everything bagels, melted some Gouda cheese on the bottom and topped my egg patty with sliced avocado, tomato and arugula. Cheddar and an English muffin would be yummy. Ciabatta bread and Gruyere would also make a fine match. Just use up whatever is lingering in your vegetable crisper and cheese drawer and you’ve got the makings of a very fine dinner!

Cider Caramel Apple Pie

In December, I stumbled upon this adorable heart embossed rolling pin on Etsy.

I had big plans for this rolling pin. It was destined to decorate the top of an apple pie, as a Valentine’s Day treat for my husband. While chocolate is the traditional Valentine’s Day treat, apple pie is what makes his heart beat a little faster. I decided to create Erin Jean McDowell‘s Cider Caramel Apple Pie. She literally wrote The Book on Pie.

The pie is sweetened with an apple cider based caramel. You boil down 8 cups of apple cider, for almost 45 minutes, until it is reduced to the consistency of caramel. When mixed with the apples, it creates a sweet-tart filling with a rich creaminess.

Erin suggest that you take your time and arrange the apples carefully in the pie shell, forming concentric circles. That way, you avoid big air gaps, and your top crust won’t cave in after baking.

The pie looked beautiful going into the oven.

Sadly, the embossed design disappeared with baking. I think that the rolling pin would be more successful with cookie dough, as it spends less time in the oven. So, as they said in 2020, I had to pivot. As a food blogger and photographer, I have learned to become a problem solver. My husband is thrilled when I need to resort to Plan B, because it leaves Plan A for him to eat, without having to wait for me to finish shooting. Food blogger problems!😉

Plan B involved pulling out my heart shaped cookie cutters. I have quite an assortment of sizes. I decided to make mini pies, because, well, mini pies are just cuter.

These pies looked just as beautiful coming out of the oven as they did going in. And the taste! The had a bright, intense apple flavour with just a hint of caramel sweetness.

Valentines Heart Brown Sugar Cookies

I’m very excited to share these cookies with you. This little cookie box, packed with hearts would be such a lovely gift! While I love the look of decorated sugar cookies, most of them are just too sweet and lacking in flavour. I have solved that problem by flavouring and colouring the icing naturally, with freeze dried fruit powder. These are sugar cookies that people will actually want to eat.

Freeze dried fruit is not the same as dried fruit. Dried fruit is dehydrated and only about 75% of the water is removed. With freeze-drying, the fruit is placed into a vacuum chamber where the temperature is well-below freezing and 99% of the moisture can be removed from the fruit.

There are so many fruits that are freeze dried these days. I chose strawberry, raspberry, blueberry and peach. I buy my freeze dried fruit online. You can grind up the fruit in a food processor or spice grinder. I like to strain the powder after grinding, to eliminate any seeds. I mixed up a big batch of royal icing and divided it into 4 bowls and added the fruit powder until I got the colour and flavour I wanted. I also mixed in a little fresh lemon juice to brighten the flavours.

For the cookies, I used my favourite sugar cookie recipe from Bon Appetit. It uses brown sugar instead of regular granulated sugar, They are a little bit chewy in the centre and very delicious. I used a variety of heart cookie cutters sizes. I bought these ones on Etsy this year.

Banana Cake with Brown Butter Cream Cheese Frosting

The inspiration for this cake came from Sally’s Baking Addiction blog. She claimed it was the Best Banana Cake she had ever made! After baking it, I must agree. It’s outstanding.

Even if you’re not a baker, chances are, that during the past year, you have baked a banana bread during the pandemic. But banana bread is so 2020. This year, it’s all about Banana Cake. So, what’s the difference between banana bread and banana cake? Generally, banana bread is a bit denser than banana cake. Banana cake tends to be a bit sweeter as well. The biggest difference however, is that Banana Cake almost always has a frosting. And really, isn’t all about the frosting.

Sally frosted it simply, with a butter-cream cheese icing. I took it up a notch and browned the butter in my cream cheese frosting. Browning the butter is an additional step that is most certainly worth the effort. It adds a nutty taste that helps to temper the sweetness of the frosting. Even non-frosting types, like my husband, loved this one.

Instead of making a simple snacking cake in a 9×13 inch pan, I baked mine in three 6-inch round cake pans and created this statuesque layer cake.

In addition to the frosting between each layer, I added a crunch element. I toasted some chopped walnuts, crushed digestive cookies and some melted butter to create a crumble.

When my children were little, we used to pretend that the first of every month was Elmo’s Birthday, complete with cake and candles. Of course the cake was almost always chocolate. And I always had at least one of the kids in the kitchen “helping”. Somehow, with help, it always took longer! I have so many lovely memories from that time. The enthusiasm for these monthly celebrations was infectious. The kids have all moved out now, but I think it just might be time to bring back monthly birthday cakes.

Banana Bundt with Cream Cheese Swirl

My name is Cindy and I have a Bundt pan addiction. Is there anything more beautiful than a Bundt Cake? It does all the work for you. Somehow, over the years, I have amassed quite a collection of Bundt pans. I have this one, this one, this one, this one, these and these. I have resisted buying these, but we all know it’s only a matter of time.

Bake from Scratch magazine founder, Brian Hart Hoffman, recently released The Bundt Collection Cookbook, 128 gorgeous and delicious ways for Bundt aficionados to show off their baking prowess.

I started off with this Banana beauty. When you slice the cake you reveal a gorgeous cream cheese swirl. The tang of the cream cheese really complements the sweet bananas. It’s a classic combo.

Once the cake is cooled, you brush it with melted butter and sprinkle coarse sanding sugar all over the top and sides. It glistens like a jewel.

Since I have baked more than a few Bundt cakes in my life. I’d like to offer a few pointers for success:

  1. To avoid every Bundt user’s worst nightmare, spray the pan very well with Baker’s Joy, Pam with Flour, or other spray that includes flour.
  2. Dense batters, like pound cake and coffee cake are best for a Bundt pan. A light chiffon or sponge cake is not a good option for this pan.
  3. Be patient when you bake this. It takes a while. Use the wooden skewer test. If the skewer comes out sticky or covered in batter, it’s not ready. If there are just a few crumbs clinging to it, that’s fine. Better still, an instant read thermometer, registering 200°F is a foolproof test.
  4. Let the cake rest on a wire rack for at least 15-20 minutes before turning cake out of the pan. You might need to give the pan a gentle bang to help loosen the cake and release.
  5. Let the cake cool entirely before glazing or icing it.
  6. Any leftover cake freezes beautifully. I slice it, wrap each slice in plastic wrap and then put them in a freezer bag.

“Meaty” Vegetarian Lasagna

I’m very excited to share this lasagna recipe with you guys! I have been working on it for a while now. I wanted to create a “meat” lasagna using plant based meats. After some trial and error, I settled on a combination of Beyond Meat ground beef and Beyond Meat spicy Italian sausage. This is not a sponsored post. I just really love their products. They really replicate the taste and texture of meat, unlike some soy based alternatives I have tried. If you’re curious to know more, you can read abut it here.

The sauce is quick to make, it only needs to simmer for about 15 minutes. Rich and satisfying, it was really difficult to believe it was not real beef and sausage.

For the cheese filling, I went traditional here, using a mix of mozzarella, ricotta and parmesan, with a bit of cream to smooth the whole thing out.

I know that making a lasagna is a big time commitment. This one is worth it. A 9×13 inch baking dish will make about 8 servings. Any leftovers freeze perfectly. I just love pulling dinner out of the freezer on nights when I don’t feel like cooking.

Watch how it all comes together. Pro tip – see how I use a potato masher to break up the ground “beef” and “sausage”.

Please don’t be tempted to use the “no boil” lasagna noodles. They just don’t have the same texture as the regular noodles. It’s an extra step that I urge you to take.