Holiday Baking Day 5: Packaging

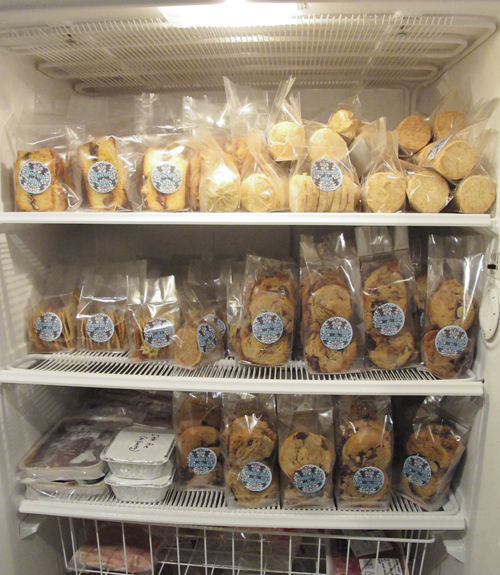
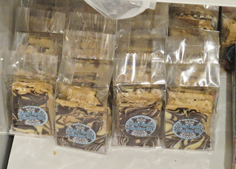
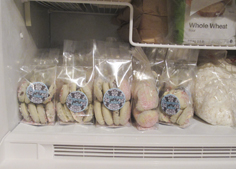
Last week I wrote about the joy of having 2 dozen pounds of unsalted butter neatly stacked in my freezer. However, this happiness is easily usurped by seeing 7 varieties of holiday treats (cookies, bark, brittle) neatly packaged and ready for giving. The sight of this never fails to fill me with delight and serenity.

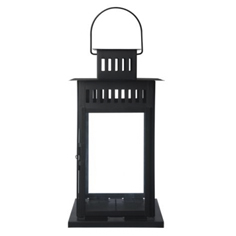
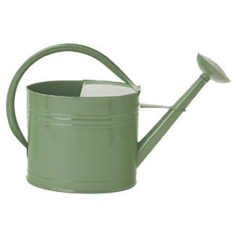
After the hard work of the baking is done, it’s time for the fun part…packaging it all up to give away. I am always on the lookout all year for interesting, reasonably priced containers in which to package up my treats. Ordinary “holiday themed” cookie tins are a little too pedestrian for me. I like to think outside the box. One year I packaged Pecan Almond Caramel Corn into a cello bag and stuffed it into an outdoor lantern from Ikea. Another year, I packaged up all the cookies in cello bags and then presented them in a huge watering can.

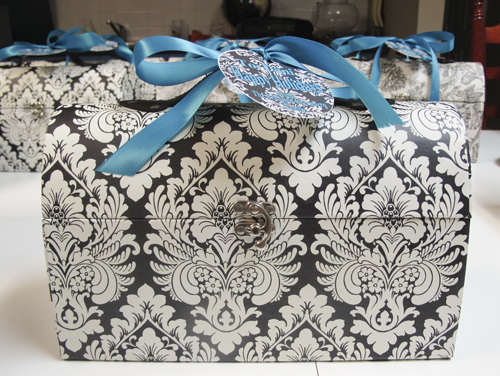
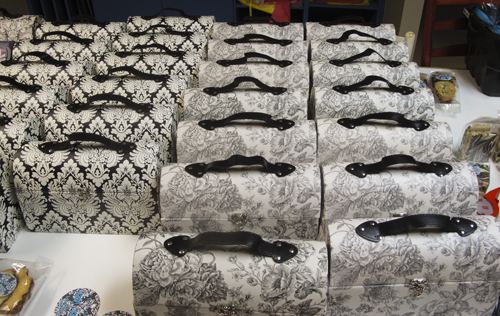
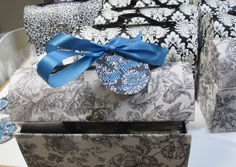
This year, I found these adorable treasure chests at HomeSense. The problem was, they only had about 8 of them, and I needed 40. So, I spent an afternoon driving around to all the HomeSense stores in town. (There are 5 in the Ottawa area) By the end of they day I had enough. I attracted a bit of attention at the cash when I piled my 10 treasure chests onto the counter. Everyone felt the need to ask me what I was planning to do with them.

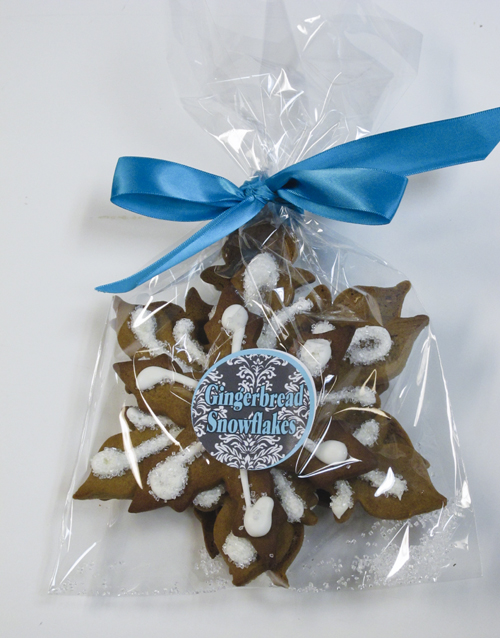
This year I was very excited to have some help doing the last bit of baking and packaging. My girlfriend and her daughter, (who is my god-daughter!) from Toronto, came for a visit. My god-daughter wanted to come and learn how to bake with me. She is 20 years old and has wonderful fine motor skills. Within minutes, she was piping the gingerbread snowflakes like a pro! With their help, I got everything packaged up in record time. I loved having their company and can’t wait for them to come back next year and help me again!

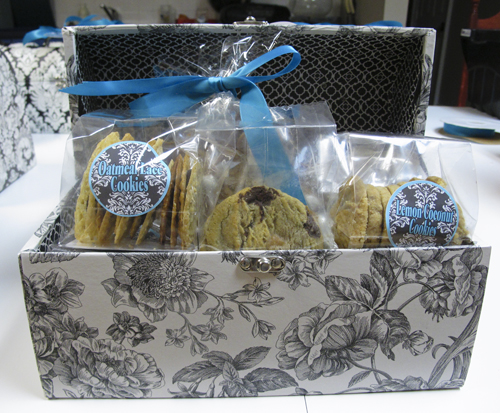
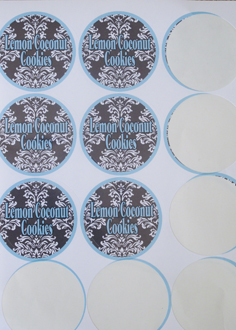
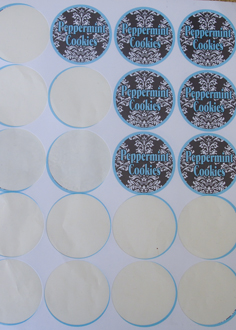
The treasure chests were black and white so I downloaded a black and white pattern to use on my labels. We played around with a few different accent colours (lavender, yellow, pink and turquoise) and the blue shade was voted tops! I use a software program from Broderbund called Print Shop. The circular labels are from onlinelabels.com.

It was a bit of a challenge to fit all the cookies into the chests, but my girlfriend is a deep thinker and very intelligent and she figured out the best way to do it in no time flat. My spatial skills are very weak so I was tremendously grateful for her assistance, as it would have taken me forever to puzzle it all out.

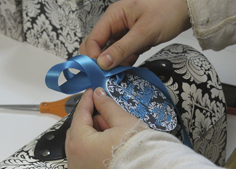
I used to tie up all the cello bags with ribbon but that caused a few different problems. Firstly, it was very time-consuming and secondly, it was way too easy to untie the bags, steal a cookie and then tie it up again, without anyone being the wiser. I finally invested in a bag sealer which has saved me money in ribbon, time in bow tying and calories in keeping my grubby little hands out of the bags!

Holiday Baking Day 4: Chocolate Covered Pretzel Brittle

Follow Me on Pinterest
They do exist. Those people who claim, ā€œI’m not really a dessert eater. I don’t have much of a sweet tooth.ā€ I just don’t happen to be a member of their tribe. I do have a sweet tooth! However, I also happen to have a salty tooth. Wait; is there such a thing? I do know that I love the combination of salt and sweet. I think I first discovered this as a young child, when my mom would put out snacks when we were having company.

There would be bowls of jube jubes, chocolate covered almonds, salted cashews and potato chips. I would eat a few jube jubes and then follow them with a few salted cashews. Of course that was the gateway to the huge glass cookie jar filled with red licorice and then some salty potato chips to chase the sugar with. When I got older, I discovered Milk Duds at the movie theatre. A few handfuls of popcorn, followed by the sweet chocolate caramel flavour of Milk Duds is an incredible flavour combo. Then my daughter introduced me to McDonald’s French fries dipped into a chocolate milkshake. Hey, don’t judge until you’ve tried it!

All this to say that when I serve those from the ā€œNon Sweet Toothā€ Tribe, one of my salty-sweet treats, I get an entirely different reaction. There is something about the addition of salt that makes sweet taste so much better. Suddenly, they’ve grown a sweet tooth.

But, have you ever wondered why salt and sweet taste so good together? Justine Sterling, contributor to the food blog delish.com, explained it so eloquently,

ā€œWe all know that taste buds allow us to taste (it’s in the name, after all). But what you may not know is that each taste bud contains 50 to 100 taste cells, which are actually what do the tasting. Each of these cells responds to a different flavor: sweet, salty, sour, bitter, or umami. We perceive taste (let’s use sweet as an example) when sugar and a sweet receptor protein interact, causing the sweet cell to become excited and send a signal to the brain, which then registers the flavor as sweet. This is a process that scientists have known for a long time.

Ā But recently the process has been further complicated by what researchers have found out about certain sweetness receptors. A study, published in Proceedings of the National Academy of Sciences, found that certain sugar receptors that were thought only to exist in the stomach, were spotted on sweet taste cells on the tongue. Researchers, led by Dr. Robert Margolskee, of the Monell Chemical Sense Center, found the SGLT1 receptor — which transports sugars into cells only when sodium is present — on sweet taste cells on the tongues of mice. This could explain why sweetness is accentuated by salt — the receptors are activated when salt accompanies sugar.ā€

Ā O.K. science lesson is over. On the fourth day of holiday baking I bring to you a yummy salty and sweet treat guaranteed to convert those from the ā€œNo sweet toothā€ tribe over to the dark, oops,I mean, sweet side!

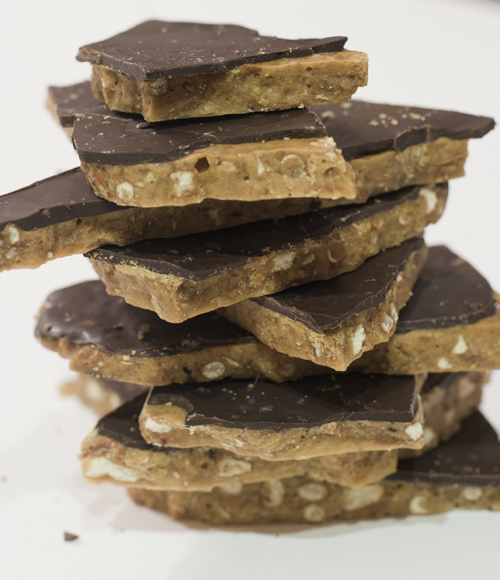
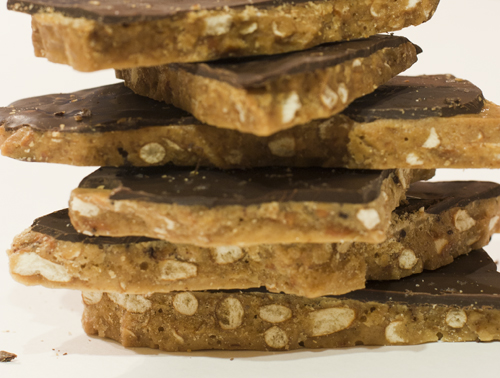
Chocolate Covered Pretzel Toffee, comes from Lucy Baker, contributor to www.seriouseats.com. Essentially you make a sort of peanut brittle, but with crushed pretzels instead of peanuts. Then the whole slab is covered in dark chocolate and finished off with a sprinkling of coarse sea salt.

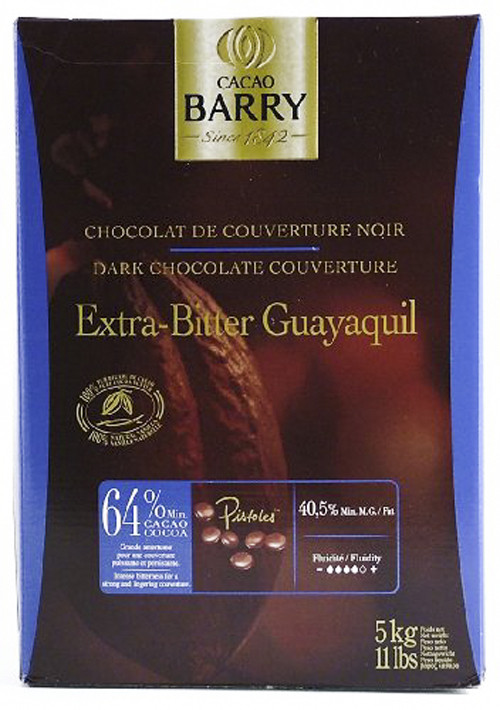
I have altered her recipe slightly. She originally called for topping the hot toffee base with chocolate chips, letting them melt and then spreading them out. I find that chocolate chips don’t melt quite as nicely as bar chocolate. Chocolate chips are actually formulated to hold their shape and are a bit too sweet for this, so I would recommend buying bittersweet chocolate (at least 64%) and chopping it up quite fine.Ā Ā I used Cocoa Barry Ā 64%. I buy itĀ in bulkĀ (20 kilograms at a time, and I get a great price of $15.79 per kilo. (The chocolate will keep for 2 years in a cool dry place.)

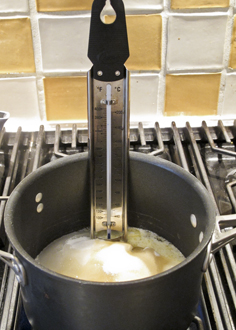
This is quite quick and easy to put together, provided you have the right equipment. Invest in a candy thermometer if you plan to do any sugar or caramel work. This is a great one as it has a foot at the bottom of the thermometer which prevents the bulb from touching the bottom of the pot, and giving you a false reading.

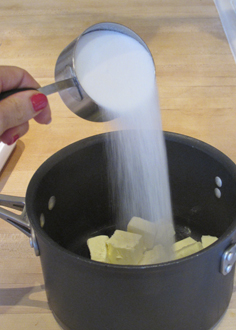
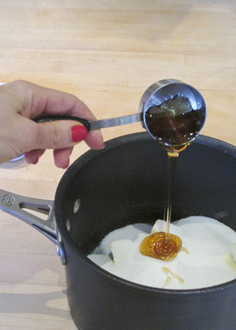
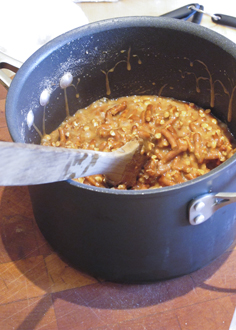
Butter, sugar, corn syrup, salt and water are cooked to 300° F.

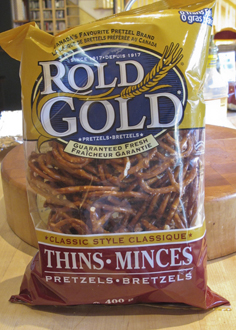
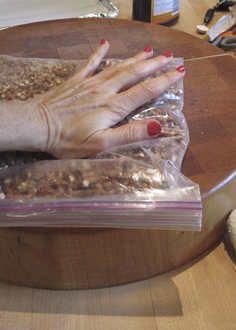
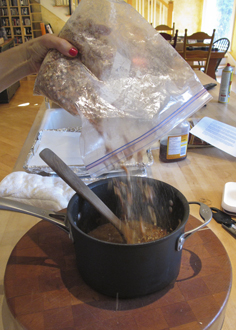
Baking soda, vanilla extract and crushed pretzels are mixed in.

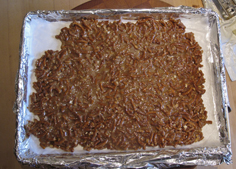
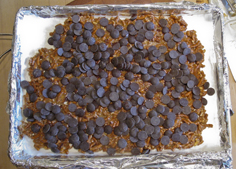
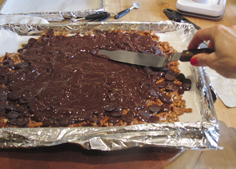
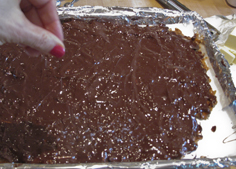
Spread out on parchment lined baking sheet and top with good quality finely chopped chocolate (NOT CHOCOLATE CHIPS!). I used Cocoa Barry Ā 64%. I buy it in bulk (20 kilograms at a time, and I get a great price of $15.79 per kilo. (The chocolate will keep for 2 years in a cool dry place.) Ā Wait 3 minutes, spread chocolate and top with a light sprinkling of sea salt. Chill and break into pieces.

Click here to print recipe forĀ Chocolate Covered Pretzel Toffee.

Holiday Baking Day 3: Oatmeal Lace Sandwich Cookies

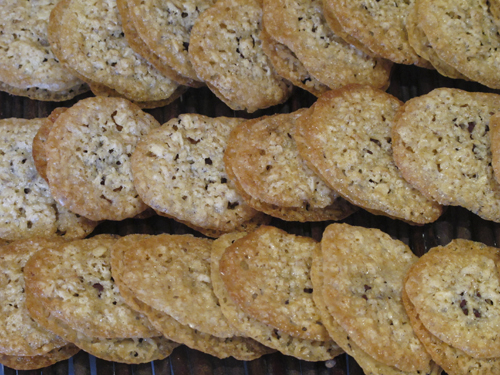
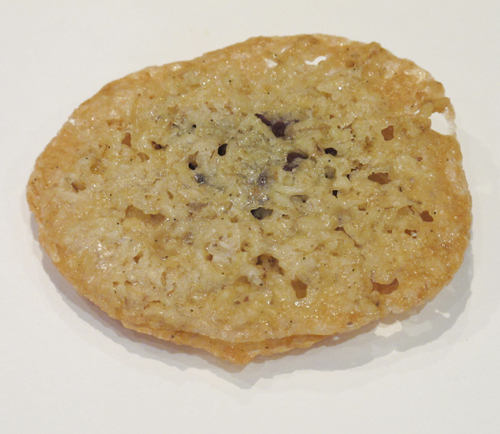
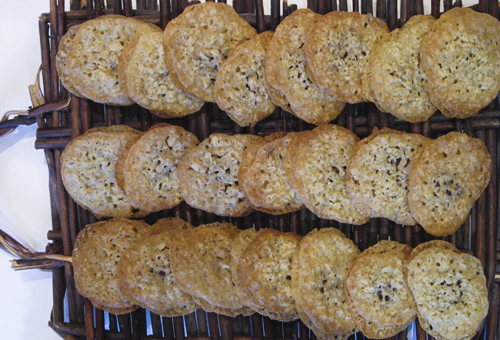
On Day 3 of my holiday baking I present to you “Oatmeal Lace Cookies. My day 2 cookies, Chocolate Chunk Caramel, would qualify for the heavyweight division. Loaded with shards of dark chocolate and melting pools of caramel, these are a hefty cookie, not for the faint of heart. Oatmeal Lace Cookies, on the other hand, fall into the lightweight division. Gossamer thin, crispy, Ā delicate, and dare I say, a little fragile, these are a beautiful cookie. They may look a little anorexic next to the chocolate chunk caramel, but rest assured, they are no lightweight in the taste department.

These cookies are the creation of Nick Malgieri. They come from his book, “Cookies Unlimited” (Harper Collins 2000). I have been known to have my celebrity chef crushes. A few years ago it was Jamie Oliver, lately I have been lusting after Chuck Hughes. But these are mere dalliances, compared to my feelings for Nick!

Oh dear, just read that last paragraph back to myself, and even to my ears it sounds a little creepy and stalkerish. Nick, if you’re reading this, please don’t be concerned. My admiration for you is purely professional. I have been a longtime student and admirer of Nick. His book, “How to Bake” was really my baking bible. His recipes are clear and methodical, leading to outstanding results every time. In 2008 he published The Modern Baker. Ā AĀ Challenge to bake the entire book was set up by a blogging friend of mine. Modern Baker is filled with creative contemporary recipes that offer great time-saving techniques. However, I think that, of all of Nick’s books, Cookies Unlimited is my favourite.

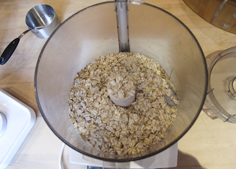
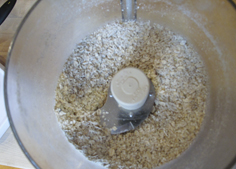
The cookie batter is simple to put together. No mixmaster required. One bowl and a wooden spoon and you’re ready to go. Start with large flake or quick cooking (not instant) oats. They will need to be ground up a bit in the food processor or blender. They should be finely chopped but not ground to a powder. They should look like the second photo here.

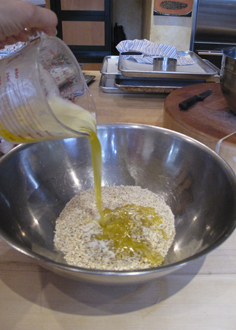
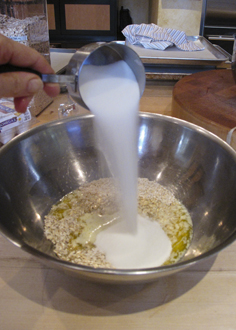
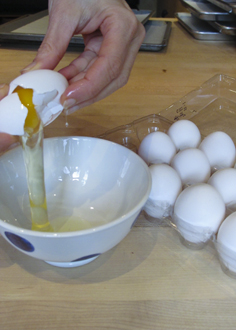
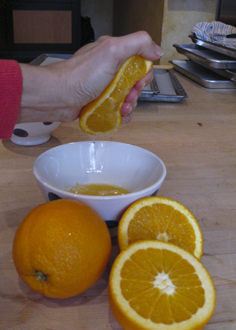
Add some melted butter, sugar, eggs, orange juice and

Forming the cookies is not difficult, but it does take a little time. Here is a video showing you the best technique and tools for the job.

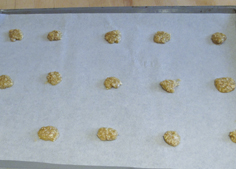
Leave lots of room between cookies on the baking sheet, as they will spread.

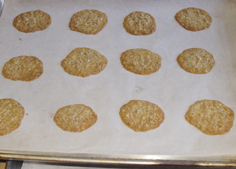
This year I sandwiched 2 cookies together with chocolate ganache to make a sandwich cookie. Plain melted chocolate will also be a perfect filling. They freeze beautifully, carefully layered between sheets of waxed paper, in an airtight container.

Click here to print the recipe forĀ Oatmeal Lace Cookies.

Holiday Baking Day 2: Chocolate Chunk Caramel Cookies

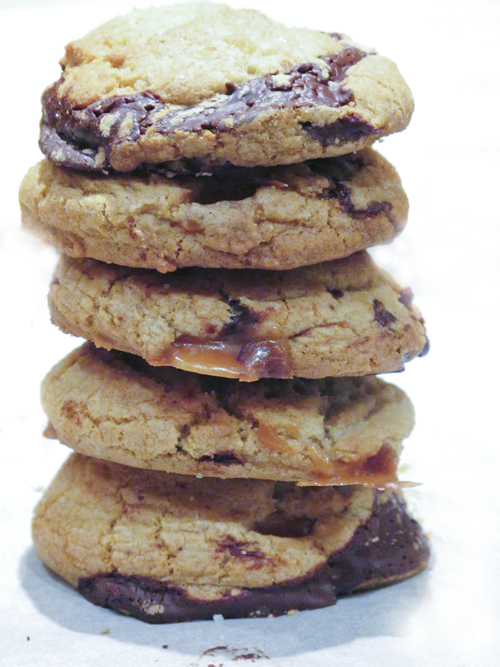
When it comes to chocolate chip cookies, people are very particular. Some like them thin and crispy; others love them thick and chewy. There are those who love them all warm and gooey from the oven.Ā Ā  Then there are those who prefer them once they have totally cooled, and the chocolate has a snap when you bite into them.Ā  Finally, there are those who love them best straight from the freezer once they have cured for a few days.Ā  Granted, that camp is quite small (by the way, I am firmly in this camp)Ā butĀ they have their followers. Here is a tale about one chocolate chip cookie that is far superior to any other I have ever tried.

A few months ago, while surfing various food blogs I came across the following sentence, ā€œI have found the last chocolate chip cookie recipe I will ever need.ā€ Wow, I thought, that is a very bold statement and one not to be uttered lightly. However, being a food blogger myself, I know how we, as a group, are prone to exaggeration. These cookies were originally created buy Ashley at notwithoutsalt.com.

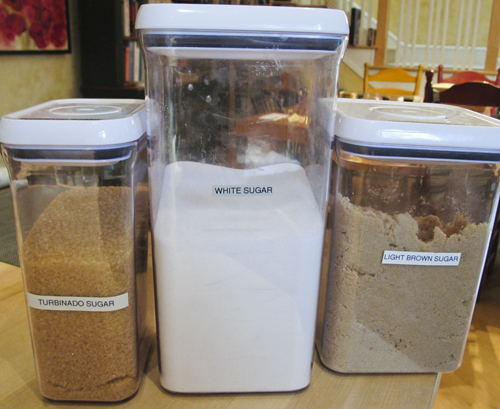
As I read through her recipe I became intrigued. All of the chocolate chip cookie recipes I have made over the years use both white and brown sugar. The white sugar makes the cookies crisp and the brown sugar, because of its hygroscopic (i.e.: it absorbs moisture from the air) properties, makes the cookies chewy. This is the first recipe I have ever seen that uses a third sugar – Turbinado sugar. Turbinado sugar is a golden coloured natural brown sugar is produced by extracting the juice from sugar cane, heating it to evaporate water and crystallize the sugar, then spinning in a centrifuge to remove some impurities and further dry the sugar. It can commonly be found at bulk food stores.

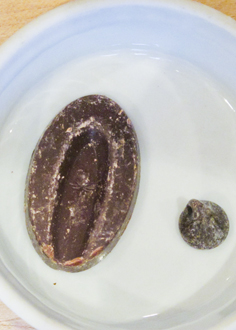
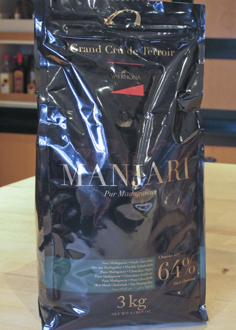
I must say a few words about the chocolate you choose for these cookies. Ashley says you must use the best quality chocolate you can afford. I made them with Valrhona Manjari 64% Chocolate from Madagascar. I know, I sound like such a chocolate snob, but I really believe that this chocolate took my cookies from good to outstanding. The Manjari chocolate is often sold in what they call “Les Feves” or “pistoles”. Essentially these are discs of chocolate that are reminiscent of chocolate chips on steroids. But they have none of the chalky, waxy quality of chocolate chips.Ā I cannot emphasize too strongly,Ā do notĀ use chocolate chips for these cookies. Chocolate chips contain an emulsifier in them to help them hold their shape during baking. You want the chocolate to completely melt in baking and then harden once again after cooling. There is some kind of physical change that takes place during the melting and cooling, that gives chocolate chunk cookies a special snap or bite to them that you just do not get with chocolate chips. Buy a few bars of good quality chocolate (at least 60-70% cocoa content). If you can’t findĀ Valrhona Manjari 64% Chocolate, try some chopped Callebaut or even Lindt dark chocolate.

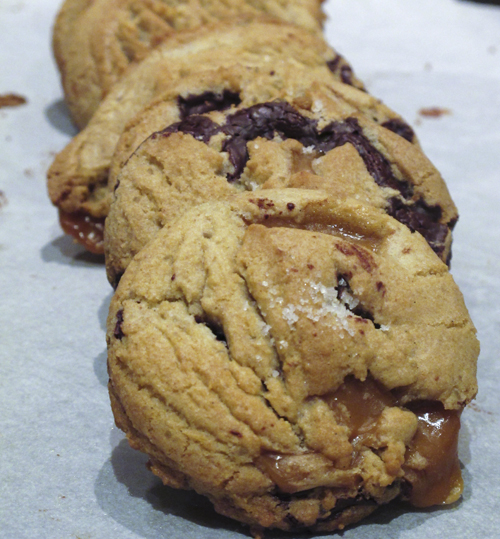
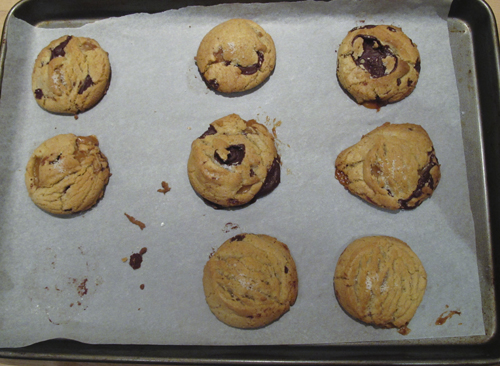
With a small sprinkling of fleur de sel, just before baking, these cookies are pretty close to perfection. But, not one to leave well enough alone, I added chopped caramel candies to mine. These are a hefty cookie, crammed full of large shards of chocolate and little tunnels of caramel.

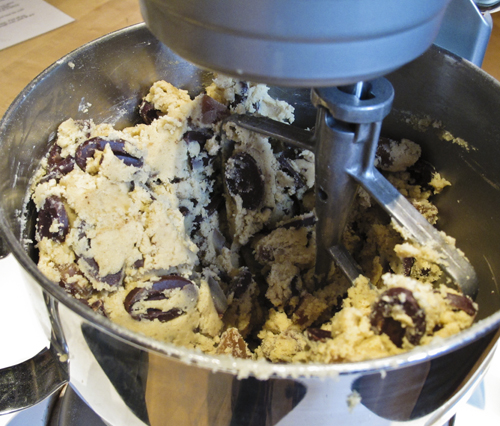
This recipe makes about 32 cookies, or less if you are they type to nibble on raw cookie dough. You know who you are, so adjust your yield expectations accordingly!

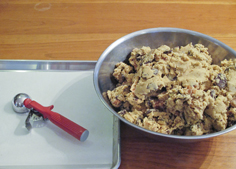
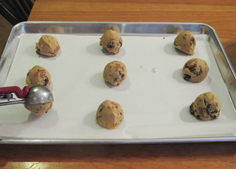
I used a 2 inch ice cream scoop and put 9 cookies on a 18 x 31 inch cookie sheet.

Warm from the oven or cold from the freezer, these cookies are pretty fantastic.

Click here to print the recipe forĀ The Perfect Chocolate Chunk and Caramel Cookie.

Holiday Baking Day 1: Dark Chocolate and Pecan Biscotti Slabs

My youngest sister once told me that the sight of 24 pounds of unsalted butter in her freezer makes her very happy. I have to admit, the same is true for me. Although in my case, the butter would all be neatly stacked in orderly rows. In my sister’s freezer, more like haphazardly thrown in wherever they would fit. Now, that’s not a dig at my sister. It’s just part of her unique charm.

Why, you may be asking, would these sisters need 24 pounds of unsalted butter in their freezer at any given time? Do we operate a bootleg bakery out of our homes? No. Were we children who came from poverty? No, as a matter of fact, we grew up in a middle-class suburb of Toronto. I guess you could say we come by our hording honestly. Our mother stockpiled our freezer with Swanson’s T.V. dinners and chicken pot pies, Sara Lee Banana Cakes and Highliner fish sticks. We hoard butter because you never know when the urge to bake will hit, and you must never be caught unprepared. We both love to bake. We both find baking an extremely creative outlet and a way of showing our love to those around us.

Rather than shop for gifts for all the people in my life for whom I am grateful, I decided many years ago to bake. And somehow, over the years my gratitude has grown to include a circle of about 40 people! I usually bake about 7 or 8 different kinds of treats and package them all up in a beautiful unique container. Ā There are a core 4 items I bake that must be included each year. If I leave any of them out, there may be a mutiny. These treats include Peanut Butter Bark, Chocolate Peppermint Cookies, Lemon Coconut Cookies and Gingerbread Snowflakes.

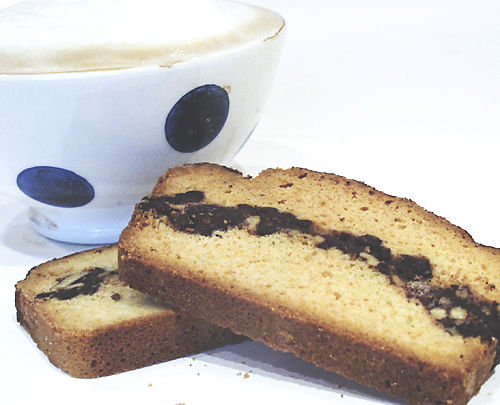
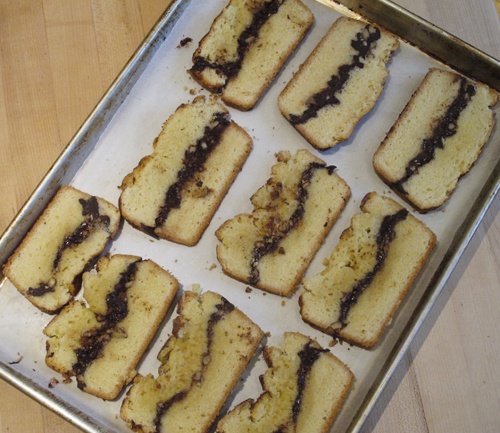
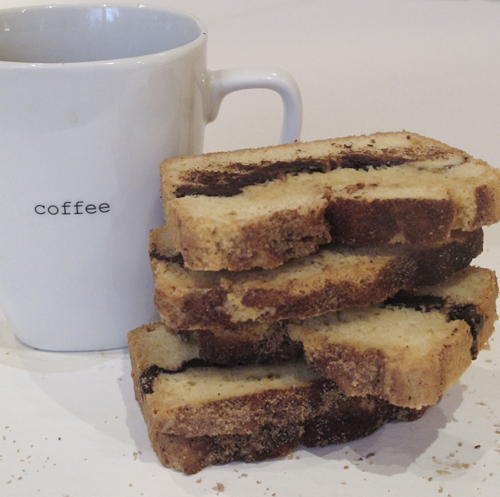
This year I added a few new items to the mix. The first are Biscotti Slabs. These are a creation of Montreal baker Marcy Goldman. Essentially, you take a typical biscotti batter, bake it in a loaf pan, chill, slice, re-bake and voilĆ : a new product. Slabs of crisp cookie-like biscotti with a delicious middle layer of chocolate and pecans and a glittering topping of cinnamon sugar. These are serious biscotti. Perfect for breakfast with a cafe latte. Anyone I have ever offered them to looks at them and says, “Oh, these are huge, I’ll just have a small piece.” They break off about a third, nibble on it quietly and then come back and finish the rest off. Sweet, but not too sweet, crunchy and quite addictive.

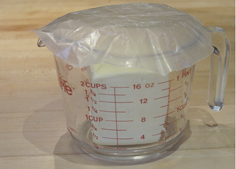
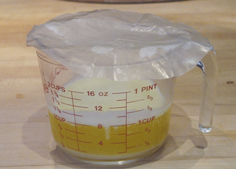
These biscotti begin with melted rather than softened butter. Marcy uses melted butter in many of her recipes. Not quite sure why this is. If you are melting the butter in the microwave, save yourself a lot of grief and a huge butter explosion and cover butter with a sheet of waxed paper first!

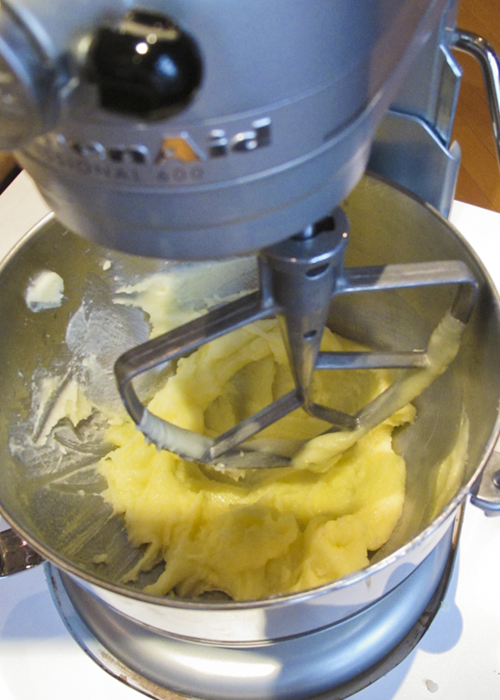
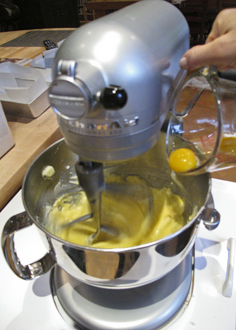
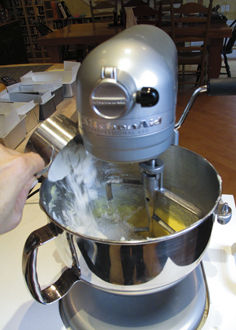
Butter and sugar are creamed together. Be sure to take the time to do this properly. It takes at least 4-5 minutes of creaming. It should look like this when it is done.

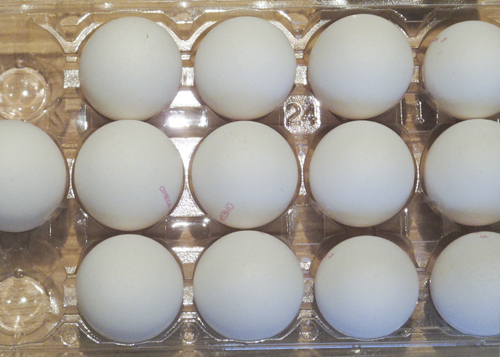
Eggs, vanilla, flour, baking powder and salt are added to complete the batter.

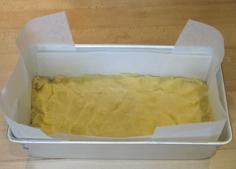
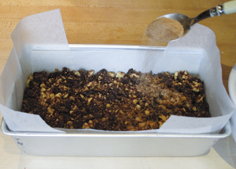
Here is my foolproof technique for lining the baking pan. No greasing required and the biscotti slab will lift out very easily without any sticking.

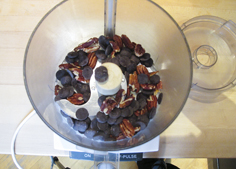
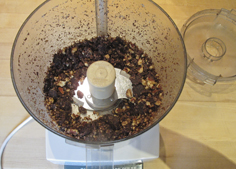
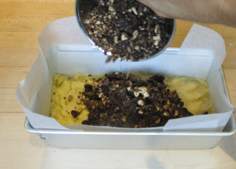
Toasted pecans and bittersweet chocolate are chopped up to make the biscotti middle layer.

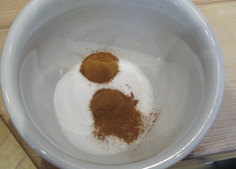
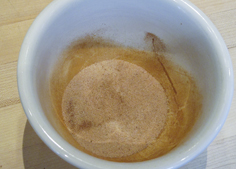
Mix together some cinnamon and sugar.

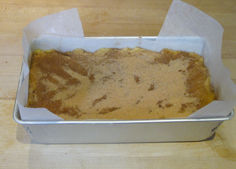
Then it’s time for assembly. Spread half the batter into the prepared loaf pan. Use wet fingers to spread it evenly. Spread the chocolate and pecan topping evenly over the batter. Sprinkle on half the cinnamon sugar mixture. Top with remaining batter and finish with a dusting of remaining sugar-cinnamon mixture.

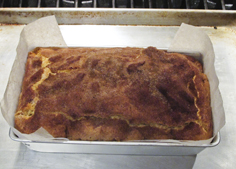
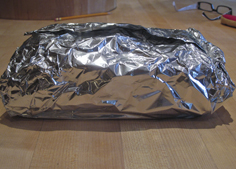
Bake for about 50 minutes. Let cool completely and remove loaf from pan. Wrap well in foil and freeze for about an hour. Then slice into slabs and bake a second time.

Arrange slabs on baking sheet and bake for an additional 10-15 minutes until crisp and slightly browned. They will continue to firm up as they cool.

Click here to print recipe forĀ Dark Chocolate and Pecan Biscotti Slabs

Penne with Turkey Sausage and Arugula

You think you know a person. Ā You sleep together in the same bed, glareĀ stareĀ across the dinner table atĀ each other, floss together every night, for almost 26 years, and you think you know this person inside and out. But then, suddenly you discover something about them that shocks you to your very core. Or in this instance, leaves you scratching your head saying, “huh??”

I’m speaking here, of course, about my husband of a quarter of a century. For the past 6 months, at least once a week, I have been making this pasta dish. And every week, he eats it, cleaning his plate, without comment. All of the sudden, this week, he looks at me and says, “Next time, can you leave the weeds out?”

Weeds?? Upon further discussion, I discovered he was referring to the wilted arugula and spinach that I add to this pasta dish. He finds the texture of sautĆ©ed green off-putting. I love them! So much so, that I plan to continue making this dish every week, but, as a compromise, as every good marriage requires some give and take to make it thrive, I will add the green vegetables that he does love, like broccoli, peas and asparagus and serve the weeds on the side. Heck, I love this guy so much, I may even give him a real thrill and add some brussels sprouts one week. Now that’s how you spice up a marriage!

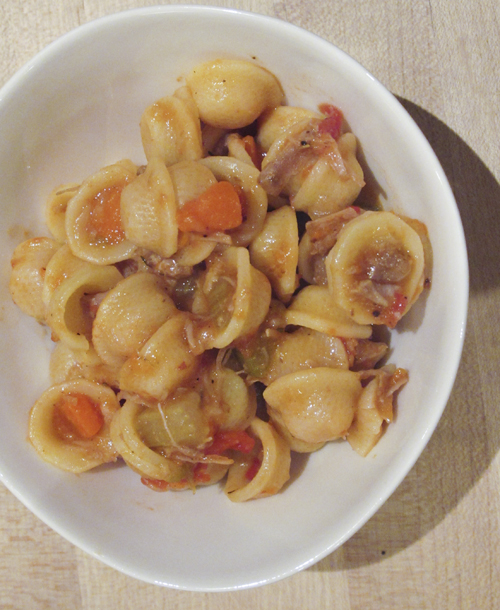
The inspiration for this dish came from a Cook’s Illustrated recipe for pasta with Italian sausage and broccoli rabe. At home I keep kosher and could not make this with traditional pork Italian sausage, so I used ground turkey and just added the seasonings found in spicy Italian sausage; fennel seed, red pepper flakes and garlic.

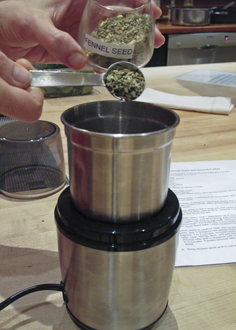
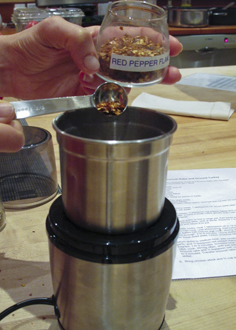
The red pepper flakes and fennel seed, along with some salt, get ground up in a spice grinder. Actually, it’s just an inexpensive coffee grinder, that I use only for grinding spices. Here’s a great tip for cleaning the spice grinder and getting rid of any odours so they do not transfer to the next thing you grind. Take about a halt a cup of raw white rice and grind it up. Any last remnants of whatever you last ground up, that may be lurking beneath the blades, will cling to the rice and will be discarded with the ground rice.

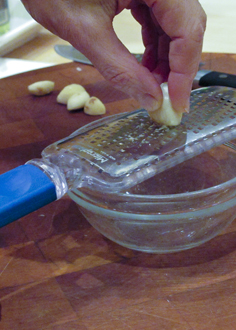
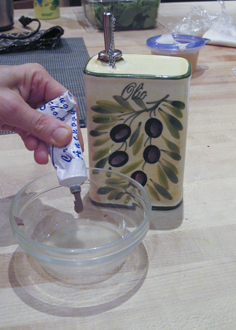
A paste of garlic, anchovy, lemon and olive oil is prepared to add flavour and finish the dish off.

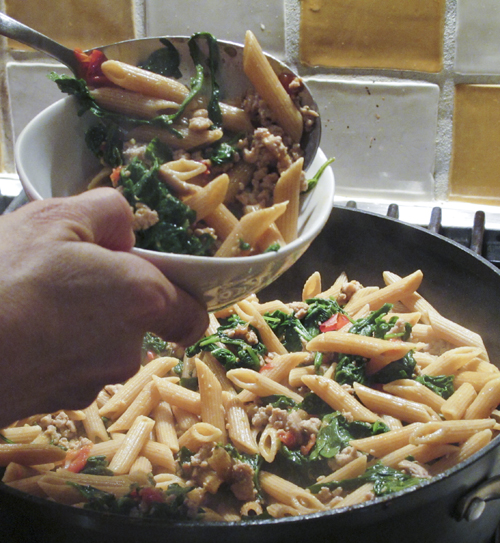
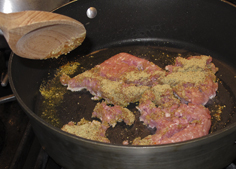
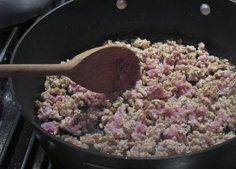
I like to use ground dark meat turkey as it is higher in fat, more flavourful and does not dry out as quickly. The ground turkey gets sautƩed with the ground spices.

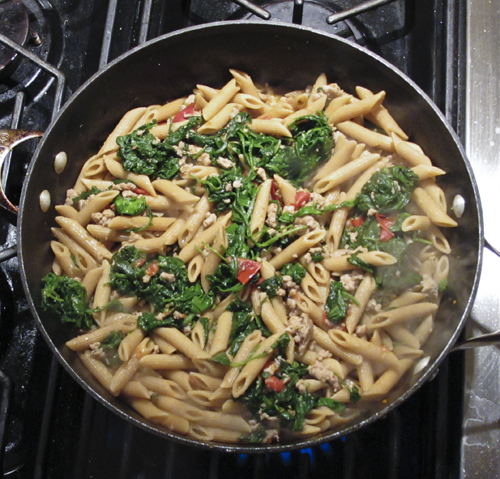
When the turkey is almost cooked through, remove it from the pan and cook your vegetables. I used baby spinach and baby arugula, as well as some diced tomatoes. Feel free to improvise and use whatever makes you happy. We also love it with fresh peas or asparagus in the spring, or frozen peas, all year round. Sometimes I will make it with broccolini.

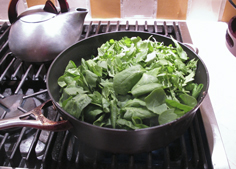
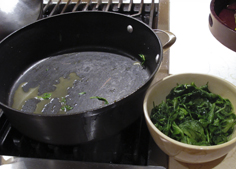
If you have never wilted greens before, you will be shocked at how they will wilt down to almost nothing.

Ā 

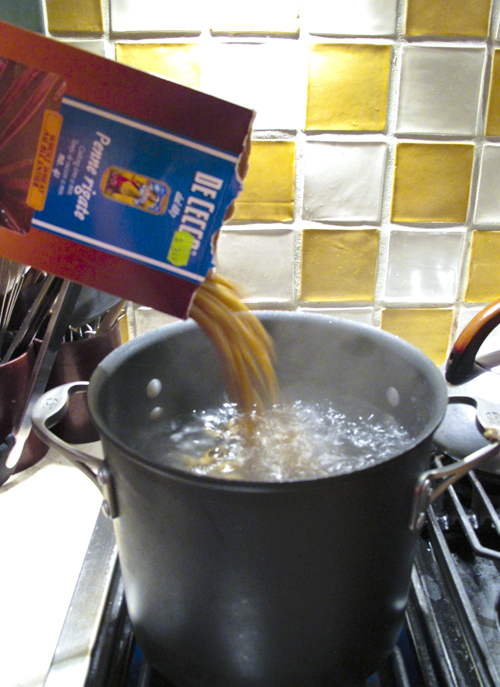
Remember to keep some of the pasta cooking water before draining the pot. The starch in the water will help to thicken the sauce.

Click here to print the recipe for Pasta with Turkey Sausage and Arugula.

Latkes with Fried Eggs and Roasted Tomatoes

I know it’s a little too early to start thinking about potato latkes, since the first night of Chanukah is not until December 20 this year. But I have a good reason for posting about them now.Ā You see, ever since I saw Chuck Hughes Ā make these on his show, “Chuck’s Day Off”, it’s all I could think about.

Now, before you continue reading any further, I must warn you that I am about to gush big time. So, if public displays of affection make you at all uncomfortable, perhaps you should stop reading this post right now. To be perfectly honest, Chuck’s been on my mind quite a bit lately. You may recall that I posted about Chuck in April, and then again at the beginning of this month. I guess you could say that I’m a bit smitten with him. For the record, I am happily married (not to Chuck!), but celebrity crushes are permitted. I think it’s actually healthy for our marriage.

For those not familiar with Chuck, check out this short video of him on YouTube, and you’ll see what I mean.

Chuck cooks on his day off for friends, family and his suppliers as a way of saying thanks. In one episode he made adobo pork shanks, fried rice and pineapple coconut pie for Edgardo and Burt, the father and son team that cleans his restaurant. How could you not love this guy?

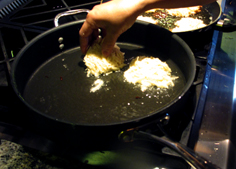
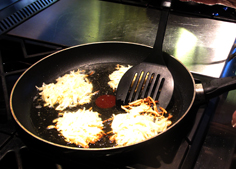
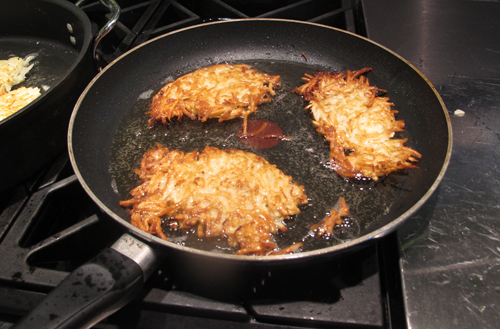
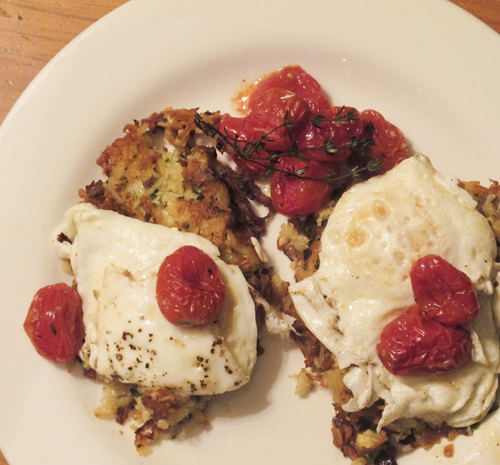
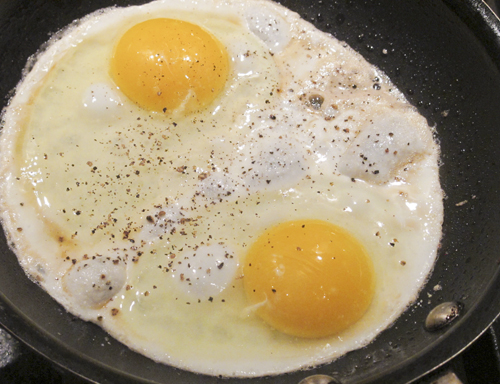
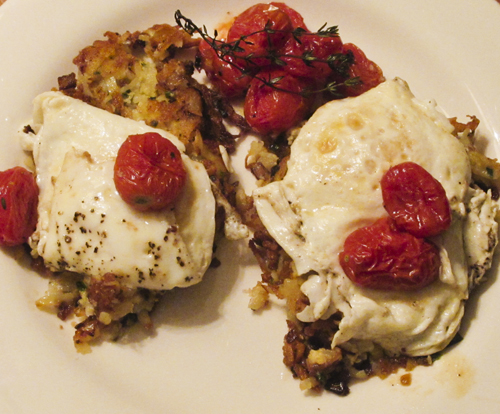
He made these latkes for his pots and pans suppliers. He topped them off with a dollop of ricotta cheese and a fried egg. And on the side, he served roasted grape tomatoes and sautƩed zucchini. The first time I tried the recipe, I made it exactly as Chuck did, but to be honest, the ricotta and the sautƩed zucchini really muddied the flavours of the potato and egg. The roasted tomatoes, however, really brightened up the whole dish. Their acidity balanced the richness of the fried potato and egg.

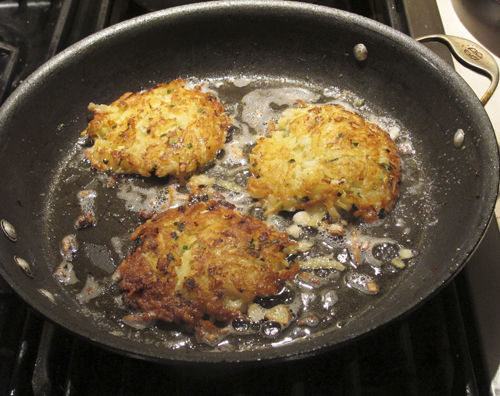
Chuck’s latke method is more like the Swiss dish “rƶesti potatoes”, than traditional potato latkes. He parboils the potatoes first, then shreds them and mixed them with onion, chives, eggs, cayenne, salt and pepper. I gave his method a whirl but must admit, I like using grated raw potatoes. I find you get a crispier latke that way.

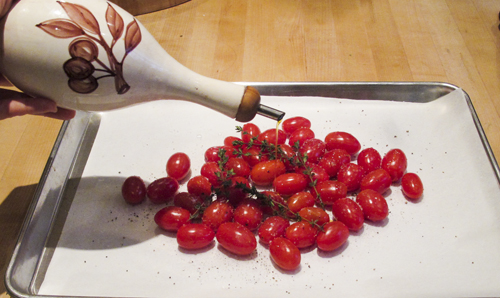
Grape tomatoes get a drizzle of olive oil, salt, pepper and some thyme.

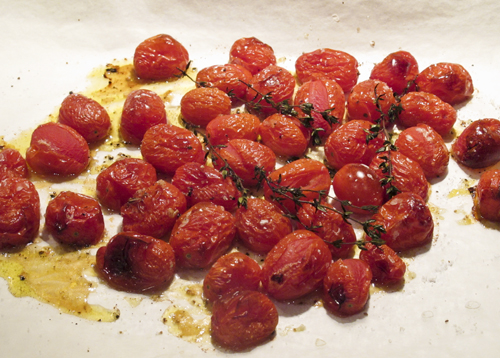
After 45 minutes in the oven they come out all wrinkled and sweet. Ā They can be made in advance and sit at room temperature while you make the latkes and fry the eggs.

Click here for my version ofĀ Potato Latkes with Roasted Tomatoes.

The Best Thing I Ate Today in Umbria Day 10 (Our last day!)

BeforeĀ I get down to the business of reporting on Day 10Ā I am excited to share with you the debut postĀ of a brand new young food blogger. (O.K, full disclosure here, it’s my daughter, andĀ I couldn’t be prouder). Check out her first post at http://bostonbakesforbreastcancer.org/tales-of-a-chocoholic/

O.K. back to Day 10 in Umbria.

My original plan, when I embarked on my trip to Umbria, was to blog at the end of each day, about the single best thing I had eaten. Boy was that a naive plan! First of all, trying to narrow down the best thing you ate all day, while travelling through Italy, is no easy task.Ā Almost every morsel I put in my mouth had me declaring, “CouldĀ be the best thing I”ve eaten today!”Ā Secondly, after attempting to blog on my first night, full with both food and wine and exhausted from touring all day, I quickly realizedĀ I would not be able to write a very coherent post. So I decided to take lots of photos and notes and do it all when I got home. I arrived home on Sept 25! It has taken me over 7 weeks to post about all 10 days, but here we are, finally at the end.

We decided to just hang out at our incredible villa for our last day before the magic was over, andĀ we all turned back into pumpkins to return to our real lives. Although, the body shapes of some of us was beginning to resemble pumpkins, after 10 days of eating our way through the Umbrian countryside. Over breakfast we just feasted our eyes on the incredible views from our terrace.

Liria, our wonderful host,Ā volunteered to give us a cooking class this morning. She offered to teach us whatever we wanted to learn. Without even hesitating, I told Liria I needed to know how to make pappaĀ al pomodoro, theĀ Tuscan tomato bread soup I’d eaten at CibreoĀ in Florence. Without a doubt,Ā  this was the best thing I ate on our trip.Ā I was smitten with this soup.

We gathered in the kitchen and Liria outfitted us with out aprons, chef”s hats and gloves. Gloves??? Wow, I was impressed. WhenĀ I remarked to Liria how blown away I wasĀ with her attention to hygiene, she laughed and said, that she only wears the gloves to protect her manicure and figuredĀ  that we were like-minded women. Boy, had she pegged us right!

The kitchen here at the villa is a sight to behold. I coveted it all, but most especially, the induction cooktop. I had always thought that a gas cooktop was the best, but the temperature control you get with this cooktop is incredible. The marbleĀ  back splashĀ was nothing to sneeze at either!

We began with fresh plum tomatoes, basil, spring onions and salt. They were simmered for about 15 minutes and then transferred to a food mill for processing. The food mill is an extremely handy kitchen tool. The skins and seeds of the tomato are separated from the flesh and no peeling is required on your part! It also makes incredible applesauce (no peeling required) and wonderful, fluffy mashed potatoes. We all got a chance to have a spin.

While the tomatoes were being milled, Liria gentlyĀ simmered some garlic, basil and, her secret ingredient, whole cloves, in a generous glug of olive oil. I was shocked that she used cloves. They are one of the few spices I can not stomach the aroma of. I find them extremely cloying and leave them out of every recipe that calls for them. Liria said that she only uses 4 of them for a huge pot of soup and you can’t really taste them. They just add a background note that enhances all the flavours. She stressed that low heat is key at this stage, as you do not want to brown the garlic, as it would become bitter. After a 10 minute low simmer, the tomato puree is added and that cooks for an additional 10 minutes.

The final addition is breadcrumbs to thicken the soup.

After an additional 10 minutes of simmering, the soup is ladled into bowls and finished off with a drizzle of extra virgin olive oil and some fresh julienned basil.

Click hereĀ to getĀ the recipe for Papa al Pomodoro.

Ā After lunch we had a chance to tour the gardens and see all the fresh produce that grows here at Casali di Monticchio. Grapes, eggplant, olives and figs are just a few of the things we observed, in addition to chickens in a coop for farm fresh scrambled Ā eggs every morning.

Ā For our farewell aperitivo, Liria pulled out all the stops and fed us a feast. Even the villa dog, Parcetta, perked up when the prosciutto came out!

I feel so grateful to have such wonderful and loving friends to haveĀ shared this incredible journey with. What a ride it’s been! Thanks to all who have followed along to read about our adventure.

The Best Thing I Ate Today In Umbria Day 9

Just realized I completely forgot to tell you all about the best thing I ate each and every morning for breakfast at our villa, Casali di Monticchio. Each morning Liria and her daughter Johanna, set out a buffet for us. Before we arrived, an e-mail went out to all the guests asking us about our food preferences. Apparently 12 out of 18 of us requested non-fat greek yogurt and berries with granola for breakfast. I know… we are such an exciting bunch! I will not divulge what the other 6 asked for.

Each morning, I started my day with had a bowl of yogurt with fresh berries, sometimes ripe peaches and bananas and always a small handful of this incredible granola sprinkled on top. It was sweet, but not too sweet, had lots of nuts and seeds and some coconut and just a few dried fruits. But the best part was that this granola had huge clumps. Everyone always eats the big clumps of the granola first and leaves the little crumbs in the box for the end. This granola had very few little crumbs and lots of huge clumps which maximized the yummy crunch factor! I needed to get Liria’s secret granola recipe. When I finally remembered to ask her this morning, she went into the kitchen and came out, sheepishly holding a huge bag of Kellogg’s fruit and nut granola. I have been searching for it ever since I came home but can’t find it. I think it is something developed for the European market. It will haunt me for a very long time.

Fortified by this excellent breakfast, about 8 of us headed off on the mini-bus, with Claudio, our ever-faithful driver, to the outlet malls. When we were first planning the trip, my travel agent, Linda, looked over the itinerary and noticed that we had not scheduled any official shopping time. WHAT?? How could I have forgotten to do that? When I asked her what she would recommend, she quickly responded that we must visit the outlet malls, situated just outside of Florence. When some people hear the words, “outlet mall”, the adrenaline starts pumping through their veins and their pulse starts to race just a bit faster. I’m just not one of those people. Don’t get me wrong, I get just as giddy as the next Canadian woman when I come within a 1 mile radius of a Target store, but outlet shopping always ends up disappointing me.

The clothes are usually just heaped on shelves and racks and I find that so aestheticallyĀ unappealing. I just don’t have the vision or the patience to sort through it all. The changing rooms are usually scuzzy and they have a limit on the number of items you can take in. Sometimes the change rooms do not even have mirrors and you have to come out to look in the mirror in a general changing area. I hate that! And finally, most of the stuff in outlet stores is the kind of stuff you would have felt quite “fashion forward” in last year but left you asking, this year, “What was I thinking?”

After I explained this all to Linda, she started to laugh at me. She explained that Italian outlet Malls are nothing like North American ones. They are very high-end and while the items may be last season, most of the designs are so classic, they will become wardrobe staples for a very long time. My girlfriend Marla is an excellent shopper. She has incredible patience and stamina, both of which you need in abundance to shop sales and outlet malls. She has a knack of combing through the sales racks and finding that one gem. That one flexible classic piece that can be dressed up to go black tie or can be worn with jeans to go for coffee. I love to shop with her, follow her into the change room and try on all her rejects. All the glory and none of the hard work. Luckily, she would be joining us on the outlet shopping trip in Italy.

The build-up to our shopping day was kind of intense. We decided to visit “The Mall” (it’s actually called that!) and “Space”. The Mall is a beautiful high-end outdoor outlet shopping centre located in the town of Leccio, about a 30 minute drive from Florence. Shops at The Mall included a veritable who’s who of big name designers. Ā Alexander McQueen, Armani, Balenciaga, Bottega Veneta, Burberry, Dior, Fendi, Gucci, Hogan, Loro Piana, Marni, Pucci, Roberto Cavalli, Salvatore Ferragamo, Sergio Rossi, Stella McCartney, Tod’s , Valentino, YSL, Zegna. “Space” is the Prada Outlet store. There was quite a discussion about which to visit first, “The Mall” or “Space.” We had heard that there were huge lineups at Space and they only let 100 people in at a time. In developing our strategy, we consulted Liria, the owner of our villa. She advised us to visit The Mall first and then Space. She said that lineups on a weekday in September would not be an issue.

When our bus pulled up at The Mall, Marla had her shopping strategy well mapped out and made a beeline to the Marni store. We all followed her like baby chicks after their mother hen! Ā The mall was everything Linda had promised. The grounds were beautifully manicured, the stores well-lit and appointed and all the wares were beautifully displayed. You would never guess you were in an outlet mall. The staff all spoke English, and were very helpful. No attitude at all. The changing rooms were large and well-lit Ā with mirrors. Best of all, there was no limit on the number of items you could take in at once. We were very successful at The Mall, and most of us found at least one or two treasures. My brother-in-law, (first photo in this post) was happy to be our bag mule as long as we fed and watered him.

I was so busy trying on clothes and attempting to keep up with Marla’s speedy pace, that I only managed to take a few photos. Most of these are from The Mall’s own website.

After The Mall, it was off to Space, the Prada Outlet. Located in an industrial area, just outside the town of Montevarchi, there were no identifying signs to let you know you had arrived. I guess Prada does not want to advertise that they have an outlet store. Try as they may to hide this outlet store, Claudio, our trusty driver, managed to ferret it out!

There was no line-up at all when we arrived, so we sailed right in. When you first enter the store, a very handsome Prada model hands you a ticket with a number on it. This is your PIN number for the day. You are not allowed to take items you wish to purchase from one department to another. Once you try the item on and decide you want to purchase it, you hand the items over to a sales associate and they set it aside with your PIN number. When you are all done shopping, you proceed to the checkout and all your items magically appear. Luckily, you are still able to change your mind at the cash and they don’t even get snarky about it!

Prada knows a thing or two about merchandising. Upon entering, straight ahead, front and center, is the shoe department. Like moths to a flame we were drawn right in! Purses, accessories and collection pieces are on the right hand side of the store and skin care, sunglasses and sportswear flank the left side of the store. Menswear, as usual, is buried at the back. I’m always surprised that men don’t have a complex about this.

Although this was an outlet store, the displays were quite beautiful and there was a large selection of items and sizes. I managed to find a beautiful black cashmere sweater for 70% off and a cute little evening bag to bring home to my daughter, as a consolation prize for daring to go to the Holy Grail (Prada Outlet) without her! Prices were really good. One friend bought two purses, one for herself and one for her sister. (Lucky sister!) My sister-in-law got some gorgeous shoes that we all coveted. All in all, a successful trip!

Stay tuned for Day 10 (our last day before going home – sob!) when we get a cooking lesson from Liria, in her fabulous kitchen!

Molten Caramel Cake

There is a cerulean blue file folder, sitting on my desk, to the left of my printer. It contains recipes and cooking ideas that I hope to try out one day. Some of these recipes I have printed off the internet from food blogs, Food Network shows and other food related sites. Others are torn from the pages of various newspapers and magazines. It is an unweildly bulging mess. Every so often, I go through the folder, and toss out things that no longer appeal to me in my current state of mind. For example, last week I tossed out a recipe for Poached Tongue with Tangy Tomato, Olive and Caper Sauce. The week before, I threw out a recipe for Malabi (a Middle Eastern milk pudding). What was I thinking?

And then there are the recipes that never get a chance to make it into the “to try one day” folder. You read about something or see a chef prepare it on TV and you are immediately mobilized into action. You must make it NOW! It’s all you can think about. That happened to me last week. I had several other pressing matters (like making dinner) to take care of, but I just ignored them and began rummaging in my kitchen cupboards to make sure I had everything I needed to make Molten Caramel Cake.

When I watched Chuck Hughes prepare these little cakes on his Food Network show last week, I was transfixed. First of all, molten caramel! Who even know you could do molten caramel cakes? Of course I had heard of molten chocolate cakes, but caramel…I just never imagined such a glorious thing. I am not a huge fan of the chocolate variety. Warm gooey chocolate just doesn’t do it for me. I like my chocolate like I like my men… solid! Caramel is a completely different story. Caramel is meant to be warm and runny and sticky. These little cakes are amazing. They take about 10 minutes to put together and 15 minutes to bake. Almost an instant dessert. You will not be sorry you ignored everything on your TO DO list to make these. Trust me, they’re worth it.

White chocolate and butter are melted, then whisked together. While I was waiting for the white chocolate to melt, I took a picture of my newly organized pantry shelves.

I just have to share with you these new storage containers I am currently obsessing over. They are made by OXO Good Grips. They’re amazing for a few reasons. First, the seal is extremely airtight. Second, they are square so you can fit more containers in your space than round containers. Third, the tops are flat, so they stack very well, also maximizing space. And finally, they are so much fun to open. Watch my demo video!
Once the white chocolate and butter are melted, whisk in some ready-made dulce de leche. The Presidents Choice brand is quite good. And Williams Sonoma makes a delicious one as well, according to my sister-in-law.

It is important to take the time to whisk the eggs and sugar together properly. It takes about 5 minutes to get the mixture to double in volume.

After 15 minutes they were done. We waited about 45 minutes before we ate them, but they would be wonderful hot from the oven too. The magic happens when you stick the spoon into the middle of the cake and warm caramel comes oozing out. What could be better? Ā They were still delicious the next morning for breakfast with a latte.

Click here to print the recipe forĀ Molten Caramel Cake.