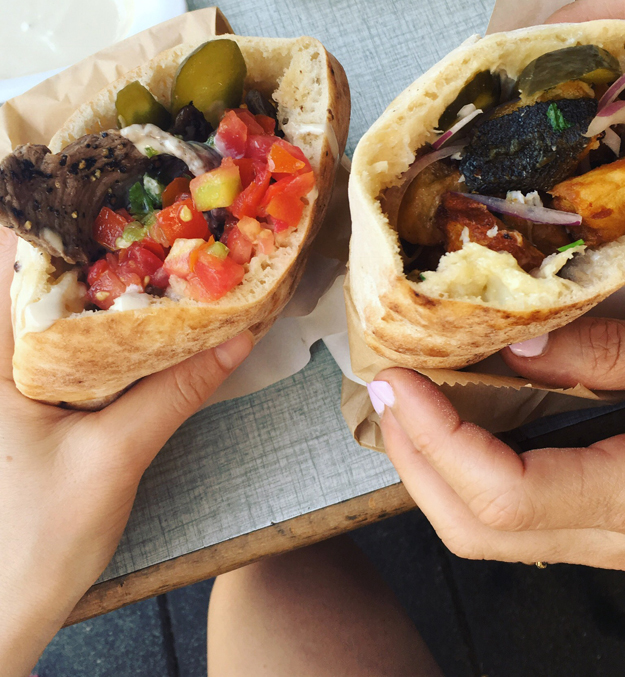
A few years ago, on a trip to Umbria, I started playing a little travel game in my mind. Each day I kept track of all the things I ate. At the end of the night, I decided which bite reigned supreme. I had the opportunity to play last month when I visited Israel to attend my nephew’s induction ceremony into the Israeli army.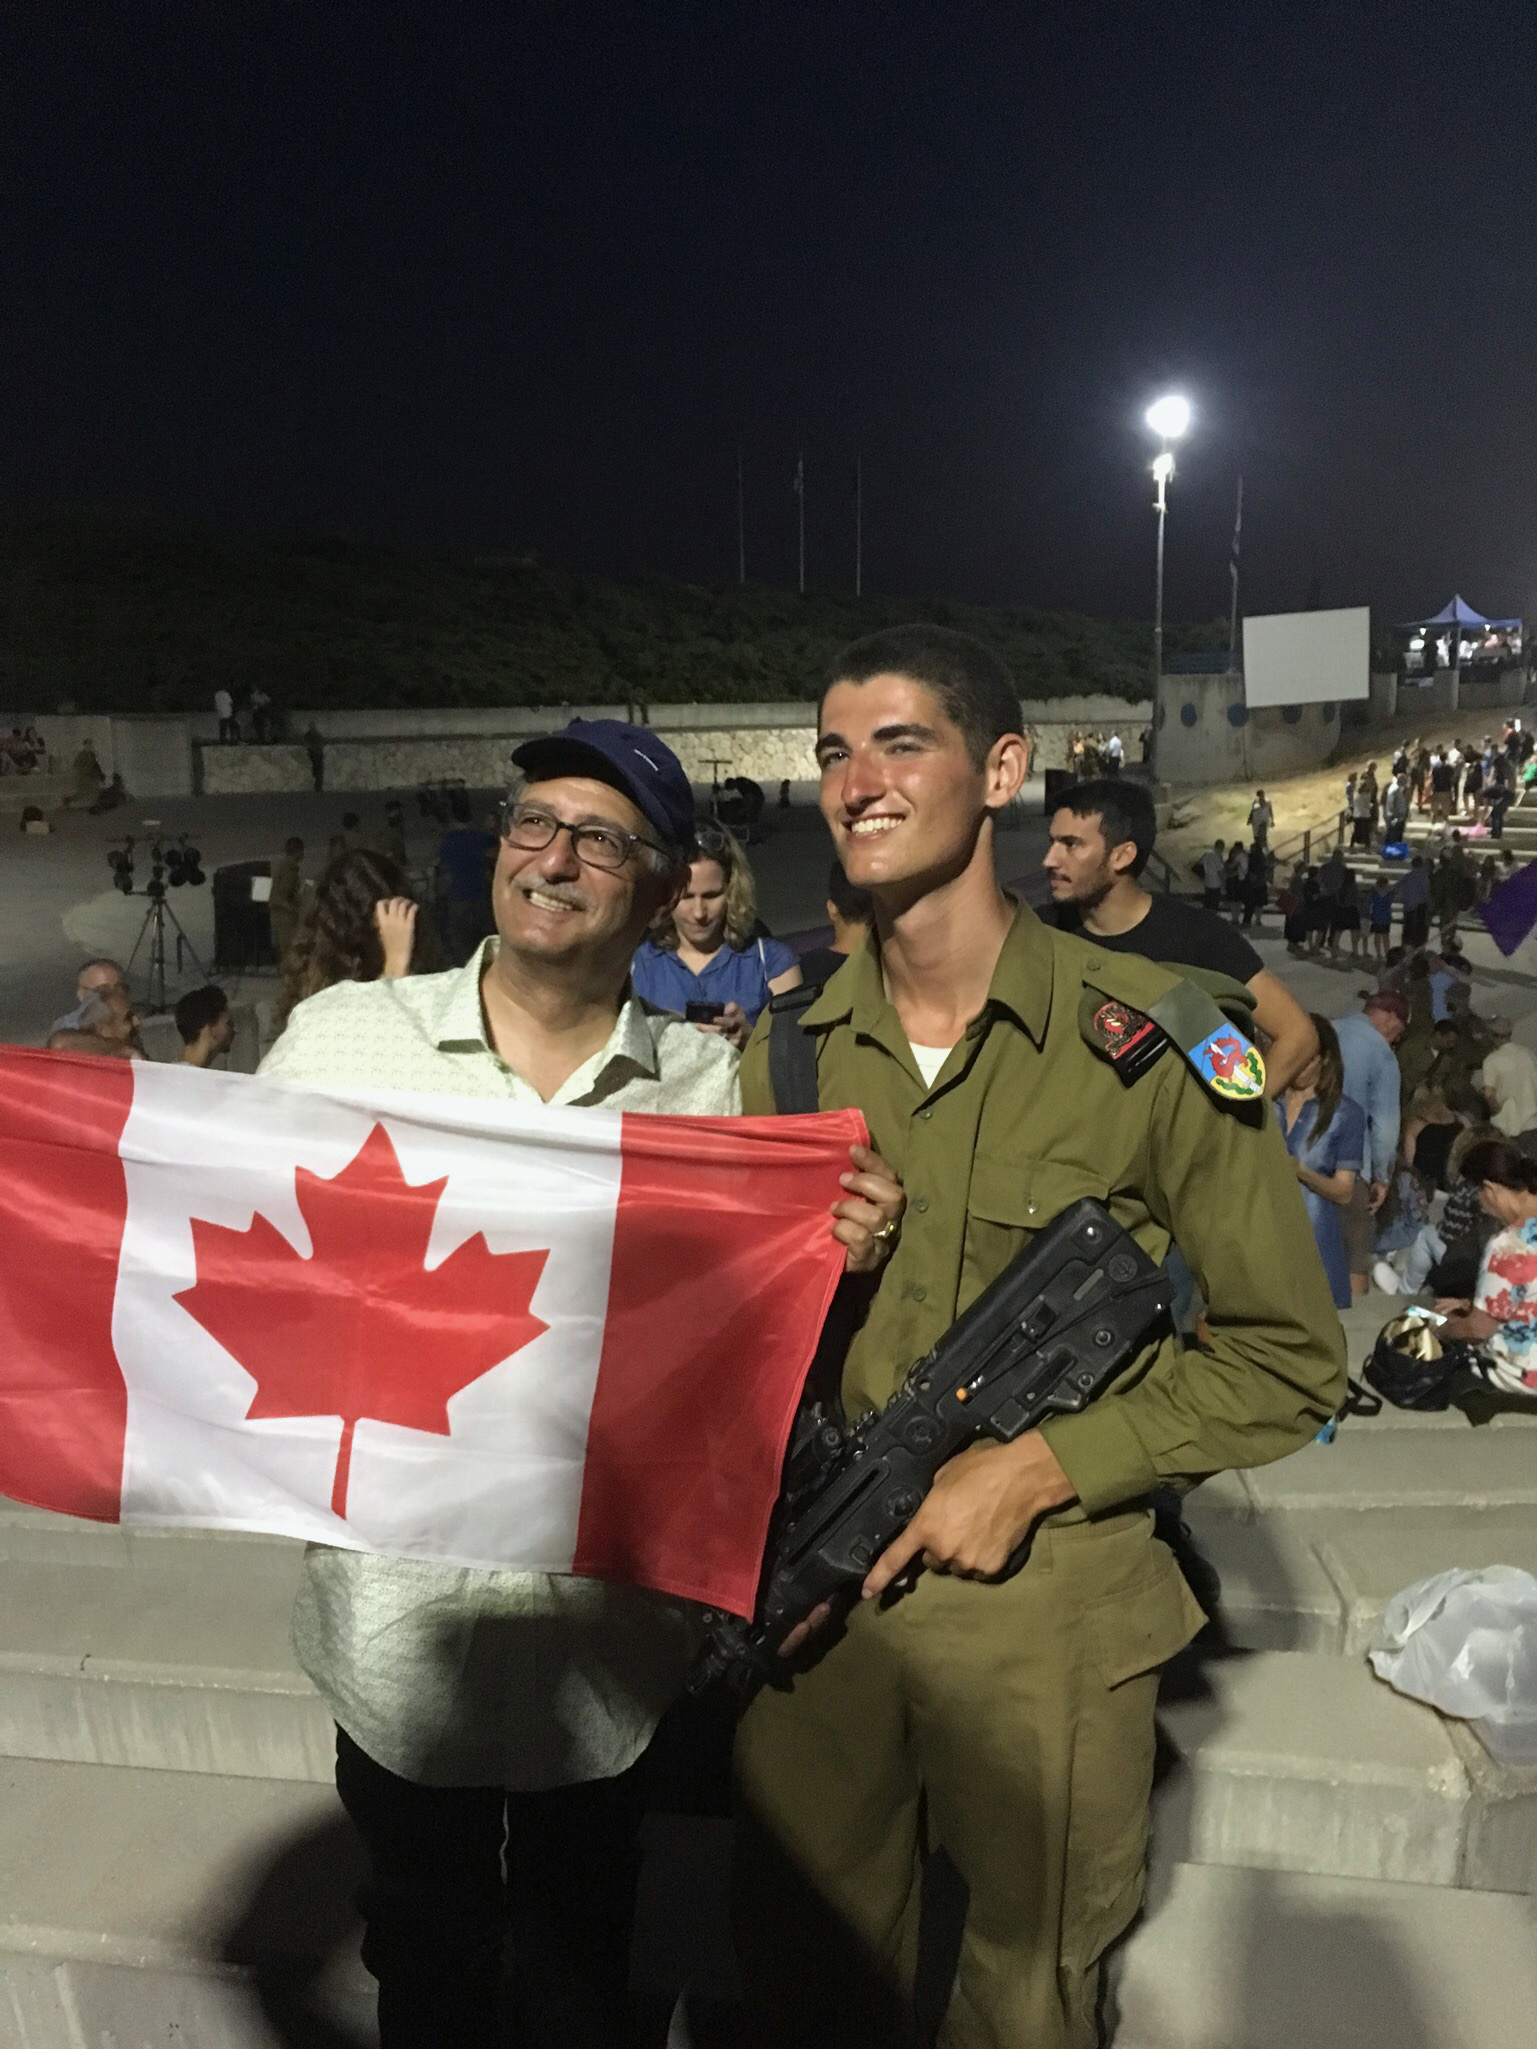 This was my 13th trip to Israel. Each time I visit, I marvel at how much there is to do and see in this tiny country. If you have never been, or it’s been a while since you last visited, you will be amazed by how modern and sophisticated the culinary scene has become. It’s not all hummus and falafel. Not that there’s anything wrong with that.
 To understand how the new Israeli cuisine evolved, you need to take a look in the rear-view mirror to examine the roots of the people of this nation. One of the most multi-ethnic countries in the world, Chef Rozanne Gold said that “I can’t think of another group of people with a spoon in so many pots.” Immigrants from Eastern Europe, Germany, France, England, Yemen, Ethiopia, and Syria, to name a few, have all influenced Israeli cuisine. Add to that the proclivity of Israeli youth to travel the world once their mandatory military service is over, bringing back with them ingredient and techniques of a multitude of cuisines, and the result is a new Israeli cuisine that is boldly flavourful, unabashedly joyous and wildly innovative.
The best bite of our third day was at OCD, in Tel Aviv. This restaurant is the brainchild of Chef Raz Rahav. At only 25 years old, he is creating some of the most exciting food in Tel Aviv in a stunning setting. I don’t think that industrial-barn falls under any design style I have ever heard of but it describes the interior perfectly.
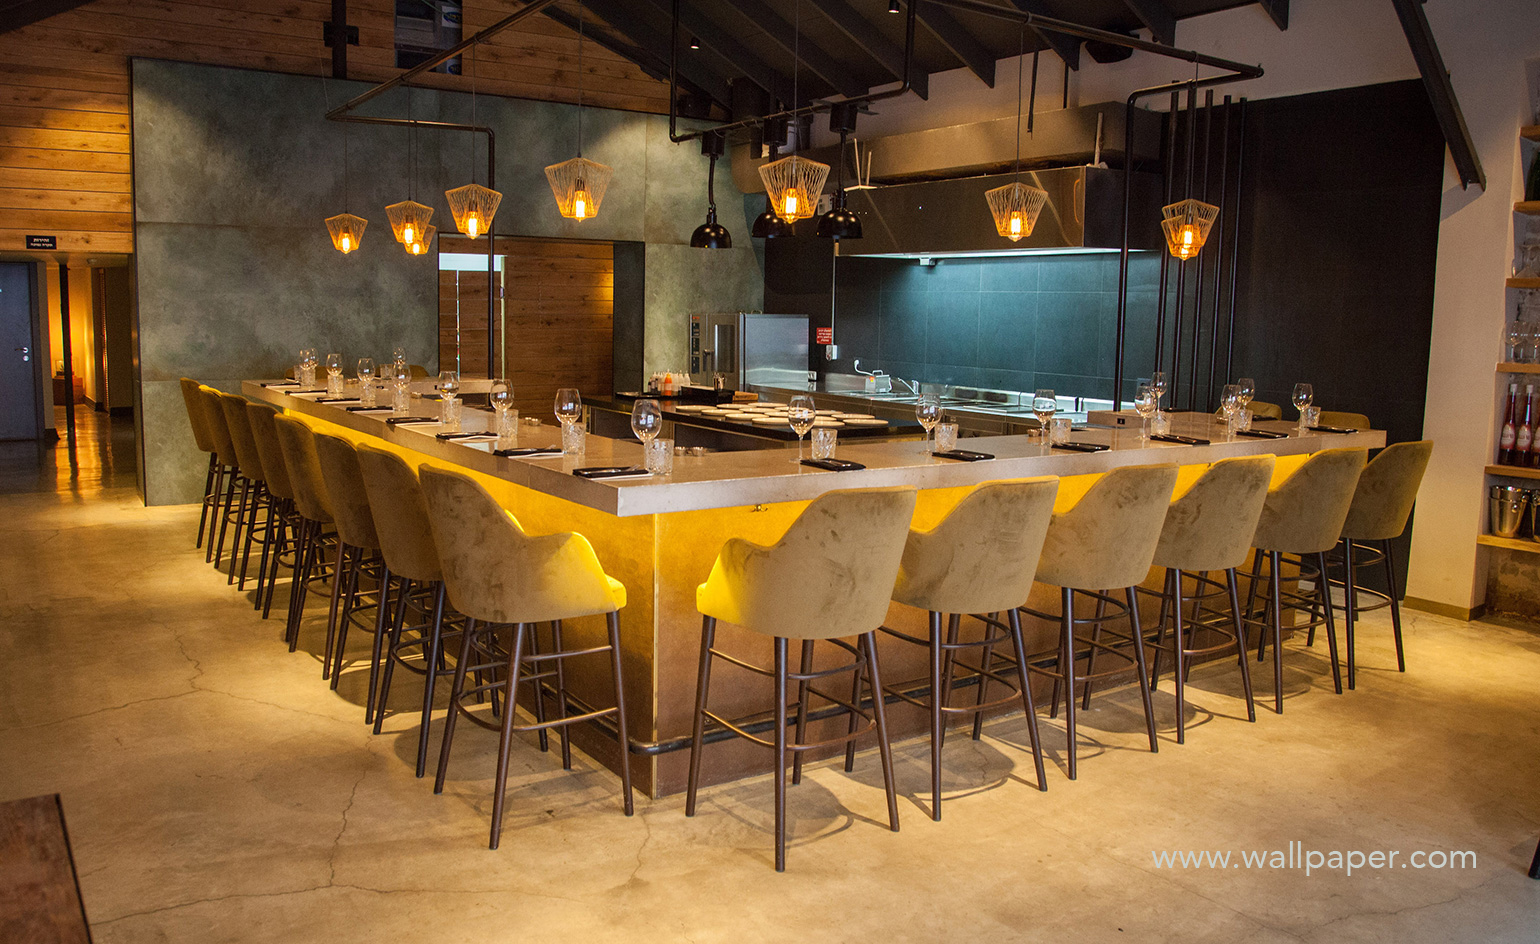 As the name suggests, Chef Rahav is obsessed with precision and complex artistic plating. But flavour does not take a back seat.
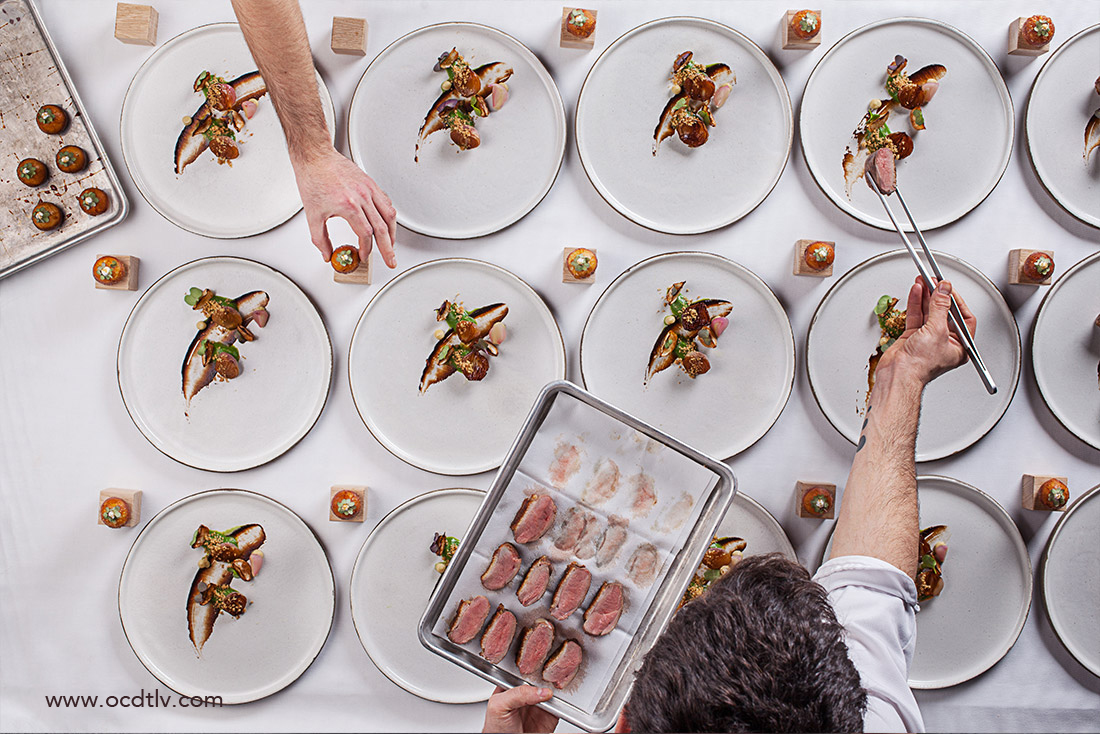 There are 2 seatings every night, each accommodating 18 guests around a u-shaped bar with an open kitchen in the center. Watching the chefs plate each course, you get the sense that this is more theatre than restaurant. There is no written menu. As each course is set before you, the chef gives a verbal explanation, either in English or Hebrew.
The day before our dinner, the restaurant emailed us to find out if we had any dietary restrictions. They will tailor the meal for you if there are certain things you do not eat, but, they ask you to come with an open mind. On their website they promise that there are no insects on the menu!
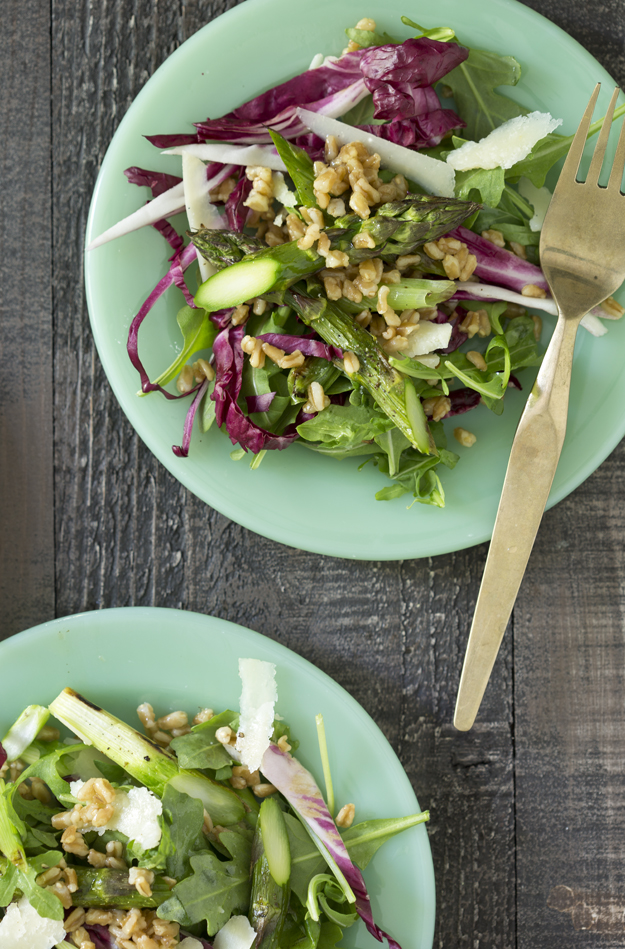
Often restaurants offering tasting menus can be a little formal and stuffy. Not OCD! You know that any meal that begins with a donut is going to be a fun night. Just a heads up here, we shot with my daughter’s iPhone and the lighting was not the greatest for food photography. Luckily Elliott S over at trip advisor had many of the same courses and got way better shots than we did. I have tagged his photos appropriately. Thanks Elliott! I also used some of Chef Rahav’s photos from his instagram account @razi_barvazi
We were greeted with a Sufganiya (hebrew for donut). A tiny little bite, about the size of a Timbit, filled with smoked labneh, sherry vinegar, and a rosemary and olive tapenade. A little flavour bomb. 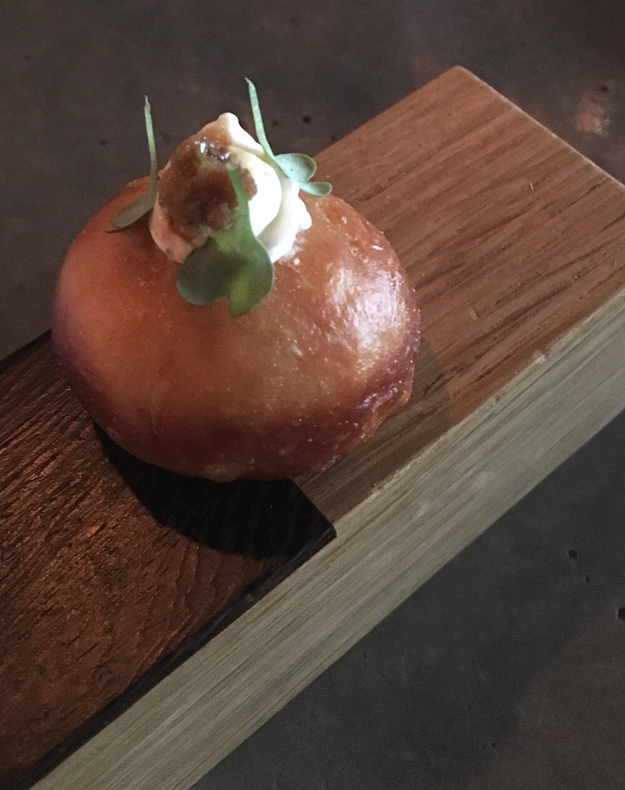 Watching them plate the dishes was almost as much fun as eating the delicious results.
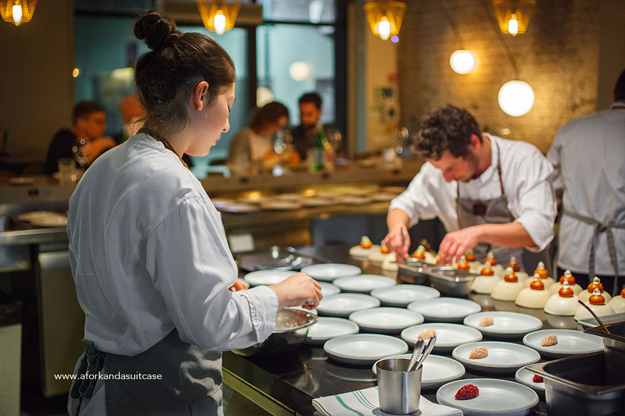 The first course was a Red Snapper Tartare. It was served with a Whipped Tomato Bavarois, Seaweed and a Poppy Seed Parker House Roll. What surprised us was that the tomato component was white—because it was made only from the water in which the tomato was simmered. The tartare was fresh and delicate, but it was the Parker House Roll that stole my heart. Chef Rahav respects textural contrasts. The crunch of the wafer thin fried seaweed garnish and those poppy seeds made me very happy.
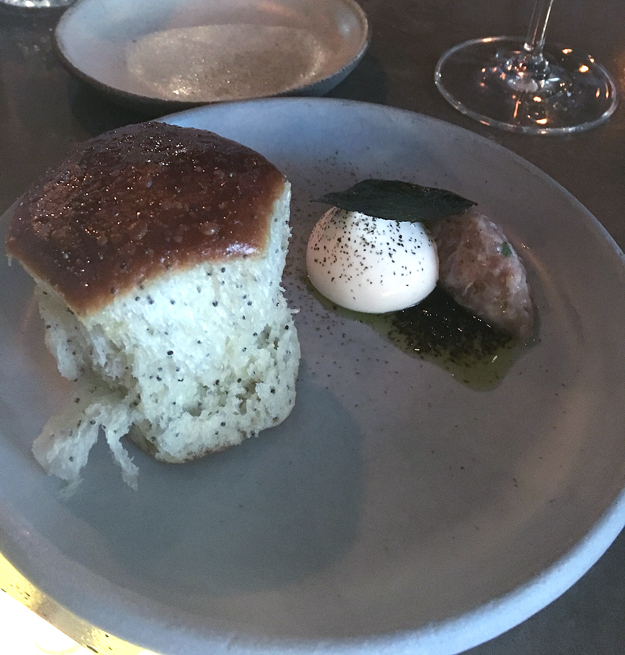 The second course was a Trout Sashimi with Smoked Cucumbers, Melon, Sorrel Flowers and Nigella Seeds Crackers.
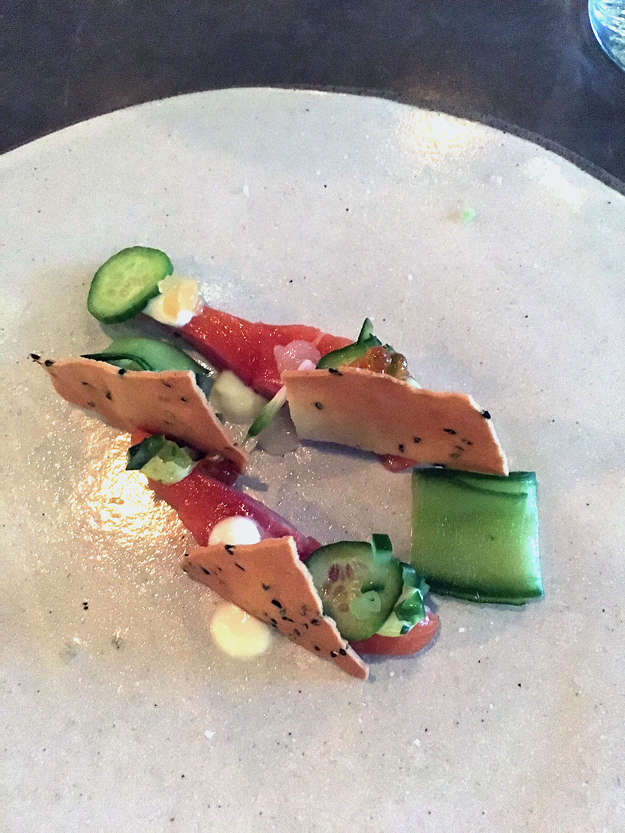 The tartare was followed up with an amuse bouche of Fried Mochi with Shallot Cream, Pickled Shallots and Cured Sardines. Our server suggested we eat it in one bite. We obliged and were rewarded with a flavour explosion in the mouth.
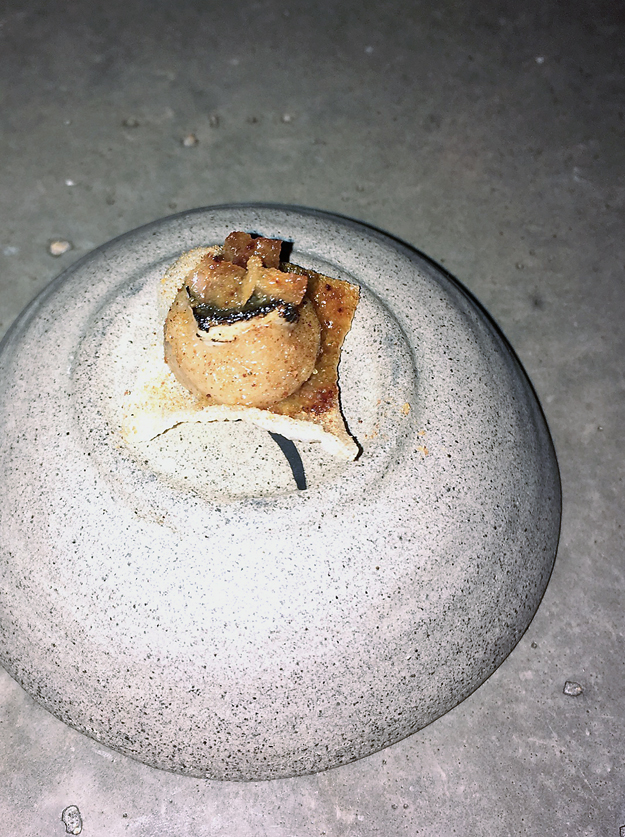 Third course was Beef Tartare with Smoked Ratte Potato and Red Sorrel.
Our fourth course was Steamed European Seabass with Oats, Cashew and Pumpkin-Curry Crab Bisque. That crispy thing you see on top is an oat tuile! Chef Rahav is a master at contrasting textures. 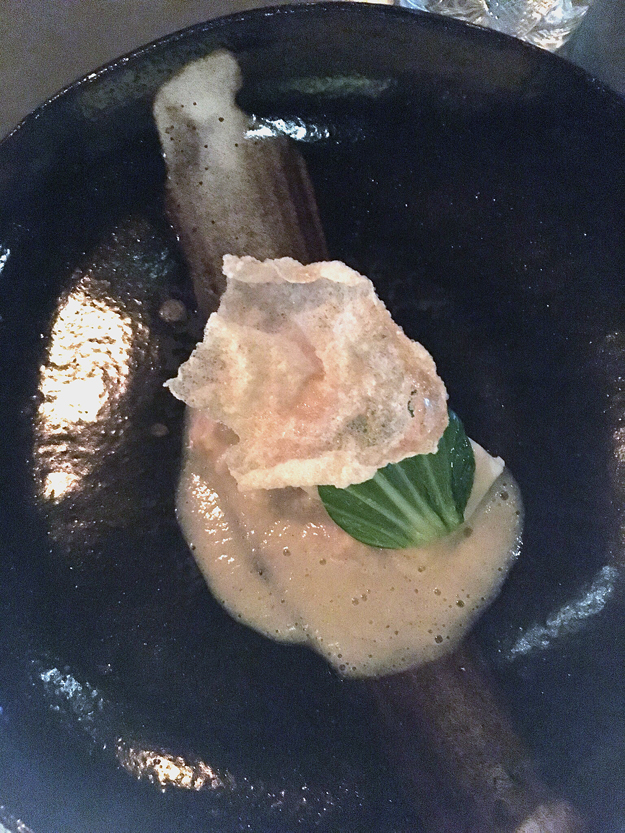 The fifth course was a love letter to the humble parsnip. The parsnips were roasted to coax out their natural sweetness. Salted pecans provided the crunch and a bone marrow maple jus added the perfect sweet-savory balance.
 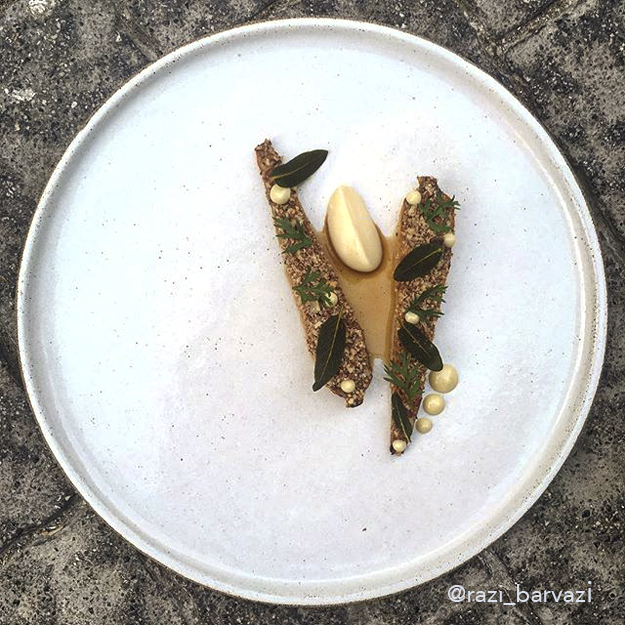 Course number six was Duck Breast with Turnips, Brandy and Bone Marrow Crumble.
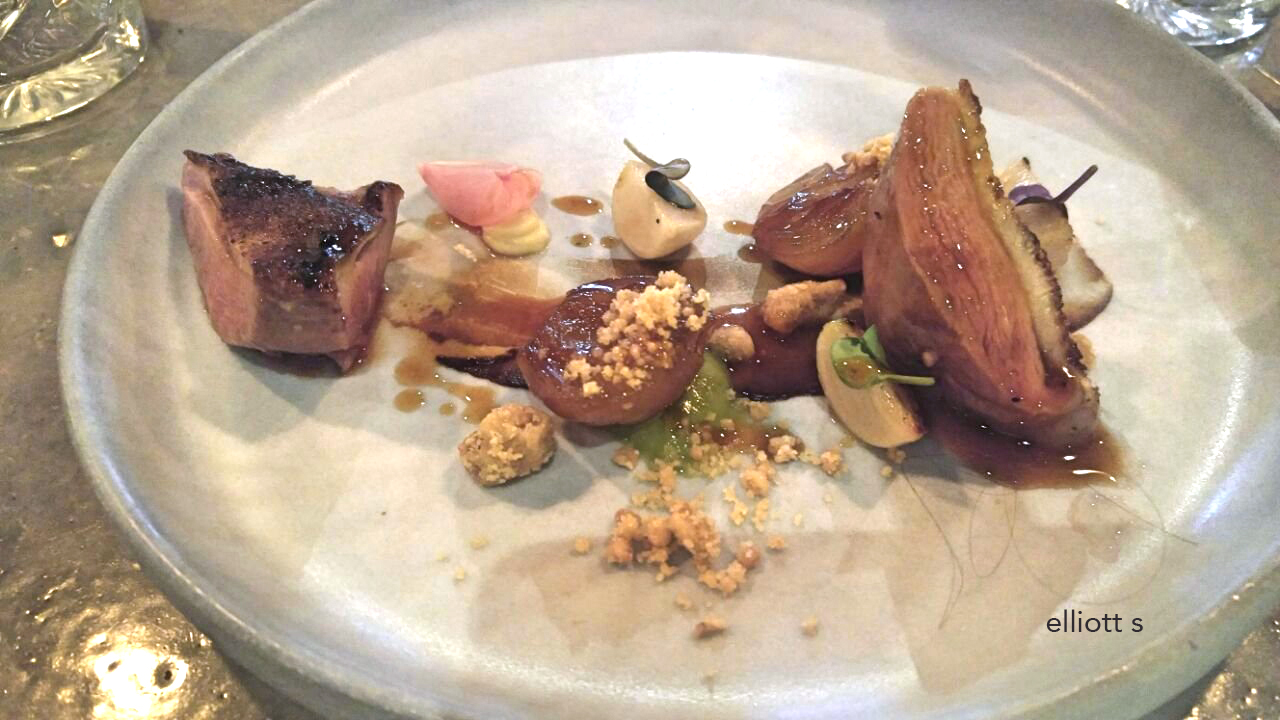 The careful attention to detail extended even to the bathrooms where the hand towels are lined up like little soldiers.
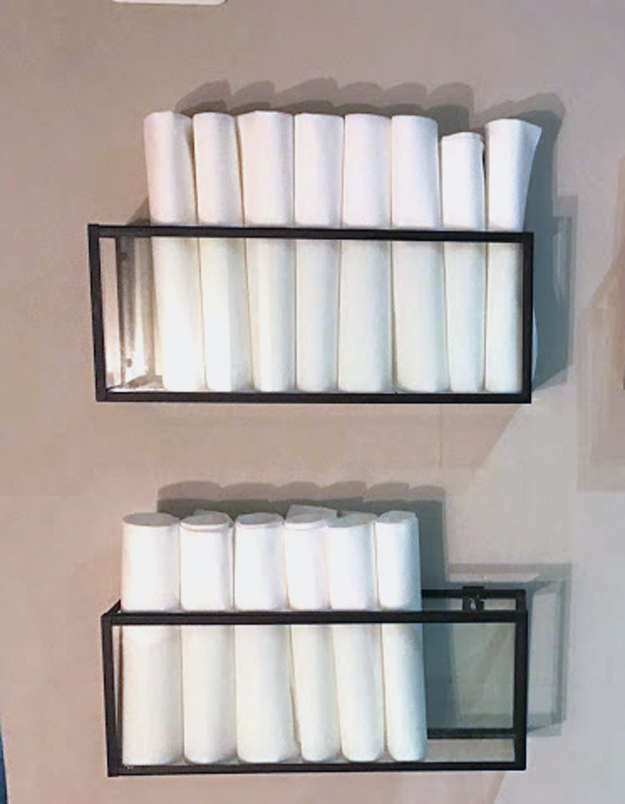 When dinner begins with a donut and ends with three desserts, it’s a good night in my world.
Course seven was the best bite of the day! Aerated Honey Parfait, (dusted with carrot powder) Candied Walnuts, Goat Cheese and Raisins. The texture of the aerated parfait was like chiffon. It just dissolved in my mouth. It reminded us of carrot cake, but a very sophisticated one!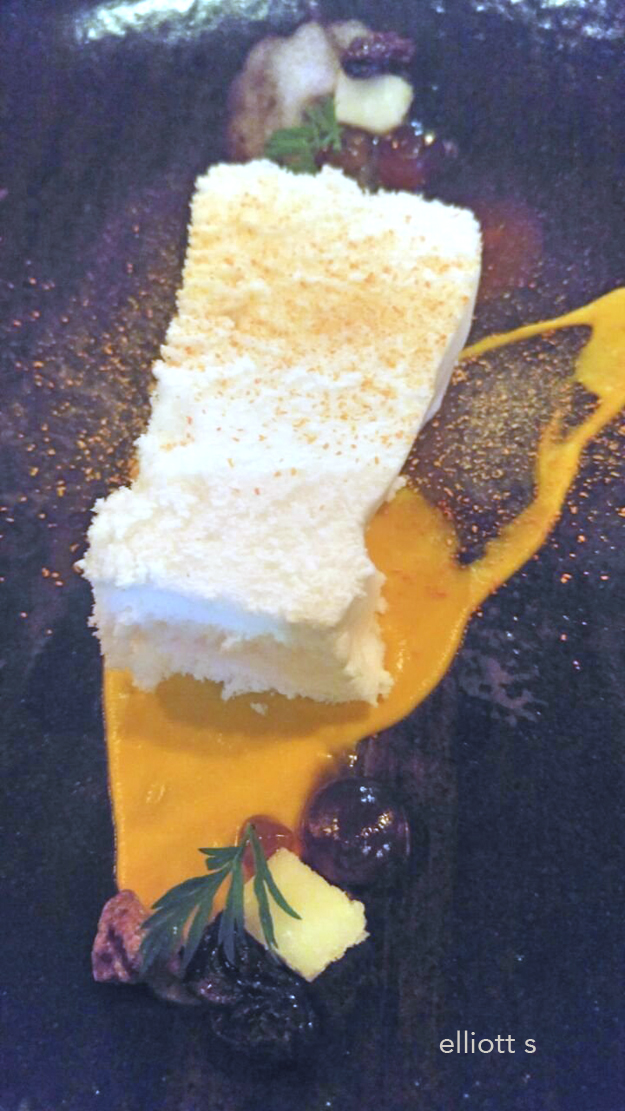
 The honey parfait was followed up with the most unusual palate cleanser I have ever eaten. It was a G&T Granita with Sour Cream, Pears, Parsnips and Pine Nuts. Not being a gin lover, it was the only dish I did not finish.
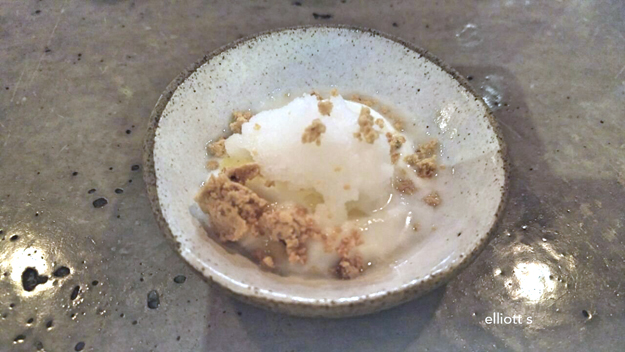 The second dessert was called, Buckwheat Textures, which featured pickled cherries and salted caramel. Enough said!
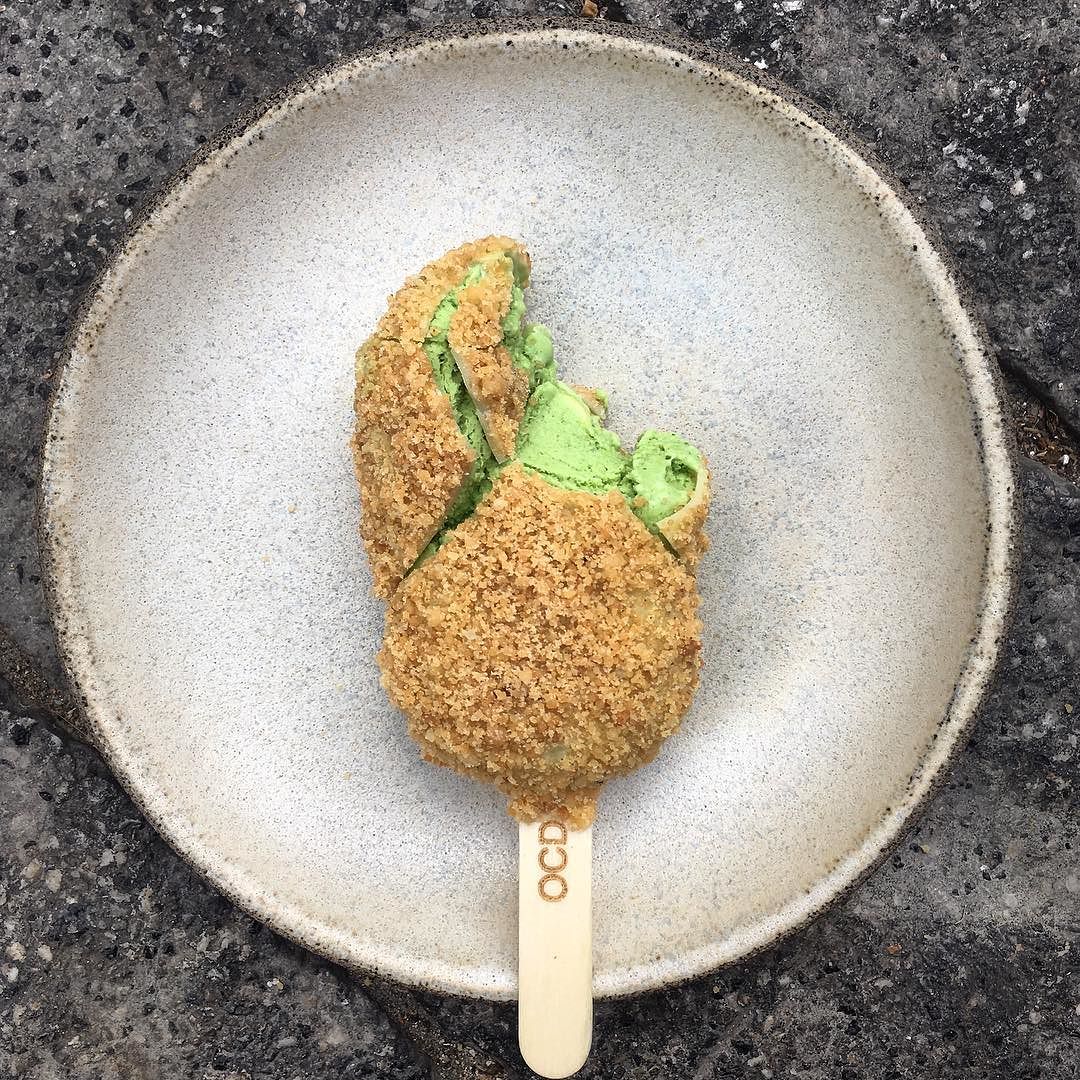
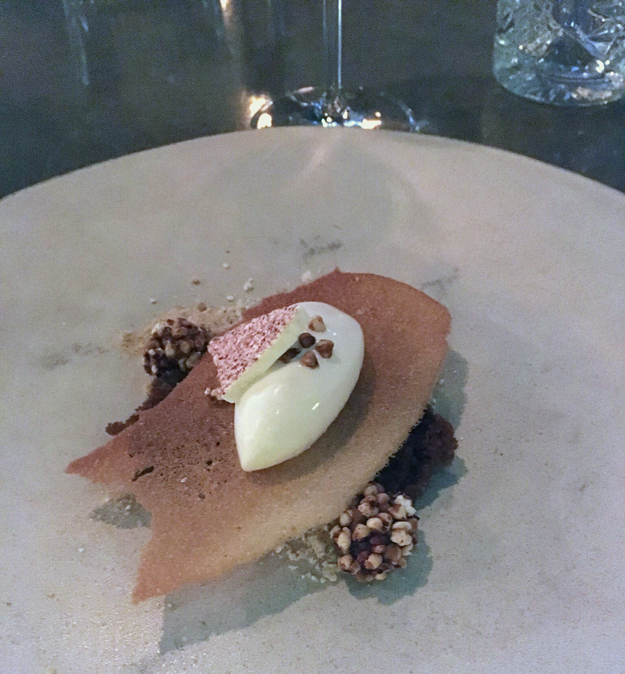 Our final course of the night was a Sweet Pea Ice Cream Bar. A perfect end to a very special evening.