When Mother Nature shows up at the farmers market flaunting her peaches (and beans), you don’t mess around too much with perfection like this. Keep it simple!I have made this salad four times already this summer. The first time I made it, it was part of a celebratory dinner* for 12. (Big football game victory – Go RedBlacks!!) Luckily I had a wonderful sous chef with me in the kitchen that day; my niece Samantha was visiting. We have collaborated in the kitchen before, on a 6 braid challah, so I knew I had some exceptional assistance.
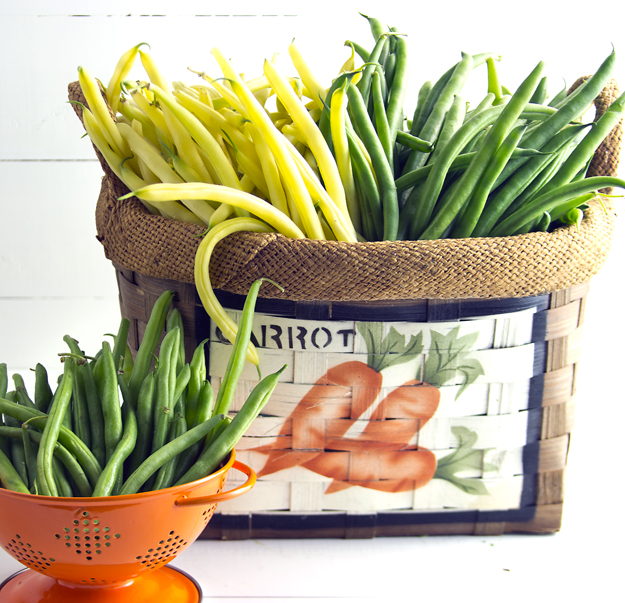
As the afternoon wore on and we continued our prep, I noticed the level of blanched beans in the colander was diminishing. My niece could not stop eating them. She told me that her beans never tasted like this, and asked what I had done? I explained that they were fresh from the farmer’s field and I that I had heavily salted the cooking water. (almost 1/4 cup Kosher salt for a big pot of water). This seasons the beans perfectly and they do not taste “salty”.
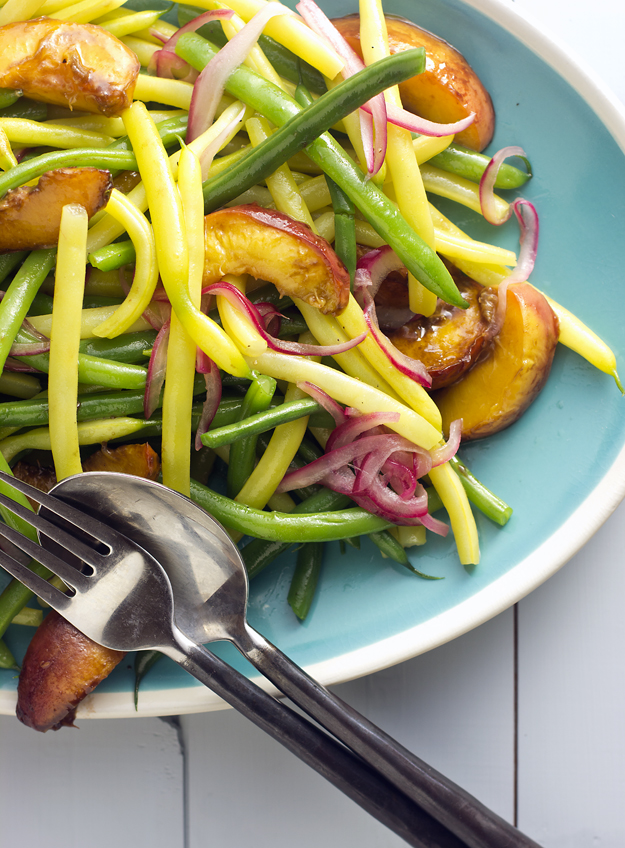
Sautéing the peaches in a bit of vegetable oil for just a few minutes really enhances their natural sweetness. The pickled onions add a welcome piquant note. This is a beautiful fresh summer salad.
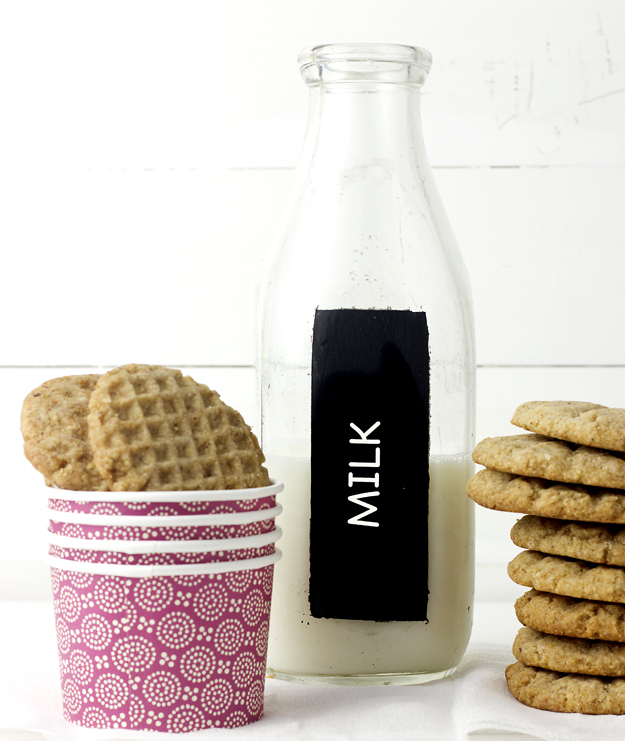
This started out as a post about some simple “Nutty Crunch Cookies” that were featured in the March 2014 issue of Bon Appetit Magazine, in their “Fast, Easy, Fresh Weeknight Favourites” column. I think that there is no better way to end a meal than with a cookie, so I am always on the hunt for new cookie ideas. I filed it away and got on with more important stuff like the actual eating of cookies.
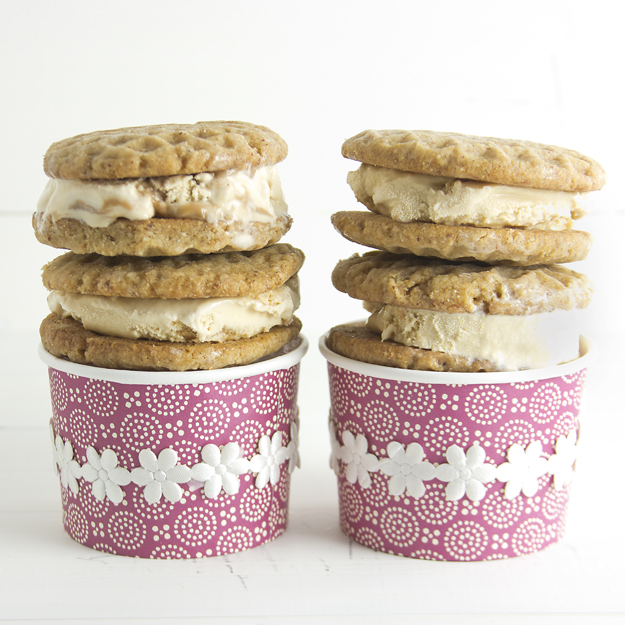
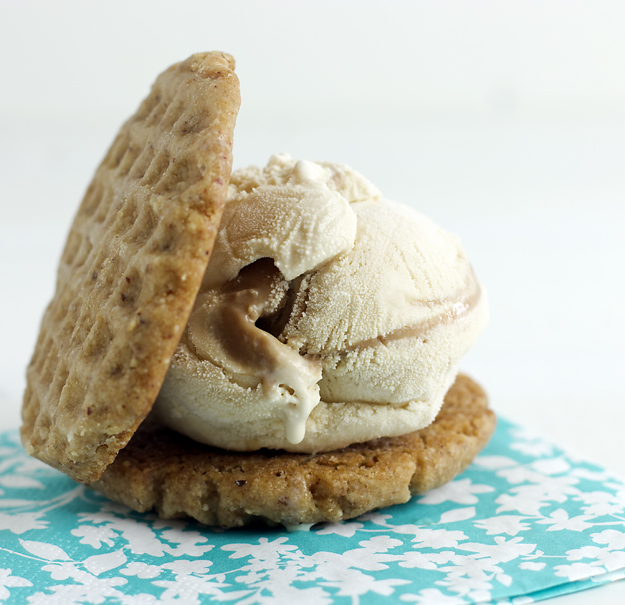
Somehow, a simple cookie seems to have snowballed into” waffle” ice cream sandwiches. If you have ever read the children’s book “If You Give a Mouse a Cookie” (or the ever popular sequel, and my personal fave, “If You Give a Pig a Pancake”) , you will understand how these things happen.
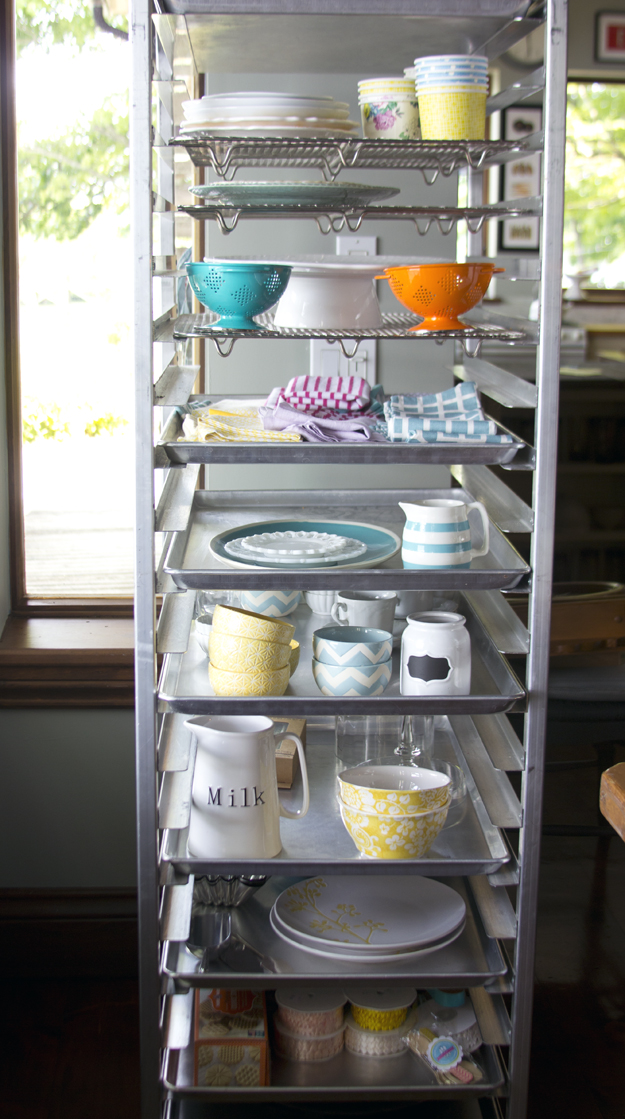
It all started with my taking some photography classes with a talented food photographer. He encouraged me to start thinking less like a cook and more like a food stylist. I interpreted that to mean I needed to go shopping. A few trips to Target, HomeSense and Zone, and I had filled a baker’s rack with some lovely new props.
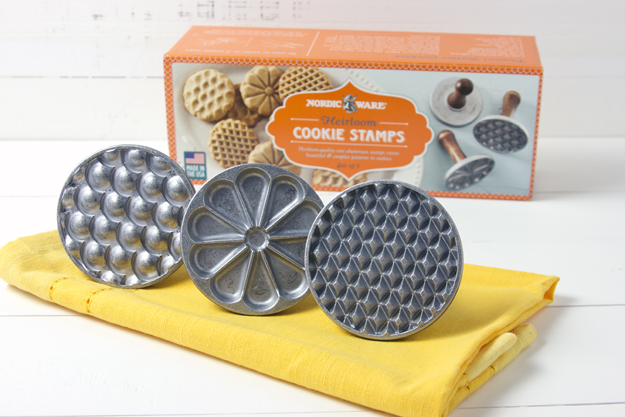
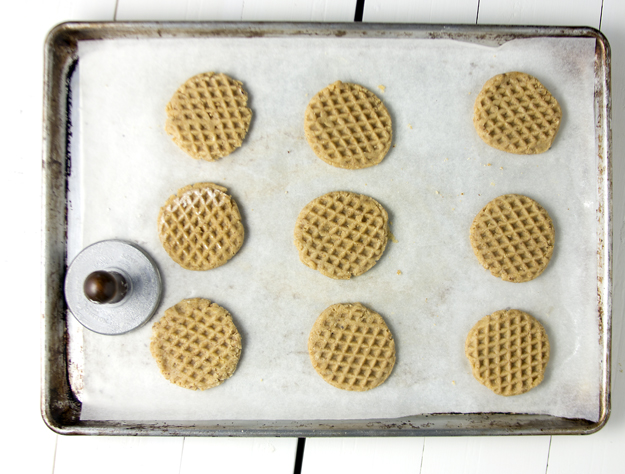
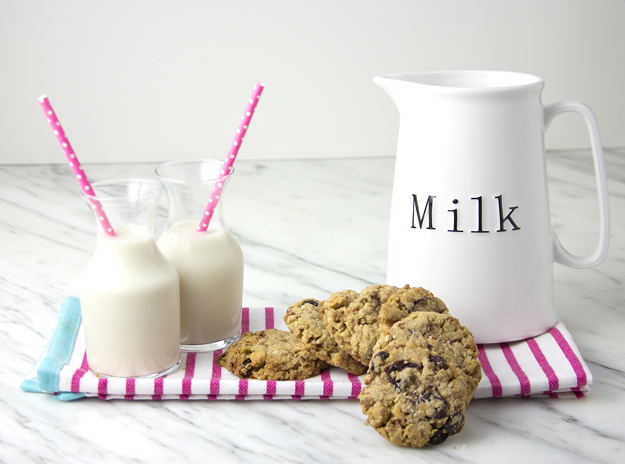
One of my favourite finds was this adorable cookie press set.I knew I had to use them to make those Nutty Crunch Cookies. As I was styling a “Milk and Cookies” shot, I kept staring at the “waffle” design on these cookies, thinking that they would be quite fantastic with a scoop of ice cream sandwiched between them. The Haagen Dazs Dulce de Leche Ice Cream sitting in my freezer called out to me.One of my favourite childhood memories is going to the CNE (The “Ex”) with my older sister and our Auntie Susie. After going on all the rides and playing all the games with us, we would head to the Food Building for Tiny Tom Doughnuts, Candy Apples and Ice cream Waffles. We used to beg for the treats before the rides, but Auntie Susie, wise beyond her years, knew that ice cream waffles prior to a wild and crazy ride on The Scrambler would not end well.
When my kids were little I would sometimes make them waffles and ice cream for dinner. Dinner and dessert all in one! I was a very efficient mother. Steaming hot crunchy waffles, wrapped around a cold scoop of ice cream is one of life’s perfect food combinations. While these cookies are not real “waffles”, the combo of the nutty crunch from hazelnut and almond cookies and the swirled caramel ribbons of dulce de leche ice cream is quite an unbeatable duo.
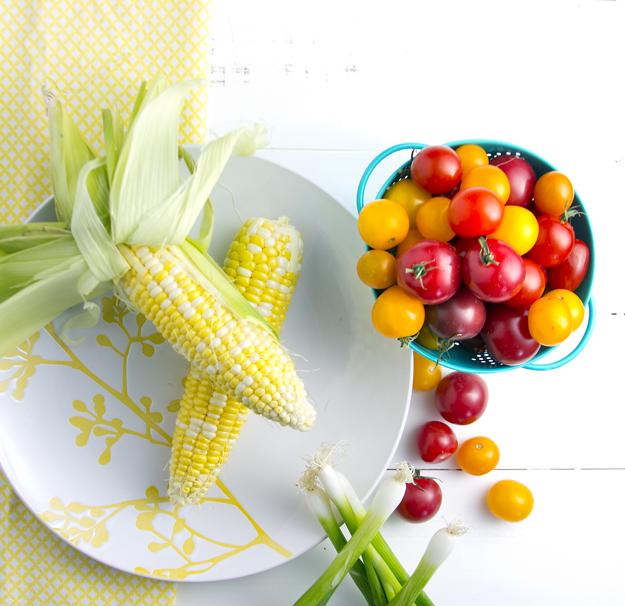
When the farmers market stands begin to overflow with corn and tomatoes, I add them to everything I make. Lightly dressed arugula gets topped with sautéed corn and tomatoes and garnished with some buttery diced avocado. Peaches and Cream Corn and Blondkopfchen mini tomatoes weave their way into fritattas and onto tortilla chips gussied up as a salsa. Tiny tomatoes bursting with sweet acidity mingle with basil and plump sweet corn kernels. Tossed with some hot penne pasta and chunks of creamy buffalo mozzarella, it makes for a very happy summertime dinner.
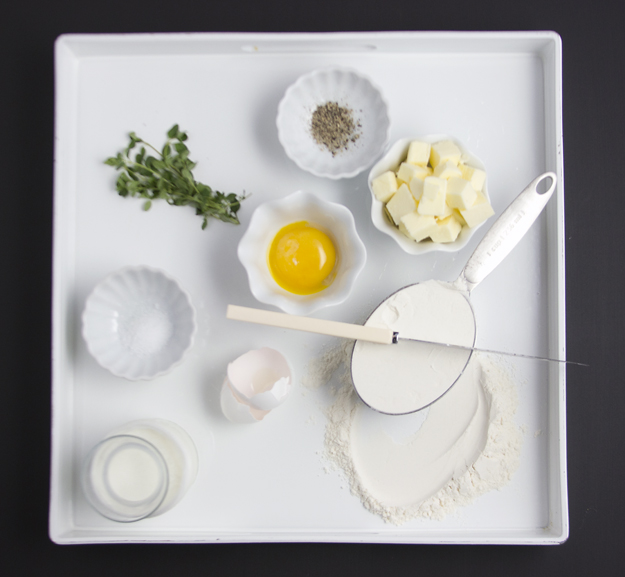
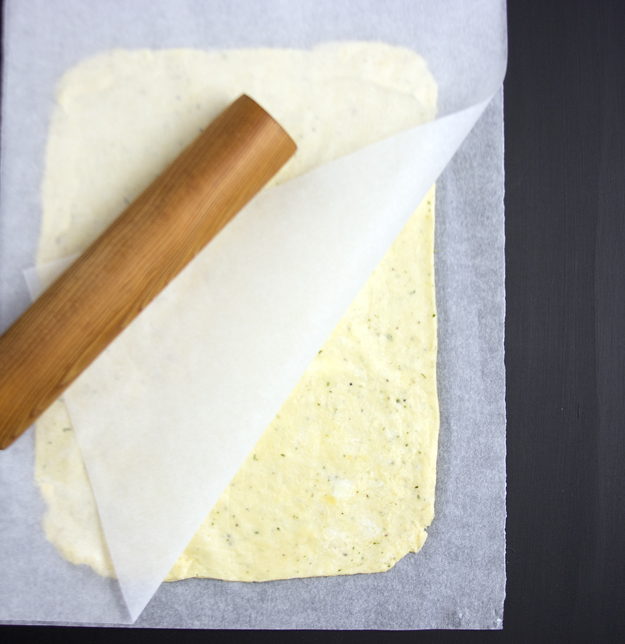
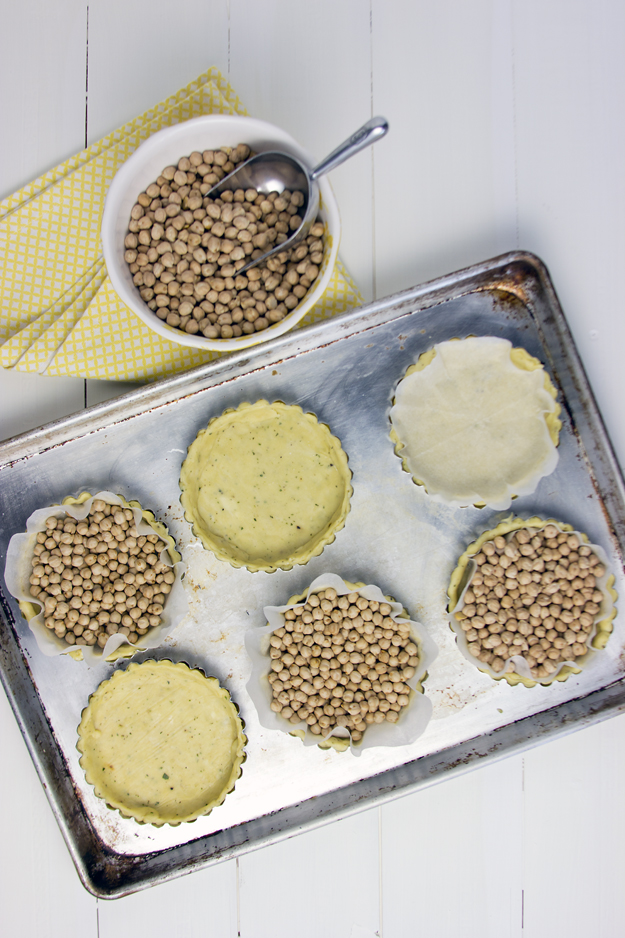
I know that for many folks, biting into a freshly boiled, buttered and salted ear is a summer ritual eagerly anticipated all winter long. When all those sweet little kernels explode in your mouth, it’s bliss for them. But I am among the, mostly silent, minority who do not like to eat corn straight off the cob. It gets stuck in my teeth and I just want to run for the floss. Yes, very un-Canadian/American of me, I know. But I am ok with that. I am perfectly comfortable being mocked when I cut my corn off the cob.With my abundance of corn, tomatoes and scallions, I decided to make a tart. Chef Christine Cushing’s buttermilk pastry, studded with fresh thyme makes a perfect base.Rolling out the dough between 2 large sheets of parchment paper is a foolproof way of handling pastry.Line the pastry with some parchment paper and fill with pie weights to blind bake the tarts. I buy dried chick peas that I reuse for this purpose only. This will give your pastry a head start so that your finished tarts do not have soggy bottoms.Delicious hot or at room temperature (they were even great reheated the next day) these little tarts are a very special way to celebrate the bounty of summer. Once everyone has a bite of these, you will be forgiven for cutting the corn off the cob.
Certain classics should not be tampered with. For example, The Wizard of Oz, as created by Frank L Baum and then interpreted by MGM in 1939, is perfect just the way it is. Why mess with brilliance? Clearly some people disagree with me as evidenced by the 2013 Disney release of Oz: The Great and Powerful, which topped box office records with a whopping 80 million dollars on its opening weekend.
And don’t get me started on the 1998 remake of Parent Trap. The original, released in 1961 was an integral part of my childhood. Suffice it to say, that Lindsay Lohan is no Haley Mills.
However, that being said, some classics need to be updated every once in a while, so they don’t get stale. I am referring to the culinary classics here; just a delicious little twist, an exciting take on the tried and true.
According to Iron Chef Geoffrey Zakarian, Caesar salad has become the epitome of American mediocrity. Appearing on virtually every restaurant menu across North America, it is often made with gloppy bottled dressing, packaged croutons, which, while salty and crunchy, still manage to taste like cardboard and canned “Parmesan” cheese, which resembles dust. Surely Caesar Cardini, the creator of the original, would be rolling over in his grave if he ever tasted one of these versions.
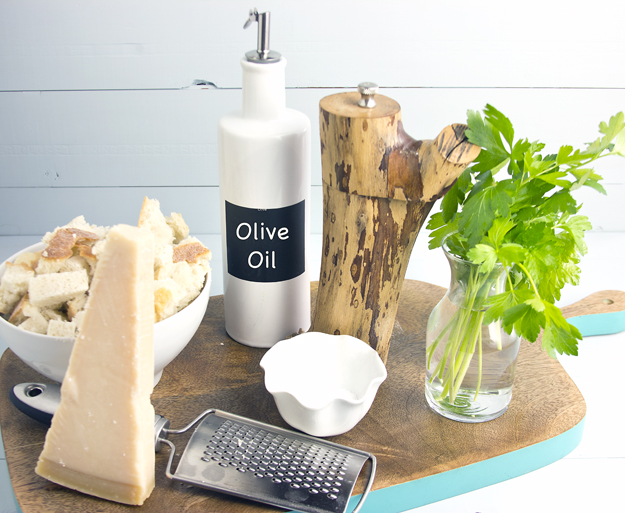
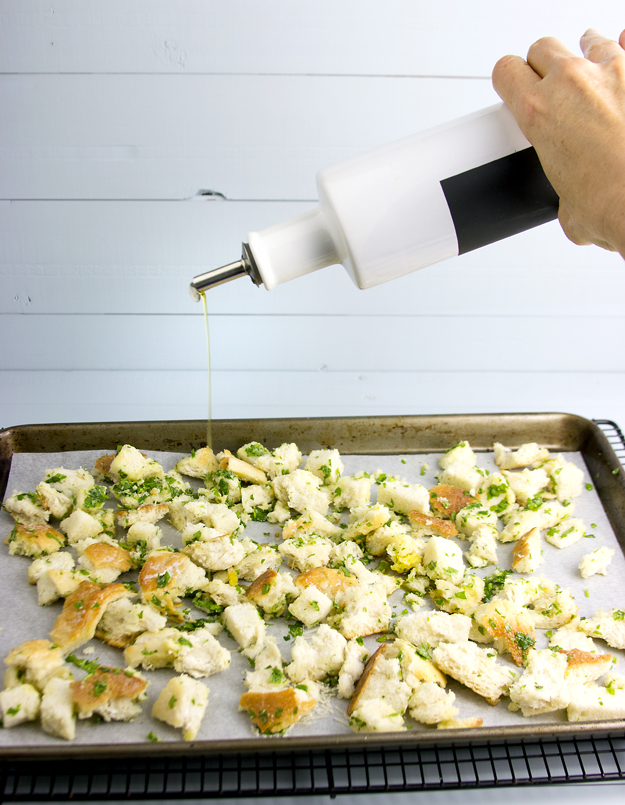
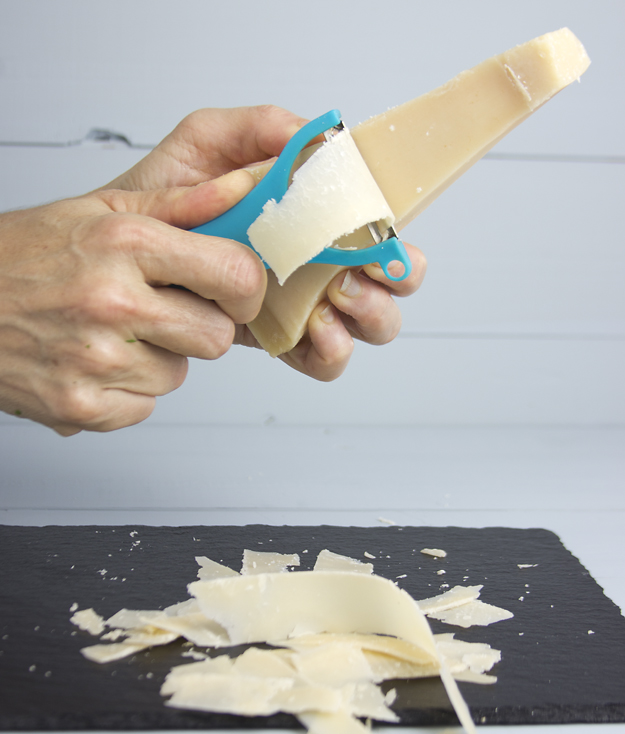
Geoffrey Zakarian’s revision of The Classic Caesar Salad is not revolutionary, just utterly delicious! He does not get ridiculous by suggesting that we forgo the croutons altogether and replace them with pan-fried tofu cubes. He just instructs us on how to make the very best crouton. Start with a good quality country Artisan bread. Then, tear the bread, using your hands, into craggy crouton shaped pieces.By tearing the bread, rather than cutting it, you get much more surface area and more little nooks and crannies to get crunchy. Geoffrey recommends frying the croutons in about ½ cup of oil, but I cut the oil in half and recommend just baking the croutons in the oven. They are still quite delicious and very addictive.Two kinds of cheese are used in this version. The classic Parmigiano Reggiano cheese is grated finely and mixed into the dressing, as in the original version. Then, Pecorino Romano cheese is shaved on top of the salad, using a vegetable peeler. Parmigiano Reggiano is a cow’s milk cheese, while Pecorino comes from sheep’s milk. Pecorino is tangier, and a bit more assertive than the milder, nutty flavoured Parmigiano.Anchovies were not used in Cardini’s Caesar salad. The original dressing contained Worcestershire sauce, which, I just discovered, does contain anchovies. The addition of anchovies came later, in the 70’s. If you think you don’t like anchovies, just give them a chance in this dressing. Anchovies are an extremely umami rich food. Umami is an almost indescribable fifth taste that takes your eating experience beyond salty, sweet, sour and bitter. Umami can best be characterized as a savory taste. Anchovies give a punch of flavor. They are that secret ingredient that you just can’t put your finger on, the one that really makes the flavour pop.
The punch of garlic in this recipe comes from roasted garlic, which is much sweeter and way less assertive than raw garlic. It adds a lovely mellow flavour.
In Geoffrey’s version of the salad, the lettuce is not torn, but rather whole leaves are arranged on a platter. It is quite lovely this way, but I took it up a notch and grilled my romaine hearts on the BBQ.
Each romaine heart is cut in half lengthwise, drizzled with a bit of olive oil and seasoned lightly with salt and pepper. The cut side is placed on the hot grill for a minute or two to get just a hint of smoke and char. Arrange each heart half on a small plate, drizzle with creamy dressing, scatter crunchy croutons on top and finish with some shards of Pecorino Romano of Parmesan.
This knife and fork salad will delight (almost) everyone who tries it. We have had lots of company at our cottage over the past several weeks and I have made this 6 times. My husband happened to be present for all six times. After being married for almost 30 years he knows my habit of finding a dish I love and making it repeatedly until I grow tired of it. After the 5th appearance of Grilled Caesar he very sweetly told me that he really loved it, but could we please have something else tomorrow. Luckily he will not be here this week, so I can make it again for my girlfriend who is coming to visit!
Aside from baking challah every week, it’s been way too long since I’ve had any fun with yeast. I have really missed that culinary alchemy that happens when you combine flour, water, salt and yeast. I decided to take it outside and grill some flatbread.
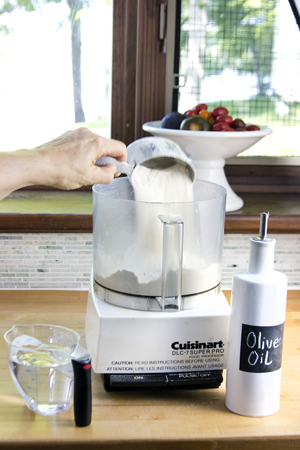
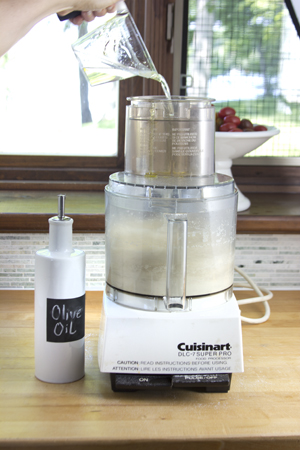
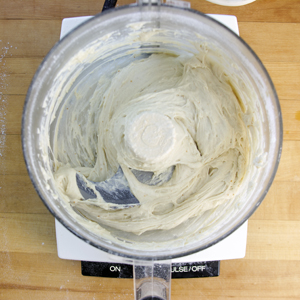
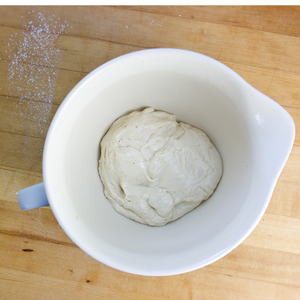
This is a gorgeous dough that comes together in the food processor in about 2 minutes flat. Made with bread flour and just a touch of nutty whole wheat flour, this dough is super hydrated with water and olive oil. A wet dough is how you achieve, what bread freaks call, an “open crumb structure”. That just means that the inside of the grilled flatbread has those airy bubbles, that make it so chewy and delicious to eat.
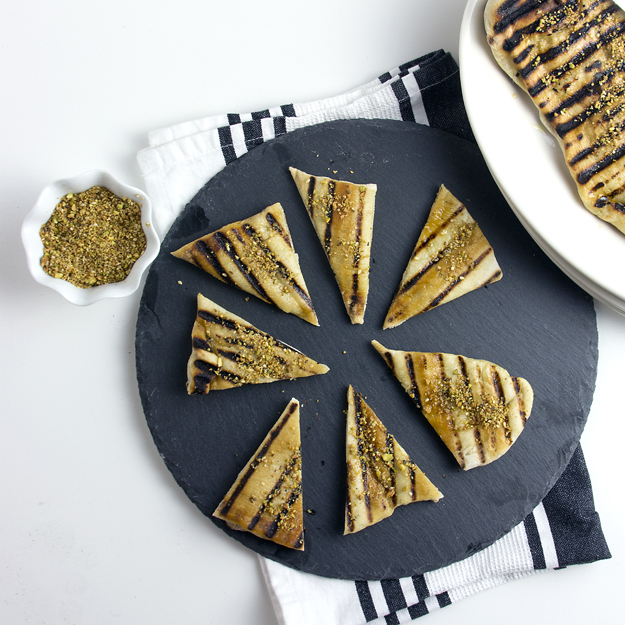
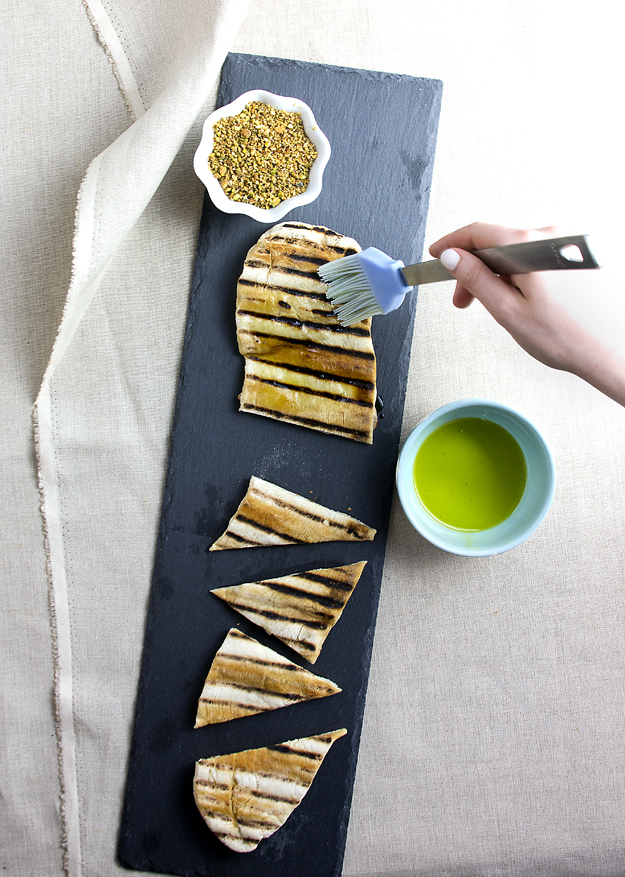
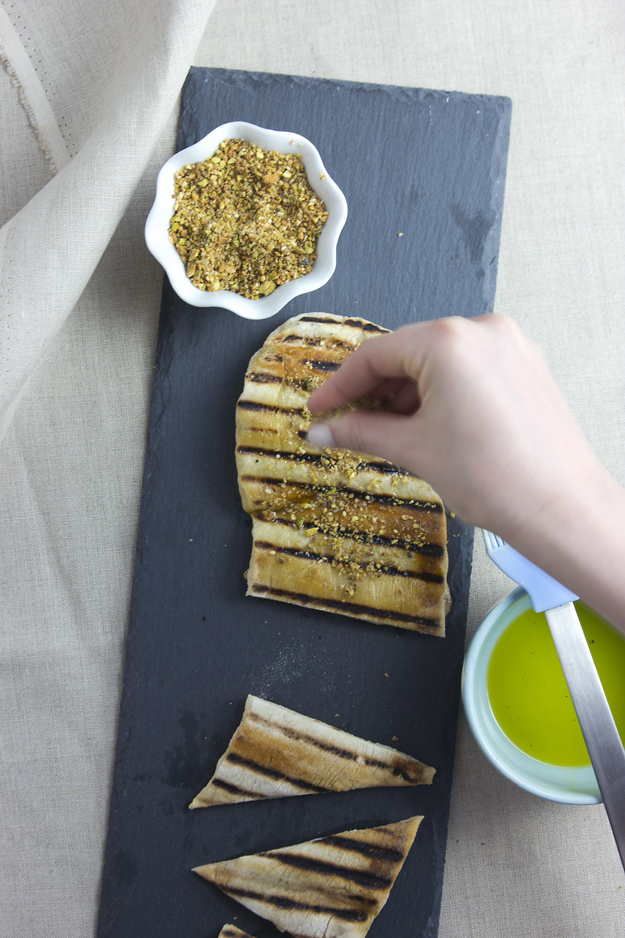
I will admit it takes a leap of faith to put this thin super stretchy dough onto the BBQ and not be riddled with anxiety that it will fall right through the grill. But, miraculously, it doesn’t. In about 4 minutes the flatbread is charred to perfection. I like to brush it with a really fruity olive oil as soon as it comes off the grill and then sprinkle it with Dukkah.
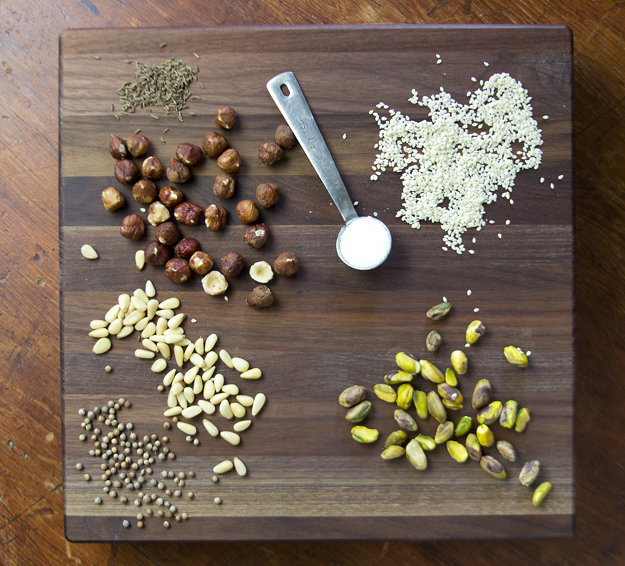
Dukkah is a Middle Eastern nut and spice mix. The first time I had it was at Mahane Yehuda Market (The Shuk) in Jerusalem. Vendors there sell small paper cones filled with dukkah, along with strips of grilled pita bread. You dip the bread into the vendor’s bowl of olive oil, dunk it into the cone of dukkah and then joyfully crunch and munch your way to a very happy place.
The name dukkah originates from the Egyptian word “dakka,” which means “to crush,” which is what you do to many of the ingredients that go into the mix. There really is no classic recipe for dukkah. Just follow the basic ratio of 1 cup nuts: 1/2 cup sesame seeds: 4 tablespoons spices: 1 teaspoon kosher salt.
I settled on a combo of hazelnuts, pine nuts, pistachios, sesame seeds, cumin and coriander seeds and salt. Go wild and create your own custom Dukkah mix. Peanuts or macadamia nuts would be fantastic. Fennel or caraway seeds would add a really unique flavour. When I am having family or good friends over, it is great fun to watch them greedily dip the warm chewy charred bread into fruity olive oil and then into the bowl of dukkah. Double dipping almost always ensues as this mix has all the hallmarks of an outstanding snack; crunchy, spicy and just a little bit salty.
And hey, if you decide not to make your own flatbread and just buy some pita bread to serve with the dukkah, I won’t judge. One of my very best friends called me after reading my post about Lemon Poppy Seed Baby Bundts to tell me that she was going to buy a few of of those adorable mini bunt pans and fill them with Duncan Hines Lemon Poppy Seed Cake mix!
Depending on where you are in your particular family life cycle, hearing the phrase “Family Togetherness” may wrap your heart like a warm hug or may cause you to run screaming from the room.
In my case, the chicks are all grown and have flown the coop. When my progeny all come together under the same roof, I sleep sounder at night. It fills me with joy. However, there was a time when I wanted to run kicking and screaming from their loving and sometimes all encompassing embrace, but that’s a tale most moms can relate to, and there is certainly no need to go into the gory details here.
This past weekend, the stars and planets were aligned just right and we were together as an entire family at the cottage. As we were having dinner on Saturday night, the youngest, wanting to relive the defining moments of his childhood, asked his siblings what were some of their worst memories of growing up. He is a bit of a “glass half-empty” kind of kid. We all laughed and then they were off down memory lane, telling stories about the time(s) mom yelled, or the time blood spurt everywhere when dad cut the youngest with an electric razor during his inaugural shave.
As I listened to my kids tell these tales it struck me that even with all the digital advances we have made with memory keeping, a family’s folklore and history really lives best through good old fashioned story telling. It is the telling and retelling of these anecdotes that connect us as a family. In our family, some of the stories have been told so many times that my kids and their cousins use a shorthand system to refer to them. As in, “Oh come on Uncle Roger, tell us Chapter 18 again.” (Chapter 18 is the tale of how my husband came to shave off his moustache of 31 years, after losing a hockey bet.)
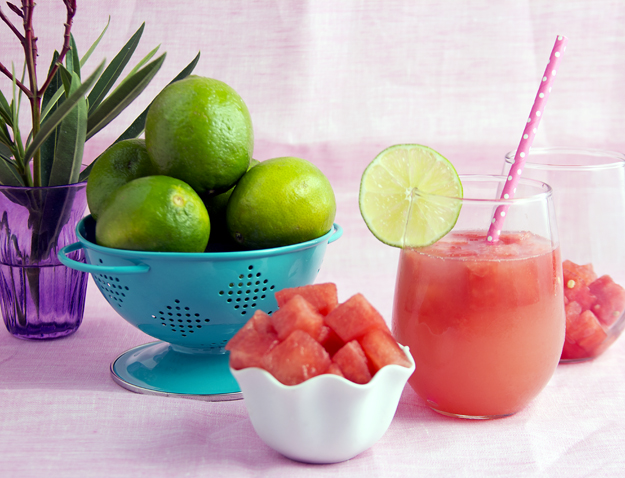
My daughter and I collaborated on Saturday to create this cocktail. One to two of these will be all you’ll need to get the stories flowing. Somehow, the kids and I polished off the entire pitcher while my husband was napping on the hammock, so I am certain that by next summer he will be telling the saga of his hurt feelings when his family neglected him during aperitivo hour.
I am the grill master of our house. However, if the weather is particularly nasty, I will try to send my husband out to cook, but inevitably I will be beckoned to see if the food is done. It seems that I have the magic touch. Well, total disclosure here; I spent the summer between my first and second year of cooking school working in a restaurant as the grill chef.
The restaurant had a huge stone barbecue on their patio. They stored the charcoal for the barbecue in 50-pound bags on the roof of a shed at the back of the patio. I had to climb a ladder at the side of the shed and toss down the sacs of charcoal. My nickname that summer was Cinderella as my face was always covered with charcoal streaks. In addition to cooking the proteins, I also had to prepare pan sauces on the grill. That required a deft hand in moving the charcoal around to create hot and cool spots on the grill. I burned more than my fair share of pans the first few weeks, but eventually I got the hang of it. By the end of that summer I was fairly proficient in determining when a burger was done, when a strip steak was cooked to medium rare and when halibut was just cooked through to perfection.
These days I cook on a gas grill, and rely more often than not, on an instant read thermometer. They are basically idiot proof and they guarantee perfect results almost every time. This one is expensive but works very well.
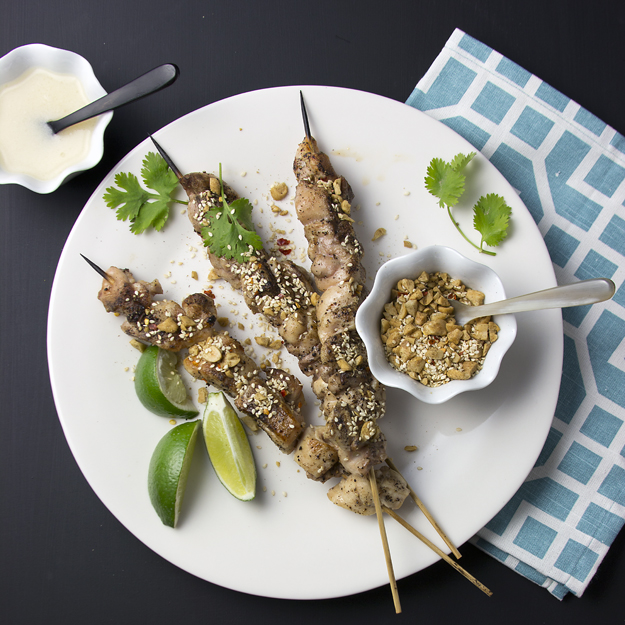
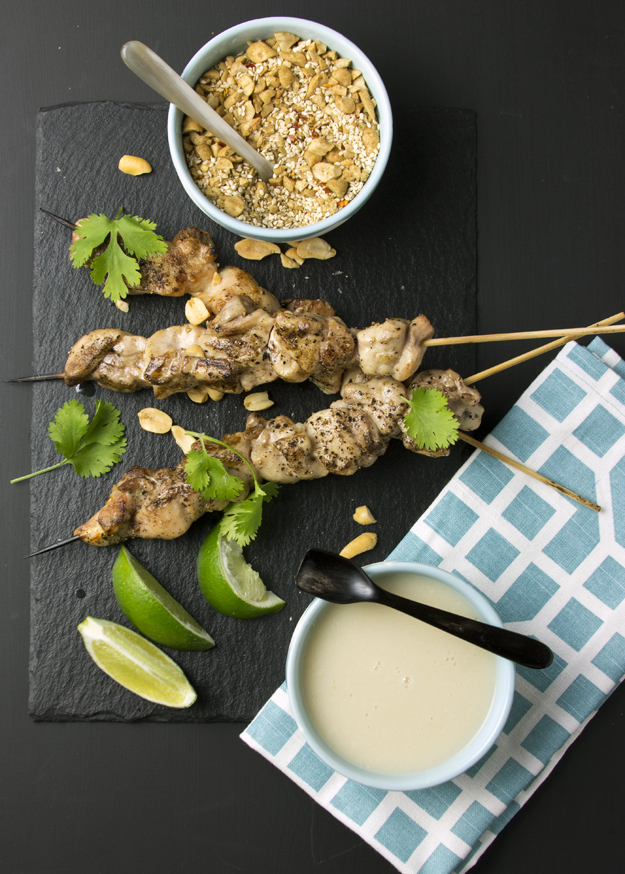
This recipe for Grilled Chicken Skewers with Ginger Coconut, sauce hails from Chris Schlesinger and John Willoughby’s brilliant book, “License to Grill.” Although this book was written over 17 years ago, it still feels fresh and relevant. I have been making this recipe for many years and never tire of it. The original recipe calls for boneless skinless chicken breasts, but I recommend using boneless skinless thighs.
I must admit that I get mildly annoyed when people tell me they only use boneless skinless chicken breasts. Not quite as annoyed as when people tell me they never use salt in their cooking, but I won’t get started on that one right now. I always use boneless skinless thighs and serve it to guests who say they don’t like dark meat. They don’t even realize they are eating thighs and they always ask me how I keep my chicken so moist. Thighs are a no-brainer. They are next to impossible to overcook because of their higher fat (and therefore flavour) content.
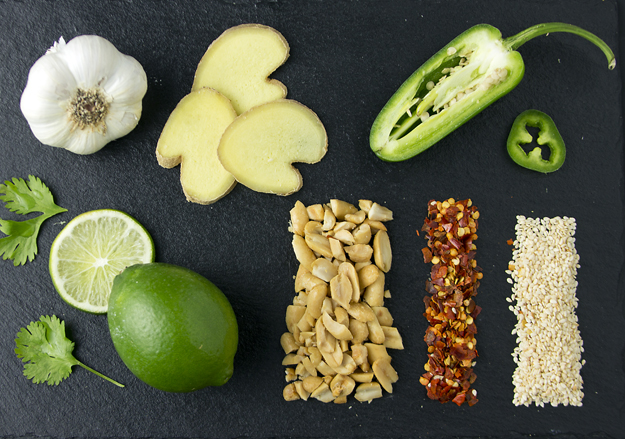
The velvety coconut-ginger sauce enrobes the chicken and the ginger, jalapeño and lime add a seductive little flavour zing. The “shake” topping, crafted from peanuts, sesame seeds, cumin and red pepper flakes adds crunch and packs a welcome buzz of heat.If you are using wooden bamboo skewers, be sure to soak them for about an hour before skewering the meat, so that they do not burn. This recipe is also quite delicious when you substitute tofu for the chicken (or so I have been told by my vegetarian daughter!)
This Spring , Universities and Colleges all around the world, released into the wild the latest crop of new grads. My daughter, newly minted herself in May, is among the hordes. She moved back home with us, just for a few months, while she considers her future. It has been a joy having her home again, although her angst at figuring out what comes next is sometimes painful to witness.
She asked me if having her home again was cramping my newly aquired empty nester status. I had to let her in on the cold hard truth that with her home, I felt like I had to be a responsible adult again and plan a proper nutritious meal. Without her there, I could be quite content with a glass of Prosecco and a bowl of Kettle Brand Sea Salt Baked Chips (my guilty pleasure), and call it dinner.
She was telling me about a dream she had. We were up at our cottage and she was outside. Suddenly, she was being chased by a tiger and a bear. Running into the cottage, she locked the door behind her turned to her parents, pleading for help. My husband, a take charge kind of guy, immediately reached for the phone to call animal control.
As she was relaying the dream to me I started analyzing it in my mind. How sweet, I thought. Even though she’s all grown up, she still needs and counts on her parents for protection and assistance.
Then, she continued on with her dream. The folks at animal control told my husband that there was really nothing they could do. Wild animals were having a rough time making it on their own in their natural habitat, because humans had wreaked havoc with it . We would just have to learn to live with the animals. My daughter was distraught and asked her dad what his next step would be. He just looked at her and admitted defeat. She looked at him with such fear and sadness. Her protector was no longer able to keep her safe.
My keen analytical mind quickly did a flip as I realized the significance of this dream. The baby bird is about to be turfed from the nest and she’s on her own to make it in this big world. For sure it’s an exciting time, but doubtless, quite scary as well.
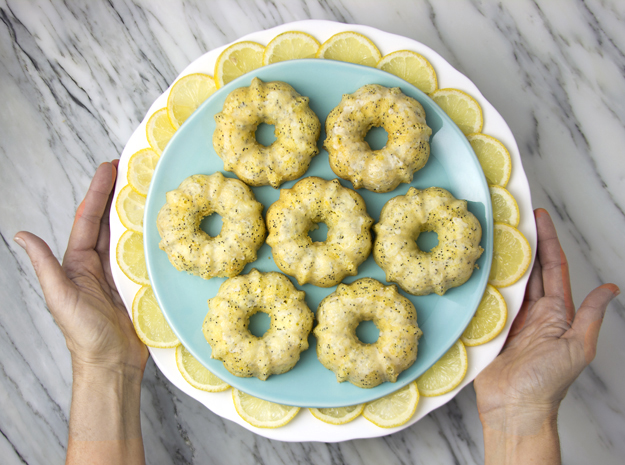
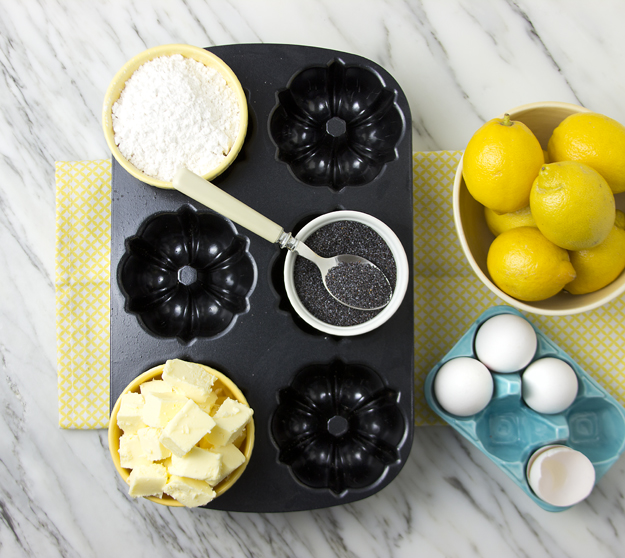
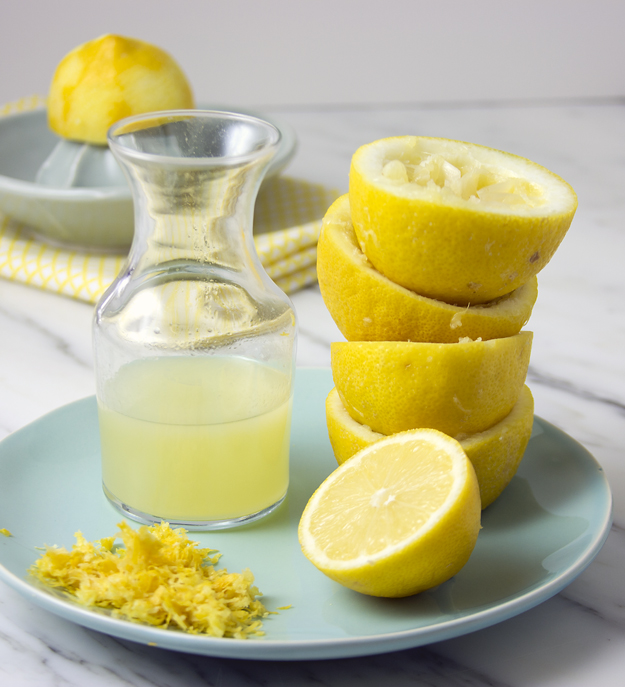
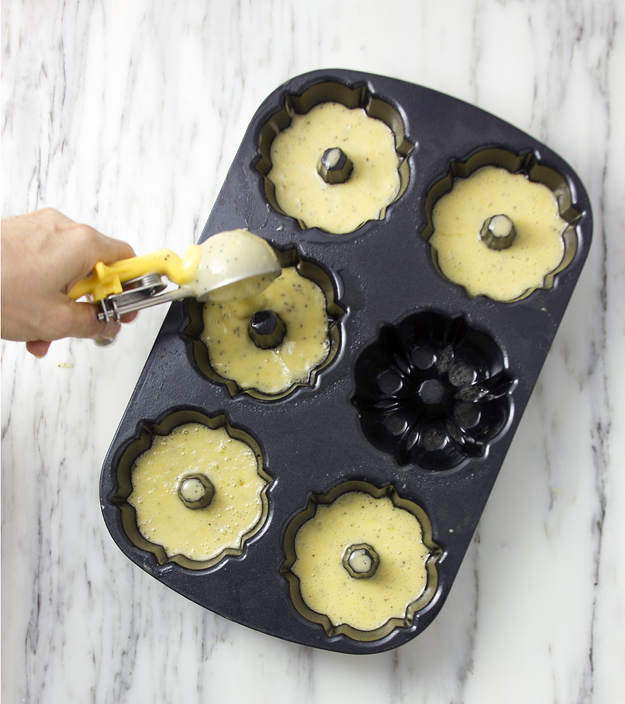
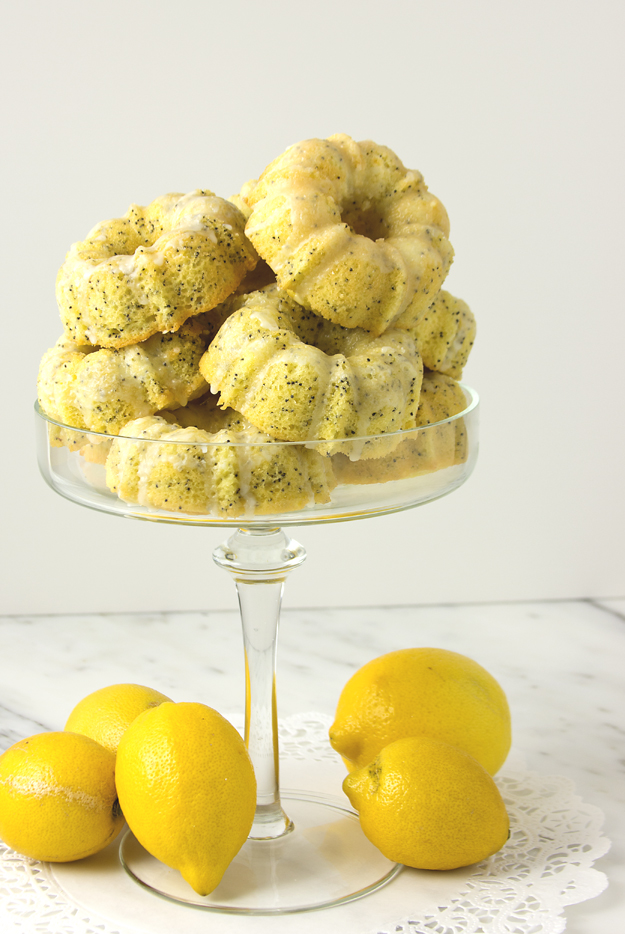
These Lemon Poppy Seed Baby Bundts are a perfect metaphor for this story! Tiny in stature but bursting with huge lemon flavour, these baby cakes can hold their own in a world of towering mega cakes. Finely textured, rich, moist and buttery, these minis deliver a puckering burst of fresh lemon flavour.
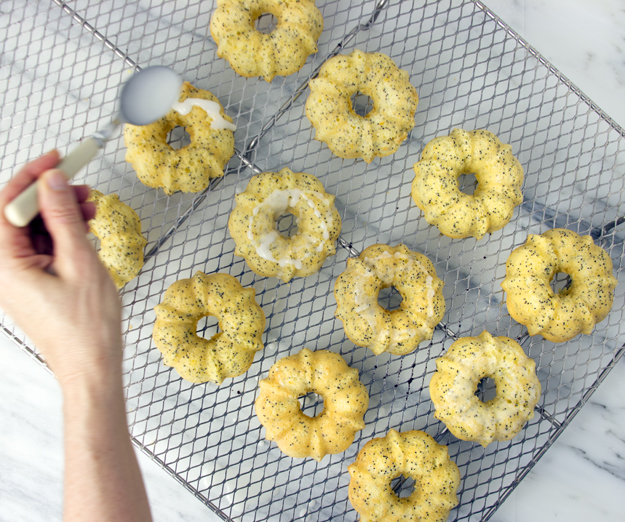
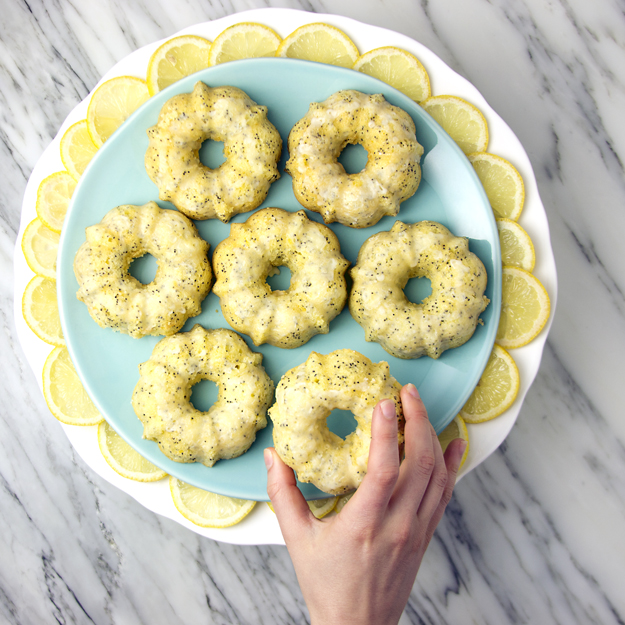
Thickly coated with a tart lemon glaze, the inside is vivid yellow from flecks of zest. The tiny specs of deep indigo blue from the poppy seeds, add a wonderful crunch as you bite into them. Mini things are so adorable and these diminuative cakes are no exception! They keep well, wrapped in an airtight container for up to 5 days, although they didn’t last that long at my house.
The popularity of hamburgers continues to soar and our desire for novel and sometimes bizarre burger concoctions knows no bounds. Have you sunk your teeth into a Luther Burger yet? Hot on the heels of the Ramen Burger comes the Spaghetti Burger. And although you gotta give the guys at Slater’s 50/50 in Huntington Beach California some credit for creativity, I won’t be trying the peanut Butter and Jellousy Burger any time soon.
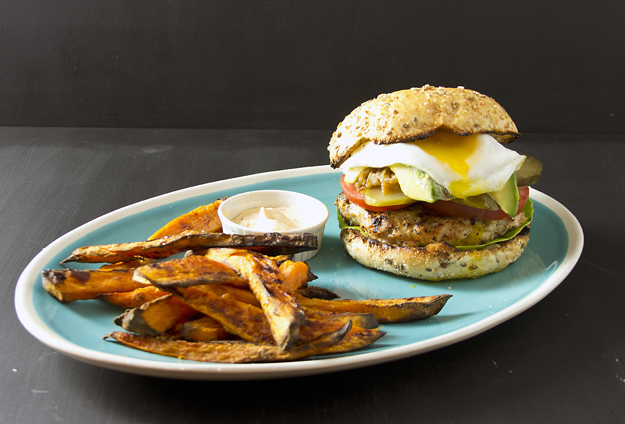
I have often felt that turkey burgers are the Rodney Dangerfield of the burger world. They just don’t get much love and respect. People look down on the lowly turkey burger. Not exciting, bland, boring and often dry as dust. I aim to change all that.
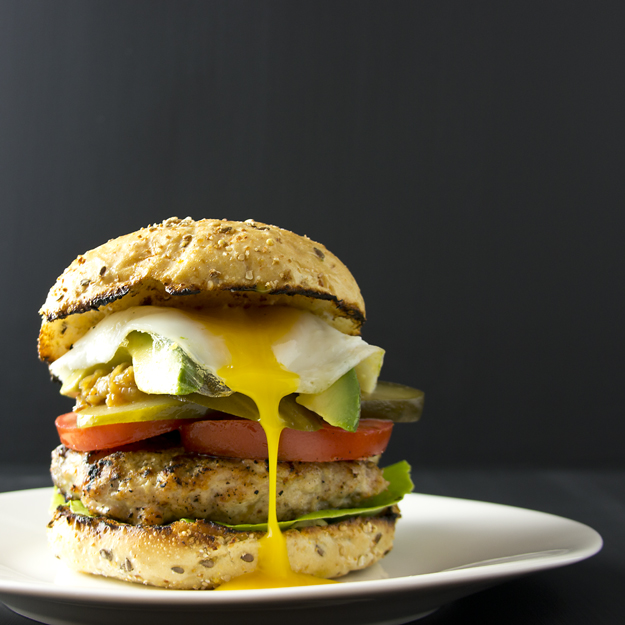
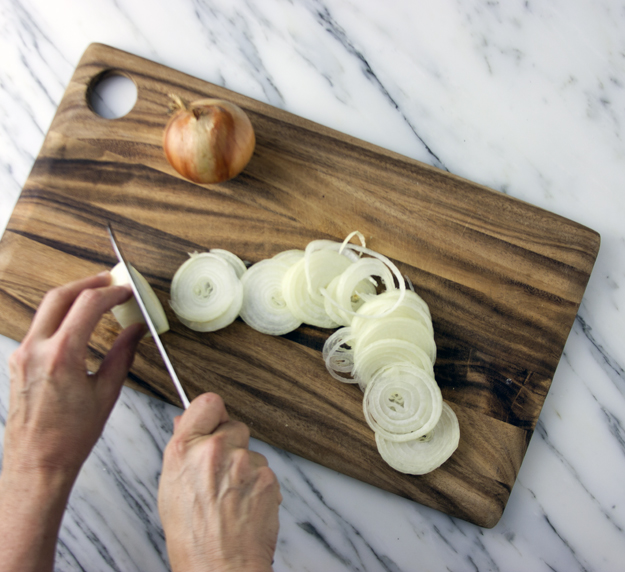
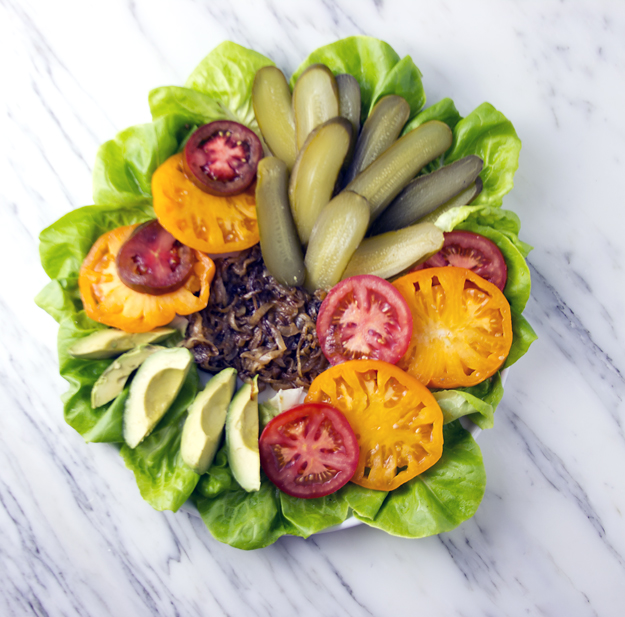
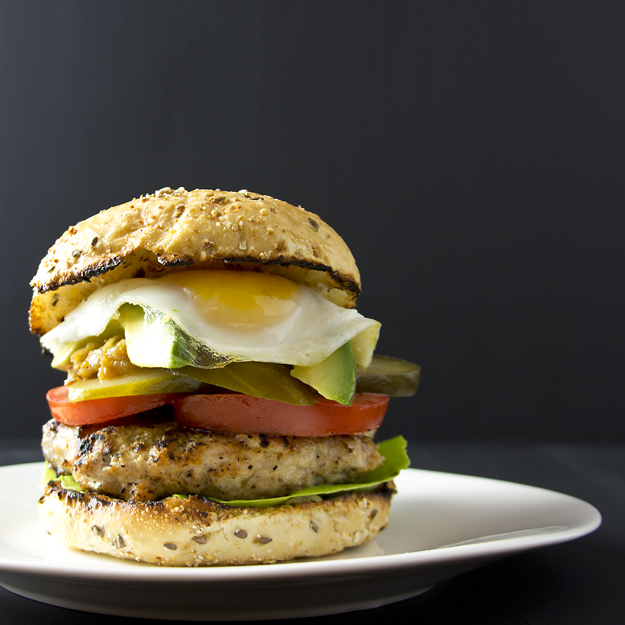
These are turkey burgers with nothing to apologize for. They are spiced with cumin and just a hint of chipotle chile powder. Lightly oiled and heavily salted just before they hit the grill, they are cooked through with just the perfect amount of char and crunch on the outside. Delicious as this burger is, it’s really all about the toppings here. I thinly sliced several onions and cooked them low and slow in a bit of olive oil, for almost 40 minutes until they were sweet and caramelized. A pinch of sugar helps the process. Patience please. Do not try to rush this process by turning up the heat. You will end up with burned onions.Some thickly sliced heirloom tomatoes, sour kosher dills and buttery avocado, sliced into wedges round out the toppings. I toasted a multi grain bun and spread it liberally with some chipotle mayo. The cherry on top is a fried egg. It seems that fried eggs are showing up on top of everything these days. There’s a very good reason for the fried egg trend. It just tastes freaking amazing. The crispy edges and the runny yolk of a fried egg are really one of life’s simpler pleasures in our ever increasingly complex world.
The richness of the yolk is the ideal way to counteract the natural leanness of the turkey.From that very first bite when you chomp into the burger and the yolk dribbles down your chin and the side of the burger, happiness will ensue. The flavours and textures of this burger are something very special. The contrast of the cool crunchy sour dill with the warm tender egg will get your taste buds very excited for a second bite. Slow down and notice the sweet-acid zip of the tomato and the smooth buttery avocado. Take note the heat of the chipotle mayo, thickly slathered on the bun and the smoky accent of cumin in the burger. It all just works.
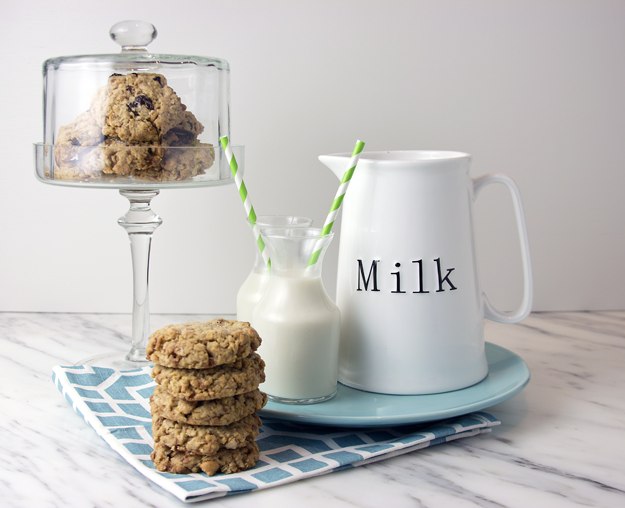
The fact that I have made these cookies four times in the past two weeks would lead you to the inescapable conclusion that I have a humungous sweet tooth and a total lack of willpower. And you would be correct! However, each time I made them I tweaked the recipe slightly until I came up with what I believe to be an outstanding cookie. So you could say that it was all in the name of research.
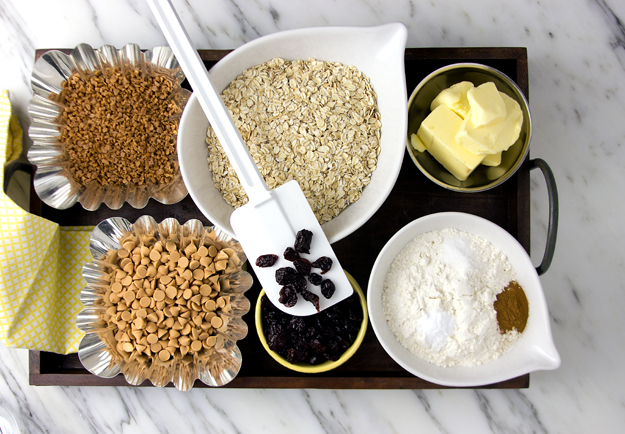
I made them exactly as the original recipe was written. I had seen these cookies on seriouseats.com, and was intrigued. They are essentially an oatmeal cookie but with some butterscotch chips mixed in. I baked the first batch but found them to be a bit too sweet and one-dimensional. So I baked a second batch and added some Skor bits to amplify the toffee flavour. They were good but not perfect. Something was missing. My daughter suggested I add dried cherries to the dough. Jackpot!
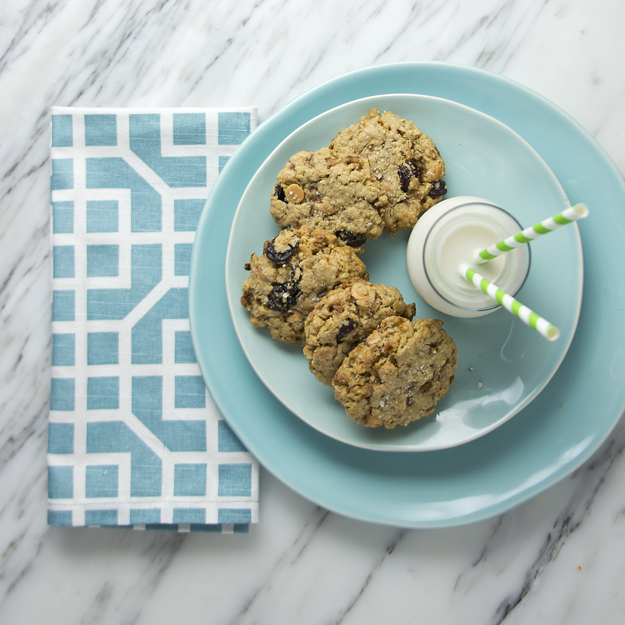
I love the way the Skor bits melt and ooze out of the cookie as they bake. There is a tiny bit of crunchy toffee on the edge of each cookie as they cool. The textural contrast between the crispy edges and the chewy center is what keeps you going back bite after bite. Tart dried cherries temper the sweetness of the butterscotch and toffee. The occasional ping on your tongue, from the Fleur de sel crystals sprinkled on top keep everything in check. These are a perfectly balanced (albeit, not nutritionally balanced) cookie!Using an ice cream scoop to portion the cookies ensures that they will all be the same size and shape and bake evenly. I like the #24 size scoop (about 1.3 ounces). I was able to get 12 cookies on my baking pans (13 x 18 inches). Pour a cold glass of milk and prepare to be enchanted. These are quite addictive.Click here to print recipe for Butterscotch Toffee Salty Oatmeal Cookies.

 When Mother Nature shows up at the farmers market flaunting her peaches (and beans), you don’t mess around too much with perfection like this. Keep it simple!
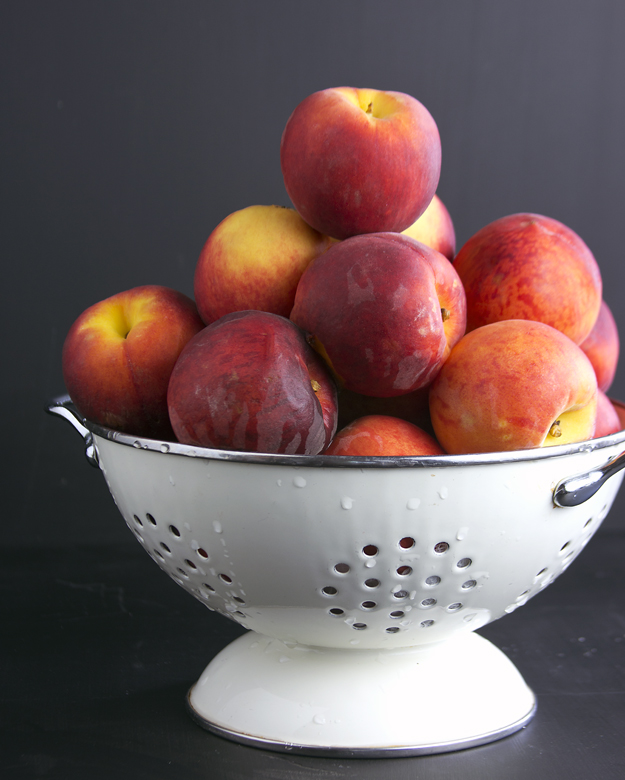
 I have made this salad four times already this summer. The first time I made it, it was part of a celebratory dinner* for 12. (Big football game victory – Go RedBlacks!!) Luckily I had a wonderful sous chef with me in the kitchen that day; my niece Samantha was visiting. We have collaborated in the kitchen before, on a 6 braid challah, so I knew I had some exceptional assistance.
 * If inquiring minds are curious, we rounded out the feast with Flatbread and Dukkah, Rib Steaks, Smashed Roasted Potatoes with Smoked Paprika and Rosemary, Arugula, Corn, Tomato and Avocado Salad, Blueberry Coffee Cake and Hazelnut Almond Waffle Ice Cream Sandwiches.