I recently discovered that Bed Bath and Beyond has their very own blog, called Above and Beyond. Who knew? Check out today’s issue to see yours truly featured as their guest blogger and read the full story! I was asked to write a guest post about the Jewish holiday Purim, which begins tomorrow (Saturday February 23) night.
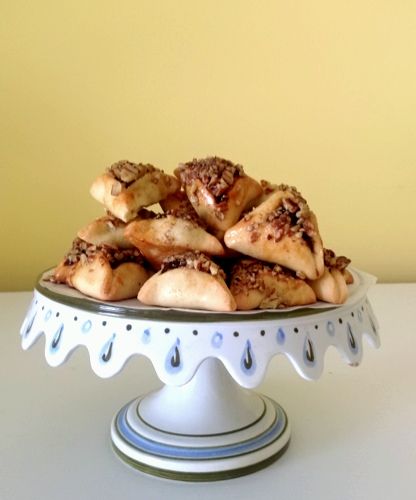
I share with their readers how to make Hamentashen, the traditional triangular shaped cookie, filled with a dried fruit filling. My hamentashen recipe actually comes from my Aunt Carol. She shared their recipe and techniques with me. Her filling uses dried prunes, golden raisins, strawberry jam, lemon juice and almond extract.
If you are looking for something more modern to celebrate the holidays with check out my recipe for Cinnamon Bun Hamentashen from last year.
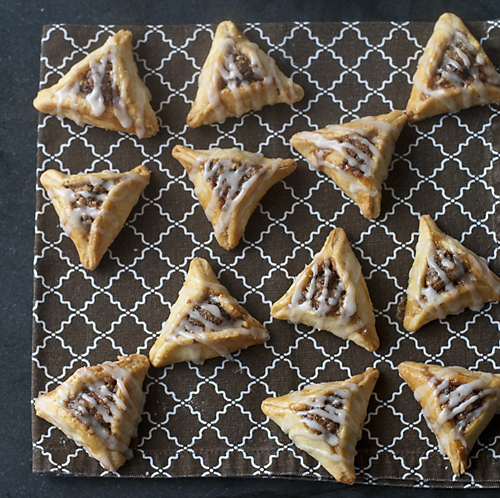
Or check out these very cool and modern hamentashen:
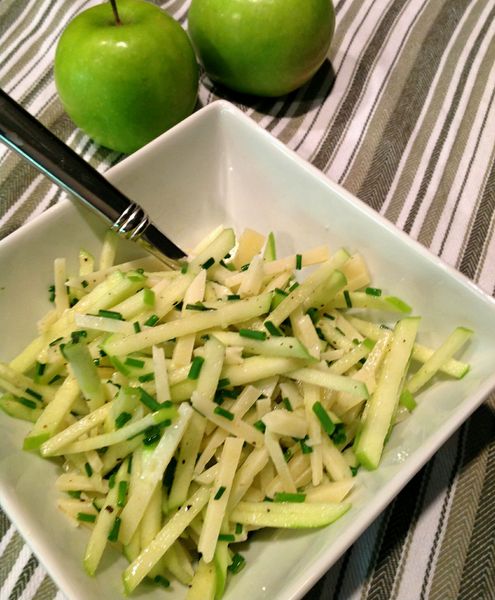
While on holiday in Naples, Florida this winter, we had dinnner at the charming Cafe Lurcat. In the apetizer section of the menu, I came across an unassuming humbly named dish, “Apple and Cheese Salad.” Compared to ” Mixed Baby Leaf Lettuces with Warm Goat Cheese and Sweet Peppers” or “Baby Beets, Pink Grapefruit and Chicory with Horseradish Cream and Walnut Pesto”, the apple and cheese salad kind of sounded like a lonely afterthought.
For some reason, it got me thinking about the Kardashian family and all those fancy K names; Kim, Khloe, Kourtney, Kendall and Kylie. Imagine if they had a sister named Jane. Everyone would pity poor plain Jane and it would just be so sad and pathetic. My mind is a very busy place, I know!
When our server came over, I asked about that salad. Her face lit up. She said that this was her favourite salad. It combined manchego cheese, granny smith apples, chives and olive oil. Although not convinced that this was the way to go, I still went ahead and ordered it because I felt sorry for this salad.
Chances are, if you are married, you have uttered the phrase, “I promise to love you in sickness and in health.” Fortunately, for my husband and I, that sentence has yet to be tested extensively. I got a glimpse into our future this past week, and I feel very optimistic about the state of our marriage.
While away on holiday I started to feel dizzy, lightheaded and my sense of balance was off. It seemed to be at its worst when I had to change positions and move from sitting to standing or lying down to standing. I took it easy for a few days but by the 5th day, it wasn’t getting any better. My husband made some phone calls and e-mails and we were waited for a recomendation as to where to find a doctor.
I was feeling a little better so we decided to go do a little shopping at Target. Now, if you are American, this may sound like the most boring thing in the world to do while on holiday. If you are Canadian, then perhaps you understand. My heart races just a little bit faster whenever I enter a Target parking lot. I felt sad when I got the news that Target is coming to Canada, becuse there aren’t that many small thrills left in life!
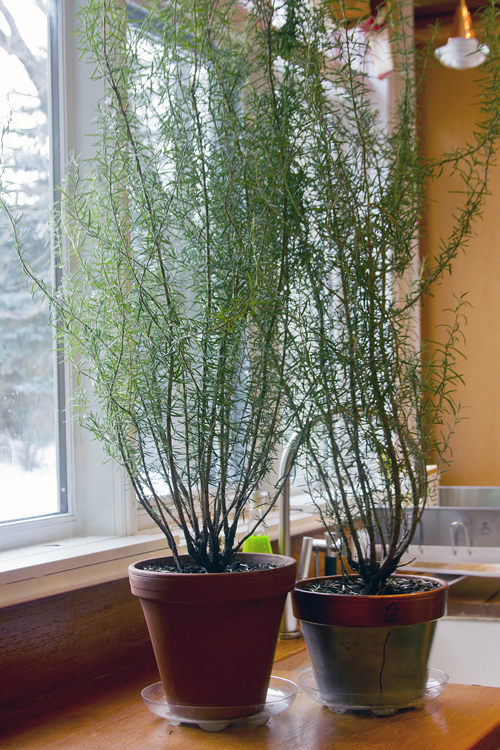
Every summer we plant an herb garden outside our kitchen door. Before we can even finish washing the dirt off our hands, the rabbits, voles, squirrels, moles and other assorted wildlife in our backyard have munched off the tops of the cilantro, basil and Italian parsley plants! For some reason, they shun the rosemary.
By fall, our rosemary plants are tall, healthy and quite lovely. We pot them and bring them inside to live on the kitchen windowsill for the winter. My husband has a wonderful green thumb and takes care of all the living things in our home. Each week, as he goes about his watering ritual he asks me the same question, “Are these rosemary plants still alive?’
I have to explain here that he is colour blind and has a great deal of trouble telling the difference between greens, browns and grays. So while I see a vibrant silvery green rosemary plant, he does not. Each week I smile and patiently answer, “Yes, dear, they are alive and well.” Okay, maybe I am not being completely honest here. Perhaps every other week I smile and give a patient answer. On alternate weeks, I am quite likely to give a snarky sarcastic retort, muttered under my breath, which I will not print here.
I must admit that this weekly discourse has given me some pause for thought. If my husband has trouble seeing shades of grey, I worry that I should die in my sleep, he may not notice the grey pallor of my skin in the morning. It may be days before he notices that I am not alive.
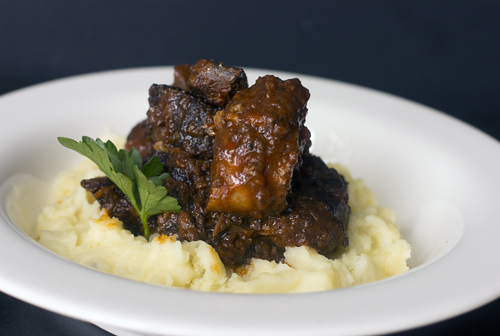
As food blogger, I struggle with presenting “brown foods”. They are not exactly the most appetizing to look at, and, to boot, they are a bitch to photograph. However, that being said, a certain food network host has been known to growl, “Brrrrown food tastes grrreat!”
For those not familiar with Anne Burrell, her larger than life personality and growly voice puts some people off. But I am in awe of her wealth of culinary knowledge. I have learned so much from watching her show, “Secrets of a Restaurant Chef.” Every recipe I have tried of hers has come out perfectly. She cooks foods that are full of flavour and her concise, easy to master techniques make her a rock star in the kitchen.
The main reason brown food tastes better, is because of a chemical process known as the Maillard Reaction. If your eyes glaze over at the mere mention of the phrase chemical reaction, then John Willoughby, meat guru and former senior editor at Cook’s Illustrated is your go-to guy to explain these things.
This morning I had the opportunity to bike the countryside of the Emerald Isle (Ireland). The lush pastoral landscape offered endless hills in 40 shades of green. The climbs were steep, with very little opportunity for cruising. My heart rate went into the red-line zone (gasping for air and unable to speak a coherent word) and I was dripping in sweat.
Sadly, this was just a virtual tour of the Irish countryside. Our instructor at today’s spin class, the very funny Roger, has quite the active imagination. He took us for a ride in the stunning Irish countryside and promised us that if we pedaled hard, there would be a pub at the end of the ride with a cold pint waiting as our reward. About halfway through the ride Roger sang out, “put your arms up in the air”. I raised both arms and gave him fist pumps. My husband and daughter looked the other way and pretended they did not know me. Apparently instructors always yell out these instructions, but no one ever follows them. Oops!
Roger kept talking about a bonus track. I had no clue what he was referring to until 45 minutes into the class, when we normally begin the cool down, he told us to ratchet up the tension on our bikes for one final hill. This was a special 60 minute class. Lucky me! I survived. Sadly there was no pub at the end of the ride. Just the dregs of my now lukewarm water bottle.
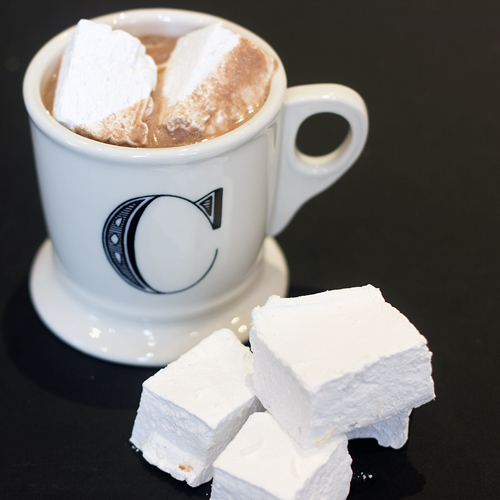
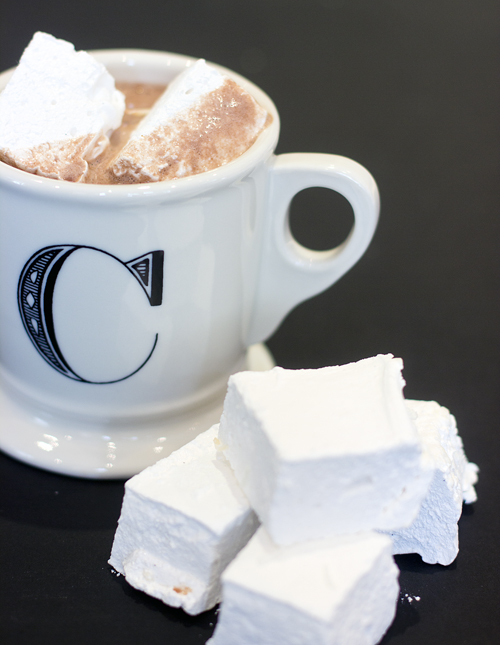
Annoyed that I didn’t get my visit to the pub, I decided that I deserved a treat when I got home. Hot chocolate and marshmallows seemed like the perfect way to cap off my morning.
To be honest, growing up, I was never really a marshmallow fan. At overnight camp I would stick my marshmallow into the camp fire and set it on fire. I would remove it, blow it out and eat the carcinogenic burned crispy part and throw the fluffy inside away. I never did have the patience for toasting them golden brown. Yet another quality I admire in my husband. He will wait until the fire has burned down to low embers and hold his marshmallow just at the right height to obtain that perfect burnished bronzed colour.
I only recently began a love affair with marshmallows several years ago, after a lunch at Jean Georges in New York City. The meal was delicious but my favourite memory of that lunch was the Bon Bon trolley that they wheeled to our table at the end of our lunch. As the waiter approached our table with the trolley he opened a huge glass jar filled with handmade pink marshmallows and lifted one out with tongs. Then he proceeded to cut each one in half with very fancy silver scissors. I inquired whether marshmallow cutting was a position you had to be promoted to. He responded that it was an entry-level job. I am still thinking about applying! Just in case you are wondering, the Bon Bon trolley also held cotton candy, salted caramels and assorted chocolates. It was a pretty special day for me! Ever since that day I have wanted to try my hand at making my own marshmallows.
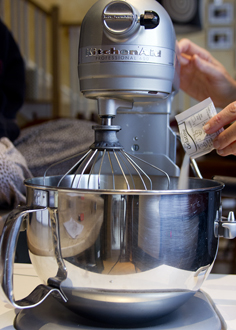
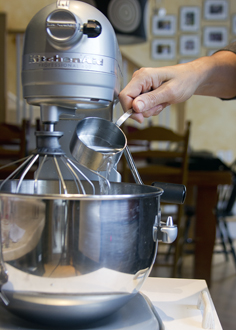
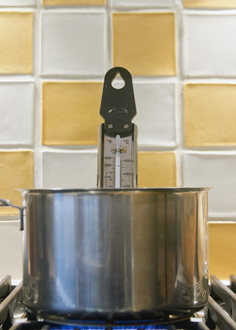
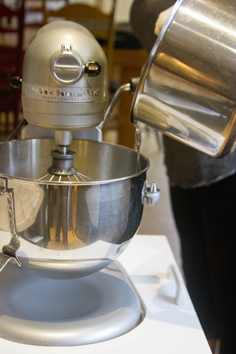
I knew that making marshmallows requires precision and a candy thermometer. I turned to my favourite culinary scientist for the how to, Alton Brown. Gelatin and ice-cold water are placed in the bowl of the stand mixer. Then sugar, water, corn syrup and salt are placed in a heavy bottom pot and brought up to 240° F. The mixture should then be allowed to cool to 210° F and then poured into the stand mixer bowl while it is mixing on low-speed.
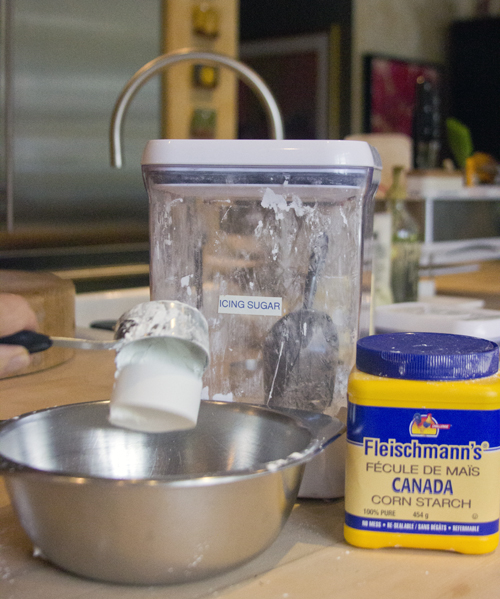
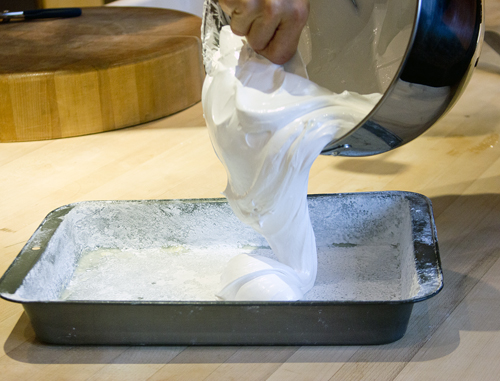
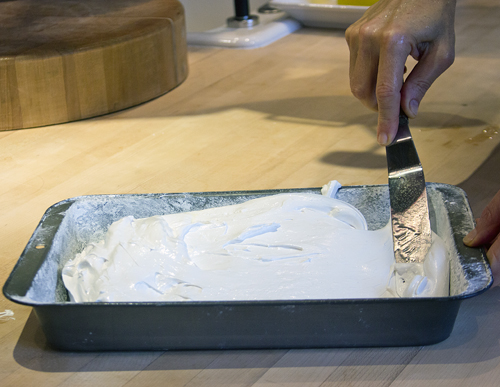
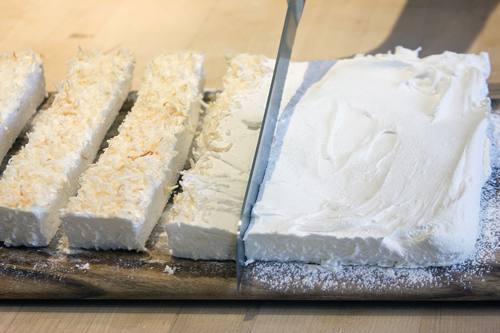
Then you turn the machine up to high-speed and mix for 12-15 minutes until the mixture cools to lukewarm. In the last minute of mixing you can add any flavourings you like. I added some vanilla bean paste. While it is mixing, prepare a 9 x 13 inch pan by spraying it with Pam and then coating it with a mixture of cornstarch and icing sugar. Then tip the goo into the pan and spread it out with an oiled spatula. This is a very gooey mixture. Dust the top with more cornstarch and icing sugar and put it aside to set for at least 4 hours or overnight. Resist the urge to lay your head down on this pillowy softness. It will not end well.
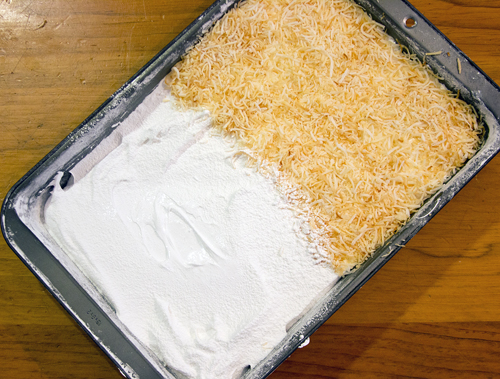
I topped half of my mixture with some toasted coconut.
A serrated knife does an excellent job cutting the marshmallows, once they have set up. You will have to wash the knife off fairly often while cutting.
Now, onto the hot chocolate:
When my kids were little the only way I could get them to go outside to play in the winter was to bribe them with hot chocolate when they came back in.
They would indulge me and play for about 20 minutes and then come inside on the pretext of having to go to the bathroom. After helping them struggle out of their snowsuits we were all sweating and no one was anxious for the dance that required getting back into all those layers. And then it was time for hot chocolate.
I will admit that I resorted to a packaged hot chocolate mix. Truthfully, the kids didn’t even like the hot chocolate either. It was really all about the marshmallows. They would scarf down the marshmallows I let them heap in the hot chocolate and I would end up pouring the hot chocolate down the drain.
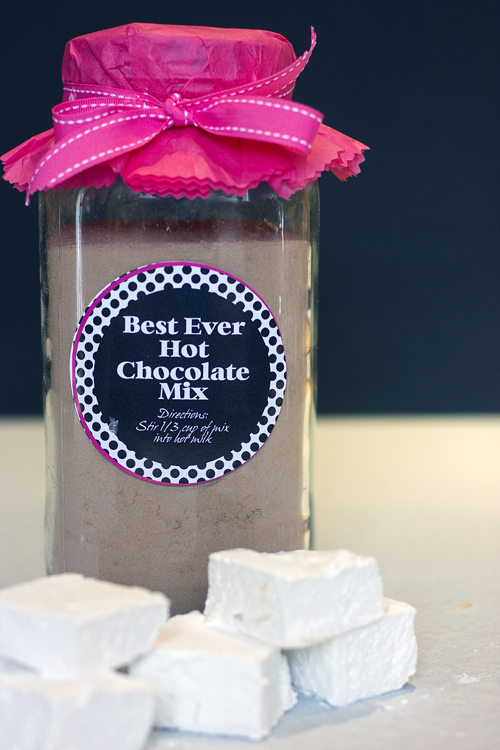
At the time, it never occurred to me that you could make your own hot chocolate mix. But you can, and it’s spectacular! This recipe, from the folks at Cook’s Illustrated, makes enough powdered mix for about 20 cups of hot chocolate. It can be stored in the cupboard for about three months, so when the craving for a cup hits you, simply stir 1/3 cup of the mix into some hot milk!
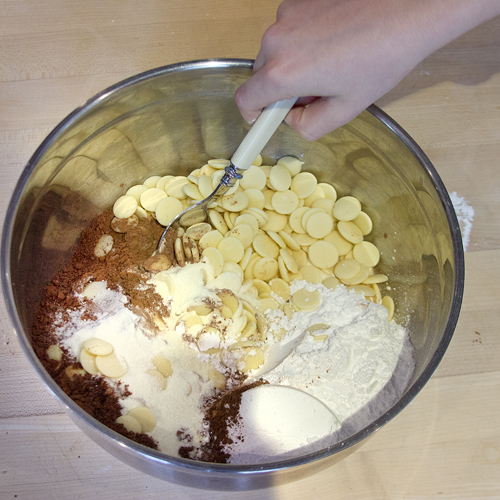
The uniqueness of this mix is that it contains two kinds of chocolate. The first, of course, is cocoa powder. There are two types of cocoa powder, natural and dutched, (also known as Dutch processed). For this recipe you want to seek out the Dutch processed kind. Camino makes an excellent dutched process cocoa powder that is available in the organic section of the supermarket.
Dutched cocoa powder has gone through an alkalizing process, which gives it a darker color and makes it less acidic. The result is a richer, more intense chocolate flavor and a nice deep chocolate color. You will sometimes see Dutched cocoa powder called for in recipes for beverages or desserts that aren’t baked since the flavor is less bitter than regular cocoa powder.
The mix also contains white chocolate, which gives the final drink a soft creamy texture.
The final ingredients in the mix include skim milk powder, which adds a sweet dairy flavour, confectioners’ sugar, which dissolves more easily than regular granulated sugar and cornstarch, which is added to the powdered sugar to help thicken the cocoa. All the ingredients get pulverized in the food processor.
Ask any of my family members and they will tell you that I am one of the most unobservant people around. I am just not curious about other people and their business. I never stop to gawk at car accidents, I am always the last person to know any of our street gossip and I never notice new haircuts or things like that. My siblings love to tell the following story as a stellar example of how notorious I am for missing the obvious.
In 1999, my dad was sick with kidney disease and heart problems. He needed to have heart valve replacement surgery. After the surgery, the doctor came out of the operating room and told us the surgery went well. I stayed at the hospital a few more hours and then I flew back to Ottawa. Several days later, my sister called me and told me I better come back to Toronto. My dad was fighting an infection and was not doing well. I caught the next flight and went straight to the hospital.
I went directly to his room. I peeked inside and saw a nurse sitting with my dad. He was sleeping. None of my family members were anywhere to be seen. The nurse smiled at me and left the room. I gave my dad a kiss on the cheek and sat down and started talking to him, holding his hand as I sat. It was a warm summer day and I thought it was so strange that his cheek and hands were so cold. After a few minutes I went out into the hall, looking for my mom and my siblings. They all came running down the hall, crying and hugging me. It was at that moment that it dawned on me why my dad was so cold. To this day, I still get teased about how unobservant I can be.
However, there is one place where I am observant – the supermarket. I love to play a little game while waiting in line at the grocery store. I check out the contents of the carts around me. You can usually tell a lot about a person by their choice of groceries. While doing my shopping in the first week of January I inevitably noticed carts full of Lean Cuisine and Weight Watcher’s frozen dinners, diet soda, cans of tuna and lots of fruit and vegetables. This is the month that we typically resolve to eat light and healthy.
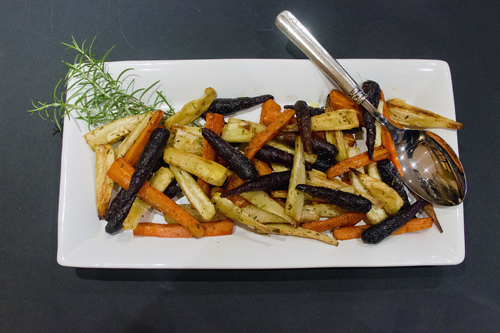
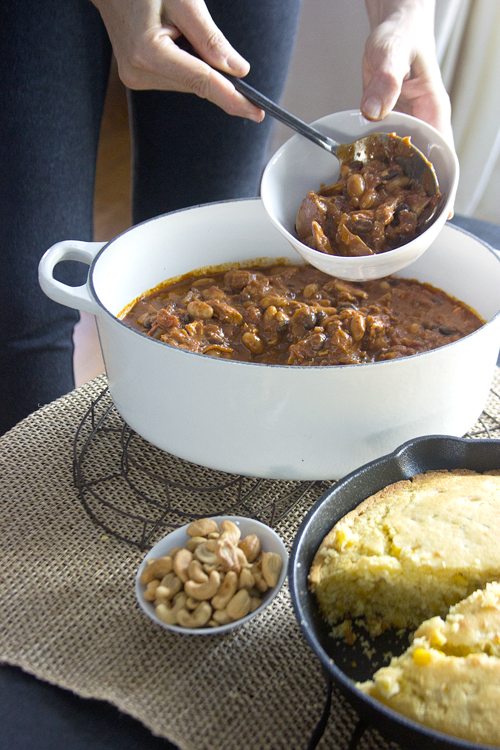
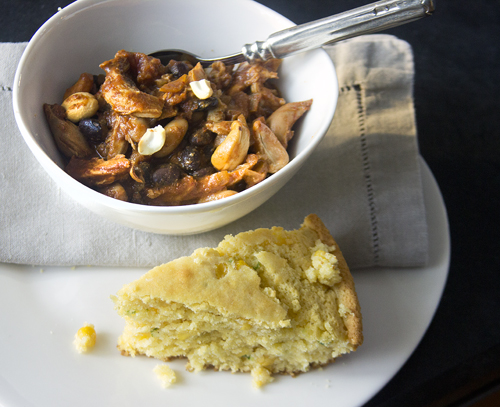
Chili is not traditionally known to be a healthy food. Usually made with beef it is high in fat. This chili is made with chicken and therefore much lower in fat and calorie content. The first time I made this chili was at a Potluck dinner at a neighbor’s house. We were standing at the buffet table spooning food onto our plates. The woman standing next to me, had her plate heaped full of the chili I had brought. She remarked how delicious it looked. I smiled and said, “Thanks, I made it.” She asked what kind of chili it was and I answered, “Cashew Chicken Chili.” She almost dropped her plate. It turned out she was fatally allergic to cashews. Hence the name “Killer Chili.”
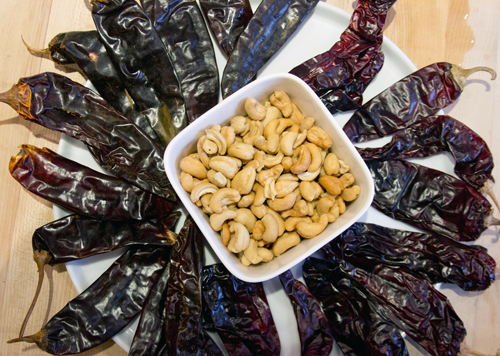
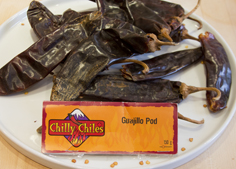
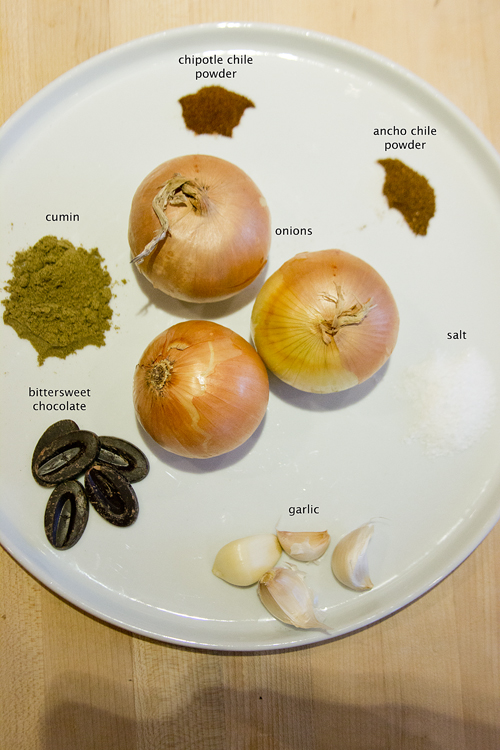
This chili relies on both dried whole chiles as well as chile powders. The combination of whole chiles and powder add a depth of flavour to the chili that you would not get if you just used chili powder. For the whole chiles, I used both New Mexico and Guajillo chiles. Ancho chiles would also be an excellent choice. I buy my dried chiles on-line from chilly chiles.
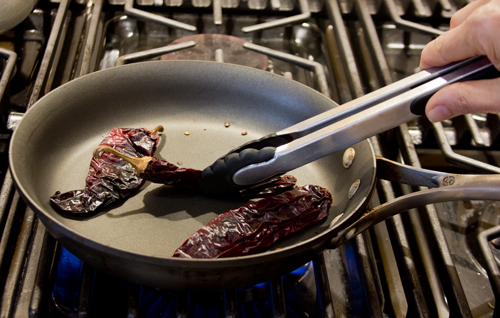
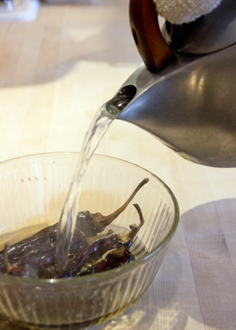
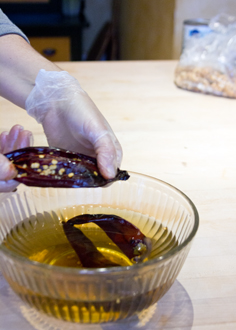
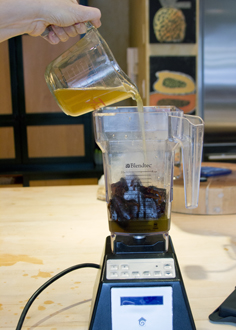
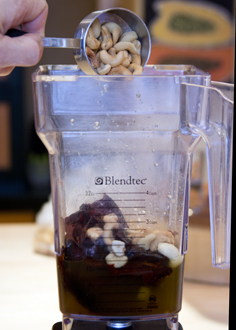
The dried whole chiles need to be toasted and then soaked in boiling water to rehydrate them for about 20 minutes. Once they are soaked, I removed the seeds. If , like my sister, you like your chili painfully spicy, feel free to add the seeds as well. The rehydrated chiles get blended with chicken stock and some cashews to create an incredibly flavourful sauce. The cashews add body to the sauce.
Ground cumin, ancho chili powder, chipotle chile powder, salt, onions and garlic round out the additional spices. Canned tomatoes and the pureed chiles create a liquid base for one cut up chicken. Once the chile is done simmering, a touch of bittersweet chocolate is added. The chicken is removed from the sauce once it is done and the meat is removed from the bones and shredded. It goes back into the sauce with some canned white and black beans. Rich, sweet and mildly hot, this chile takes the edge off any roughness in your day!
I’m not quite sure why, but goal setting has always made me uncomfortable. So it goes without saying that I am not big on making New Years Resolutions. That being said, as 2012 came to a close last night, I am feeling in a reflective mood. I suppose that happens naturally as we age. While I don’t have any specific goals in mind, my fervent hope is that I will age gracefully! By that I mean that I wish to be an interesting, informed, engaged and active member of society in my senior years. I have been blessed to have known several such women in my lifetime.
I do not want to spend my later years in isolation, feeling bitter and unloved. Aging gracefully requires acceptance and on the flip side, a healthy amount of denial. Although, to be completely honest, I am not quite ready to accept that without the aid of Schwarzkopf Golden Brown 254, I would be completely grey! Good genetics and luck certainly play a role, but I firmly believe that the keys to aging include staying active and challenging yourself to step out of your comfort zone and be open to trying new experiences.
That being said, while I am active each day, I tend to get stuck in a rut and am not exactly adventurous regarding trying new activities. I have several friends who have discovered the joy of spinning and one in particular who has become addicted to it. She says that she sweats all the toxins out of her body during spin class and attributes this form of exercise to her glowing complexion and firm body. If I didn’t love her so much, it would be very easy to be jealous. My husband is an avid biker (not the Hell’s Angels kind!) and has also recently jumped on the spinning bandwagon.
I am pleased to announce that I recently lost my virginity! My spinning virginity, that is. We were away on a family holiday in Costa Rica and last week I shocked my husband by signing us up for a spin class. My goal for my first class was to stay on the bike for the entire 50 minutes and not have to do the walk of shame, leaving the studio, halfway through, trailing a puddle of sweat behind me as I retreated.
For all you spinning novices our there who may be tempted to give it a whirl, here are my helpful hints to get you through your first class:
When the instructor tells you to turn up the resistance on your bike, put your hand over the tension knob and pretend you are increasing it, but do not, under any circumstances, dial it up. Remember to begin spinning a little slower so that it looks like you actually have increased the resistance.
Avoid eye contact with the instructor.
Resist the urge to jump off your bike and stuff your towel down the instructors throat as he continually yells what he believes to be motivating little bon mots to get you to work harder.
If you think you are going to throw up and/or die, and really do need to stop for a minute or so, get off the bike under the guise of adjusting the seat height. This should buy you a minute or two to catch your breath.
Resist the urge to jump off your bike and rip the power cord of the stereo system out of the wall because the techno beat of the music is making you want to scream. Recite something calming in your mind instead. I did my yoga chant and closed my eyes.
I successfully managed to stay on for the entire class and further shocked my husband by signing up for the next day’s class. As of this writing I have attended four spin classes and during my last class, I do believe I won the “Sweat Game.” The rules are fairly rudimentary. Whoever has the biggest puddle of sweat under his or her bike at the end of class, is the winner. Extra points for not slipping and wiping out in your own puddle of sweat when class is over.
I am planning to continue attending spin class at when I get home although I doubt that the view at my local Goodlife can compete with this one. Oh well, I can always close my eyes and imagine!
Flushed with success at attempting something new (spinning), I decided to challenge myself to experience something new each and every day while on holiday.
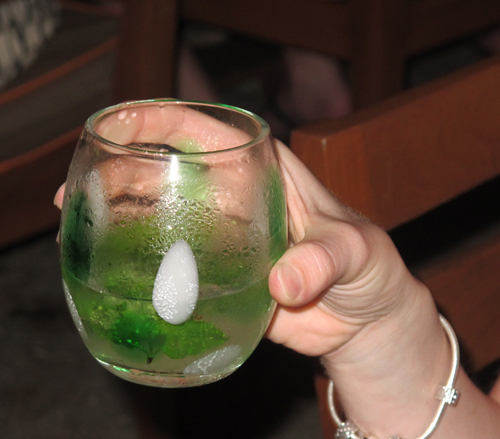
On Tuesday, I had my very first Mojito! It was challenging, but I managed to finish the entire glass in about 10 minutes! I discovered that indeed, I do like rum!
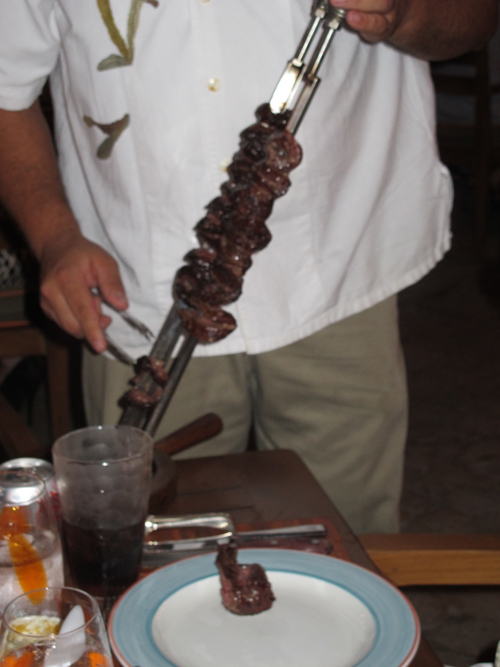
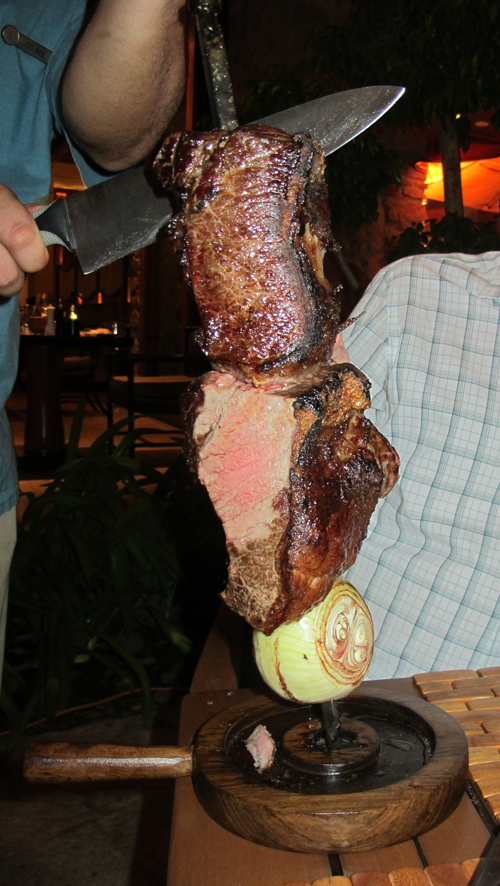
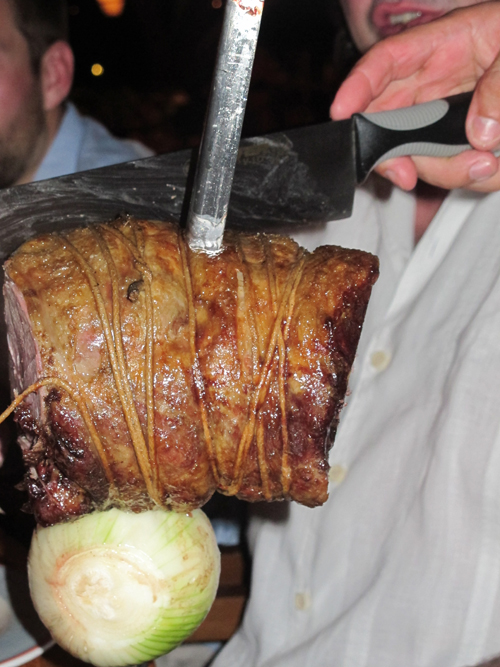
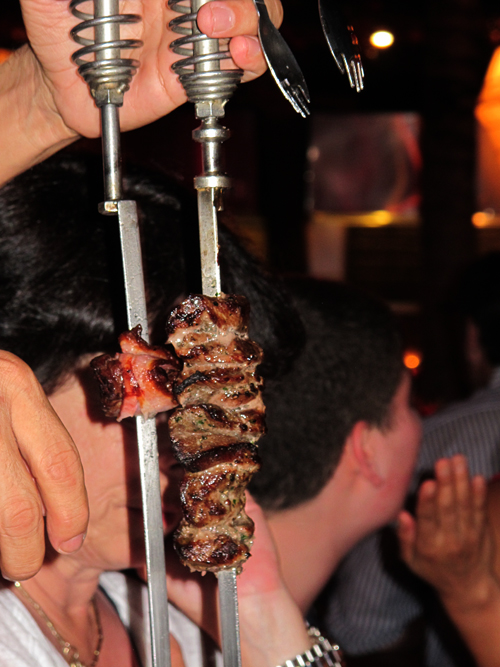
On Wednesday, I had my very first “Churrasqueira” experience. Churrasqueiras are restaurants serving grilled meat, many offering as much as you can eat: the waiters move around the restaurant with the skewers, slicing meat onto the client’s plate. Here at our hotel the skewers contained nine signature cuts of meat: Marinated Chicken Wings, Mexican Style Chorizo, Marinated Pork Belly, Baby Sirloin, Top Sirloin, Rib Eye Steak, Filet Mignon, Skirt Steak, and Boneless Leg of Lamb.
On each table was a round little disc of cardboard. One side the disc was coloured green, signifying to the waiters that you are a serious carnivore and wish the meat parade to continue. The flip side of the disc is red, which lets the waiters know that you have already unbuttoned your pants and are unable to swallow another bite. Mercifully, once they see red, they will stop bringing meat to your table. One member of our group is on the Paleo diet and he was in pure ecstasy. Luckily, his shorts had an elastic waistband that night.
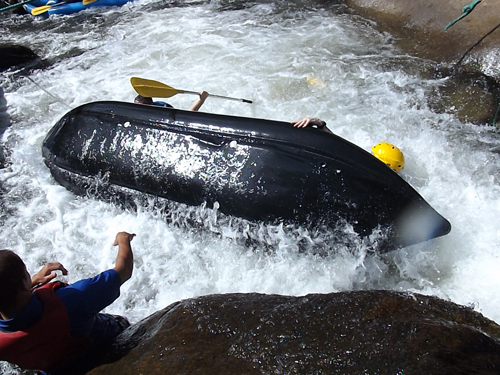
One of the good things about aging is that your memory begins to fail. While on the surface, this may seem like a negative thing, it can actually be a quite agreeable and favourable. On Thursday, we went white water rafting. Apparently we had been to these rapids the last time we were in Costa Rica in 2005. I had no recollection of it whatsoever, so the whole experience was new and fresh for me. And quite an exhilarating thrill. My husband sat in the stern of our rubber raft and was masterful at guiding us through the class 3 rapids. We only got bounced out of our raft once.
Today we visited Rio Perdido, a thermal mineral gorge. They had a series of zip-lines and other aerial adventures that are not for the faint of heart. In my continual quest to try something new each day of this holiday, I swung over the Rio Blanco Canyon in a fantastic imitation of a human pendulum. I climbed to the top of a platform and on what can best be described as a “Tarzan swing” I held on for dear life (I was attached to safety cables, lest you think I have completely lost my mind) and swung over the gorge from one platform to the other. The guide on the opposite platform was supposed to catch me as I swung towards him, but he pushed me and I swung back to the first platform where the guide pushed me back again, as if I were on a giant swing! I screamed quite loudly to the amusement of my entire family. Apparently they do this to everyone and I was the last one in on the joke! My pounding heart certainly reminded me that I was alive and well!
In two days our blissful holiday comes to an end. While it is unlikely that I will continue on my once a day newness quest, I certainly intend to continue to open myself up to new experiences. If my glowing friend is reading this, save me a seat at spin class!
This is a photo of my backyard. Last week 40 centimeters of snow fell on our city and yesterday, to add insult to injury, an additional 25 centimeters piled up! That’s over 2 feet of snow for those of you not familiar with the metric system. In any language, it’s a sh#@load of snow!
Just In case there is any doubt about where I fall on the love-hate spectrum of winter, I reside on the far right. I despise winter! However, my oldest son recently became certified to teach skiing, so in the generous spirit of the season, I am thrilled for him and all the skiers out there.
Last week, I promised no more cookie postings in December. However, I did not promise no more sugar. I couldn’t go cold turkey without sugar, so there is just a little bit of brown sugar in the following recipe. I felt that I needed to offer you a warm buffer against the nastiness that is winter.
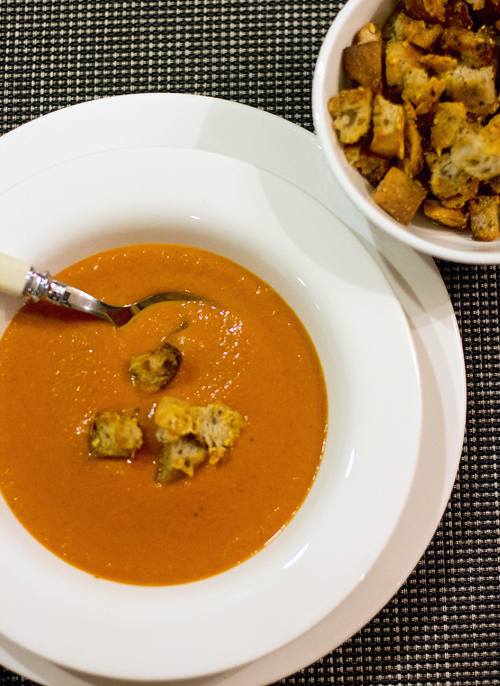
A big bowl of steaming hot tomato soup and a grilled cheese sandwich are the consummate comfort lunchtime meal for many a school age child. That being said, my childhood lunchtime never included this classic tummy warmer.
When I was growing up, my sisters and I came home from school everyday for lunch. Our public school was a short 8-minute walk from our house. The walk could be done in 7 minutes if we took the shortcut, but I seem to recall that we had to pass by a scary house if we took it, so we toughed out the extra minute. We always watched the Flintstones at lunchtime and usually ate Kraft Dinner or a Swanson’s Chicken Pot Pie or a T.V. Dinner. Hey, it was the 70’s and we were a modern family!
I never really developed a taste for tomato soup until recently. I tried Campbell’s tomato soup in university and didn’t particularly care for it. If I needed comfort, my go-to soup was my mom’s chicken soup or, in a pinch, Campbell’s Chicken Noodle.
Lately, I have been noticing tomato soup popping up on restaurant menus and on all the food web sites and magazines. The world is a darker and scarier place now and I suppose tomato soup is the quintessential reminder of those simpler, gentler times.
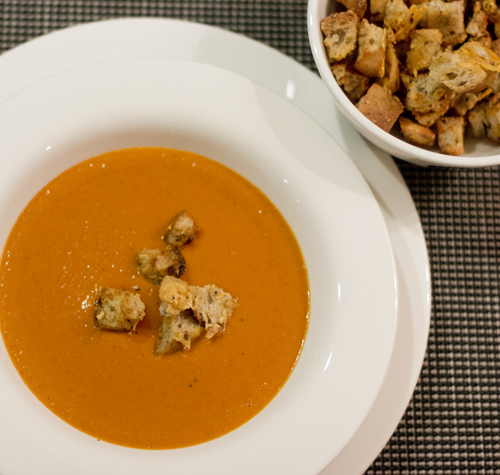
I discovered this Brown Sugar Roasted Tomato Soup on www.seriouseats.com. I get an e-mail everyday from them. Serious Eats is a website focused on celebrating and sharing food enthusiasm through blogs, video and online community. They are passionate about food, informative, inclusive and, most importantly, they make me laugh.
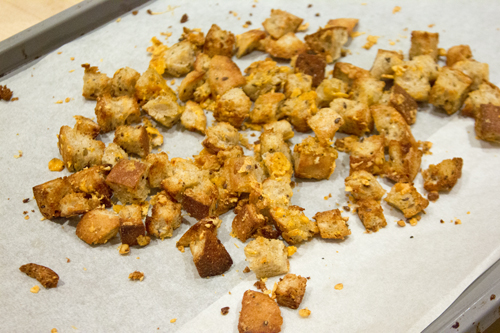
Instead of serving this soup with the traditional grilled cheese sandwich, it gets a topping of cheddar cheese croutons. Brilliant, and quite delicious, this may become your new favourite go to comfort food when your world seems a little too treacherous and uncertain to handle.
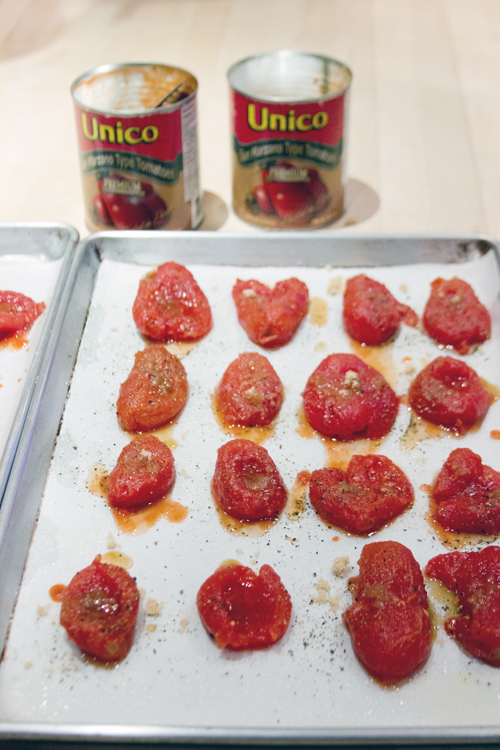
Canned tomatoes are drained and then topped with a little brown sugar to enhance their natural sweetness. A quick roasting in the oven and the tomatoes and brown sugar caramelize into sweet deliciousness.
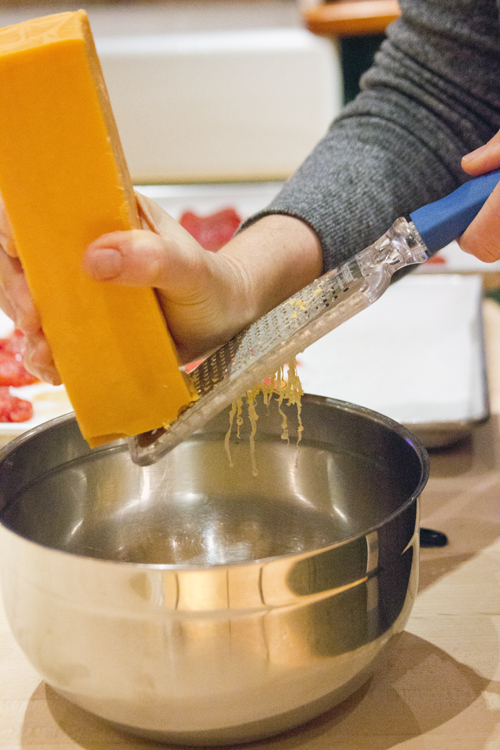
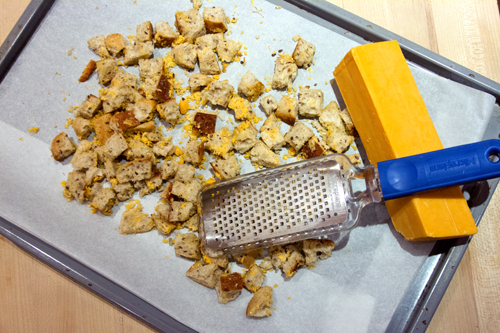
Finely grated cheddar cheese and olive oil get massaged into some whole grain bread cubes and then the whole lot gets tossed into a hot oven.
You know that it is time to stop posting new cookie recipes on your blog when your inbox begins to fill up with comments from readers who tell you that they have baked several batches of your cookie recipes and now their clothes are feeling a little snug. Hey people, I got my own tight pants problems here!
So, that being said, I promise that this is my last cookie post for December. These cookies were inspired by Alice Medrich. In her book, Chewy Gooey Crispy Crunchy Melt-in-Your-Mouth Cookies, I was transfixed by a recipe for Salted Peanut Toffee Cookies. After reading her description, I knew I had to try these.
“Encrusted with toffee-coated peanuts and accented with flaky sea salt, these updated peanut butter cookies have a tender, melt-in-your-mouth shortbread texture. “
I whipped up a batch but sadly, I found the cookies to be a bit dry. I was envisioning a chewy peanut butter cookie with a crunchy coating. And then I remembered Mom Mom Fritch’s Peanut Butter Cookie recipe. My sister sent me this recipe almost 12 years ago and we had a good laugh over the name Mom Mom.
You see, when my first son was born, almost 23 years ago, he was my parent’s first grandchild. We asked my dad what he would like to be called, perhaps Zaidy or Grandpa. He said no, since he called his dad Pop, it only seemed fitting that now he would be called Pop Pop. As a joke, my husband said to my mom, and we’ll name you “Mop Mop.” We all laughed but somehow the name has stuck and 13 grandchildren later she is called Mop Mop (or more affectionately Moppy) by all those near and dear to her.
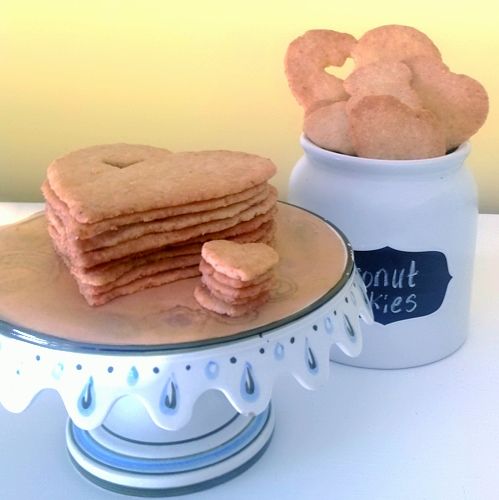
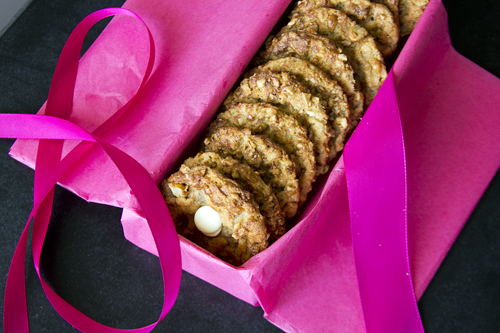
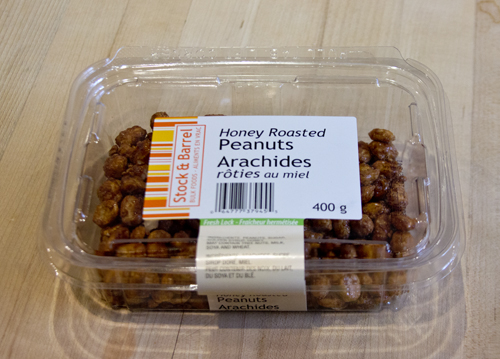
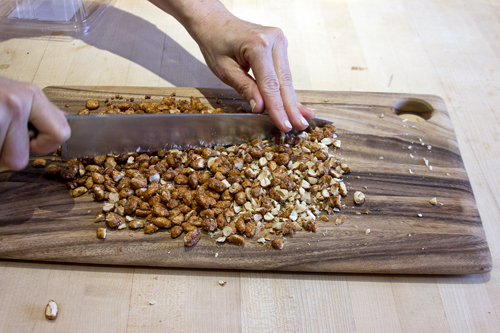
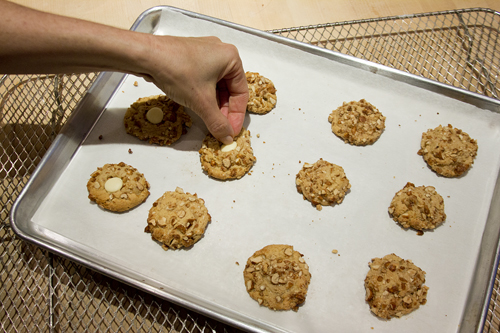
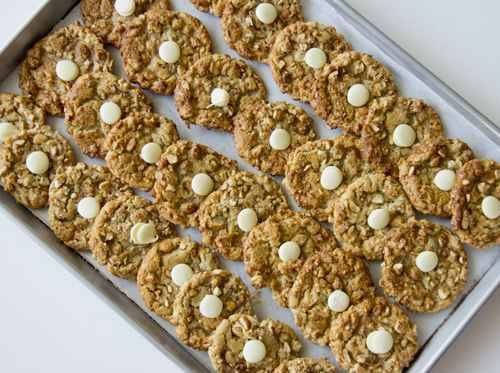
As it turned out, Mom Mom Fritch makes killer peanut butter cookies. There is no flour in her recipe, so they are super chewy and moist. Rolling them in chopped honey roasted peanuts before baking adds a wonderful crunchy texture which contrasts so well with the chewy cookie in the center. I decided to take them up a notch further and pressed a nugget of white chocolate into each cookie as soon as they came out of the oven. (That genius idea was courtesy of Alice Medrich.) Heaven!
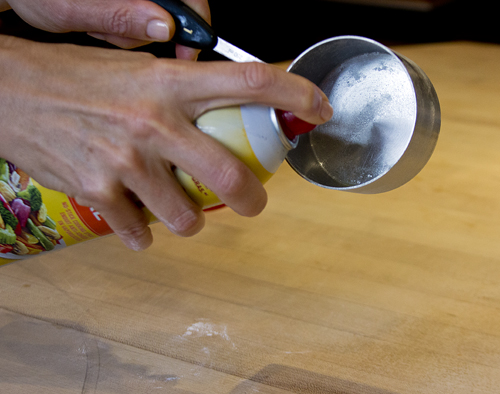
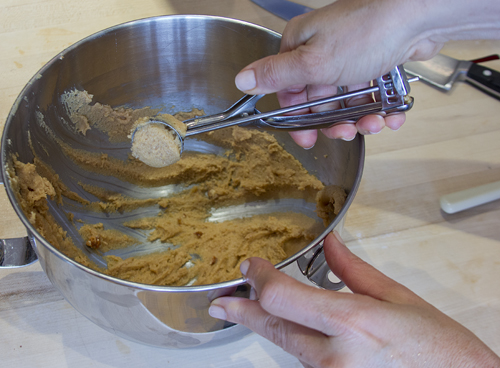
Spray your measuring cup with Pam and the peanut butter will slide right out!
Using a 1 tablespoon spring loaded scoop makes easy work of forming the balls.
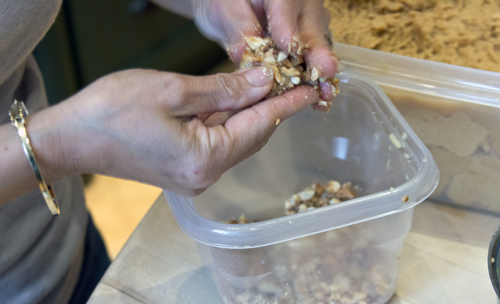
Roll peanut butter ball in egg wash and then into chopped honey roasted peanuts. You will need to press the chopped nuts into the ball to get them to stick.
Press a nugget of white chocolate into each cookie as soon as they come out of the oven.