Tag Archives: Holiday Cookies

Prue Leith’s Chocolate Caramel Hobnobs (And Why I Had to Make Them)

Stack of Chocolate Caramel Hobnobs with feathered dark and white chocolate topping, displayed on a plate with additional cookies in the background.

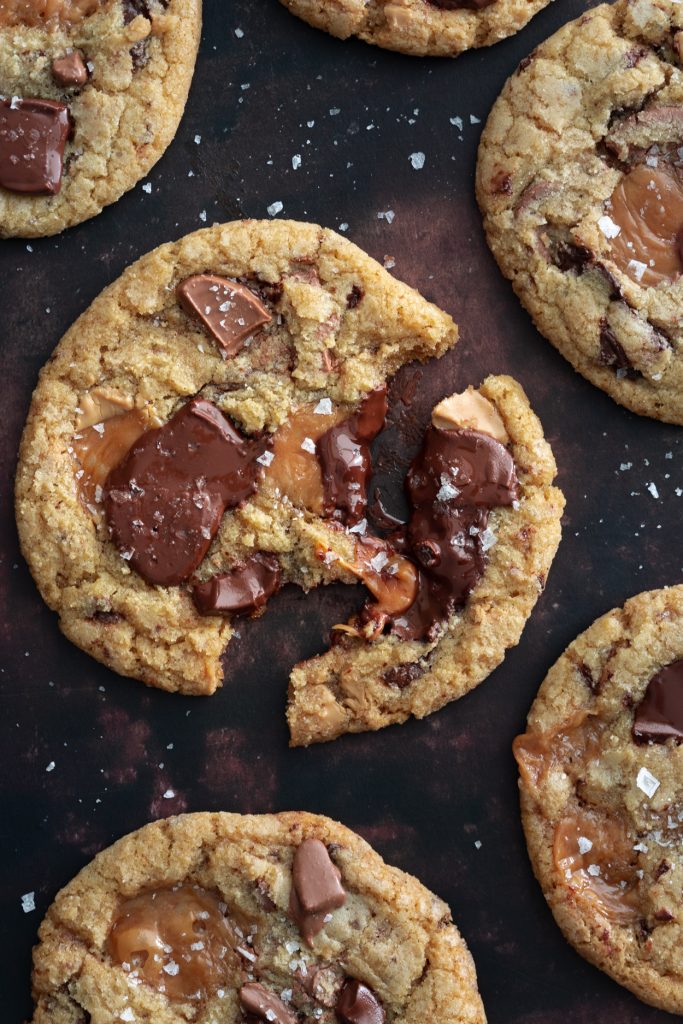
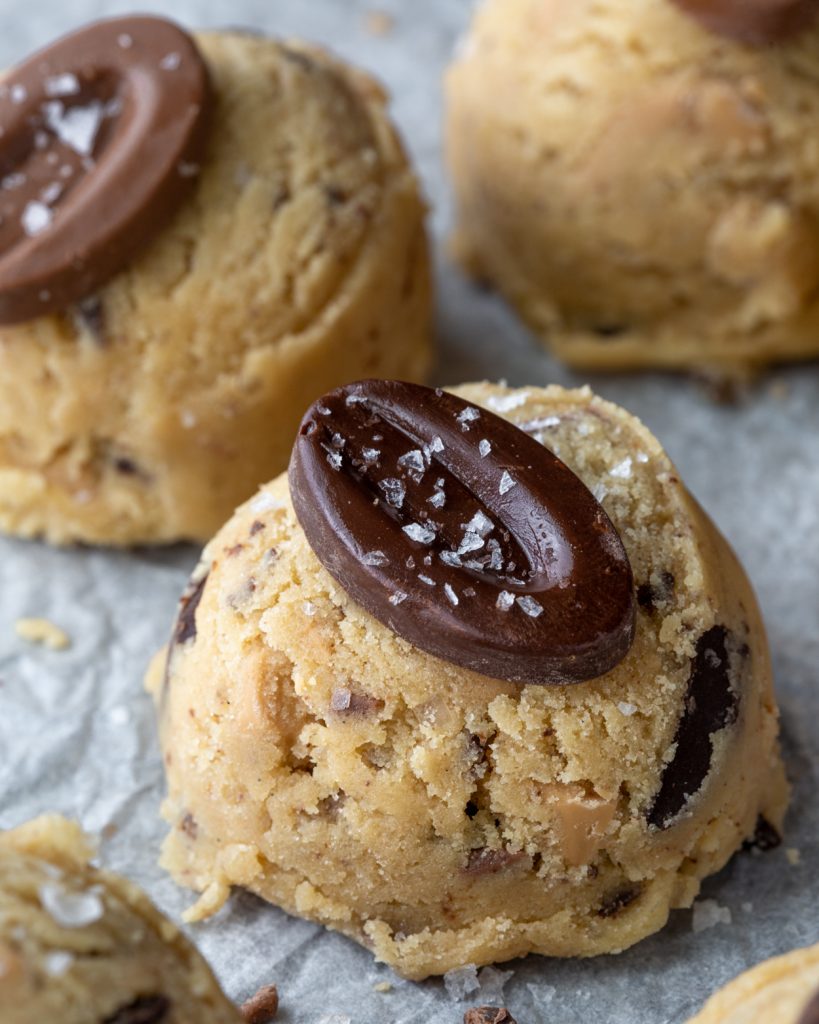
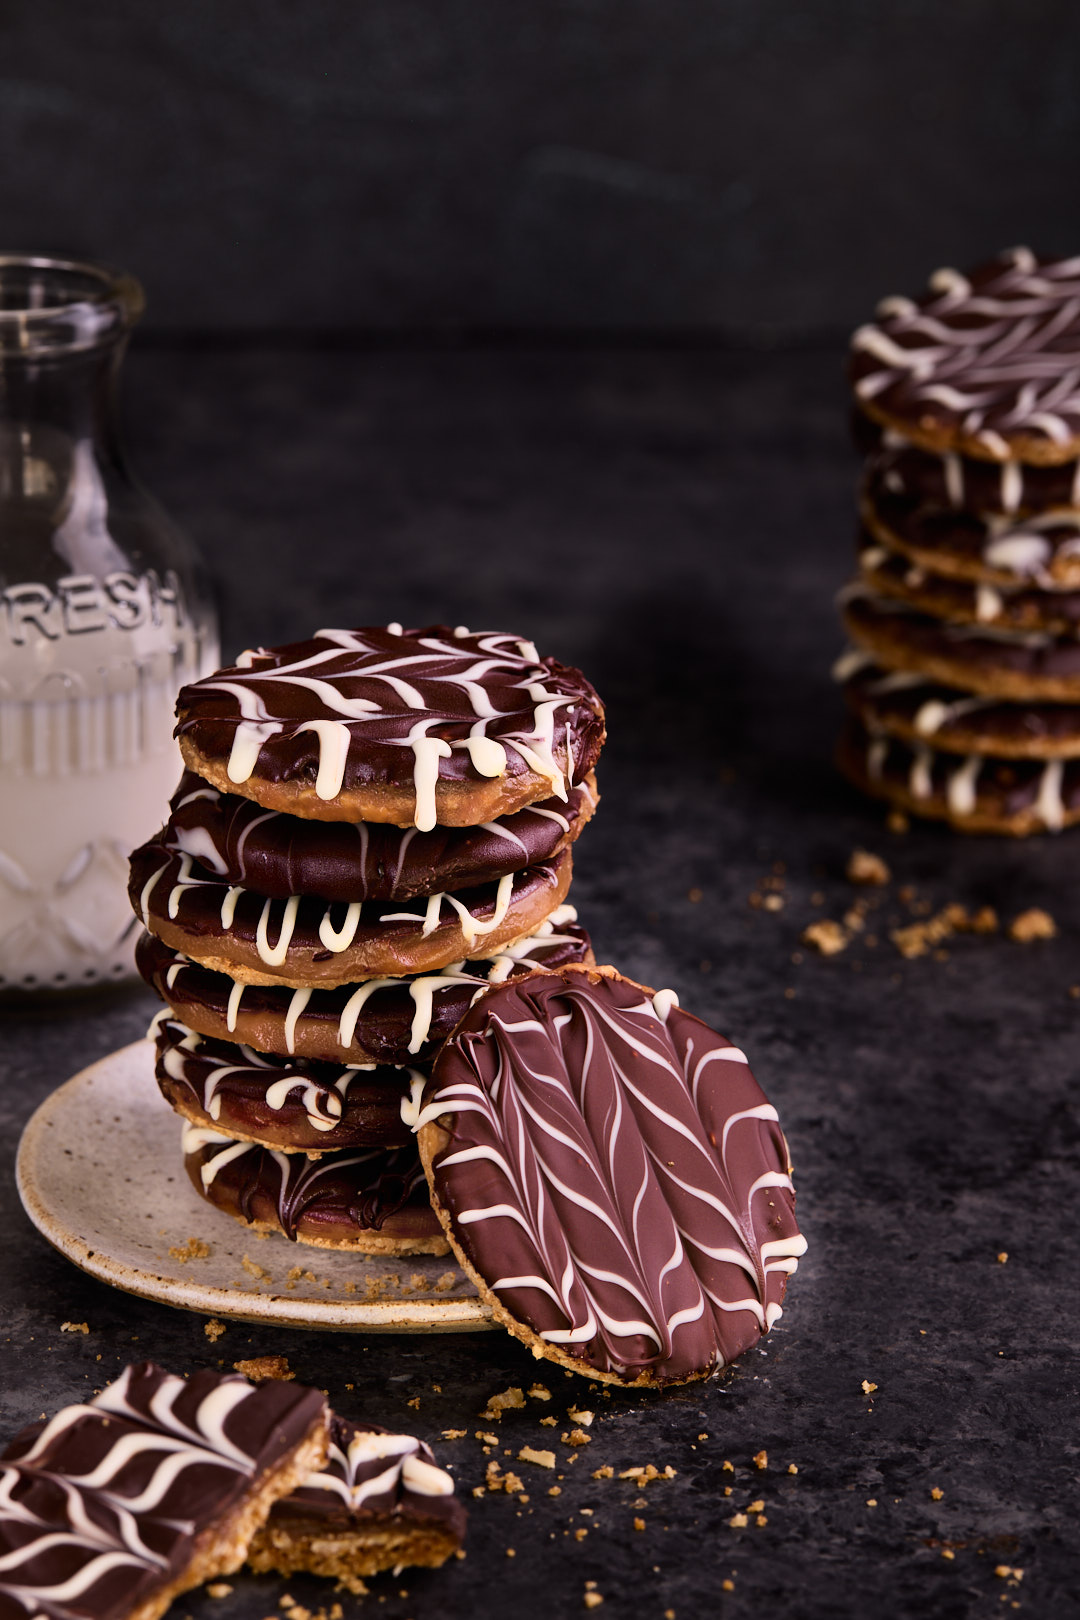
As soon as I saw these Chocolate Caramel Hobnobs appear as the technical challenge on The Great British Bake Off, I knew immediately I had to make them. They’re Prue Leith’s fancy, extra-indulgent take on the classic British biscuit — toasty oats, chewy centres, a thin layer of glossy caramel, and a smooth feathered chocolate coating on top. The ingredient list includes whole wheat flour and rolled oats… almost wholesome, until they’re not.

These are cookies for people who love a baking project. You know who you are. And if that’s not you, feel free to enjoy the pretty pictures and video and move right along. What I love most about these is the textural contrast: bite through that snappy chocolate shell and it yields to a chewy caramel layer before giving way to the oat-packed cookie underneath. Plus, they’re undeniably beautiful — the kind of treat that looks as impressive as it tastes.

If you’re new to Hobnobs, you’re not alone — they’re a beloved British biscuit that many North Americans have never tasted. Think of them as a toasty, crunchy oat cookie with a rustic, nubbly texture and just the right amount of sweetness. They’re famously good with tea and deeply nostalgic in the U.K. The chocolate-covered version is iconic, and once you try one, you immediately understand why they have such a loyal following.

Keys to Success in baking Prue Leith’s Chocolate Caramel Hobnobs

  • Use the right oats: Large-flake (rolled) oats provide the signature texture. Quick oats or instant oats won’t give the same chew or structure.
  • Don’t skip double-panning: Stacking two baking sheets prevents the bottoms from over-browning while the cookies bake and helps them stay crisp without burning.
  • Chill the dough before cutting: Rolling the dough between parchment and chilling it for 15 minutes makes it firm enough to cut clean, even rounds — and helps the cookies keep their shape in the oven.
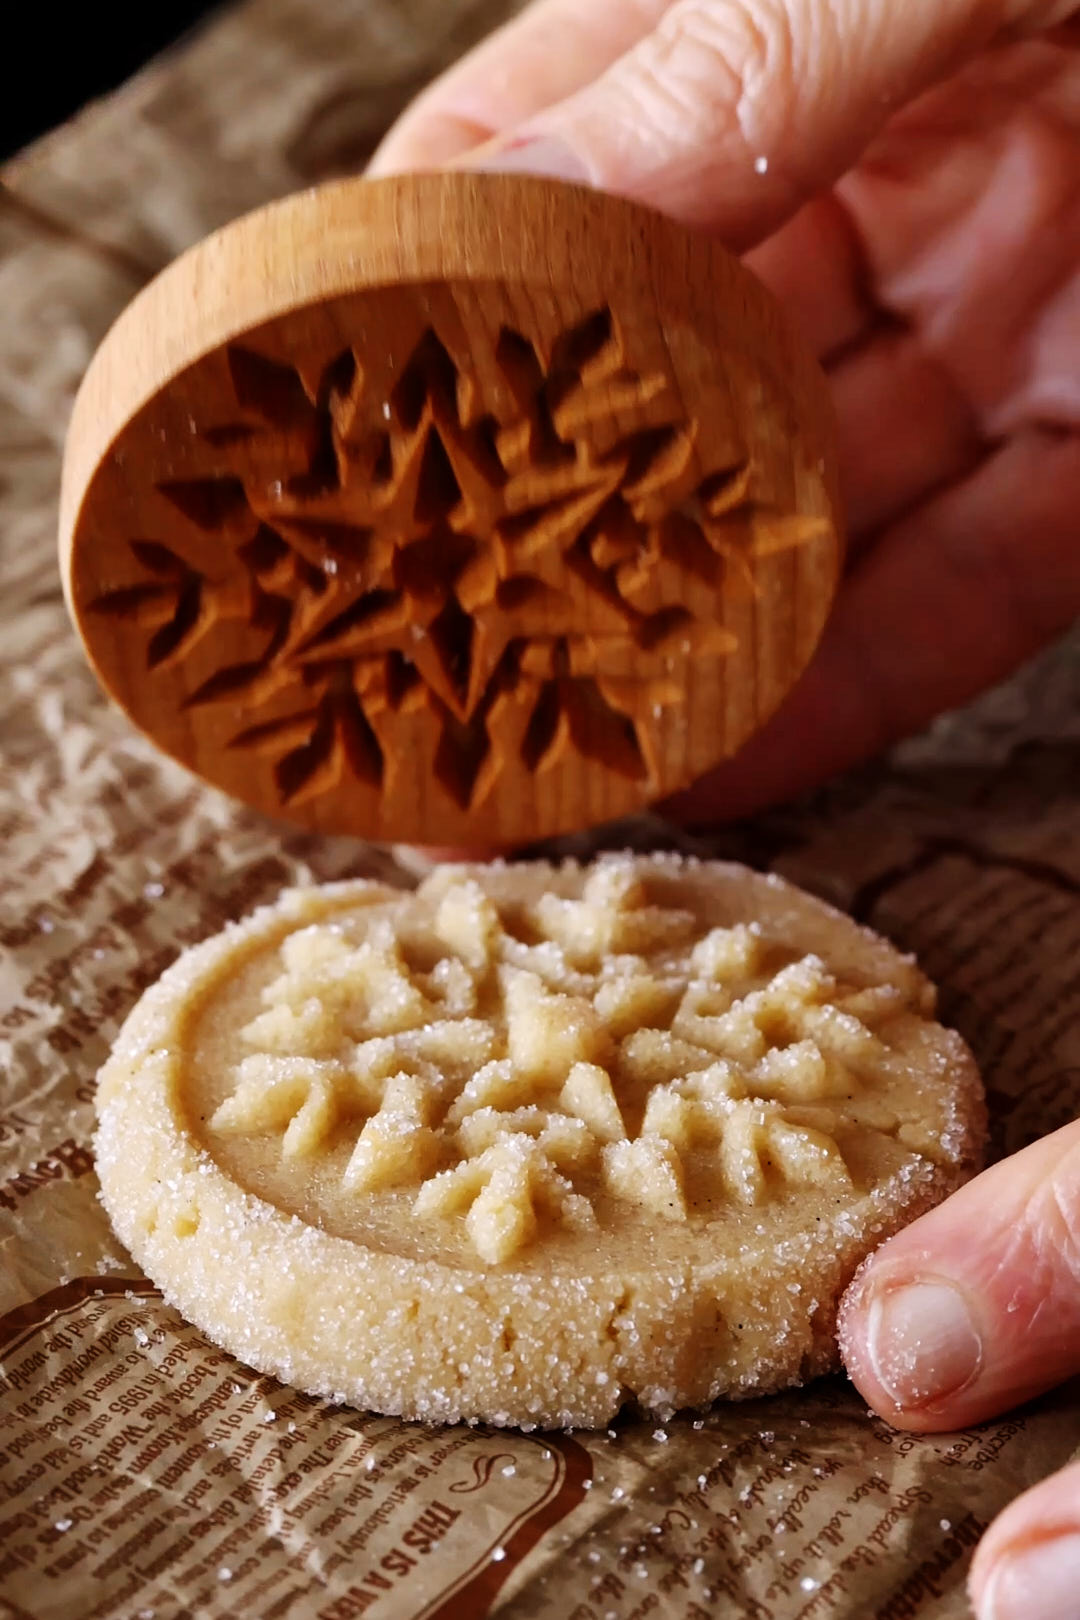
  • Trim the cookies while warm: These bake up a little irregular around the edges (authentic GBBO energy). Pressing the cutter over each cookie while they’re still warm gives you perfect rounds that fit neatly into the silicone molds.
  • Make caramel with confidence: Don’t stir the sugar — just let it melt on medium-low heat and darken to a deep amber. Gently swirl the pan if needed, and wash down any sugar crystals with a wet pastry brush to prevent crystallization.
  • Let the caramel cool before assembling: Cool it until thick but still pourable. Too hot and it will run; too cool and it won’t spread evenly.
  • Use good-quality chocolate, not chocolate chips: Because the chocolate is the visible top layer, choose chocolate you enjoy eating on its own. Tempering isn’t required here, but fully melting and cooling it slightly before dipping gives a cleaner finish.
  • Feather the chocolate while it’s still wet: Work one cookie at a time. Dip a cookie in the dark chocolate, pipe the white chocolate lines immediately, and feather them right away. Don’t dip all the cookies first and try to feather afterward — the dark chocolate will begin to set, and you won’t get clean, defined lines.
  • Pipe thin lines of white chocolate, then drag a toothpick through to create the classic feathered pattern. Timing is everything — if the chocolate begins to set, the feathering won’t be clean.

Prue Leith’s Chocolate Caramel Hobnobs

saltandserenity
These are Prue's twist on the classic Hobnob. A layer of caramel and an elegant feathered chocolate topping take the classic Hobnob to a new level.
Servings 12 cookies
Calories 412 kcal

Equipment

  • 1 heavy bottomed small saucepan
  • 1 candy or instant read thermometer
  • Two 3 inch non-stick round silicone baking pans
  • 1 3-inch round cookie cutter
  • 1 wooden toothpick or wooden skewer

Ingredients
  

Cookies

  • 100 grams unsalted butter
  • 35 grams granulated sugar
  • 40 grams light brown sugar
  • 1 Tablespoon Golden Syrup
  • 50 grams all-purpose flour
  • 50 grams whole wheat flaour
  • 100 grams large flake (rolled) oats, not quick cook or instant oats
  • 3/4 teaspoon baking soda
  • 1/4 teaspoon Diamond Crystal Kosher salt, or 1/4 teaspoon Morton's kosher salt

Caramel

  • 100 grams granulated sugar
  • 100 grams 35% cream
  • 100 grams unsalted butter, cut into 1/2 inch cubes

Chocolate Coating

  • 400 grams bittersweet chocolate
  • 100 grams white chocolate

Instructions
 

Cookies

  • Preheat oven to 350°F
  • Cream the butter and sugars: In the bowl of a stand mixer fitted with the paddle attachment, beat the butter, granulated sugar, and brown sugar on medium speed until light and creamy, about 2–3 minutes.
    Add the golden syrup and mix to combine. Scrape down the bowl.
  • Mix dry ingredients: In a separate bowl, whisk together the all-purpose flour, whole wheat flour, oats, baking soda, and salt until evenly distributed.
  • Combine: Add the dry mixture to the butter mixture. Mix on low just until a dough forms.
  • Prepare pans: Stack two half-sheet pans (13 × 18 inches), lining the top one with parchment.
    Doubling the sheet pans prevents the cookie bottoms from over-browning.
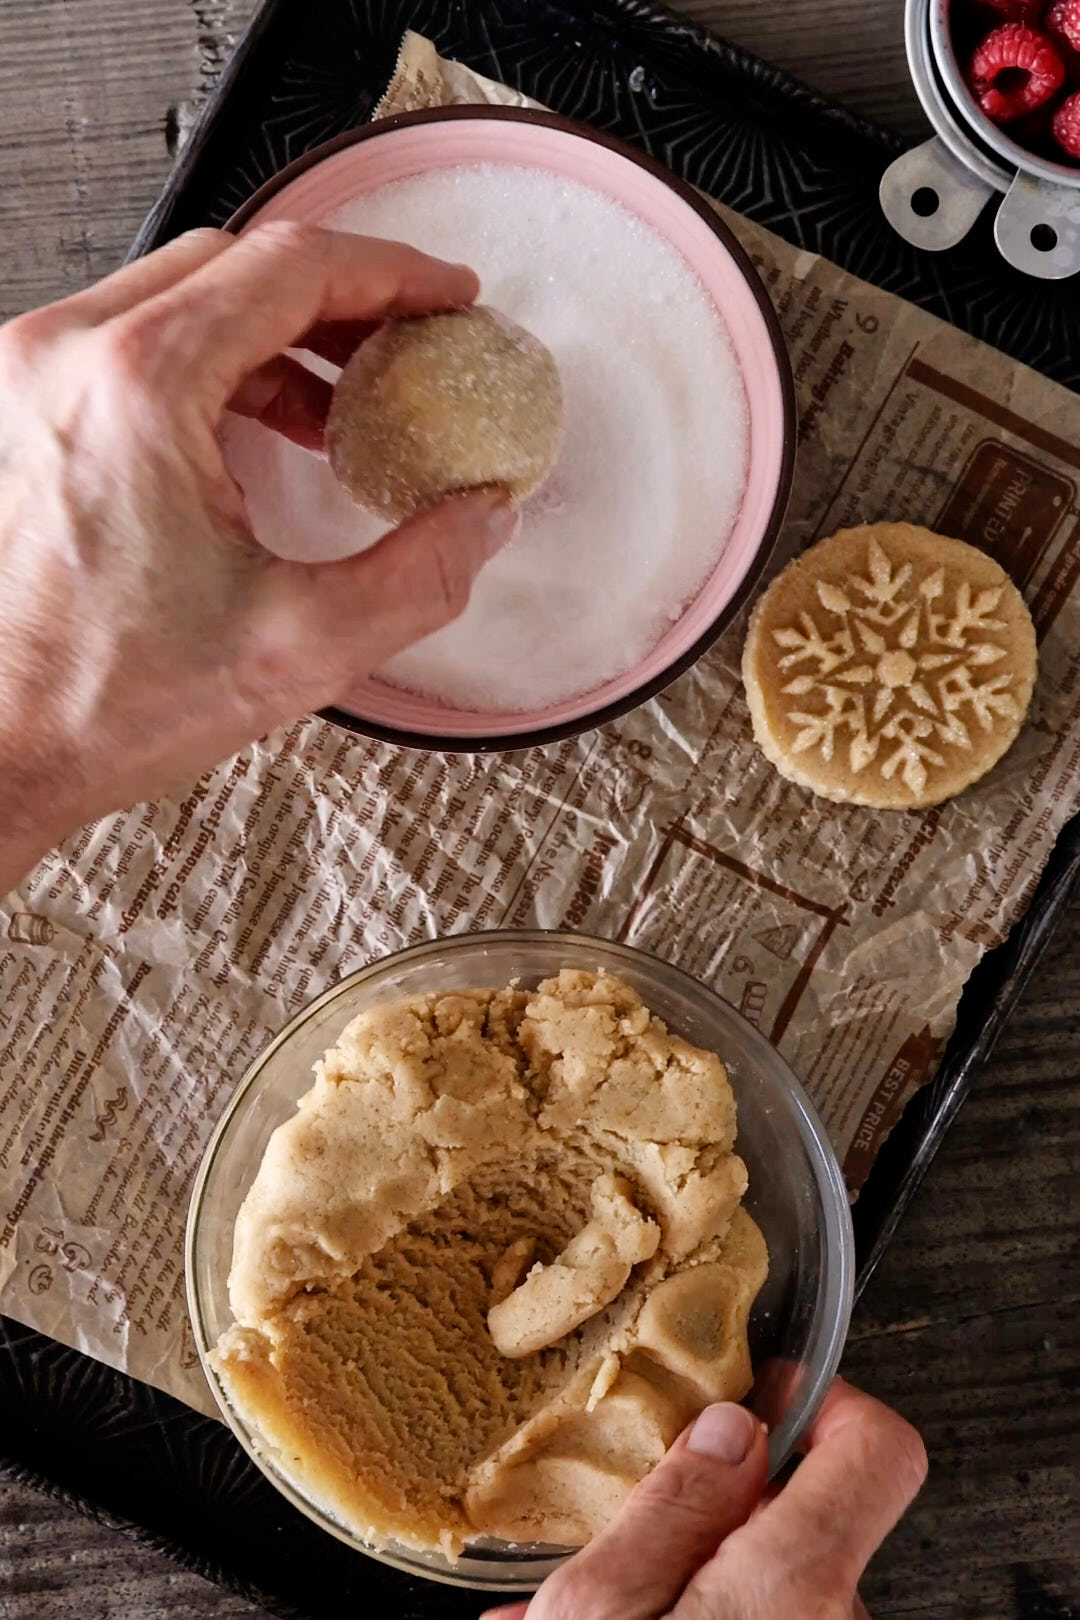
  • Roll and Chill: Turn the dough onto a lightly floured surface. Use your hands to gather together and create a rough rectangular block.
    Roll between two sheets of parchment to a 11 × 8-inch rectangle.
    Chill the sheet of dough for 15 minutes.
  • Cut rounds: Using a 3-inch round cookie cutter, cut 12 rounds.
    Place 6 cookies on the double-lined sheet, spaced apart. Set aside the remaining 6 cookies.
  • Bake: Bake for 6 minutes, then rotate the baking sheet 180°.
    Continue baking 6–7 more minutes.
    Cookies will look slightly irregular and not perfectly round — that’s expected.
  • Trim cookies while warm: While the cookies are still warm, use the 3-inch cutter to trim them into perfect rounds so they fit the silicone molds.
  • Cool: Let the cookies crisp on the baking tray for 5 minutes, then transfer to a rack to cool completely.
    Repeat baking with the remaining 6 cookies.

Caramel

  • Make the caramel: Place the sugar in a small heavy-bottomed saucepan over medium heat. Let it heat without stirring until it begins to melt and turn a deep amber.
    You can gently swirl the pan to help the sugar melt evenly, but avoid using a spoon or spatula.
    If sugar crystals form on the sides of the pot, brush them down with a wet pastry brush to prevent the caramel from crystallizing.
  • Add cream: Carefully pour in the cream. The mixture will bubble vigorously — this is normal. Whisk until smooth.
    Cook until the caramel reaches 248°F on a candy thermometer.
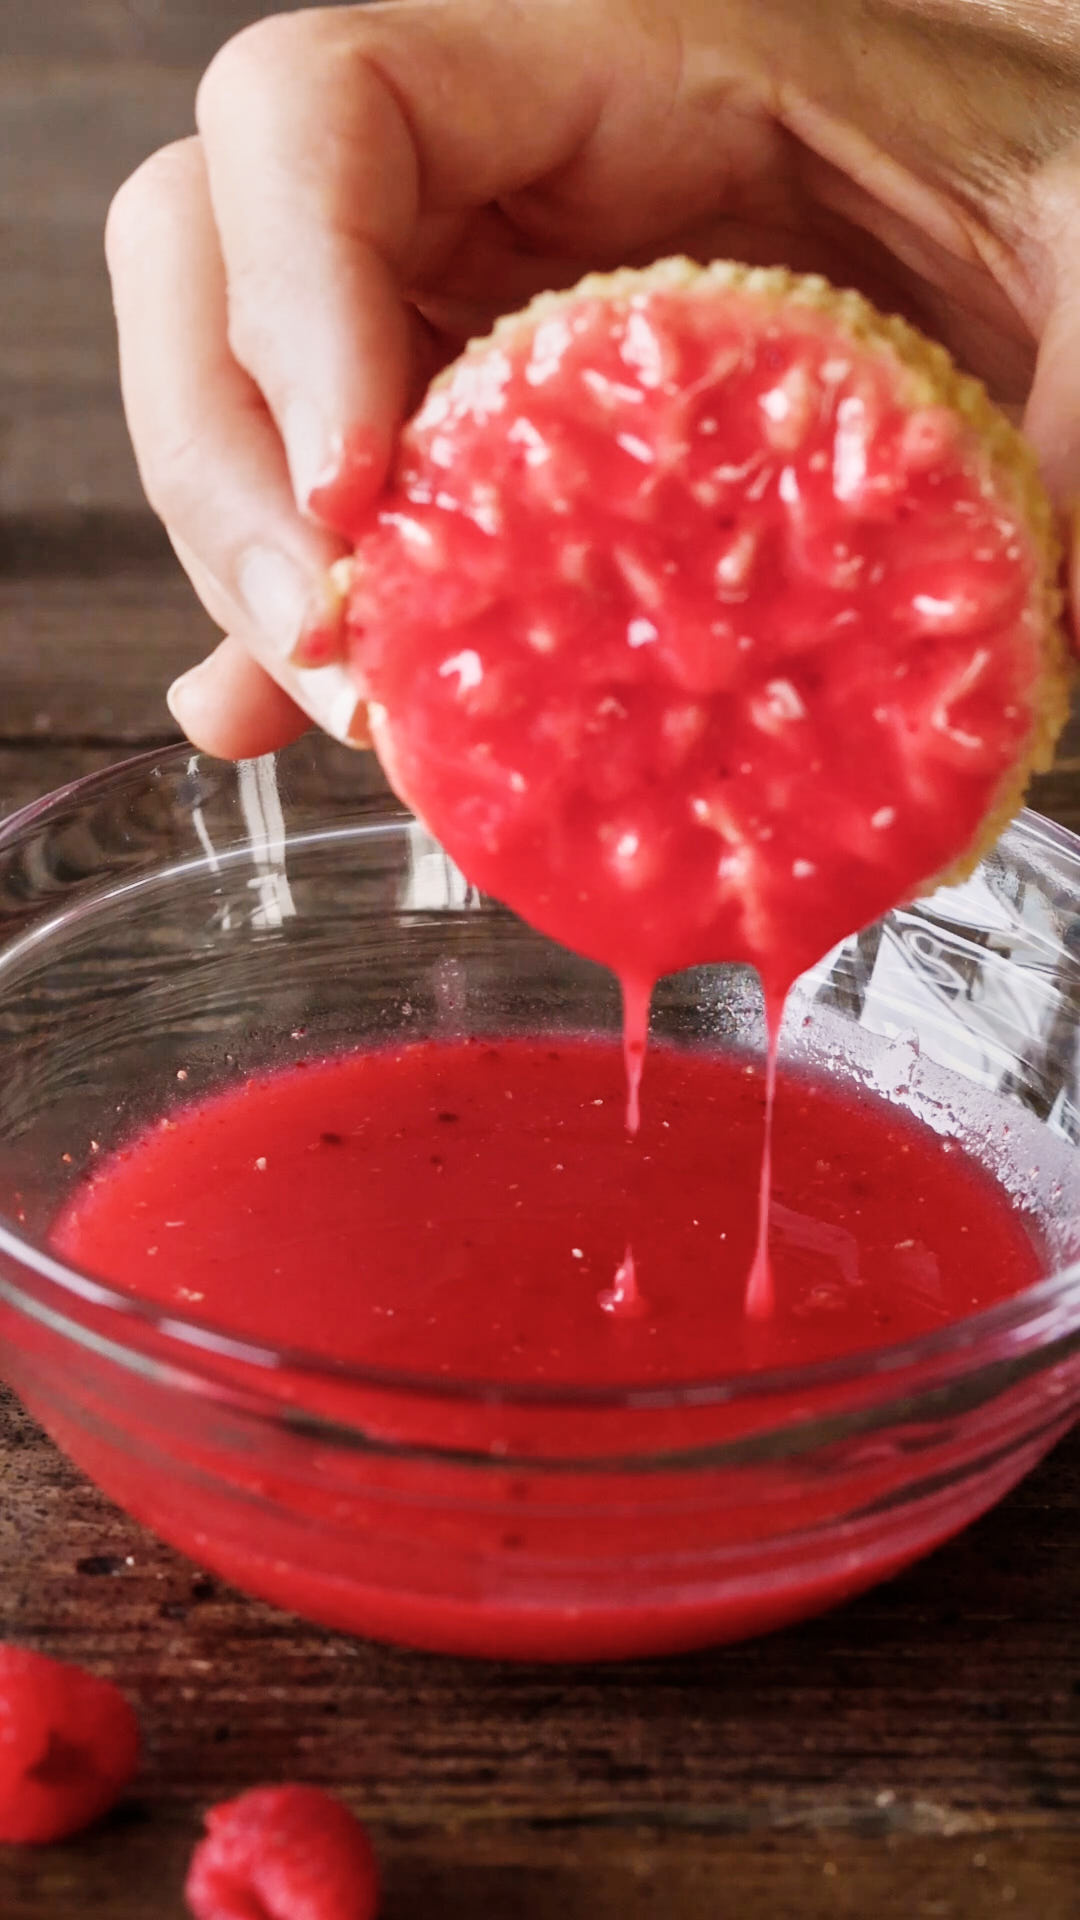
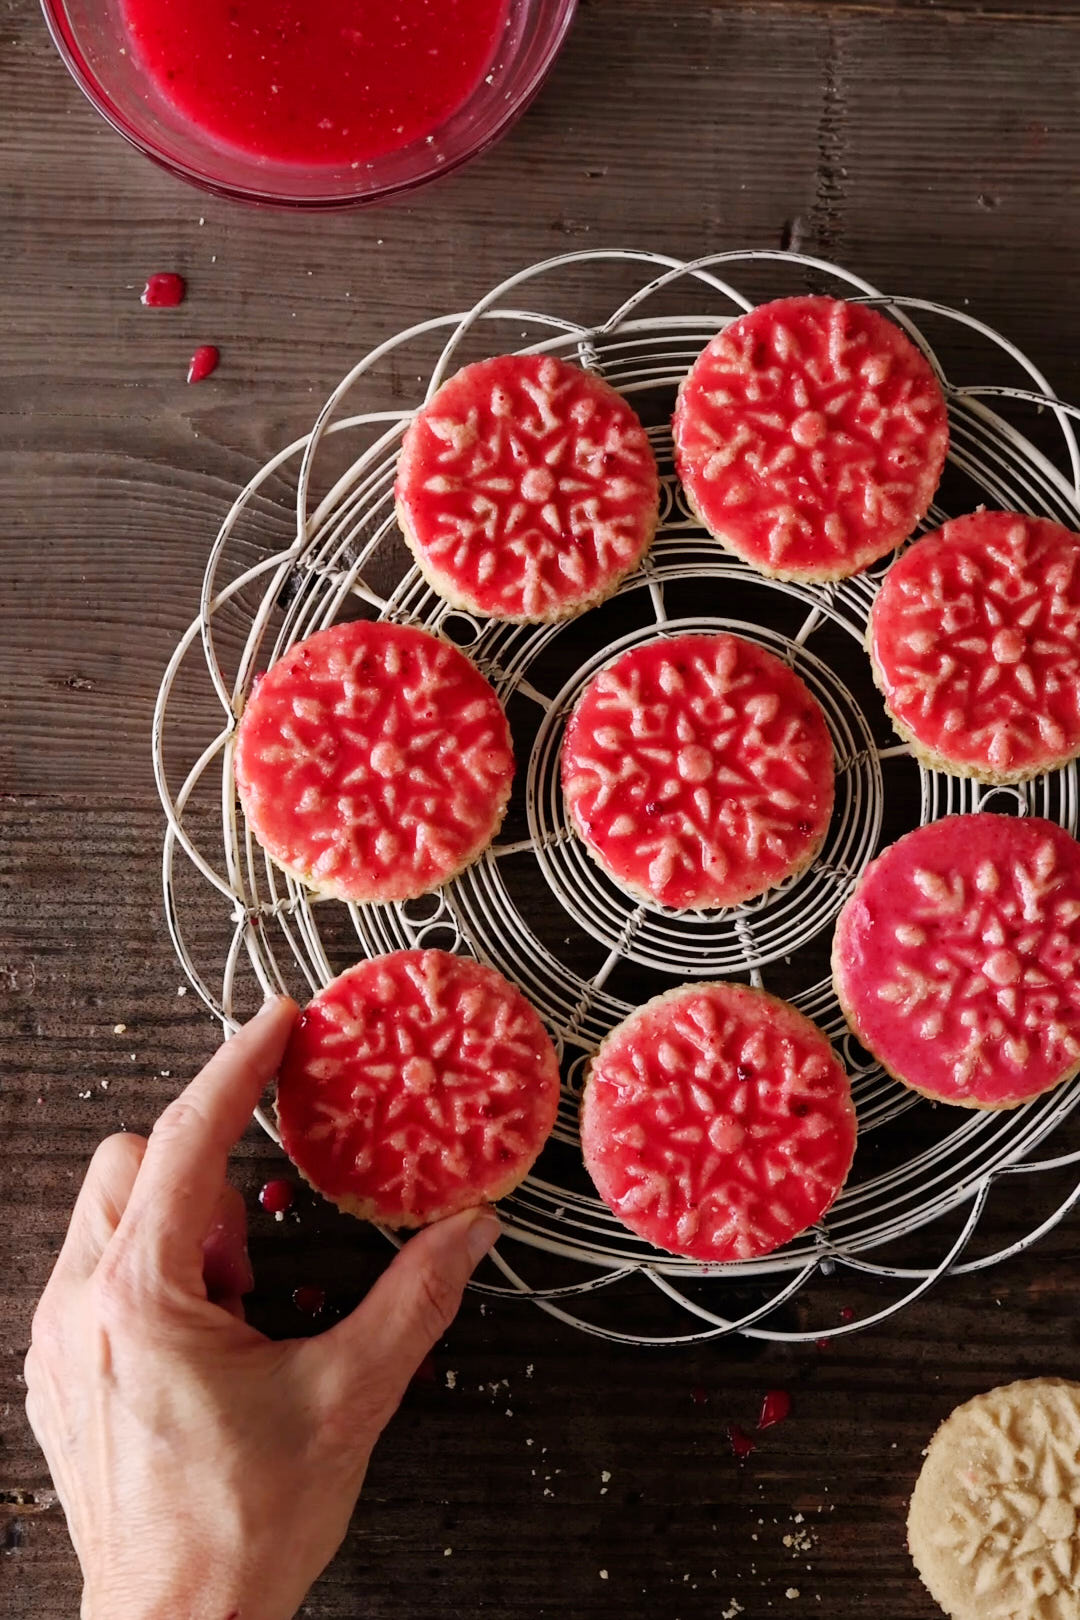
  • Cool and fill silicone molds: Let the caramel cool until thickened but still pourable.
    Spoon a scant 1 tablespoon of the caramel into each of the silicon moulds and place a cookie (base side down) on top of the caramel. Press down gently until the biscuit is touching the caramel then repeat with the remaining 11 cookies. Leave to cool for 10 minutes, then freeze for about 1 hour, until firm. Gently pop the caramel coated cookies out of the moulds.

Chocolate Coating

  • Melt chocolate: Melt bittersweet and white chocolate separately:
    Either in microwave at 50% power in 45-second intervals, stirring between each, or using a double boiler over gently simmering water
  • Set up coating station: Line a baking sheet with parchment.
    Pour the melted dark chocolate into a shallow 4–5 inch bowl.
    Transfer the white chocolate into a piping bag and snip a very fine opening.
  • Dip and Feather: Working with one cookie at a time:
    Dip the caramel side into the dark chocolate
    Let excess drip off
    Place on the parchment-lined sheet
    Before the dark chocolate sets, pipe five thin lines of white chocolate across the top of each cookie.
    Drag a toothpick or skewer through the lines to create a feathered pattern.
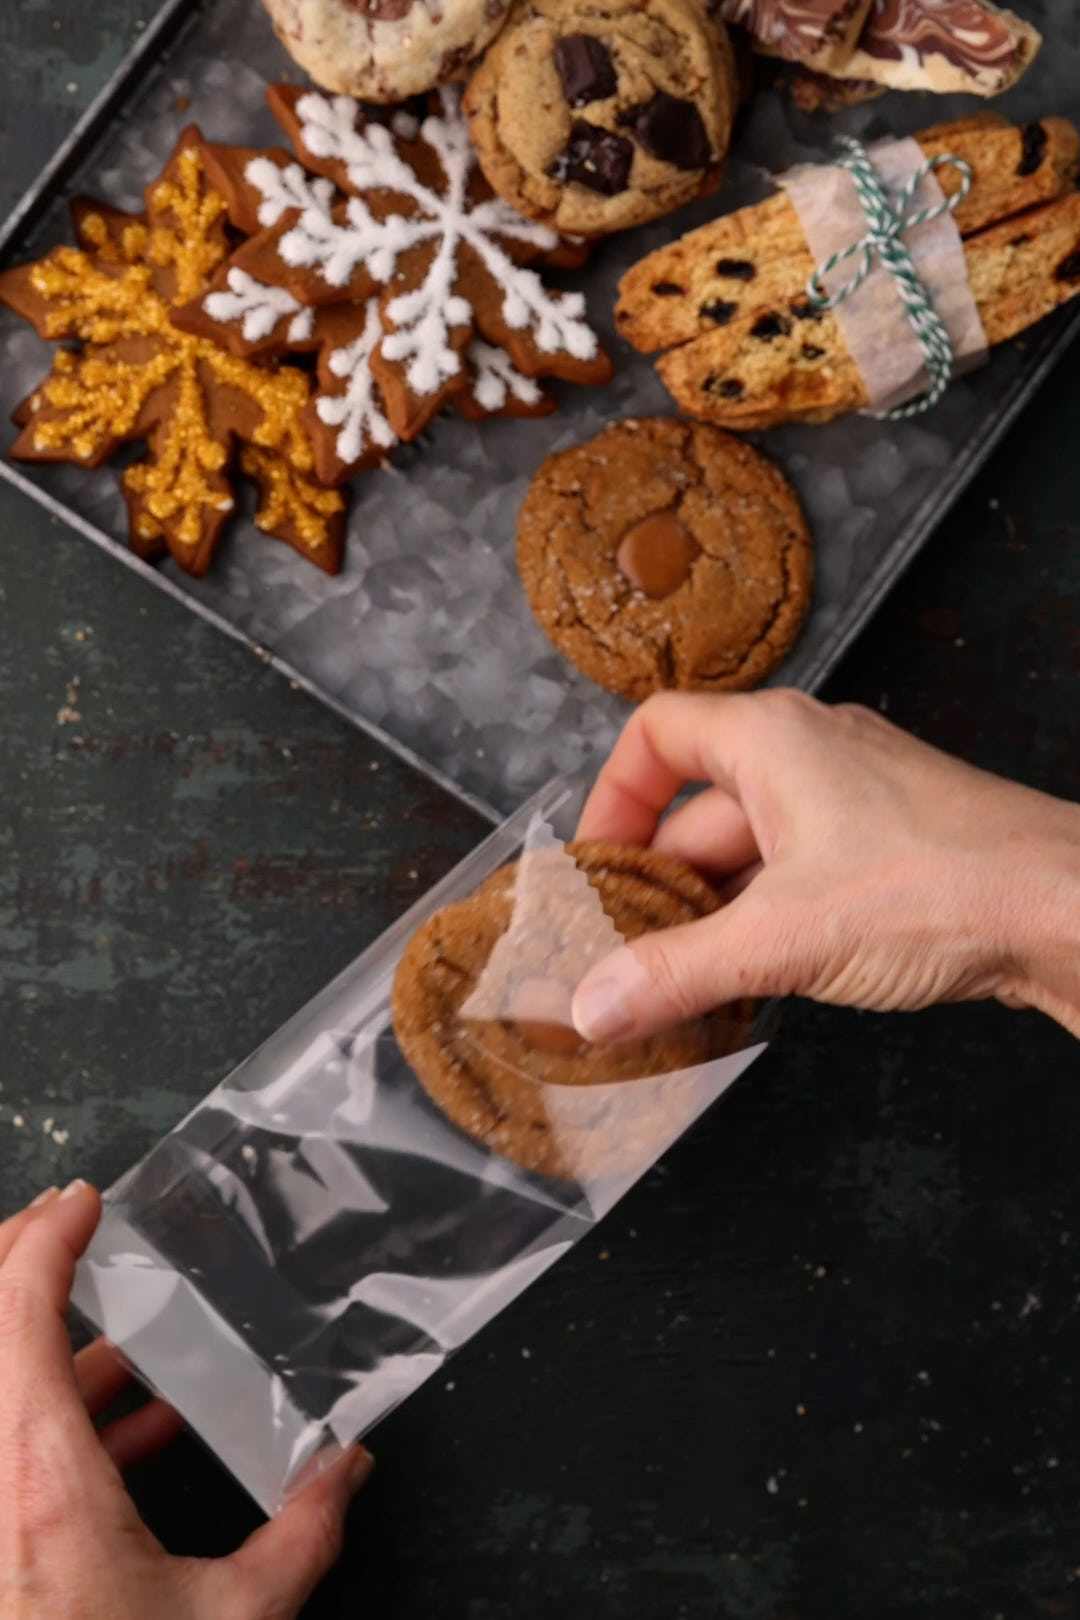
  • Set and Store: Chill until the chocolate is fully set.
    Store in an airtight container:
    Up to 1 week in the fridge
    Up to 3 weeks in the freezer

Notes

  • Golden syrup is not the same as corn syrup. Corn syrup is made from starch and has a mild flavour, while golden syrup is made from sugar and has a deeper, buttery caramel taste.
  •  
  • Golden syrup is widely available online and is worth seeking out for the unique flavour it adds.
  • The silicone molds used are 3-inch round baking molds 

Nutrition

Calories: 412kcalCarbohydrates: 42gProtein: 4gFat: 26gSaturated Fat: 16gPolyunsaturated Fat: 1gMonounsaturated Fat: 7gTrans Fat: 1gCholesterol: 48mgSodium: 132mgPotassium: 185mgFiber: 3gSugar: 27gVitamin A: 550IUVitamin C: 0.1mgCalcium: 46mgIron: 2mg
Tried this recipe?Let us know how it was!

These might not be your everyday cookie, but that’s exactly what makes them fun. Chocolate Caramel Hobnobs are for bakers who love rolling up their sleeves — melting sugar, trimming rounds, feathering chocolate — the whole delicious production. If that’s you, you’re in the right place. And if you’re too busy right now, go ahead and bookmark this recipe for a quieter weekend and enjoy the pretty pictures in the meantime.

Looking for something quick and easy instead? Try my Double Chocolate Peanut Butter Bark — it’s fast, festive, and every bit as irresistible.

Holiday Cookies 2024

Holiday cookies are my love language, but packaging them can be just as fun as baking them. This post is full of Holiday Cookie packaging ideas. Gifting cookies has been one of my favourite holiday traditions for over 30 years. It all started when my kids were little—I’d bake treats for their teachers and even for the receptionist at the pediatrician’s office (because let’s be honest, she’s the gateway to getting an appointment when your kids are sick).

Over the years, I’ve built up lots of knowledge—and quite a collection of tools and materials—for packaging cookies. Whether it’s for friends, family, or faraway loved ones, thoughtful packaging can make your cookies look just as special as they taste. In this post, I’ll share my favourite tips to ensure your cookies arrive fresh, protected, and beautifully presented.

Why Packaging Matters

Packaging cookies isn’t just about making them look pretty (though that’s definitely a bonus). It’s all about keeping them fresh, intact, and as inviting as they were when you first baked them. Here’s why it’s worth taking a little extra time to package them up thoughtfully:

  • Freshness First: Nobody wants to open a cookie tin and find stale treats! A little planning goes a long way in keeping those soft cookies chewy and those crisp cookies, well, crispy. Airtight bags or boxes are your best friends here.
  • Protect the Pretty Stuff: Whether it’s a perfect drizzle of icing or a sprinkle-topped masterpiece, cookies can be fragile. Good packaging keeps them from getting crushed or cracked—especially if they’re traveling long distances.
  • A Gift That Feels Special: Packaging is like wrapping a present—it’s the first thing people notice. A cute ribbon, a festive box, or a custom label makes your gift feel extra thoughtful. It’s all in the details!
  • Making It Easy for the Recipient: Separating cookies into individual bags or layers keeps flavours from mingling (because let’s face it, no one wants their peppermint cookie tasting like gingerbread). It also makes it easy for people to share—or to stash a cookie for later without making a mess.
  • It’s Just Fun (and Fulfilling): Honestly, packaging cookies has become one of my favourite holiday rituals. There’s something so satisfying about picking out just the right box, choosing the boxes, designing the labels and deliberating over fonts. It feeds my creative soul. And seeing the joy on someone’s face when they open a beautifully wrapped box? That’s the best part.

Essentials for Packaging

  • Cello bags are sturdy and a great way to keep the flavours of different cookies separate. If you’re in the USA, I like ordering these from Clear Bags. If you’re in Canada, I like ordering from Pritchard Packaging in Ottawa (I ordered the Clear Stand Up Pro Bags in 2 sizes: 68-BG-1LB and 68-BG-2LBplus).
  • Bag Sealer Nothing says professional like a bag sealer. It will keep the cookies fresher than tying with a ribbon.
  • Beautiful Boxes These adorable boxes are from karentology
  • Shipping boxes. Choose something slightly larger than your container. For the gingerbread boxes I shipped my cookies in these boxes. Uline has a great selection of sizes. I wrapped each gingerbread box in a thin layer of bubble wrap and packed it in the corrugated box. Make sure to fill all empty space with cushioning material, such as more bubble wrap or styrofoam peanuts.

Choose a variety of flavours and shapes and nothing too delicate. Here is my 2024 lineup:

That’s a wrap

There’s something so special about giving cookies during the holidays. It’s more than just a treat—it’s a way to share a little sweetness and show someone you care. Whether you’re hand-delivering a beautifully wrapped box or mailing a package full of cookies across the miles, thoughtful packaging makes the gift even more meaningful.

Do you have any go-to tips for packaging or shipping cookies? I’d love to hear about them! Share your ideas in the comments—I’m always looking for new ways to make cookie gifting even better. Happy baking and happy holidays!

Coconut Lemon Shortbread Snowflakes

Coconut Lemon Shortbread Snowflakes

Shortbread cookies are a timeless holiday classic, and this version adds a fresh twist. Packed with lemon zest and coconut, these delicate cookies will shatter your expectations—literally and figuratively. Lemon and coconut might not scream “holiday,” but they’re the perfect palate refresher after all the rich gingerbread and eggnog.

Rich, buttery, and melt-in-your-mouth, these cookies are tender—and yes, a bit fragile. I love using my set of snowflake cookie cutters to create a mix of sizes. After all, no two snowflakes are alike!

Keys to Success for Coconut Lemon Shortbread Cookies

  • Splurge on quality butter: Shortbread is all about the butter. I made mine with Kerrygold while in the U.S.—my favorite! If you’re in Canada like me, look for “European” or “European-style” butter, which has a higher butterfat content (82–86%) compared to typical butter at 81%. It makes all the difference.
  • Don’t over mix the dough: Stop mixing before it forms a ball. Dump it out and finish bringing it together by hand. Roll the dough between two sheets of parchment paper while it’s still soft, then chill the sheets before cutting out shapes. Rolling pin guides are a game-changer for even thickness.
  • Don’t skimp on the coconut sugar sprinkle: This adds both flavour and texture.
  • Chill cut-out cookies before baking: This helps them hold their shape beautifully in the oven.
    Cool completely before moving: These cookies are delicate, so let them set fully before transferring from the baking sheet.

I hope these Coconut Lemon Shortbread Cookies bring a little extra joy to your holiday baking. They’re a refreshing twist on a classic and always a hit at the table. If you give them a try, I’d love to hear how they turn out! Share your creations and let me know what you’re baking this season—I’m always inspired by your festive treats.”

Coconut Lemon Shortbread Snowflakes

Lemon Coconut Shortbread Snowflakes

Servings 12 large (5 inch) cookies
Calories 325 kcal

Ingredients
  

For cookies

  • 110 grams granulated sugar
  • 225 grams unsalted butter, removed from fridge 30 minutes befroe making dough
  • 50 grams desiccated, unsweetened coconut
  • 200 grams all-purpose flour
  • 100 grams cornstarch
  • 1/4 teaspoon Diamond Crystal Kosher salt or 1/8 teaspoon Morton's kosher salt
  • 2 Tablespoons lemon zest

For sprinkling on top of cookies

  • 60 grams granulated sugar
  • 28 grams desiccated unsweetened coconut

Instructions
 

  • Preheat the oven to 325° F and line 2 large baking sheets with parchment paper.
  • In the bowl of a stand mixer, fitted with the paddle attachment, cream the butter and sugar together until light and fluffy, for about 3-4 minutes. Add the coconut, flour, cornstarch, salt and lemon zest and continue mixing just until dough begins to come together. Dump dough onto the counter and finish mixing by hand.
  • Divide dough in half and roll out each piece of the dough, between 2 sheets of parchment paper to a ¼ inch thick thickness. Chill dough for about 30 minutes.
  • After chilling, peel off top parchment sheet and gently lay it back in place.  Flip the dough over; peel off and discard second parchment layer.
  • Cut the dough, using cookie cutters of your choice. I used a few different sizes of snowflake cutters, ranging from. 5 inches to 2 inches. Transfer shapes to prepared baking sheets, using a wide metal spatula, spacing them 1 inch apart. Chill snowflakes in freezer for about 10 minutes to firm them up again. Set scraps aside. 
  • While cookies are chilling, place sugar and coconut for the topping, in a spice grinder or food processor, and pulse a few times to coarsely grind.
  • Sprinkle cookies liberally with sugar-coconut topping and bake for 6 minutes. Switch position of trays and bake for a further 7-8 minutes, until the cookies are lightly golden brown. Carefully lift one of the cookies with a spatula to check the bottom of the cookie. It should be lightly browned. Bake for a few more minutes, if it is still pale.
  • These are fragile cookies so you must let them cool completely on the baking sheet, set on a rack. Store in an airtight container. They will keep for about a week at room temperature, or can be frozen for 2 months.
  • Gather the scraps; repeat rolling, cutting and baking.

Nutrition

Calories: 325kcalCarbohydrates: 36gProtein: 2gFat: 20gSaturated Fat: 13gPolyunsaturated Fat: 1gMonounsaturated Fat: 4gTrans Fat: 1gCholesterol: 40mgSodium: 54mgPotassium: 60mgFiber: 2gSugar: 15gVitamin A: 469IUVitamin C: 1mgCalcium: 10mgIron: 1mg
Tried this recipe?Let us know how it was!

Raspberry Glazed Brown Sugar Snowflake Cookies

There are some very skilled cookie decorators out there creating stunning piped holiday sugar cookies. I’m looking at you @arloscookies, @nm_meiyee, and @constellationinstallation. No matter how hard I practice, I will never reach those heights and I’m ok with that. I am in awe of their talent and love to look at their gorgeous creations.

While I love the look of intricately piped sugar cookies, I find the taste of royal icing too cloying. These raspberry glazed snowflake sugar cookies are the perfect solution for beautiful and delicious sugar cookies. Watch how they come together.

The dough is made with brown sugar, which creates a chewy cookie. All the decorations are done with a wooden cookie stamp from @fancyfoodtools. This is the one I bought.

Not all wooden cookie stamps are created equal. Make sure you buy one that has deep enough grooves, so that when you bake the cookies, and they rise, the design will still be as sharp after baking. Roll the cookies in granulated sugar before stamping. The sugar ensures that the cookies will not stick to the stamp.

The glaze for these cookies is made with icing sugar, lemon juice and freeze dried raspberries. There is no artificial food colouring in them. The freeze dried raspberries must be ground up in a food processor or spice grinder. I like to put the ground berries through a fine mesh sieve, to strain out the seeds.

You want the glaze to be quite thin for dipping.

Once dipped, the glaze will take about an hour to set.

Click here to print recipe for Raspberry Glazed Brown Sugar Snowflake Cookies.

Holiday Cookies 2023

This year’s holiday roundup is probably my prettiest and most delicious ever. I made all my favourites for gifting. Cookies are my love language and I love to share them. I enjoy the entire process of gifting, from baking to sourcing packaging, and designing and choosing the fonts for the labels.

Here are the links to all the recipes:

These adorable gingerbread cookie boxes are from karentology I preordered them in August as soon as I saw them.

I like to package each kind of cookie in a separate bag. These flat bottom cello bags are perfect for keeping cookies fresh.

I invested in a bag sealer many years ago. It just makes your cookies look so professional.

I label each kind of cookie. I really like these Avery kraft brown labels. They let the cookie be the star. Avery labels have a great free online design program that is simple to use.

Caramel Stuffed Ginger Crinkle Cookies

I first learned about Ginger Crinkle Cookies from my friend Lanie. She baked me a big batch and brought them to my cottage many years ago. I was instantly smitten. Crispy at the edges and chewy in the center, intensely flavoured with ginger and cinnamon. Typically, I have always though of ginger cookies as a winter Christmas type of cookie, but surprisingly, she found the recipe in the “Kosher Palette” cookbook. They make an excellent summer cookie too, especially when you sandwich some salted caramel ice cream between two of them!

Over the years I have tinkered with the recipe and had the idea to stuff the center of them with some chewy caramel. It took a while to get the right caramel for the stuffing. I first tried Kraft caramels but they hardened after baking and cooking and didn’t give me the chewy center. I made my own caramel, which was outstanding, but way too much work. Then I tried Werther’s Original Chewy Caramels. They stay chewy even after the cookies cool. I also put them through the freezer test and once thawed, the caramel stays chewy.

Check out this video to see how they come together.

Here are a few tips to ensure success:

  • Use a cookie scoop to ensure consistent size and even baking. I use this one. It has a one ounce (2 Tablespoon) capacity.
  • Spray your measuring cup with a bit of non-stick cooking spray before measuring and pouring the molasses. It will glide right out. You can do this for measuring anything sticky, like peanut butter or honey.
  • Roll the scoped cookies in coarse sanding sugar. The texture of the coarse sugar is what gives the cookies their characteristic crinkle top. If you’re in Canada, Bulk Barn carries it.
  • The Werther’s caramels are rectangular shaped. Before stuffing the cookies, twist them so they are more circular in shape. This will prevent oozing.
  • I like to top each cookie with additional caramel to give a visual cue as to what type of cookie you will be eating. After a bit of experimenting, I found that about 1/3 of a caramel, placed on top, halfway through the baking time, yielded the best results. A sharp scissors was best for cutting the caramels.
  • As soon as the cookies come out of the oven, use a round cookie cutter, larger than the cookies, to give a little “scoot” to even out the shape and have picture perfect round cookies. I learned this trick from Erin over at cloudykitchen.

Click here to print recipe for Caramel Stuffed Ginger Crinkle Cookies.

Cookie Box

Today is International Cookie Day. I can think of no better way to celebrate than with a cookie box. It’s hard to choose my favourite cookie. It’s like asking a parent to choose a favourite child. It all depends on the day and mood.

Some of the cookies in this box are over the top decadent indulgences. The Raspberry Sandwich Cookies ,the Coffee Chocolate Hazelnut Sandwich Cookies and the Toblerone Shortbread fall into this category.

Some of the cookies have a quieter more humble flavour, like the Lemon Coconut Cookies and the Chewy Brown Sugar Cookies.

As in nature, no two of my snowflake cookies are exactly the same. I went with a pink and gold colour theme this year. Very glam. Even though we’re still mostly staying home, my cookies are dressed up and ready to party.

I make Chewy Gingerbread and Brown Sugar Snowflakes every year. This year I also added some reindeer to my collection. They are undeniably adorable and so much fun to decorate.

However you’re celebrating International Cookie day at your house, I hope it’s filled with lots of sweetness, butter and sugar.

Raspberry Sandwich Cookies

These are one of the most beautiful cookies I have ever baked. But physical beauty aside, they are also very delicious. Sometimes beautifully decorated cookies end up disappointing in taste. Too sweet and lacking in flavour complexity.

If you’re looking for fast holiday cookies, these are not for you. These take time, but you will be rewarded with intensely flavoured and beautiful cookies. These cookies were inspired by a recipe from the November/December Holiday issue of Chatelaine magazine. In the original recipe, the top of the sandwich cookies were dipped in melted white chocolate, dyed pink with food colouring. They were filled with raspberry jam. When my husband tasted them he said that they were good, but they needed more raspberry flavour.

I needed to figure out how to boost the raspberry flavour. Sandwiching more jam in the middle would not work. It would just ooze out. Adding a border of buttercream would act as a dam, holding in more jam.

I made a batch of Swiss meringue buttercream and flavoured and coloured it with freeze-dried raspberries, ground up into a powder. Freeze dried fruits are a great way to flavour buttercream. I used about 3/4 cup of freeze dried raspberries to the buttercream. If I added 3/4 cup fresh berries to the buttercream, it would be way too wet.

The second way I boosted the raspberry flavour was to mix some freeze dried raspberry powder into the melted white chocolate, for dipping the top of the sandwich cookies into. Natural food colouring with flavour!

Start with a vanilla sugar cookie dough. I like to roll the dough out between two sheets of parchment paper as soon as I make it, rather than chilling first and then rolling. I find it very difficult to roll cold dough. After rolling the dough, chill for at least an hour.

Once the dough has chilled, cut out your shapes. A fluted square cutter is very pretty for these.

Dip half the baked cookies into the raspberry white chocolate and pipe the other half with a border of raspberry buttercream. I used a small French star tip to pipe the buttercream. Fill in the centre of the buttercream with jam. Top each sandwich cookie with a chocolate dipped lid.

Store cookies in an airtight container in the fridge. They should be fine for 4-5 days. Let come to room temperature before serving. You could also freeze them for several weeks. A little box of these gems would make a beautiful holiday gift.

Triple Chocolate Chunk Caramel Cookies

Sometimes you need a simple little cookie, like these or these. And then there are times that require something outrageous and over the top, like these Triple Chocolate Chunk and Caramel Cookies.

These cookies call for three kinds of chocolate, bittersweet, milk and blonde (caramelized white chocolate). This is not a sponsored post, but I highly recommend using Valrhona chocolate. I used Dark Bittersweet 70% Guanaja, Milk 40% Jivara and Blonde (White) 32% Dulcey. I order my chocolate online from The Vanilla Food Company. The quality is outstanding and it really does make a difference what kind of chocolate you use in these cookies. Supermarket chocolate chips just won’t give you the same results.

For the caramels, I just used vanilla caramels from Bulk Barn. Werther’s chewy caramels or Kraft caramels would also work well here. In the video I made, you see me mixing the caramels right into the dough. DO NOT DO THAT! The caramel oozes out of the cookies and makes a huge mess. Trust me. I made over 8 dozen of these cookies, figuring out the best way to do it.

To prevent the ooze, set the caramels aside. Scoop your cookie dough, and while the dough is in the scoop, stuff one whole caramel into the centre of the scoop. The surrounding dough insulates it. I also found it best to freeze the scooped dough for at least 2 hours before baking. That also helped to prevent the caramel from escaping.

For picture-perfect cookies, hold back about 3 Tablespoons of each of the three kinds of chocolate, coarsely chop them and top the cookies with these bits of chocolate about halfway through the baking time. This will give you pretty pools of melted chocolate on top of your cookies. You can also cut a few extra caramels into quarters and top the half baked cookies with one or two additional pieces if you like.

These cookies also use three types of sugar, white, brown and turbinado (raw sugar). The addition of the turbinado adds a bit of crunch to the cookies. I learned about this from Ashley, on her blog, Not Without Salt.

These cookies would make an excellent addition to a cookie box for holiday giving, or just stash them away in your freezer for those days that call for extravagance. I won’t judge.

Pistachio and Sour Cherry Linzer Cookies

Martha just told me that it’s National Bake Cookies Day! There’s actually a special day for that? In my kitchen, everyday is bake cookies day. My Instagram feed is flooded with cookies this month.

Today’s cookie is a Linzer cookie. I have long been an admirer of these pretty jam filled treats, but until this week, I have never baked them. The talented food photographer Bea Lubas frequently bakes and shoots Linzer cookies and her work is so inspiring.

While they may look like just another pretty jam filled sugar cookie, the addition of ground nuts to the dough turns them into a cookie so tender that it just about melts in your mouth. The dough for a traditional Linzer cookie is made with ground almonds. Since I happened to have a surplus of pistachios on hand, from a greedy shopping spree in Sicily, I used those instead. 

The classic filling for linzer cookies is raspberry jam, but I went with sour cherry. The sweet-tart flavour is a perfect complement to the rich tender crumb of the pistachio cookies.

Here are a few tips for success when baking these cookies:

The dough is quite sticky. Make sure to roll it between 2 sheets of parchment and dust with flour. 

Chill the dough well before cutting out shapes. The cookies will keep their nice crisp edges and won’t spread too much if they hit the oven cold.

Dust the tops with icing sugar before covering the sandwiches. That way you won’t hide the pretty jam filling.

If you want to make these ahead, bake the cookies and freeze. Thaw, fill and dust with icing sugar the day you plan to serve them.