Butternut Squash and Israeli Cous Cous

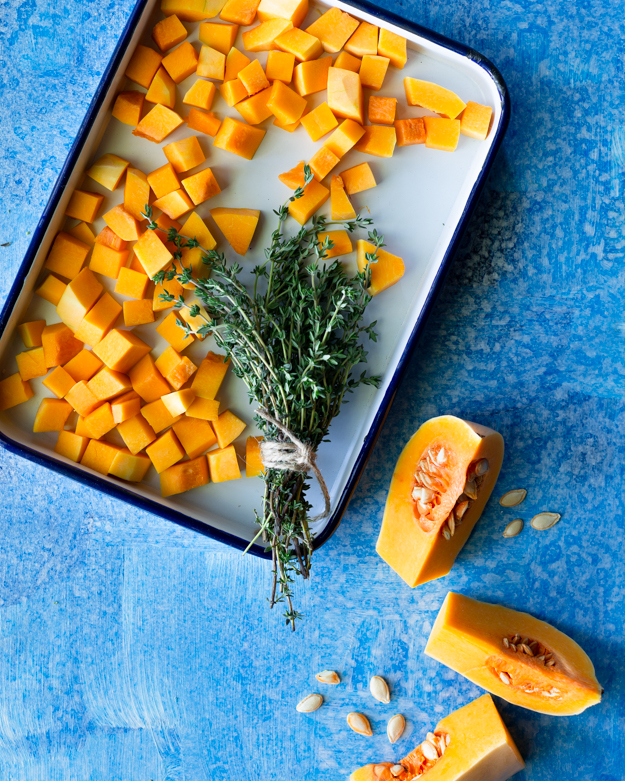
Let’s ease into this new season together, gently. No to boots and sweaters just yet, but I will encourage you to turn on the oven and roast some butternut squash. If you’re intimidated by a whole butternut, I’ve got you covered. Here’s an old video I made showing you the safest way to get the job done.

https://youtu.be/lMvnojo8S64

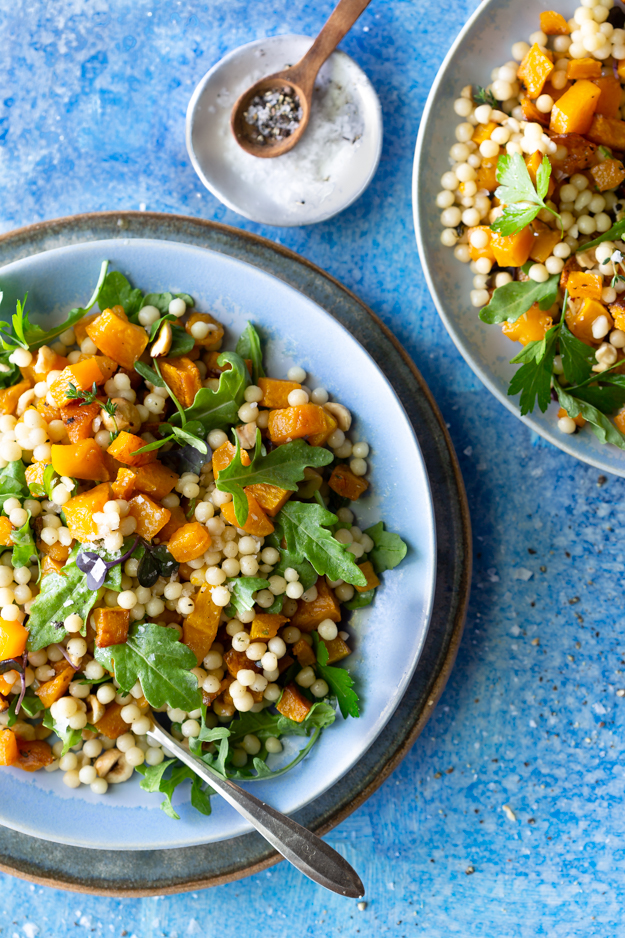
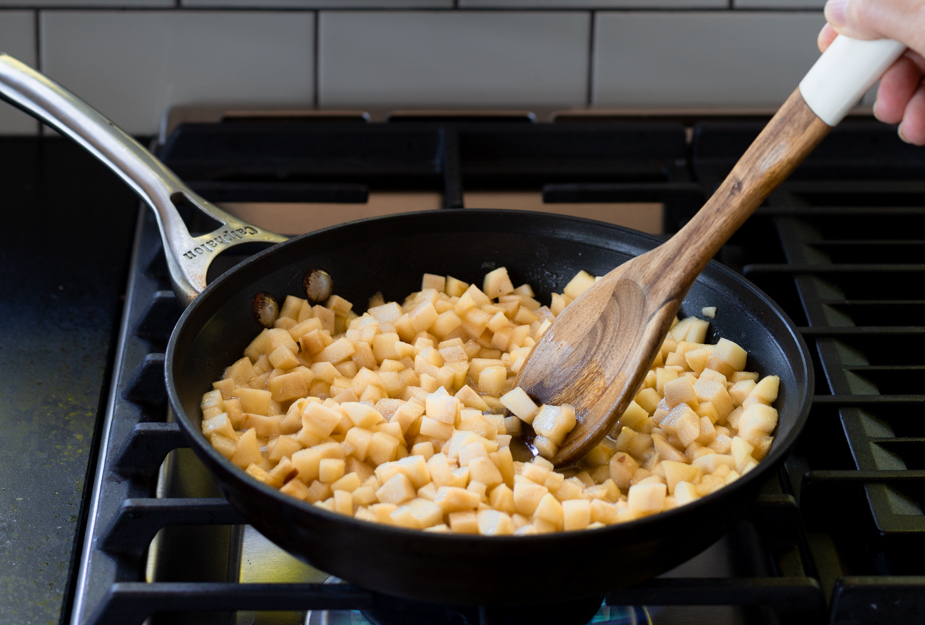
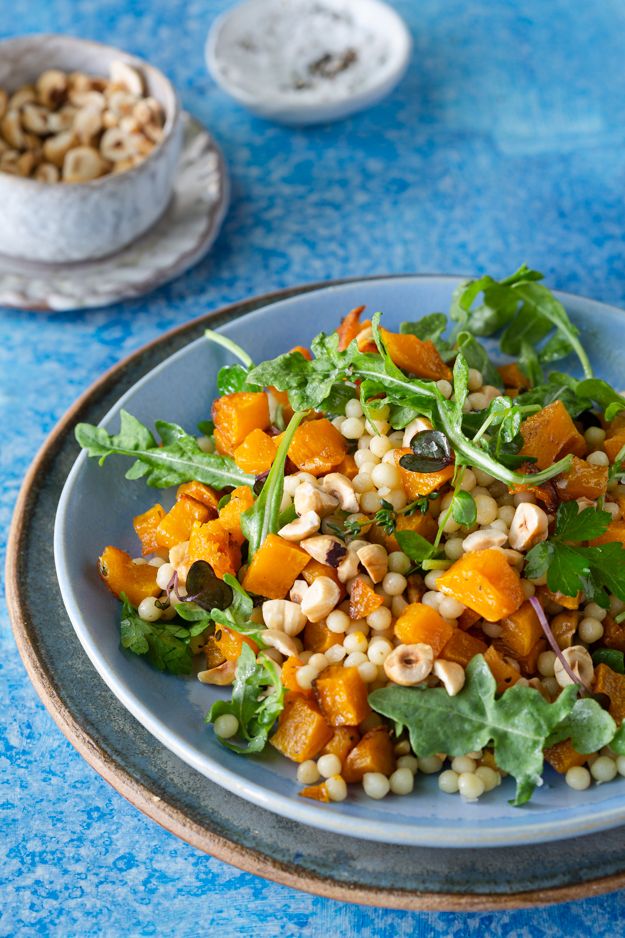
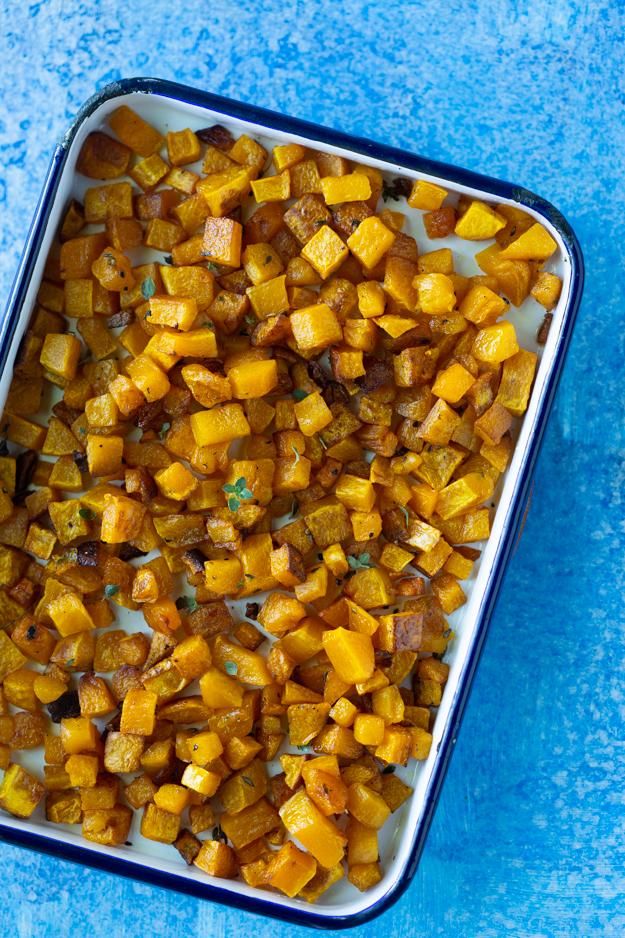
I like to dice the squash quite small for this salad. Little cubes, about 1/4 inch in size is perfect. Be patient and methodical, it will be worth it. Tiny pieces cook more quickly, plus, when all that surface area makes contact with a screaming hot pan, the result is lots of little crispy bits. Toss diced squash with some olive oil, salt and pepper and a few sprigs of fresh thyme and roast at 400°F.

I love to pair the squash with Israeli couscous (also known as pearl couscous). Israeli couscous is technically not a grain, but rather a pasta. Made from wheat flour and semolina, it is toasted, rather than dried. The easiest way to cook it is in lots of boiling salted warter, just like any other pasta. Cook it until it’s al dente. Part of the charm of Israeli couscous is the chewy, bouncy texture.

The squash and couscous are quite bland, so they need an assertive dressing to make it come alive. My vinegar of choice is sherry vinegar (labelled vinaigre de Jerez). It’s more rounded and complex than red wine or apple cider vinegar and way less cloying than balsamic. It has a crisp, bright acidity with lots of nuttiness and some caramel undertones. Don’t buy anything labelled “cooking sherry”. That’s not the same thing. My favourite brand sells for about $12 a bottle and it’s commonly sold in higher end grocery stores. In Ottawa I buy it at Herb and Spice. If you can’t find it, red wine vinegar would work quite well in this salad.

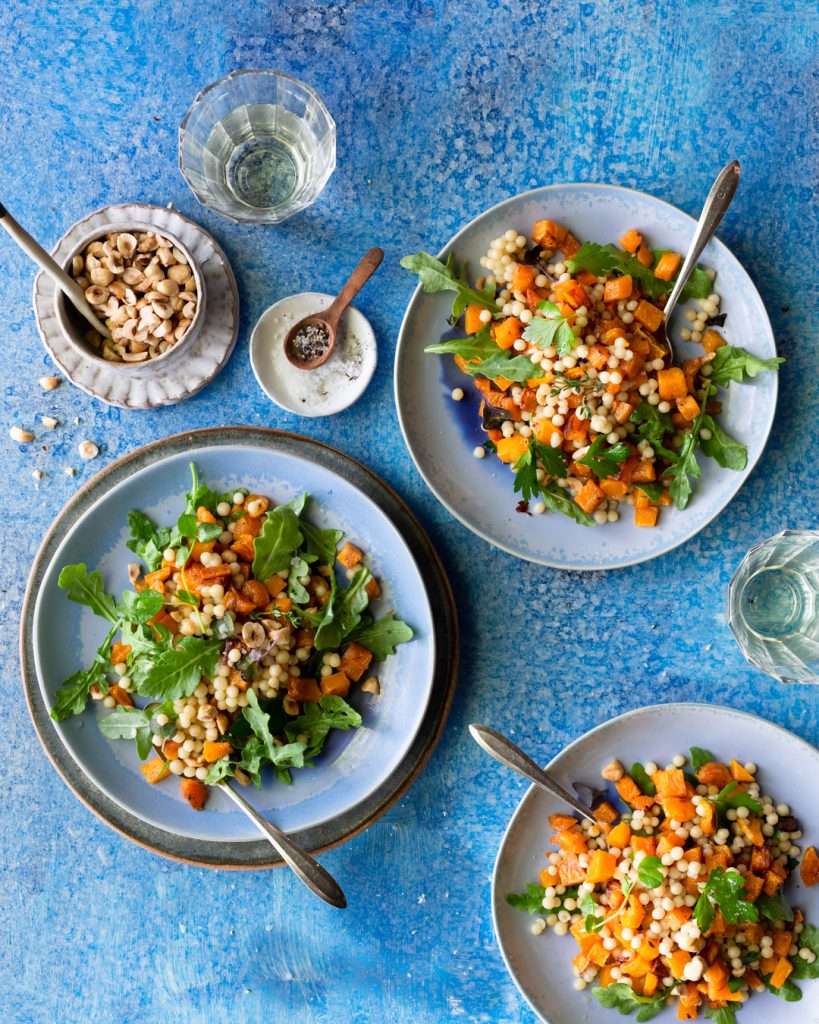
My green of choice for this salad is arugula. It’s peppery bite is perfect with the bland couscous and the sweet squash. A sprinkling of deeply toasted hazelnuts adds a welcome crunch. Any leftovers keep well in the fridge for 1-2 days.

Grilled Gazpacho with Cheese Crisps

I’m not ready to wear socks yet. It’s technically still summer, and I plan to squeeze out every bit of joy from the last moments of the season. The markets are still overflowing with corn, peppers and tomatoes, so I’m going to ignore the pumpkins for just a bit longer.

This late summer soup comes together quickly. I grilled tomatoes, sweet red peppers, a jalapeno pepper, sweet onion and some corn. I dumped everything, except for the corn, into the blender and puréed until smooth.

The soup could be served heated or chilled, your choice. I like to serve it with some do-it-yourself garnishes. I filled some little bowls with diced cucumber, red pepper and charred corn.

If you’ve got a bit of extra time, make some lacy Parmesan crisps to crumble up into the soup for some crunch. They take about 8 minutes to bake in the oven.

Apple and Honey Challah Twist

Rosh Hashanah, the Jewish New Year, is just a few weeks away. It’s traditional to dip apples in honey, to symbolize our desire for a sweet year ahead. In my desire to be efficient and practical, I thought it would be a brilliant idea to bake my honey and apples right into the challah. I have been hard at work the past two weeks, figuring out just how to achieve that.

My starting point was my favourite challah dough. On Rosh Hashanah, challah is round, a circle without an end, to symbolize our wish for a year in which life and blessings continue without end. I was inspired by cloudykitchen’s Mixed Nut and Dulce de Leche Brioche Knot. Her clever twisting method was perfect for Rosh Hashanah.

After baking 5 versions of apple and honey challah, I believe I have nailed it. My husband, my chiropractor and my UPS man were happy to eat my experiments. None were a total fail, but there were a few issues along the way. The first hurdle to overcome was how to add the apples. Raw apples leached too much moisture into the challah, and made for a soggy bread. Sauteeing them first, solved that problem.

The apple flavour was kind of muted in the finished bread. In order to amp up the apple volume, I spread the dough with a thin layer of apple butter. Apple butter is simply very concentrated applesauce. There is actually no butter in it, only apples. It’s tangy and really packs a wallop of flavour. Some brown sugar, cinnamon and golden raisins provided a perfect counterpoint for all that zingy apple flavour.

Check out my video to see how it all came together.

https://youtu.be/KY80IAQMm14


Any leftover bread makes amazing toast the next morning. It’s a perfect way to segue gently from summer into fall. I’m not quite ready for pumpkin, but I will happily embrace apples in any form.

Late Summer Tomato and Burrata Pasta

Tomatoes don’t reach their prime until mid-late August. That’s when the farmstands and markets are full of juicy, ripe, warm from the sun tomatoes. And if you’re anythig like me, you buy way too many because we have waited so long for them to arrive. If you happen to have a surplus of ripe tomatoes, this pasta is a fantastic way to use them up.

A mix of different kinds of tomatoes is fine. If you can find any heirloom varieties, they are perfect for this dish. Just halve or quarter the little ones and dice the larger ones into a 1/2 inch dice. There is a no-cook sauce. When tomatoes are this good, heat is not needed. Mix up a marinade of garlic, anchovy paste, red pepper flakes, olive oil, red wine vinegar and capers. Let the tomatoes macerate in this liquid while you cook the pasta. Use a good quality, fruity extra- virgin olive oil here. And don’t be afraid of the salt. Tomatoes need lots of salt.

Cook up a pound of pasta. Penne, rigatoni, fusilli, orecchiette or any short pasta will work here. You need a hollow pasta or one with lots of curves, to catch all the flavourful liquid. Toss the drained pasta into the bowl with the tomatoes. The warm pasta will absorb all that delicious liquid.

This pasta can be served warm or you could let it sit for a few hours and serve it at room temperature. Add a few dollops of burrata cheese and lots of fresh basil just before serving. If you can’t find burrata, fresh mozzarella would also be delicious. Check out this article if you’re wondering about the difference between freh mozzarella and burrata.

Strawberry Shortcake Ice Cream Bars

If you’re of a certain age, you may remember a time when ice cream treats were sold from a truck that travelled around to different neighbourhoods. That ringing bell would set off an avalanche of kids, running from their houses.

My favourite was the Strawberry Shortcake Ice Cream Bar. I loved how the crunch of the outside coating gave way to the soft fluffy ice cream middle. I recently had a craving for them and bought a box at the supermarket. It was so disappointing. It tasted nothing like my memory. It was too sweet and really artificial tasting. Nostalgia is often like that.

Luckily for us, Stella Parks over at seriouseats has made it her mission to turn our childhood memories into a reality that never disappoints.

In order to get an intense strawberry flavour, start with freeze-dried strawberries instead of fresh ones. Fresh strawberries have too much water, and when you freeze them into an ice cream base, it becomes icy, not creamy and smooth.

This is a no churn ice cream (meaning no ice cream machine needed). Start with egg whites and sugar, heat them to 165°F and then whip them into a, stiiff meringue.

Whip some heavy cream with ground up freeze dried strawberries and then fold it into the meringue. Then pipe this mixture into popsicle molds. After years of buying and losing plastic popsicle molds, I finally invested in these. But any popsicle molds will work.

Pop them into the freezer for at least 24 hours.

For dipping, mix melted white chocolate with a bit of coconut oil. That will give you a thin outer shell for the ice cream. Grind up some more freeze dried strawberries with Rice Krispies and then roll the chocolate coated bars in this. Crunch!!

Take a bite and relive your childhood!

Apricot Raspberry Crisp

If we’re being completely honest here, and I think that we’ve known each other long enough for total transparency, fruit crisp is not really about the fruit. The fruit is just a vehicle for the buttery, crumbly crisp topping. Right?

My crisp topping incorporates butter, brown sugar, rolled oats, flour, a healthy pinch of salt and a lavish amount of toasted nuts. Today I opted for pistachios. I think they pair perfectly with apricots.

The topping comes together quickly, using your hands in a big bowl. Maker a double batch of the topping and store the extra in the freezer so you can make a crisp whenever the urge hits. It’s great in the fall with apples or pears and cranberries in the winter.

https://youtu.be/FVaoXEsgoWg

No need to peel apricots, just pit and dice. The amount of sugar you add will depend entirely on how ripe your apricots are. Start with 1/4 cup of sugar and taste. You can always add more. I like to thicken my crisp with Minit Tapioca. It does not make the juices cloudy like flour would. It’s available in the supermarket in the same aisle as Jell-O.

Plum and Cherry Galette with Pistachio Crust

Most recipes I post on this blog go through several iterations of testing before I deem them “blog worthy” . (Sort of like “sponge worthy”.) I don’t want to waste your time posting recipes that disappoint. As main taste tester, my husband happily eats most of my experiments. However, even he could not choke down first version of this galette. It was an epic fail.

I started with my favourite Galette Dough, spread it with a thin layer of pistachio paste, and dotted halved Bing Cherries over that. It looked pretty going into the oven.

But once baked, the pistachio paste became gummy, the zingy cherry flavour became muted and the chopped pistachios on top of the tart burned and became bitter.

I tackled the problems one at a time. It was clear that the pistachio flavour I was hoping for was not going to come from adding them on top of the dough. But what if I incorporated chopped pistachios into the dough? Bon Appetit has a great recipe for a savory galette, with a pistachio crust. This dough would work perfectly in a sweet application.

To tackle the dull cherry flavour, I decided to nix the fresh cherries and spread sour cherry jam on the galette. This is my favourite brand, but there are other brands available online or in the supermarket.

The final piece of the puzzle was figuring out what fruit to put on top. I had a bag of ripe plumcots in the fridge and their vibrant red interior would be gorgeous for this galette. Plums, apricots or pluots would also be excellent choices.

I like to think of a galette as a lazy-ass tart. No need to press into a pan or crimp edges. Just gently fold the dough to create an edge. The rustic appearance is part of the galette’s charm.

This galette was a home run. The gentle crunch of the pistachio in the crust added texture. The sour cherry jam was a perfect complement to the sweet plumcots.

Malted Milk Ice Cream Sandwiches

If you’re not a food photographer, you might think that shooting ice cream sandwiches is fun. Nothing could be further from the truth. Photographing ice cream is one of the most challenging foods, because it melts so quickly.

I made the mistake of trying to shoot this last Saturday at the cottage, where it was a sweltering 32°C, with a humidex of 41°C! The ice cream wasn’t the only thing melting. We were sweating just standing still. I finally shoved the sandwiches back into the freezer and spent the afternoon on the hammock, in the shade. I got up very early Sunday morning before the heat got too bad and managed to get a few good shots.

Do you remember ice cream sandwiches before they got all fancy? That squidgey chocolate wafer, so moist, it stuck to the paper wrapper. How you had to lick the chocolate crumbs off your fingers after you were all done. The familiar, bland, slightly too sweet, vanilla ice cream center.

I wanted to recreate the ice cream sandwiches of my youth, but with a bit of an update. I’d keep the fudgy chocolate wafer but elevate the ice cream center. I decided to fill mine with malted milk ice cream.

Cook’s Illustrated has a fantastic recipe for the chocolate wafers. The addition of chocolate syrup keeps them super fudgy. All the ingredients are mixed in a bowl and spread into a thin layer on a baking sheet. Once they are baked and cooled, you can cut them into any shape you like.

If you would prefer not to make ice cream, just soften some storebought and spread it out onto a baking sheet. Freeze until solid and then cut into the same shape as the chocolate wafers.

They are delicious as is or you can go deluxe and embellish them with melted chocolate and various toppings. I used chopped Malteasers, mini chocolate chips and Skor bits.


Broccoli Coconut Soup

I was visiting my mom in Toronto a few weeks ago, and, as I was rummaging through her fridge, (because isn’t that what we all do when we go home to mom?), I was struck by the revelation that this woman, who lives alone, has a fridge stocked to feed a large army.

My mom is the condiment queen. All the shelves on the fridge door, as well as the entire top shelf are filled with jars and bottles. There are at least 6 jars of mustard (dijon, honey, yellow, spicy, brown and whole grain) and 5 bottles of hot sauce in varying intensity of heat, from wimpy to incendiary. And who needs 3 half-full bottles of hoisin and oyster sauce and 4 bottles, of soy sauce with varying levels of saltiness?

The produce drawers are packed with every kind of fruit and vegetable you could ever want. I was pleased to see that she finally keeps tomatoes on the counter now, after years of storing them in the fridge. And don’t even get me started on the tupperware containers of unidentifiable leftovers.

When I asked her why she has so much food in the fridge, she answered me quite simply, “Just in case.” To be fair, she has 6 children and 14 grandchildren (or snowflakes, as she likes to call them) and they are always stopping by for a quick visit and of course, a snack or meal. She wants to be sure that she has everyone’s favourites.

She has an additional fridge and freezer in the garage with back-up stock. The freezer is packed with ice cream novelty snacks that the older grandkids help themselves to, late in the evening, on their way home from a night out with friends.

I would be remiss if I forgot to tell you about the candy cart in the kitchen. It is a repurposed bar cart, filled with over 24 clear glass jars of candy, nuts and chocolate treats. She goes to Bulk Barn every few weeks to buy refill stock. She is diabetic and never touches any of it. My weakness is the sour jube jube jar, which I dump out onto the counter, pick out the red, green and purple ones, and then stuff the yellow and orange ones back into the jar.

I discovered a jar of bright green soup, at the back of the second shelf. My mom identified it as a Broccoli Coconut Milk soup that my sister, Bo, made a few days ago. I sniffed it, deemed it safe to eat and heated it up for our lunch. It was so good!

Vibrant and flavourful, this creamy soup is a nutrient-dense powerhouse. Here is how I recreated it. I started with some chopped shallots, because, for some reason, they don’t make me cry when I chop them, and I love their delicate flavour. But you could certainly use an onion if that’s what you have on hand.

I added some garlic and a jalapeno pepper for a bit of heat. Feel free to omit if that’s too spicy for you. Add one large head of chopped broccoli, including the stems (just peel and slice them). I used chicken broth, but water or vegetable broth would work as well, and about one cup of coconut milk. Use the full fat one please.

Simmer until the broccoli is very tender. The soup will look quite grey at this point, but fear not. Add in a bunch of spinach and a small handful of cilantro. I really like the bright citrus note that cilantro adds but if you’re a hater, leave it out. When blended, the soup turns the most vibrant green colour. You’ll feel healthy just looking at it.

Garnish the soup with any or all of the following: toasted coconut flakes, spinach leaves, crispy fried shallots, cashews and steamed broccoli florets.

Baked Brie with Honey Balsamic Roasted Strawberries

This is my version of a lightened up baked brie. I guess that’s a bit of an oxymoron, because, how could baked brie ever be called a “light” dish. But it’s all a matter of relativity. When I worked in catering, one of our most popular dishes was a wheel of brie, covered in brown sugar and toasted pecans. Then it was wrapped up in a buttery white wine pastry. It was delicious but it just seems excessive to me now.

Local strawberries are abundant now. I wanted them to shine and be the star of this dish. I mixed them with honey and balsamic and let everything macerate for an hour. The berries exuded some of their juices but the flavours of the berry liquid, honey and balsamic never seemed to meld. I decided to try roasting them for a mere 8 minutes and the berries slumped ever so slightly and became one with the honey and balsamic. The magic of the brief trip to the oven really brought all the flavours together. If you like it hot, try Mike’s Hot Honey.

While the berries are cooling, pop the wheel of brie into the oven for about 8 minutes, just until it is slightly softened and warm. Top with cooled berries, basil and toasted nuts. Serve with crackers or some really good toasted ciabatta or baguette.