Tag Archives: Comfort food

Chicken Soup 101: Roasted Chicken Soup Built in Two Steps

I’m not big on New Year’s resolutions, but I do embrace the idea of Gentle January — a softer reset that’s less about fixing and more about slowing down. This year, that’s looked like cooking a little more deliberately, posting a little less, and developing a very real obsession with The Block Australia (I don’t even try to fight it anymore). It’s been over a month since I last posted here, so it’s fair to say I leaned all the way in.

This soup fits that mindset perfectly. It’s a two-step roasted chicken soup that isn’t rushed and isn’t meant to be: first you make a deeply flavoured roasted stock, then you use that stock to build the soup itself. The reward is flavour you can’t hurry — and a pot of soup that feels worth the wait.h the wait.

Here’s how I make it.

Why This Roasted Chicken Soup Is Built in Two Steps

This soup is built in layers, and the first one matters most. Instead of starting the soup straight on the stovetop, you begin by making a roasted chicken stock. Roasting the bones (and vegetables) before simmering caramelizes their natural sugars and deepens their savoury flavour, giving the stock a rich, golden colour and far more complexity than a raw stock ever could.

Once that stock is strained, it becomes the foundation for the soup itself. Fresh chicken and vegetables are simmered gently in the finished stock, allowing everything to stay clean, clear, and balanced. It’s a slower approach, but it’s intentional — each step has a purpose, and together they create a soup that tastes deeply comforting without feeling heavy.

Can I Shortcut This?

You can — but this is one of those recipes where the shortcut changes the outcome. Using a good-quality store-bought stock or skipping the roasting step will still give you a perfectly fine pot of soup, and there’s nothing wrong with that on a busy weeknight. But it won’t give you this soup.

The two-step process is what creates the depth, clarity, and golden colour that make this one special. Roasting the bones first builds flavour you can’t add later, and simmering the soup in a finished stock keeps everything clean and balanced instead of muddled. If you’re going to take the time to make chicken soup from scratch, this is the version that rewards the effort.

That said, the stock freezes beautifully — so when you do make it, consider making extra. Future-you will be very glad you did.

Keys to Success

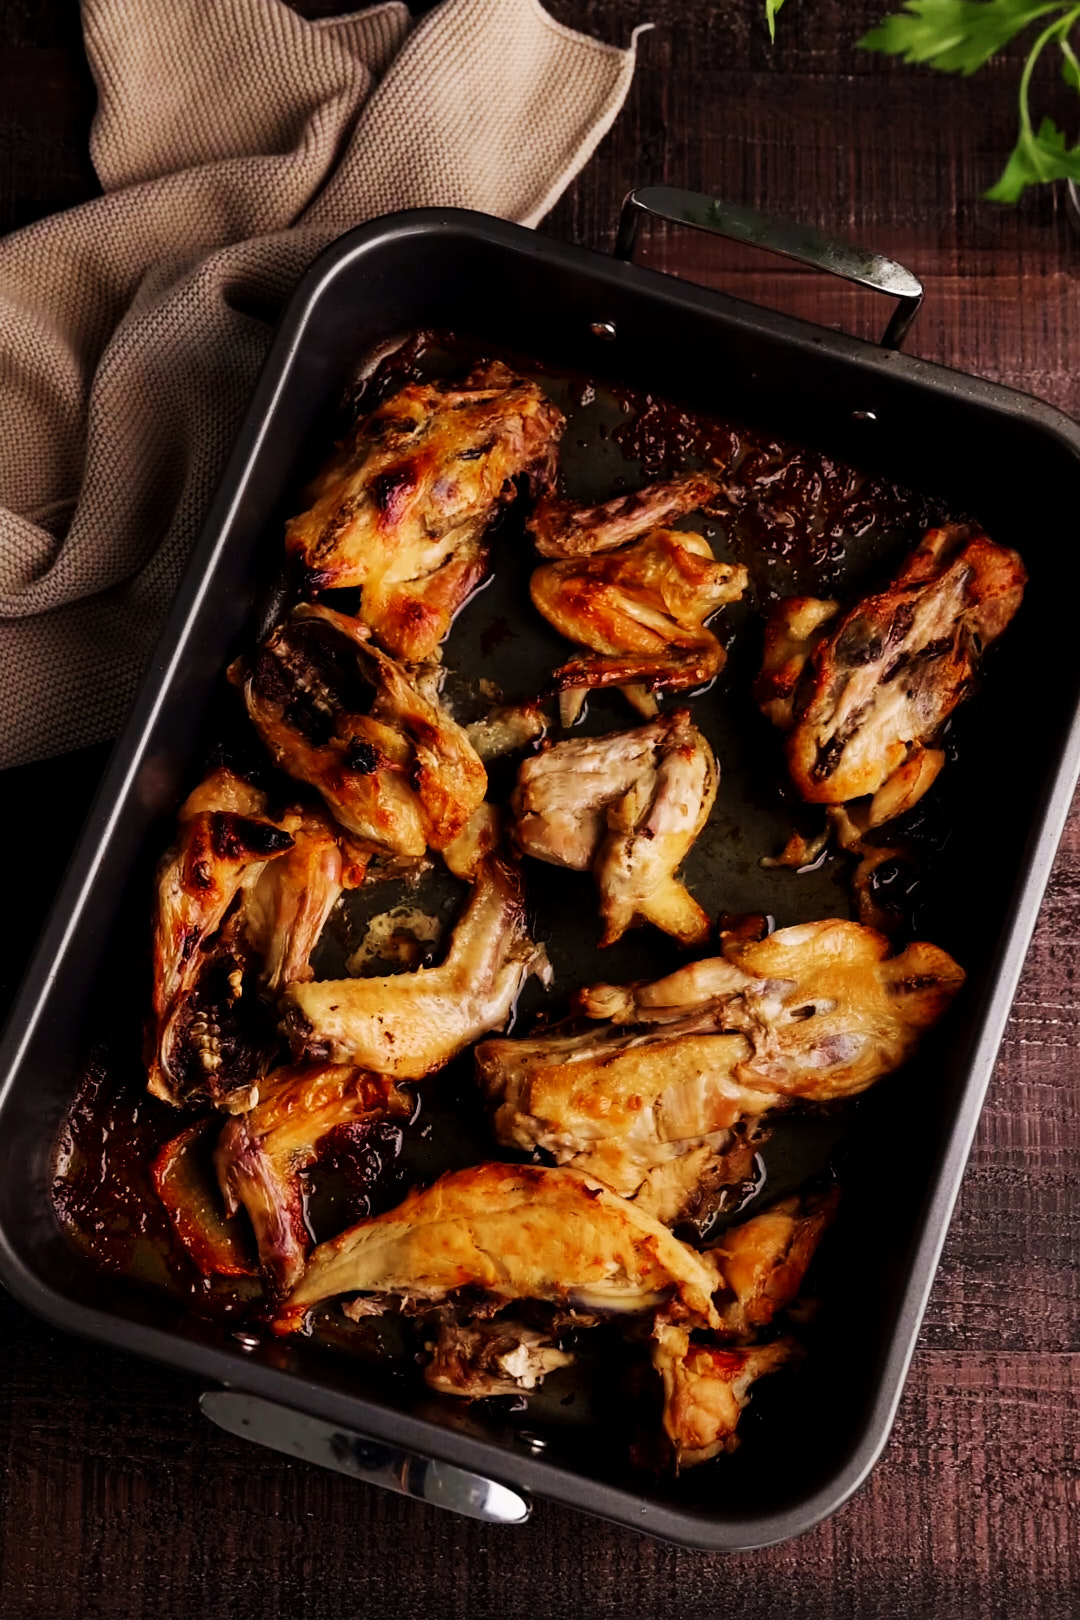
  • Roast until deeply golden. Don’t rush this step. Deep browning is what gives the stock its flavour and colour.
  • Keep the simmer gentle. Once it boils, turn it down. A low simmer keeps the broth clear; boiling makes it cloudy.
  • Strain, then start fresh. Straining the stock before making the soup isn’t extra — it’s what gives the final broth clarity and balance.
  • Use fresh ingredients for the soup stage. Fresh chicken and vegetables simmered in finished stock stay bright instead of tasting overcooked.
  • Don’t skip the parsnips. They might feel optional, but this is how my mom made her soup. Parsnips add a subtle sweetness that balances the savoury broth beautifully.
  • Make it ahead and chill overnight. Chilling makes it easy to lift off the layer of chicken fat from the top. Don’t discard it — that fat is pure flavour.
  • Save the fat. It’s the key to the best matzoh balls ever — and it deserves its own post (coming soon).
  • Season at the end. The stock concentrates as it cooks, so wait until the soup is finished before adjusting salt and pepper.
  • Let time do the work. This soup rewards patience more than effort.
Bowl of homemade chicken soup with a clear golden broth, shredded chicken, carrots, egg noodles, and a matzoh ball, garnished with fresh dill and served on a wooden board with a blue cloth.

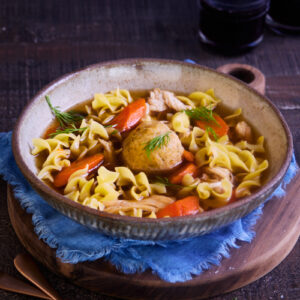
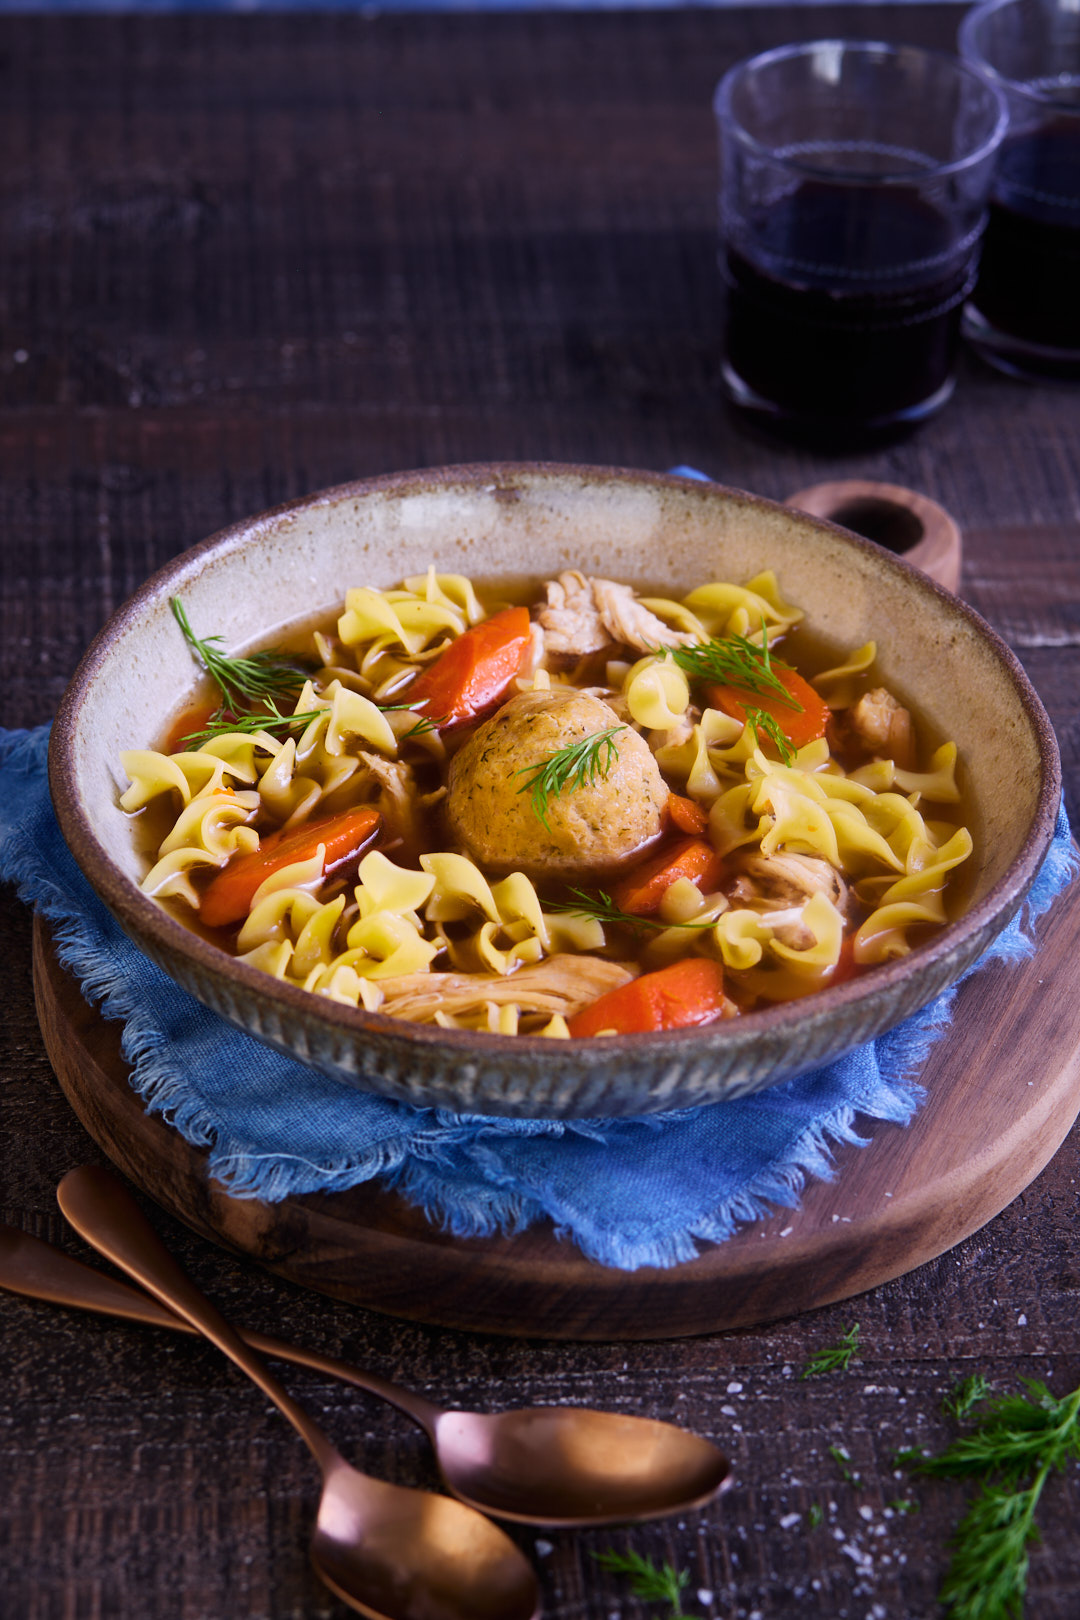
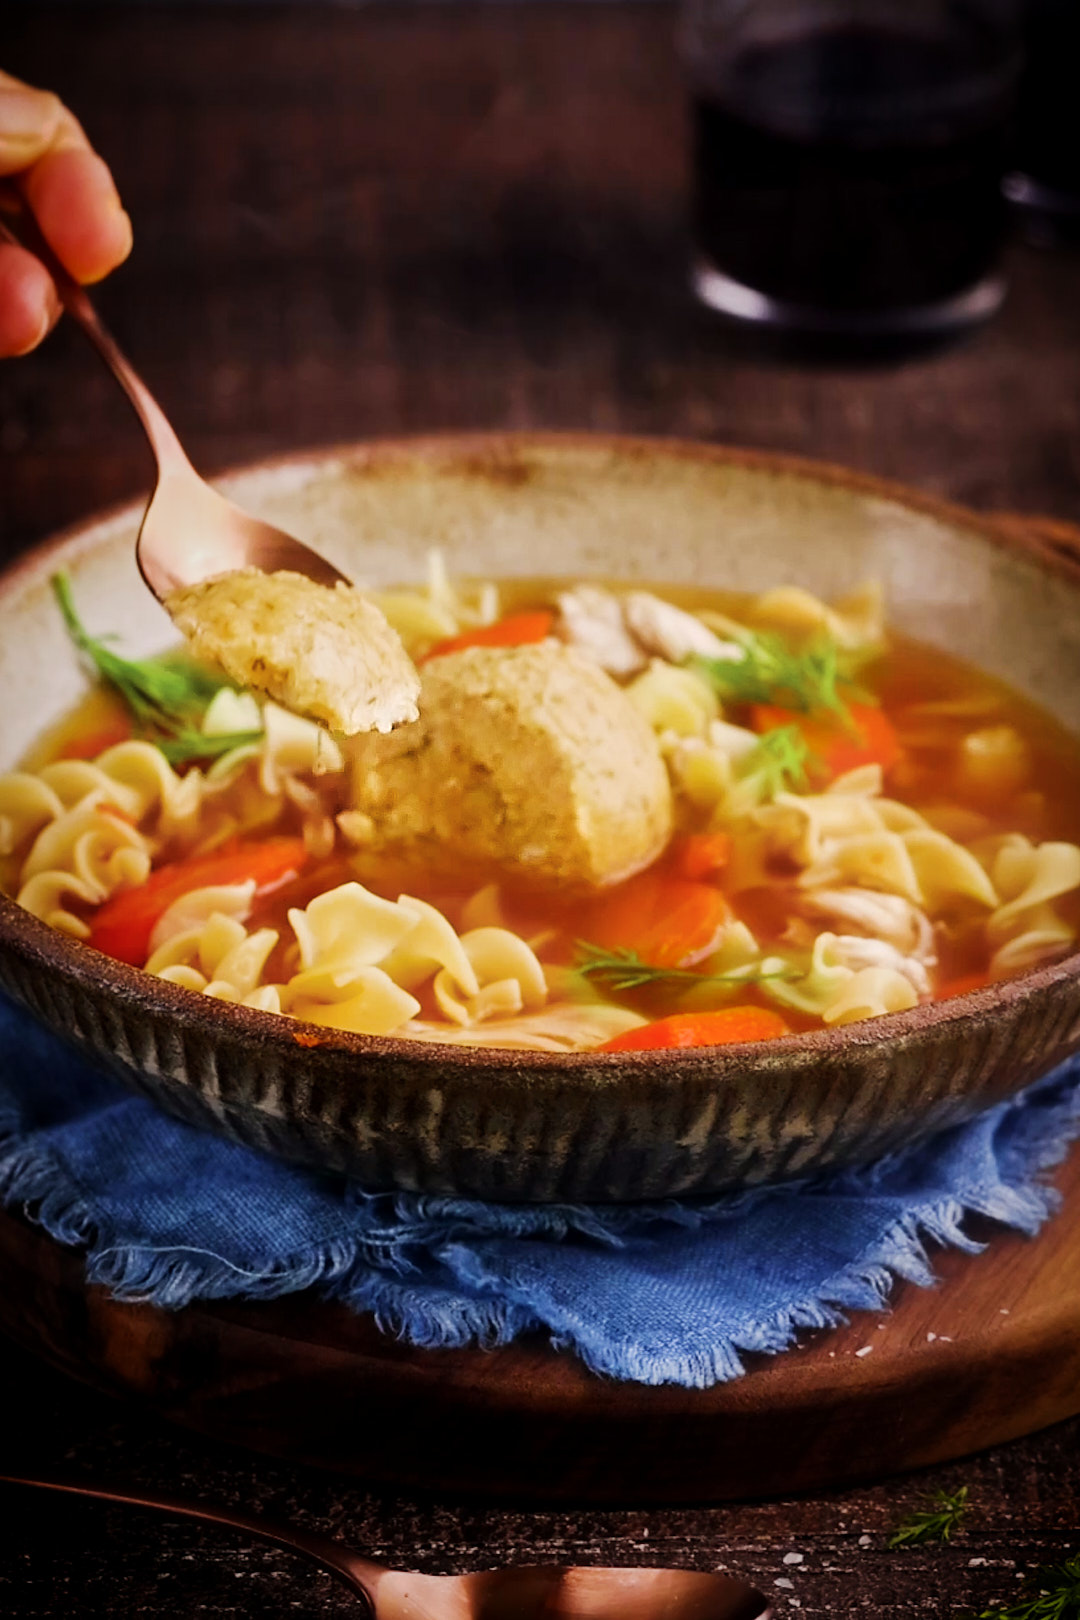
Roasted Chicken Soup with Perfect Matzoh Balls

Good chicken soup doesn’t start on the stovetop — it starts in the oven. This is a two-step chicken soup, beginning with a deeply flavoured roasted chicken stock, followed by the soup itself. Roasting the bones and vegetables before simmering gives the stock a rich, golden colour and a depth of flavour you simply can’t get otherwise.
It does take a little extra time, but none of it is complicated, and every step is worth it. This is the kind of soup that tastes like it’s been cared for — comforting, clear, and built on flavour from the very beginning.
Servings 12

Ingredients
  

  • 12 cups roasted chicken stock, (recipe below)
  • 1 4 pound chicken, cut into 8 pieces
  • 4 pounds chicken bones , (backs, feet, ribs, wings, necks)
  • 2 medium onions , peeled and quartered
  • 2 large parsnips , peeled and cut into 2-inch lengths 
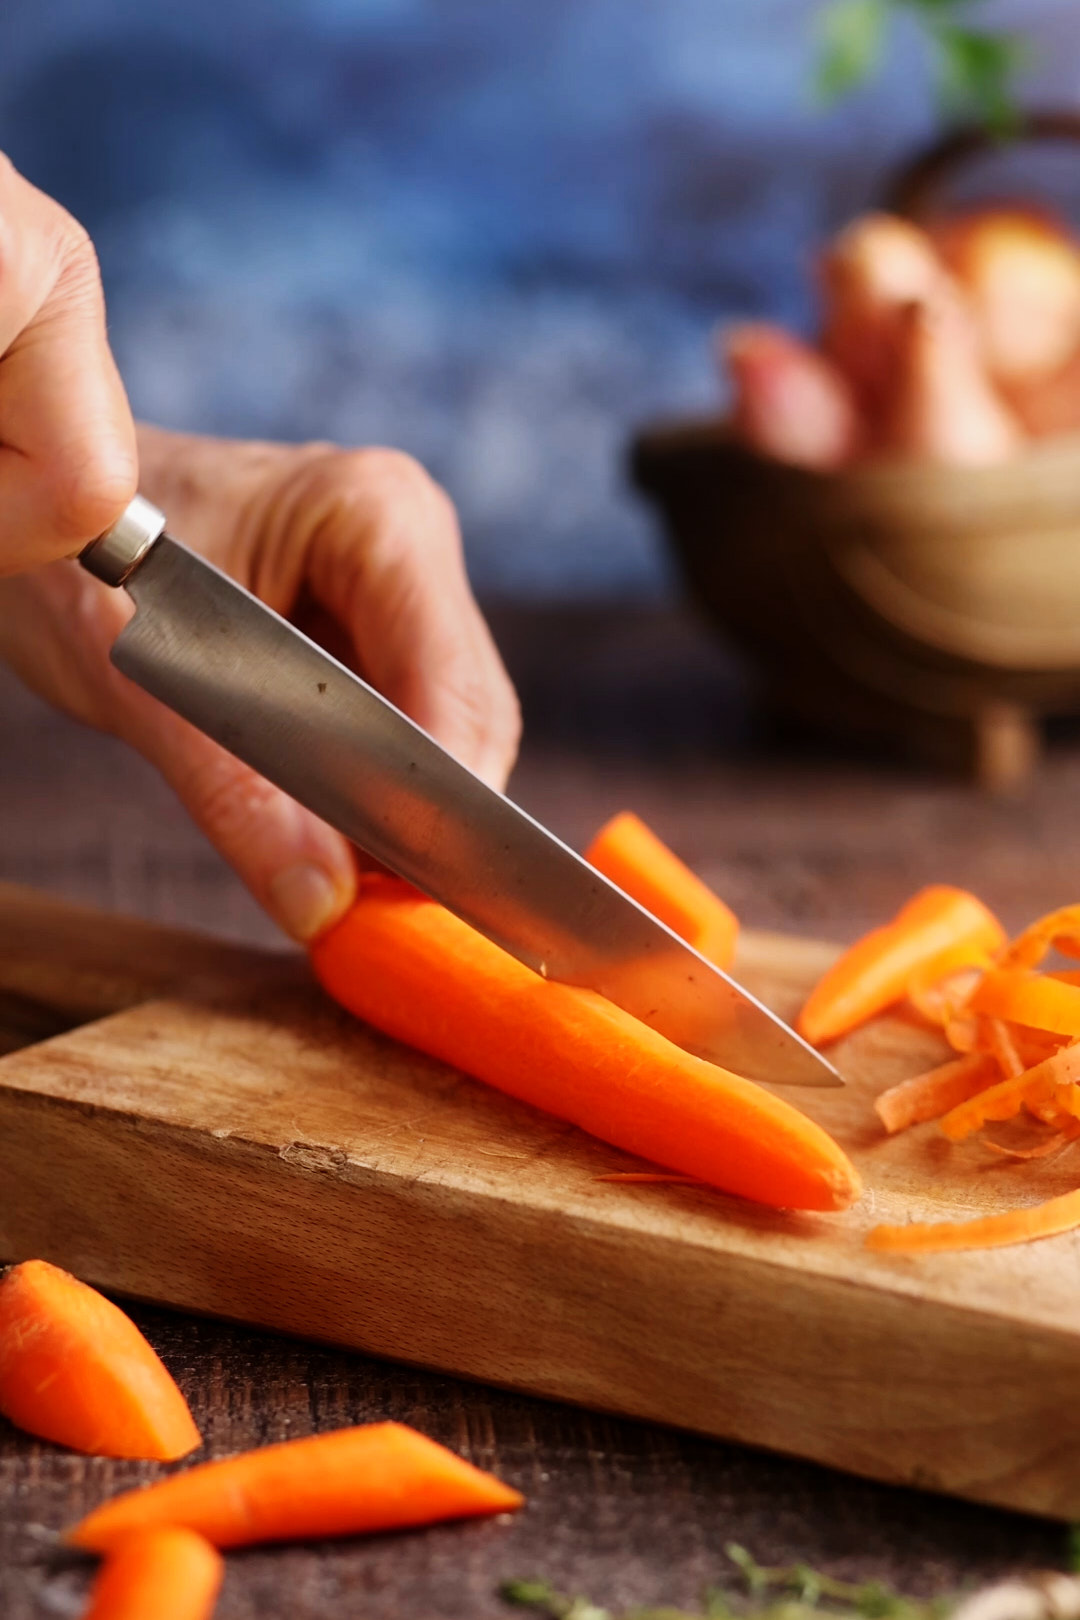
  • 4 large carrots , peeled and cut into 2-inch lengths
  • 2 stalks celery, , (with leaves), cut into 2-inch lengths
  • 2 stems parsley , (not the leaves)
  • 10 whole black peppercorns
  • 2 dried bay leaves
  • 1 Tablespoon Diamond Crystal Kosher salt, or 1/2 tablespoon Mortons Kosher salt
  • cooked Matzoh balls, (recipe coming soon)
  • fresh dill or parsley for garnish

Instructions
 

  • Start the soup base. Pour the roasted chicken stock into a large stockpot. Add the chicken bones and the cut-up chicken. Bring to a boil.
  • Skim. Reduce heat to low. Using a slotted spoon, skim off any foam that rises to the surface.
  • Add aromatics. Add onions, parsnips carrots, celery, parsley stems, peppercorns, bay leaves and salt. Partially cover the pot, leaving the lid slightly ajar so steam can escape.
  • Simmer. Simmer gently for 2 hours.
  • Strain. Strain the soup through a cheesecloth-lined strainer into a clean pot. Reserve the cooked carrots to serve in the finished soup.
  • Shred the chicken. When the chicken is cool enough to handle, remove the skin and bones from the breasts and thighs and shred the meat into bite-sized pieces. Discard the bones, skin, and remaining vegetables.
  • Chill overnight. Refrigerate the reserved carrots and shredded chicken in a covered container. Let the strained soup cool slightly, then cover and refrigerate overnight.
  • Remove the fat. The next day, lift off the hardened fat from the top. Save it for the matzoh balls.
  • Finish and serve. Bring the soup to a boil, then reduce to a gentle simmer. Add the reserved carrots and chicken, plus cooked matzoh balls, and simmer for about 5 minutes to warm through. Season with additional salt and pepper to taste. Garnish with fresh parsley and/or dill.
Tried this recipe?Let us know how it was!

Roasted Chicken Stock

Stock keeps well in freezer for up to 4 months.
Servings 12 cups

Ingredients
  

  • 4 pounds raw chicken bones , (backs, feet, ribs, wings, necks), rinsed and patted dry
  • 2 Tablespoons vegetable oil , divided
  • 2 large onions , quartered, no need to peel, the skin adds great colour to the stock
  • 2 large carrots , washed well, cut into 2 inch lengths, no need to peel
  • 2 stalks celery , cut into 2 inch lengths
  • 1 large leek , halved lengthwise, washed and cut into 2 inch lengths
  • 3 sprigs fresh thyme
  • 10 whole black peppercorns
  • 3 dried bay leaves
  • 16 cups cold water

Instructions
 

  • Preheat oven to 425°F.
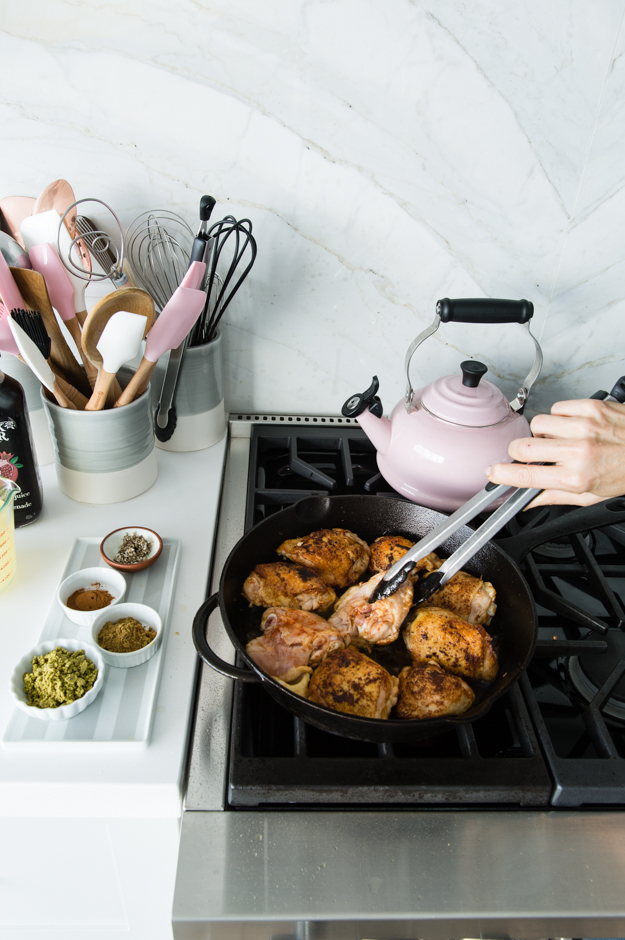
  • Roast the bones. Add 1 Tablespoon oil to a large roasting pan. Add bones and roast on the lower rack until deep golden brown, about 40–45 minutes, stirring occasionally for even browning.
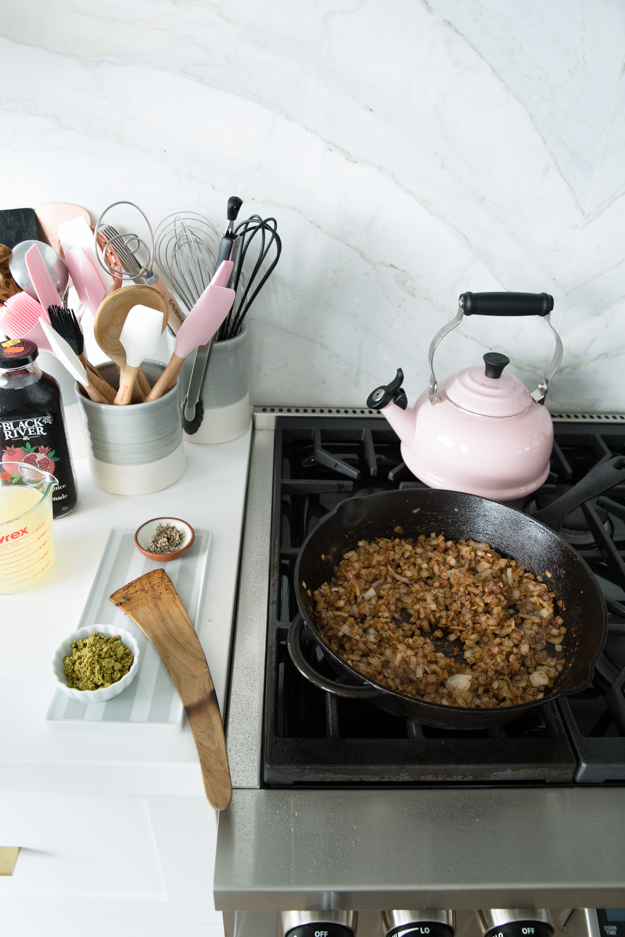
  • Roast the vegetables. While the bones roast, toss onions, carrots, celery, and leek with the remaining 1 Tbsp oil on a large baking sheet. Roast until browned, about 30 minutes.
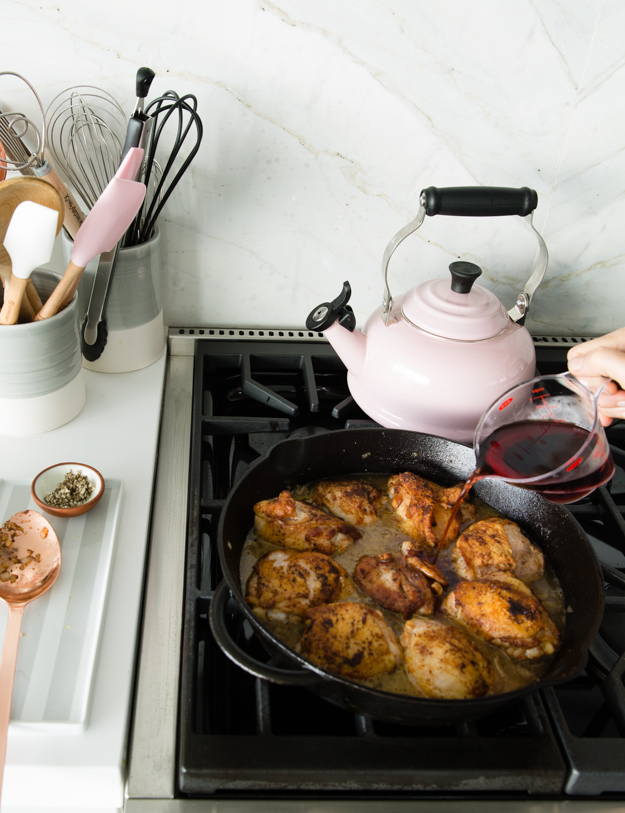
  • Simmer the stock. Transfer the roasted bones to an 8-quart stockpot. Add the cold water and bring to a boil. As soon as it boils, reduce heat to low and skim off any scum that rises to the top. Add roasted vegetables, thyme, peppercorns, and bay leaves.
  • Keep it gentle. Simmer uncovered for 2 hours. The liquid should barely bubble—if it boils (or if you stir), the stock can turn cloudy.
  • Strain and chill. Strain through a cheesecloth-lined strainer and discard vegetables and bones. Refrigerate and remove the fat from the top. Use immediately or freeze in small containers for later.
Tried this recipe?Let us know how it was!


This is the kind of soup you make when you want to slow down and cook with intention. None of the steps are difficult, but each one has a purpose, and together they build a broth that’s clear, golden, and deeply comforting. Make it over a weekend, let it rest, and enjoy the process as much as the result. Once you’ve done it this way, you’ll understand why this is the chicken soup I always come back to.

Battle Apple Cider Donuts


I’ve made both baked and fried apple cider donuts before, but never side by side. This fall, I decided it was time for a little friendly competition — purely scientific, of course. I wanted to see which method would win in a head-to-head test: the brown butter–baked version or the classic fried cider donut.

I’ll start by admitting I’m not really a donut person. If I’m choosing dessert, I’ll usually reach for a cookie. But these? These are a whole different story. Both versions encapsulate everything cozy and comforting about fall — apple cider simmering on the stove, the scent of cinnamon and nutmeg wafting through the kitchen, and sugar clinging to warm pastry. Each batch finishes with a quick toss in cinnamon sugar, sealing in flavour and adding just the right amount of crunch. I had several willing taste testers on standby, which only added to the fun.

The experiment was simple: same base flavours — apple cider, apple butter, cinnamon, and nutmeg — but two very different paths. One donut gets the brown butter treatment and bakes up golden and tender in the oven. The other takes a fearless dive into hot oil, emerging with a crisp, caramelized shell and a perfectly plush, dense interior.

Baked: Soft and tender, like little fluffy clouds.

Stack of freshly baked Apple Cider Donuts.
Interior crumb of Baked Apple Cider Donut. Light and fluffy.

Fried: Crisp shell that gives way to a plush, perfectly dense interior – in the best possible way.

Tray of freshly fried Apple Cider Donuts.
Plush dense interior crumb of fried apple cider donut.

Baking and frying side by side turned out to be the best kind of kitchen challenge. Watching the differences unfold — how each batter behaved, how each one smelled as it cooked — was as fascinating as it was delicious. And while opinions were split among my taste testers (two preferred the baked, three went for the fried), I’m firmly in the fried camp. I adore a dense, satisfying crumb — that texture you really bite into. Light and fluffy gets far too much love and attention, if you ask me.

Keys to Apple Cider Donut success:

  • Reduce the cider for maximum flavour. Boil it down until it’s thick and syrupy — concentrated cider is the heart of these donuts. I saw that America’s Test Kitchen suggested using thawed frozen apple juice concentrate as a shortcut to save time. I tried it, but it just didn’t deliver the same depth or punch of flavour that reduced cider does. It’s worth taking those extra few minutes at the stove — your kitchen will smell incredible.
  • Use the right spice balance. Cinnamon and nutmeg are essential, but don’t overdo it. You want the apple to shine through.
  • Don’t skip the brown butter. For the baked version, this step adds incredible depth and aroma. It’s what takes the flavour from good to irresistible.
  • Mind your temperature. If you’re frying, keep your oil around 350°F. Too hot and they brown before cooking through; too cool and they’ll absorb oil.
  • Handle the dough properly. The fried donut dough is quite sticky — it needs a liberal dusting of flour to handle and shape. Be sure to give it at least 3 hours in the fridge before cutting and frying. This rest time allows the flour to fully hydrate, making the dough easier to work with and ensuring that perfectly plush texture once fried.
  • Use parchment squares for frying. Cut small squares of parchment paper and place each donut on one before frying. This makes transferring the donuts into hot oil so much easier and helps them keep their shape. The parchment slips right off as they fry — just fish it out with tongs.
  • Coat while warm. Whether baked or fried, the cinnamon sugar sticks best when the donuts are still just warm to the touch. Bonus tip: if you can find freeze-dried apple powder, add a touch of it to the cinnamon-sugar mix — it really amps up the apple flavour.
  • Freeze any extras. Both versions freeze beautifully — just rewarm briefly before serving, and they’ll taste freshly made.

Baked Apple Cider Donuts (with a brown butter twist)

Oven-baked cider donuts dipped in brown butter and coated in cinnamon-sugar.
Servings 20 donuts
Calories 303 kcal

Equipment

Ingredients
  

Donuts

  • 339 grams unsalted butter, to be browned, method below
  • 496 grams fresh apple cider, (2 cups) NOT apple cider vinegar
  • 225 grams all-purpose flour
  • 130 grams whole wheat flour
  • 1 1/2 teaspoons baking powder
  • 1/2 teaspoon baking soda
  • 1 teaspoon Diamond Crystal Kosher salt or 1/2 teaspoon Morton's Kosher salt
  • 1 teaspoon ground cinnamon
  • 1/4 teaspoon ground nutmeg
  • 198 grams granulated sugar
  • 105 grams light brown sugar
  • 128 grams apple butter or applesauce
  • 3 large eggs
  • 1 teaspoon vanilla bean paste or vanilla extract

Sugar Coating

  • 132 grams granulated sugar
  • 1 teaspoon ground cinnamon
  • 1/8 teaspoon ground nutmeg
  • 1 Tablespoon freeze dried apple powder, optional

Instructions
 

  • Brown the butter: In a light-coloured, heavy saucepan over medium-low heat, melt the butter. Cook, stirring often, until the foam subsides, it smells nutty, and the milk solids turn deep golden brown, 5–7 minutes. Immediately scrape everything (fat + browned bits) into a heatproof bowl to stop the cooking. Cool 5–10 minutes.
    You’ll use 137 g of this browned butter in the batter; reserve the rest for dipping later.
  • Reduce the cider and enrich: Wipe out the pan. Add 496 g (2 cups) cider and boil over medium-high, stirring occasionally, until reduced by about half (to roughly 1 cup), 10–15 minutes. Off heat, whisk in the 128 g apple butter (or applesauce). Let cool until just warm, not hot
  • Prep pans and oven: Heat oven to 350°F. Lightly spray the cavities of your donut pans; use a pastry brush to coat evenly and avoid pooling. 
  • Dry mix: In a medium bowl, whisk together AP flour, whole-wheat flour, baking powder, baking soda, cinnamon, nutmeg, and salt until well combined
  • Start the batter with browned butter and sugars: Weigh 137 g of the cooled browned butter into a large mixing bowl. Add 198 g granulated sugar and 105 g light brown sugar; whisk until glossy and slightly thick. Whisk in the eggs one at a time, fully incorporating each before adding the next, then whisk in the vanilla. (If anything looks greasy or separated, give it 30–60 seconds of extra whisking.) 
  • Combine wet and dry ingredients: Switch to a spatula. Stir in half the dry mix, then all of the warm (not hot) cider mixture, then the remaining dry mix. Fold just until no dry patches remain. Batter will be thick and scoopable.
  • Fill and bake: Transfer batter to a piping bag (or zip-top bag) and pipe each cavity about ⅔ full (aim for level rims). Tap pan gently on counter to remove any large air bubbles. Bake 8–10 minutes until domed, lightly golden, and the centres spring back when gently pressed; a toothpick should come out clean. Cool 10 minutes in the pan, then turn out onto a rack. Re-grease pans and repeat with remaining batter.  
  • Cinnamon-sugar finish: Stir together the 132 g sugar, cinnamon, nutmeg. and optional freeze-dried apple powder. Gently re-warm the reserved browned butter until fluid. While doughnuts are warm (not hot), dip the tops in butter, let excess drip, then press into the cinnamon-sugar. For a fully coated effect, lightly brush sides with butter and toss in a shallow bowl of sugar mix.
  • To serve and store: Best the day they’re baked. To freeze, skip the sugar coating; cool completely, freeze airtight up to 2 months. Re-warm at 300°F (about 8 minutes), then dip into melted browned butter and sugar just before serving.

Notes

Adapted from Tara O’Brady’s recipe for Apple Cider Donut Cake. to really amp up the apple flavour, I added a bit of freeze dried apple powder to the cinnamon-sugar mixture for dipping finished donuts into. Totally optional if you can’t find it. I order it online. 

Nutrition

Calories: 303kcalCarbohydrates: 41gProtein: 3gFat: 15gSaturated Fat: 9gPolyunsaturated Fat: 1gMonounsaturated Fat: 4gTrans Fat: 1gCholesterol: 64mgSodium: 192mgPotassium: 90mgFiber: 1gSugar: 26gVitamin A: 467IUVitamin C: 0.3mgCalcium: 39mgIron: 1mg
Tried this recipe?Let us know how it was!

Apple Cider Donuts

The orchard classic: hot, fresh, and fried to perfection.
Servings 10 donuts
Calories 449 kcal

Equipment

  • Deep-fry thermometer
  • Doughnut cutter or 3¼-inch round cutter plus 1¼-inch round cutter;

Ingredients
  

Donuts

  • 485 grams apple cider (2 cups), NOT apple cider vinegar
  • 128 grams apple butter (1/2 cup), or applesauce
  • 113 grams sour cream (1/2 cup)
  • 2 teaspoon vanilla bean paste or vanilla extract
  • 455 grams all-purpose flour
  • 1/2 teaspoon baking soda
  • 2 1/2 teaspoons baking powder
  • 1 teaspoon Diamond Crystal Kosher salt, or 1/2 teaspoon Morton's Kosher salt
  • 1 teaspoon ground cinnamon
  • 1/8 teaspoon ground nutmeg
  • 50 grams granulated sugar (1/4 cup)
  • 53 grams light brown sugar (1/4 cup)
  • 2 large eggs
  • 56 grams unsalted butter (4 Tablespoons), melted and slightly cooled

For frying and coating

  • vegetable oil, for frying
  • 45 grams all-purpose flour, for dusting parchment lined baking sheet, (1/3 cup)
  • 198 grams granulated sugar
  • 1 Tablespoon ground cinnamon
  • 1/8 teaspoon ground nutmeg
  • 2 Tablespoons freeze-dried apple powder, optional

Instructions
 

  • Reduce cider: In a medium saucepan, bring the apple cider to a boil over medium-high heat. Cook, stirring occasionally, until syrupy and reduced to about 120 ml / ½ cup, 18–22 minutes. Pour into a medium bowl. Whisk in the apple butter, sour cream, and vanilla. Let cool slightly.
  • Mix dry ingredients: In another medium bowl, whisk together flour, baking powder, salt, baking soda, cinnamon, and nutmeg.
  • Cream eggs and sugars: Using a stand mixer fitted with the paddle or a hand mixer, beat the brown sugar, and eggs on medium-high until light and fluffy, 3–4 minutes. Add the melted, cooled butter and mix until incorporated, about 1 minute.
  • Combine wet and dry ingredients: Reduce mixer speed to low. Add the dry ingredients in two additions, alternating with the cider mixture in two additions, starting and ending with the dry. Mix just until combined. Dough will be very soft and sticky.
  • Shape and chill dough: Thoroughly flour a parchment-lined baking sheet with about ⅓ cup flour. Scrape dough onto it. Dust the top and your hands with more flour and gently pat into a ¾-inch thick rectangle. Lightly flour again, cover tightly with plastic wrap, and chill at least 3 hours or up to overnight.
  • Make cinnamon sugar: Stir together the sugar, cinnamon, nutmeg and freeze dried apple powder (if using) in a wide, shallow bowl. If your apple powder has clumped up, push it through a fine mesh sieve to remove any lumps.
  • Cut doughnuts: Cut 10 squares of parchment, about 4 inches each. Working directly on the floured baking sheet, dip your cutter(s) in flour and punch out rounds. If using two cutters, cut the centre holes. Place each doughnut on its own parchment square. Gather scraps (including holes), gently re-roll once, and cut more rounds—don’t overwork or doughnuts will be tough. You should get about 10 doughnuts plus the bonus (chef's snack!) holes.
  • Set up frying station: Place a wire rack over a paper towel–lined baking sheet. Fit a large heavy pot with a deep-fry thermometer. Add oil to a depth of 3 inches and heat over medium-high to 350°F (177°C).
  • Fry doughnuts: Working in batches, carefully lower donuts (parchment and all) into the hot oil; after a few seconds, peel away parchment with tongs. Fry until deep golden brown, about 3 minutes per side. Transfer to the rack. Repeat with doughnut holes, about 2 minutes per side. Return oil to 350°F between batches.
  • Coat & serve: While still warm, toss doughnuts and holes in the cinnamon sugar. Best enjoyed within a few hours of frying.

Notes

Adapted from Dessert Person by Claire Saffitz. Freeze dried apple powder, an optional ingredient in the recipe, is available online, if you decide to use it. I

Nutrition

Calories: 449kcalCarbohydrates: 71gProtein: 7gFat: 15gSaturated Fat: 6gPolyunsaturated Fat: 5gMonounsaturated Fat: 4gTrans Fat: 0.2gCholesterol: 56mgSodium: 418mgPotassium: 157mgFiber: 2gSugar: 30gVitamin A: 271IUVitamin C: 1mgCalcium: 105mgIron: 3mg
Tried this recipe?Let us know how it was!

In the end, the fried donuts won my heart — and my taste buds. That crisp shell giving way to a plush, dense interior is everything I love about fall baking: comforting, nostalgic, and deeply satisfying. Still, the baked version has its charm — soft, tender, and laced with brown butter warmth.

So maybe it’s less a battle and more a celebration of two ways to capture the flavour of fall. Whether you’re Team Brown Butter or Team Hot Oil, the smell of cider and cinnamon wafting through the house is pure happiness.

Shakshuka in a a Hurry.

Shakshuka in a Hurry

There’s something magical about a meal that feels slow and nourishing—but comes together in minutes. That’s exactly what drew me to this recipe for Shakshuka in a Hurry by Vancouver creator Rachel Halldorson. I don’t usually share recipes from other creators, but this one was too good not to pass along. I have adapted it very slightly. It’s everything I want in a solo dinner: quick, comforting, deeply flavourful, and made with pantry staples. One pan, a handful of fresh ingredients, and a few minutes later… dinner is done.

Keys to success for Shakshuka in a Hurry

  • Perfume the oil with garlic. Start by sautéing a crushed garlic clove in olive oil for just a minute. Then remove it. This infuses the oil with mellow garlic flavour without any harsh bite—just warm, subtle depth.
  • Use cherry tomatoes, not grape. Cherry tomatoes are juicier and break down more easily, creating a silky sauce that’s perfect for poaching eggs. Grape tomatoes tend to be firmer and less saucy.
  •  Ricotta + cottage cheese = creamy magic. A blend of ricotta and cottage cheese adds luxurious texture and a protein boost. Use a fork to mash the cottage cheese a bit—it smooths out the curds and helps it melt into the sauce.
  •  Make a little nest before adding eggs. Use the back of a spoon to create small wells in the tomato sauce before cracking in your eggs. This helps them stay put and cook evenly.
  • Don’t be shy with the salt and chili flakes. Tomatoes love salt—and this dish comes alive with a bit of heat. Red pepper flakes are great, or try Burlap & Barrel’s Silk Chili Flakes for a subtle, smoky warmth I’m currently obsessed with.
  • Finish with fresh herbs and a sprinkle of Everything Bagel Spice. Dill, cilantro or parsley add freshness and the everything bagel spice adds some crunch.

Serving Suggestions

  • This dish was made for crusty bread. A slice of sourdough or a warm hunk of baguette is perfect for scooping and swiping—don’t let that rich tomato sauce go to waste.
  • Add greens if you’d like. A handful of baby spinach or arugula stirred into the tomato base before adding the eggs can bump up the veg factor. Or serve with a simple green salad on the side.
  • Perfect for solo dinners… but easily doubled. This recipe is ideal for one, but it scales up beautifully. Add an extra egg or two and invite someone to join you.
  • A cozy brunch option. Serve in the pan with a pot of coffee or a mimosa and pretend you’re at a café in Tel Aviv. Bonus points for serving it straight from the skillet.

Shakshuka in a Hurry

This quick and easy Shakshuka recipe is perfect for solo dinners—juicy cherry tomatoes, gently poached eggs, and a creamy twist. Comfort food in under 20 minutes.
Servings 1 serving
Calories 407 kcal

Equipment

  • 8 inch skillet with lid

Ingredients
  

  • 2 Tablespoons ricotta cheese
  • 2 Tablespoons cottage cheese
  • 1 large garlic clove
  • 1 teaspoon olive oil
  • 1 1/2 cups cherry tomatoes
  • 1/2 teaspoon Diamond Crystal Kosher salt, or 1/4 teaspoon Morton's Kosher salt
  • 1/8- 1/4 teaspoon red pepper flakes
  • 1-2 Tablespoons water
  • 2 large eggs
  • 1 slice crusty bread or toast

For Garnish

  • 2 Tablespoons chopped fresh herbs, dill, cilantro or parsley
  • 2 teaspoons Everything Bagel Spice

Instructions
 

  • In a small bowl, combine the ricotta and cottage cheese. Use a fork to mash and blend until mostly smooth. Set aside.
  • Smash the garlic clove with the side of a large knife and peel away the skin. Heat the olive oil in an 8-inch nonstick skillet over medium heat. Add the garlic and sauté for 1–2 minutes, just until lightly golden. Remove and discard the garlic.
  • Add the cherry tomatoes to the skillet. Season with salt and red pepper flakes. Cover and cook for 5 minutes to help the tomatoes burst and soften.
  • Uncover the pan and use a potato masher or fork to gently crush the tomatoes into a chunky sauce. If the mixture looks too dry, add 1–2 tablespoons of water. Let it cook for another 1–2 minutes, until the sauce is thick and jammy.
  • Use a spoon to make two small wells in the sauce. Crack an egg into each well. Dollop spoonfuls of the cheese mixture around the eggs.
  • Cover the skillet and cook for 2–3 minutes, or until the egg whites are set but the yolks are still runny.
  • Garnish with chopped herbs and a sprinkle of everything bagel spice, if using. Serve immediately with crusty bread or toast for dipping.

Nutrition

Calories: 407kcalCarbohydrates: 27gProtein: 26gFat: 22gSaturated Fat: 7gPolyunsaturated Fat: 4gMonounsaturated Fat: 9gTrans Fat: 0.1gCholesterol: 392mgSodium: 1596mgPotassium: 785mgFiber: 4gSugar: 9gVitamin A: 2243IUVitamin C: 53mgCalcium: 258mgIron: 5mg
Tried this recipe?Let us know how it was!


Whether you’re cooking for yourself or sharing with someone else, this quick Shakshuka is proof that simple ingredients can still deliver big comfort. I don’t often repost other people’s recipes, but this one from Rachel Haldorsen really is something special—and too good to keep to myself. If you give it a try, I’d love to hear what you think. Leave a comment, tag me on Instagram, or tell me what kind of bread you used to soak up that glorious sauce.

Musakhan Wraps

These wraps are cookbook author Anas Atassi’s interpretation of Musakhan. Originally served in the fall to celebrate the olive harvest, Musakhan is considered by many to be the national dish of Palestine. It is essentially a whole roast chicken, flavoured with sumac and other Middle Eastern spices. It is typically eaten with your hands. Served on flatbread, over a bed of slowly caramelized sumac flavoured onions, Musakhan is the epitome of Palestinian comfort food.

In Atassi’s Syrian version, the chicken is shredded , then fried with onions and sumac and rolled up into a delicious flatbread. His new book, Sumac is a love letter to that spice and his native country. He says, “With this book, I hope to build a bridge between Syrian culture and the rest of the world, with food the common denominator. But even more, I hope that Sumac will present a positive image of my country, in spite of all the unfortunate events now taking place in Syria.”

The star of this dish is sumac, which comes from the dried and ground berries of the wild sumac flower. It has a deep crimson colour and is tangy with a sour, acidic flavour, similar to lemon juice. Cinnamon, cardamom and cloves add warmth and a depth of flavour to the chicken.

Onions are not a supporting cast member here. They form an integral part of the dish. Three large onions are sliced, seasoned generously with sumac and sautéed low and slow in olive oil, until they become sweet and mellow.

I used large flour tortillas as a wrapper for the chicken and onions. Once filled, I fried them in a bit of olive oil to crisp up the outside.

I decided to serve it with a dipping sauce on the side. I used a vegan sour cream as I wanted to keep the meal dairy-free. I mixed it with lemon juice, garlic and dill. Yogurt would also work well.

Khachapuri (Georgian Cheese Bread)

Essentially, Khachapuri (pronounced hatch-a-pooree), is a bread canoe filled with hot bubbling cheese and topped with a runny egg. How bad could that be?

This decadent dish originated in the Republic of Georgia,. It’s been on my “must bake” list for several years now. It checks all the boxes for pandemic comfort eating, so I decided the time was right. I pulled out all the various recipes I had been collecting and started baking.

Over the past month my oven has churned out over a dozen khachapuri. I wanted to get it perfect. The first hurdle was what to use for the cheese filling. In Georgia they use a combo of imeruli and sulguni cheeses, neither of which are available in Ottawa. I tested some possible substititions and discovered that I liked a combo of mozzarella, ricotta and feta.

Once the filling was settled, I turned my attention to the dough. The more traditional recipes called for an enriched (butter and milk added) dough. While quite delicious, we found that version to be just too rich. I decided on a leaner pizza dough, enriched with just a tablespoon of olive oil. Storebought pizza dough is fine, but homemade is better.

In a desperate attempt at delusion, I added a big heaping handful of massaged kale to each khachapuri, in order to convince myself that these were healthy.

To get the classic canoe shape, the dough is rolled into an oval. Add the filling, leaving about a one inch border. Then roll up the edges, toward the centre and pinch and twist the top and bottom of the canoe to seal.

When the khachapuri are almost done, pull them from the oven to add the egg for the final few minutes of cooking. I tried it with whole eggs and just the yolk, and preferred the yolk.

In addition to finishing the dish with an egg, the traditional recipe also adds a few pats of butter once it comes out of the oven. Shockingly, this butter lover decided to omit that step of the recipe. Just too much.

The best way to eat khachapuri is with your hands. Rip off a piece of the crust and dip it in the runny egg and cheese, preferably while sitting in front of the TV watching Netflix. We’re watching Fauda right now and it makes for messy but very delicious eating.

Za’atar Roasted Chicken over Sumac Potatoes

There is something about a chicken roasting in the oven that makes me feel like everything’s going to be ok. Such a simple, humble dish has an amazing power to reassure and comfort. And we could all use a little comfort right now.

This roast chicken is comfort food with a zesty attitude. The recipe comes from Adeena Sussman‘s new cookbook, Sababa. Adeena is a Tel Aviv based food writer and recipe developer. Sababa celebrates the fresh and sunny flavours and vibrant spices of Israel. It’s my new favourite way to make roast chicken. If you have never roasted an entire chicken, nothing could be simpler. Even though we are just 2 at home now, I roast a whole chicken at least once a week. Leftovers the next day are a gift!

Spices figure prominently in this dish. Shallots and red potato wedges get a coating of olive oil and sumac. If you have never used ground sumac, you are missing out. Sumac is a bush that grows in the Middle East. The bright red berries are harvested, dried and ground into a coarse powder with a tangy lemony flavour. It’s much less astringent than lemon juice and adds a light pop of tartness. It’s widely available in Middle Eastern stores and if you’re in Canada, Bulk Barn carries it.

The second spice that makes an appearance is za’atar, which is actually a spice mixture. Za’atar gets mixed with lemon zest and olive oil and massaged into the chicken skin. I love this dish because you roast the chicken and the veggies all in one pan. The fat from the chicken coats the potatoes and the ones at the edge get super crispy.

Be patient and let the chicken rest for at least 10 minutes once it’s done before you try to carve it. Served with a green salad, you have a complete meal.

Charred Broccoli and Israeli Couscous Salad

I am continually amazed by the culinary alchemy that takes place when you roast or grill vegetables. The dry heat caramelizes the natural sugars in vegetables, which brings about a sweetness and amazing depth of flavour. Have you tried roasting parsnips? Next level fabulous, I promise you.

So although, intellectually, I know the joys of charring, when it comes to broccoli I have stubbornly resisted grilling it. I just love the taste of plain boiled broccoli. With a little drizzle of olive oil and a generous sprinkling of flaky sea salt, I could eat a huge bowl of it. I actually crave it. It’s kind of a comfort food for me. To be clear, it’s in a totally different comfort category than say, frozen chocolate chunk cookies. But chowing down on a big bowl of boiled broccoli makes me feel serene and calm.

I only tell you all this so that you will understand the depth of my resistance to grilling broccoli. But then something, or I should say someone, changed my mind and I decided to give it a try. I watched Michael Symon char broccoli and then combine it with Israeli couscous. I think he is such a talented chef.  I love the big bold flavours of his food. Plus, he is just so sweet. Liz is a lucky woman.

Cut the broccoli into one inch thick planks. The flatter the surface area, the more even the grilling. There will be some rounded pieces, but that’s ok. Please don’t cut off the stems. Just peel off the woody outer core. The center is tender and the best part of the broccoli, as far as I’m concerned. A few glugs of olive oil, lots of salt and pepper and you’re ready for the grill. You could also roast them in a 400°F oven for about 10-12 minutes.

If you’re grilling, turn the heat down to low. The flat parts and stems will get light golden brown. The florets will deeply char, and you might worry that they are too burned. That deep char is what give this dish it’s amazing flavour, so don’t worry if they look black.

Once you take them off the grill, chop them up into bite sized pieces. I mixed mine with Israeli couscous because I love their bouncy chewy texture. Feel free to use farro, wheat berries or even quinoa if that’s what you love.

Get creative with the other mix-ins. Michael used golden raisins and sliced almonds. I substituted dried cherries and pistachios. Just don’t forget to toast your nuts. Some green onions, mint and Italian parsley add a verdantl freshness. I tossed it all together with a gentle vinaigrette made with fresh clementine juice and some fruity extra-virgin olive oil. Any leftovers will keep for a day in the fridge.

Click here to print recipe for Charred Broccoli and Israeli Couscous Salad.


Braised Pomegranate Chicken with Israeli Couscous

Apologies to all who tried to access my blog over the last few days and were unable to connect. I’ve had some technological issues, something about exceeding the allowable CPU’s and plugins not properly updated. Sadly, my skill-set does not extend to understanding the issues much less fixing them. I turned my problem over to the talented Hillary Little, and put my talents to work on problems I can solve.

I spent the better part of the week perfecting pomegranate braised chicken. I already have one pomegranate chicken recipe on the blog, and while it’s very delicious, it’s been in my weekly dinner rotation for over 7 years now and I’m bored with it. The chicken is braised in a tomato based sauce, enhanced with some pomegranate molasses. I really wanted a more vibrant, pronounced pomegranate flavour.

In my quest to perfect pomegranate chicken, I made it several times this week. In round one, I loaded up on pomegranate molasses in the braising liquid. The finished sauce was way too bitter. Strike one. I also had the brilliant idea of making it a one pan dish and added the uncooked Israeli couscous to the pan, with the browned chicken and braising liquid.  By the time the chicken was done, the couscous was too mushy. Strike two.

In round three, I used less pomegranate molasses and added some white wine and chicken stock to round out the braising liquid. It was better than round one, but the pomegranate flavour was really muted. Strike three.

A quick web search revealed an epicurious.com recipe that cleverly used pomegranate juice as the braising liquid. Wish I’d thought of that! As the chicken braisedin the oven, the juice reduced down to a thick, rich, sweet-tart sauce. Exactly what I was trying to achieve.

I started with bone-in, skin-on chicken thighs. I really wanted the extra flavour that braising on the bone would bring. Season the chicken liberally with salt and paprika and put it in the skillet on high heat, skin side down. Leave it alone for a good 5-8 minutes to give it a chance to really get brown. There’s flavour in the brown. 
Remove the chicken and pour off some of that rendered fat. Saute the onions until light brown. Cumin and cinnamon add great depth of flavour and ground pistachios add body and texture to the sauce.
 I used a combination of pomegranate juiceand chicken stock for the braising liquid. Vegetable stock or water would also be fine. 
Israeli couscous is the perfect starch to sop up all that braising liquid. I added tons of fresh mint and Italian parsley to give it a lively herbal note. Toasted chopped pistachios and pomegranate seeds added crunch. A squirt of lemon juice and big glug of extra virgin olive oil brought it all together.

Click here to print recipe for Braised Pomegranate-Pistachio Chicken Thighs.

Click here to print recipe for Israeli Couscous with Pomegranate and Pistachio.


SaveSave

SaveSave

SaveSave

SaveSave

SaveSave

SaveSave

SaveSave

SaveSave

SaveSave

SaveSave

SaveSave

SaveSave

SaveSave

SaveSave

SaveSave

SaveSave

Braised Beef Short Ribs

with mashed potatoes 2

As  food blogger, I struggle with presenting “brown foods”. They are not exactly the most appetizing to look at, and, to boot, they are a bitch to photograph. However, that being said, a certain food network host has been known to growl, “Brrrrown food tastes grrreat!”

For those not familiar with Anne Burrell, her larger than life personality and growly voice puts some people off. But I am in awe of her wealth of culinary knowledge. I have learned so much from watching her show, “Secrets of a Restaurant Chef.” Every recipe I have tried of hers has come out perfectly. She cooks foods that are full of flavour and her concise, easy to master techniques make her a rock star in the kitchen.

The main reason brown food tastes better, is because of a chemical process known as the Maillard Reaction. If your eyes glaze over at the mere mention of the phrase chemical reaction, then John Willoughby, meat guru and former senior editor at Cook’s Illustrated is your go-to guy to explain these things.

Continue reading

Brown Sugar Roasted Tomato Soup

snow 2

This is a photo of my backyard. Last week 40 centimeters of snow fell on our city and yesterday, to add insult to injury, an additional 25 centimeters piled up! That’s over 2 feet of snow for those of you not familiar with the metric system. In any language, it’s a sh#@load of snow!

Just In case there is any doubt about  where I fall on the love-hate spectrum of winter, I reside on the far right. I despise winter!  However, my oldest son recently became certified to teach skiing, so in the generous spirit of the season, I am thrilled for him and all the skiers out there.

Last week, I promised no more cookie postings in December. However, I did not promise no more sugar. I couldn’t go cold turkey without sugar, so there is just a little bit of brown sugar in the following recipe. I felt that I needed to offer you a warm buffer against the nastiness that is winter.

A big bowl of steaming hot tomato soup and a grilled cheese sandwich are the consummate comfort lunchtime meal for many a school age child. That being said, my childhood lunchtime never included this classic tummy warmer.

When I was growing up, my sisters and I came home from school everyday for lunch. Our public school was a short 8-minute walk from our house. The walk could be done in 7 minutes if we took the shortcut, but I seem to recall that we had to pass by a scary house if we took it, so we toughed out the extra minute.  We always watched the Flintstones at lunchtime and usually ate Kraft Dinner or a Swanson’s Chicken Pot Pie or a T.V. Dinner. Hey, it was the 70’s and we were a modern family!

I never really developed a taste for tomato soup until recently. I tried Campbell’s tomato soup in university and didn’t particularly care for it. If I needed comfort, my go-to soup was my mom’s chicken soup or, in a pinch, Campbell’s Chicken Noodle.

Lately, I have been noticing tomato soup popping up on restaurant menus and on all the food web sites and magazines. The world is a darker and scarier place now and I suppose tomato soup is the quintessential reminder of those simpler, gentler times.

I discovered this Brown Sugar Roasted Tomato Soup on www.seriouseats.com. I get an e-mail everyday from them. Serious Eats is a website focused on celebrating and sharing food enthusiasm through blogs, video and online community. They are passionate about food, informative, inclusive and, most importantly, they make me laugh.

Instead of serving this soup with the traditional grilled cheese sandwich, it gets a topping of cheddar cheese croutons. Brilliant, and quite delicious, this may become your new favourite go to comfort food when your world seems a little too treacherous and uncertain to handle.

ready to eat 1

Canned tomatoes are drained and then topped with a little brown sugar to enhance their natural sweetness. A quick roasting in the oven and the tomatoes and brown sugar caramelize into sweet deliciousness.

tomatoes ready for roasting

Finely grated cheddar cheese and olive oil get massaged into some whole grain bread cubes and then the whole lot gets tossed into a hot oven.

grating cheddar

croutons ready for toasting 2

toasted croutons

Click here to print recipe for Brown Sugar Roasted Tomato Soup.

ready to eat 4